idea 创建spring-cloud 项目之Eureka注册中心练习
最近在系统的学习Spring Cloud,我们知道spring cloud 提供了一系列创建分布式应用的组件。而Erueka作为一种服务注册中心而被广泛使用,这里就来创建一个简单的Spring cloud项目 使用Eureka作为注册中心来使用 和学习一下。
首先我们 使用的是idea 版本是
一。我们先来创建一个Spring Boot项目
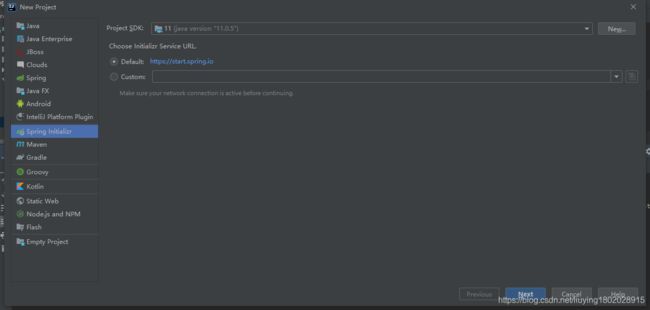
我用的是jdk 11
使用模板快速创建一个springBoot项目
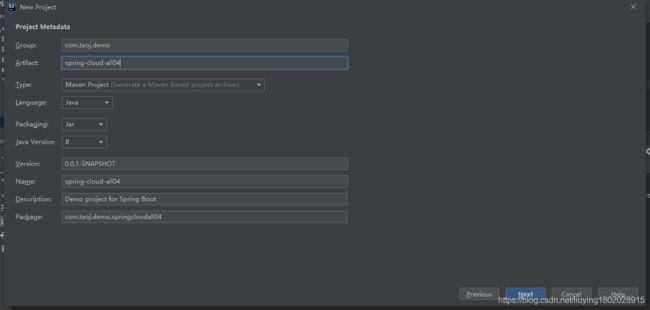
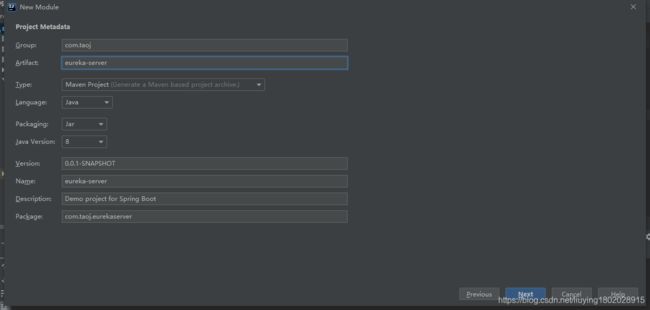
Group和ArtifactId 见上图
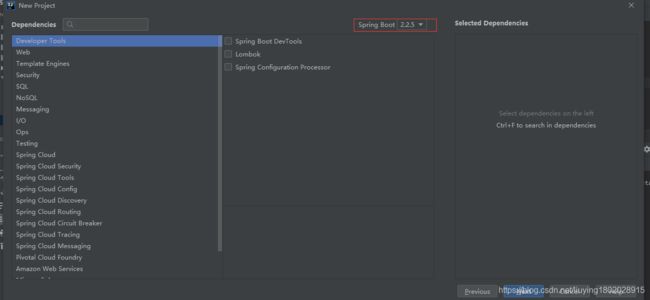
因为这个是一个父工程 我们不引入任何依赖,SpringBoot版本选择了2.2.5
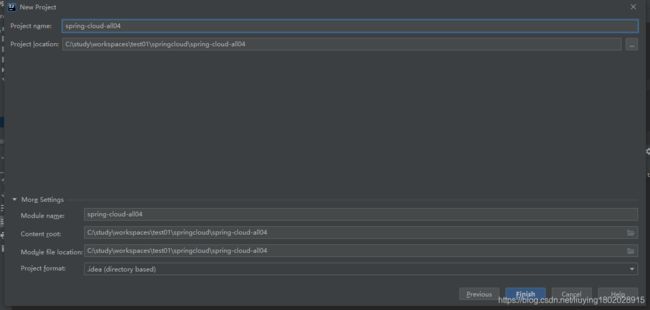
点击Next 再点确定
此时,待引入相应的依赖后,我们成功创建了一个全新的干净的SpringBoot项目
修改一些默认的maven配置,这里就不再赘述
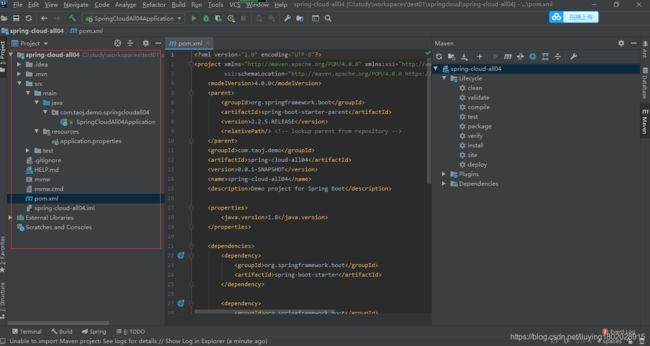
以下就是创建爱国的父工程的工程目录
二。我们对父工程的pom文件做一些简单的修改
不做修改前 父工程的pom文件如下
    4.0.0

        org.springframework.boot
        spring-boot-starter-parent
        2.2.5.RELEASE


    com.taoj.demo
    spring-cloud-all04
    0.0.1-SNAPSHOT
    spring-cloud-all04
    Demo project for Spring Boot


        1.8


            org.springframework.boot
            spring-boot-starter


            org.springframework.boot
            spring-boot-starter-test
            test


                    org.junit.vintage
                    junit-vintage-engine


                org.springframework.boot
                spring-boot-maven-plugin
如上所示,只引入了一个springboot和spring-boot-starter-test的依赖
我们要加入以下这段 依赖管理
                org.speingframework.cloud
                spring-cloud-dependencies
                ${spring-cloud.version}
                pom
                import
这是对版本管理做一个统一
修改之后的pom文件如下所示:
    4.0.0

        org.springframework.boot
        spring-boot-starter-parent
        2.2.5.RELEASE


    com.taoj.demo
    spring-cloud-all04
    0.0.1-SNAPSHOT
    spring-cloud-all04
    Demo project for Spring Boot


        1.8
        Greenwich.SR2


            org.springframework.boot
            spring-boot-starter


            org.springframework.boot
            spring-boot-starter-test
            test


                    org.junit.vintage
                    junit-vintage-engine


                org.speingframework.cloud
                spring-cloud-dependencies
                ${spring-cloud.version}
                pom
                import


                org.springframework.boot
                spring-boot-maven-plugin
其中我们把spring-cloud-version 设置成了 Greenwich.SR2 对于这个 我本身还没有搞透,先留一个疑问,先就这样来做
三。接下来我们要创建一个子项目 eureka-server
1.创建一个Module
还是选择快速创建一个springboot项目
接下来就是老套了:
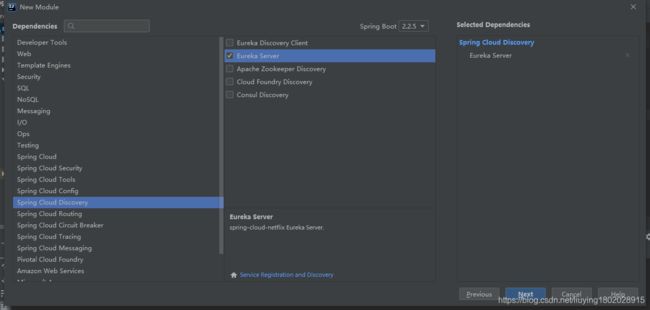
但此时我们要选择一个依赖 eureka-server的依赖
注意这里的springboot的版本 还是2.2.5
点继续
Finish
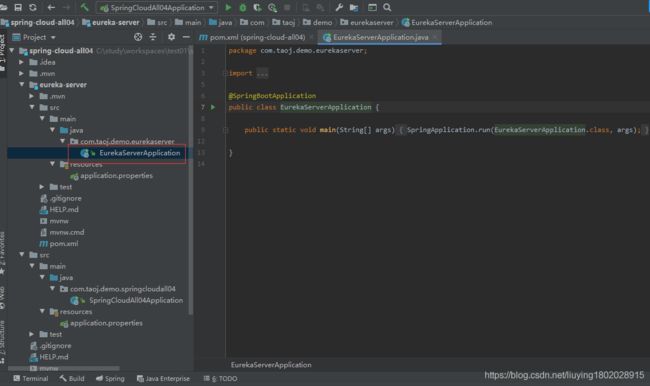
带依赖引入成功后 ,项目结构如下:
四。启动Eureka-Server
此时我们来启动以下 这个新创建的 Eureka-Server
直接启动EurekaServerApplication这个类
一启动 发现报错了 ,我们没有定义Eureka-Server的注解
先看我们的启动类
package com.taoj.demo.eurekaserver;

import org.springframework.boot.SpringApplication;
import org.springframework.boot.autoconfigure.SpringBootApplication;

@SpringBootApplication
public class EurekaServerApplication {

    public static void main(String[] args) {
        SpringApplication.run(EurekaServerApplication.class, args);
    }

}
EurekaServerApplication类的头上只有一个 @SpringBootApplication的注解 但是没有@EnableEurekaServer的注解,我们来加一下,加完之后的EurekaServerApplication的类是这样的
package com.taoj.demo.eurekaserver;

import org.springframework.boot.SpringApplication;
import org.springframework.boot.autoconfigure.SpringBootApplication;
import org.springframework.cloud.netflix.eureka.server.EnableEurekaServer;

@SpringBootApplication
@EnableEurekaServer
public class EurekaServerApplication {

    public static void main(String[] args) {
        SpringApplication.run(EurekaServerApplication.class, args);
    }

}
这样还不行 我们还要创建一个 配置文件,application.yml文件
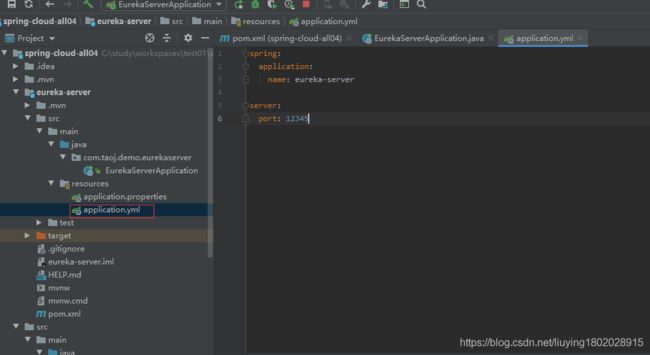
如下所示,我们在resources目录下创建一个 application.yml的文件
我们在这个文件中 先声明改应用的名称为 eureka-server 和端口 为 12345
此时我们再来重启一下这个Eureka-Server
重启完 我们发现还是报错,如下:
我百度了一下 这个错误:
com.sun.jersey.api.client.ClientHandlerException: java.net.ConnectException: Connection refused: connect
看到这篇博文中: https://cloud.tencent.com/developer/article/1494956
这篇博文中说 这个报错 我们要在Eureka的配置文件中加入这两行配置:
# 此应用为注册中心,false:不向注册中心注册自己。
eureka.client.register-with-eureka=false

# 注册中心职责是维护服务实例,false:不检索服务。
eureka.client.fetch-registry=false
我加完之后application.yml是这样的:
spring:
  application:
    name: eureka-server

server:
  port: 12345

eureka:
  client:
    # 此应用为注册中心,false:不向注册中心注册自己。
    register-with-eureka: false
    # 注册中心职责是维护服务实例,false:不检索服务。
    fetch-registry: false
重启之后成功:
接下来我们访问一下Eureka-Server
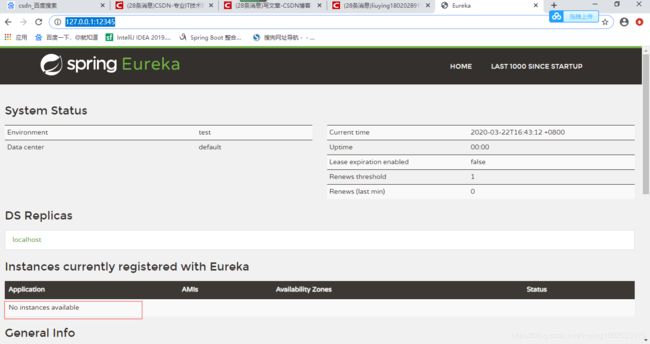
http://127.0.0.1:12345/
这是访问后的结果,说明Eureka-Server 启动成功了,并且在Application一栏中也发现 No instances avaliable ,说明没有应用,这也说明之前的那两个配置起作用了,Eureka-Server没有向自己注册自己,那么我们来看一下,Eureka-Server也可以作为一个服务想自己注册自己是一个什么样子呢?
# 此应用为注册中心,false:不向注册中心注册自己。
eureka.client.register-with-eureka=false

# 注册中心职责是维护服务实例,false:不检索服务。
eureka.client.fetch-registry=false
接下来我们来改动一下application.yml
如https://cloud.tencent.com/developer/article/1494956 博文中所示
4. 解决:还原配置文件使用的 eureka 为如单实例 注册 方式 即可。如上图中第一行配置:
# 注册中心 - 端口: 1234、工程名: eureka (见 eureka 工程中配置)。
eureka.client.serviceUrl.defaultZone= http://localhost:1234/eureka/
改动之后的application.yml如下:
spring:
  application:
    name: eureka-server

server:
  port: 12345

eureka:
  instance:
    hostname: localhost
  client:
    serviceUrl:
      defaultZone: http://${eureka.instance.hostname}:${server.port}/eureka/
    # 此应用为注册中心,false:不向注册中心注册自己。
#    register-with-eureka: false
    # 注册中心职责是维护服务实例,false:不检索服务。
#    fetch-registry: false
此时我们再来重启一下Eureka-Server
启动后:
成功重启
之后我们再来访问一下 Eureka-Server
http://127.0.0.1:12345/
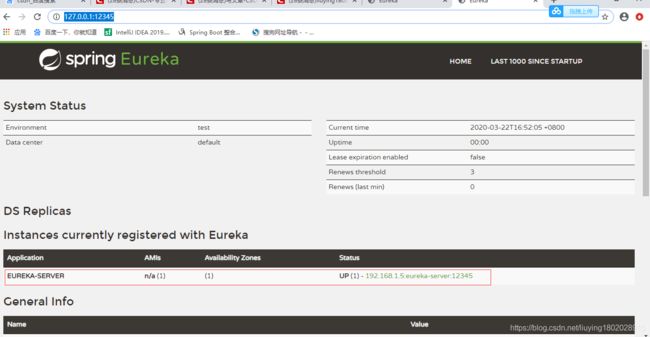
如图:
eureka也能正常访问,并且可以看到 Application中多了一个应用 Eureka-Server的应用,说明此时我们已经成功的把Eureka-server作为一个服务注册到自己(注册中心)上了,开心。至此我们完成了一个简单的Eureka-Server注册中心。接下来我们继续做一些别的操作。
五。获取Eureka的所有实例
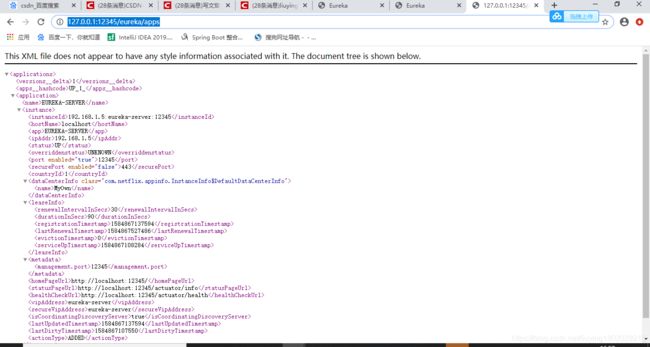
浏览器访问: http://127.0.0.1:12345/eureka/apps
这就是所有的实例
这里的应用有Eureka-Server
访问某一个应用:
http://127.0.0.1:12345/eureka/apps/EUREKA-SERVER
在apps后面加上 Application-Name
如下图:

