使用python+selenium爬取qq空间好友动态
分析过程如下:
打开qq空间网址:https://qzone.qq.com/ ,内容如下:
要想用selenium登陆qq空间,必须点击账号密码登陆按钮然后再填写账号密码登陆。
点击账号密码按钮后跳转到如下页面:
以上过程实现代码:
# 这是你的chromedriver的对应版本文件
chrome_driver = r'E:\迅雷下载\chromedriver_win32\chromedriver.exe'
driver = webdriver.Chrome(executable_path=chrome_driver)

driver.get('https://qzone.qq.com/')

# driver.

# 切换网页框架
driver.switch_to.frame(driver.find_element_by_id('login_frame'))

# print(driver.page_source)

# 切换到账户密码输入界面
driver.find_element_by_id('switcher_plogin').click()
接下来就是输入账号、密码,点击登陆。
代码如下:
# 输入账号
driver.find_element_by_id('u').clear()
driver.find_element_by_id('u').send_keys('****') # 此处填写账号

# 输入密码
driver.find_element_by_id('p').clear()
driver.find_element_by_id('p').send_keys('****') # 此处填写密码

# 登陆账号
driver.find_element_by_id('login_button').click()
# 等待三秒让浏览器加载完
time.sleep(3)
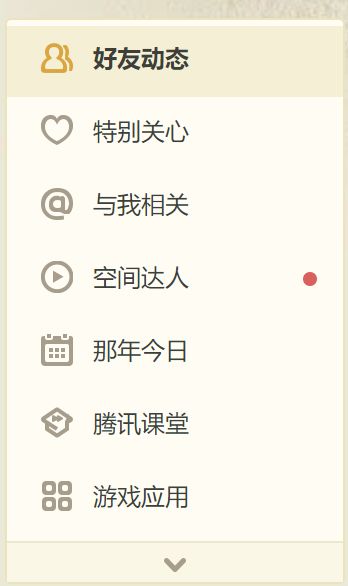
登陆过后就进入了qq空间,但有可能不是好友动态页面,这是就需要用selenium来模拟点击跳转到好友动态页面:
代码如下:
driver.find_element_by_xpath('//*[@id="tab_menu_friend"]/div[3]').click()
# 休息3秒等待页面加载完
time.sleep(3)
这时我们就进入了qq空间好友动态页面,但是我发现好友动态是页面局部刷新加载出来的,所以要去查找动态加载文件。经过查找,我发现动态加载信息存放在feeds_3_html....文件下。
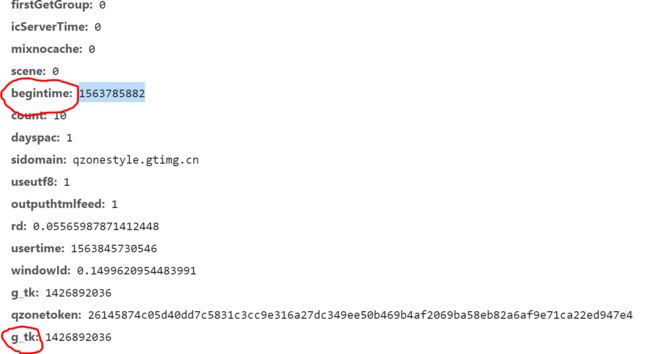
使用代码直接获取这个页面会报错,因为这个页面不仅需要登陆,而且他请求地址中的g_tk查询字符串还是通过加密构造的,其中有两个字段非常关键,一个是begintime,还有一个是加密得到的g_tk。
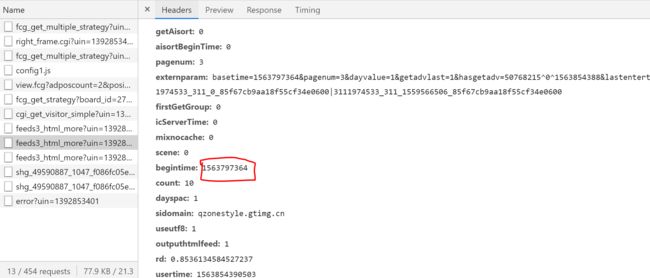
begintime这个字段是你的动态请求中第一条动态的上一条动态的发布时间的时间戳。
g_tk这个字段是在jQuery中加密的字段。
jQuery中加密代码如下:
getACSRFToken:function(url) {
    url = QZFL.util.URI(url);
    var skey;
    if (url) {
      if (url.host && url.host.indexOf("qzone.qq.com") > 0) {
        try {
          skey = QZONE.FP._t.QZFL.cookie.get("p_skey");
        } catch (err) {
          skey = QZFL.cookie.get("p_skey");
        }
      } else {
        if (url.host && url.host.indexOf("qq.com") > 0) {
          skey = QZFL.cookie.get("skey");
        }
      }
    }
    if (!skey) {
      skey = QZFL.cookie.get("p_skey") || (QZFL.cookie.get("skey") || (QZFL.cookie.get("rv2") || ""));
    }
    var hash = 5381;
    for (var i = 0, len = skey.length;i < len;++i) {
      hash += (hash << 5) + skey.charCodeAt(i);
    }
    return hash & 2147483647;
为了获取g_tk,首先是要获取登陆过后的cookies。
代码如下:
# 获取cookie为字典形式
cookie_dict = {i['name']: i['value'] for i in driver.get_cookies()}
# 把cookie转化为字符串形式:name1=value1; name2=value2;
cookie_str = ''
for key, value in cookie_dict.items():
    cookie_str += key + '=' + value + '; '
用python实现的加密代码如下:
# -*- coding: UTF-8 -*-
import re


class GetGTK(object):
    def __init__(self, cookiestr):
        self.cookieStr = cookiestr
        self.p_skey = None
        self.skey = None
        self.rv2 = None

    def getNewGTK(self):
        skey = self.p_skey or self.skey or self.rv2
        hash = 5381
        for i in range(0, len(skey)):
            hash += (hash << 5) + ord(skey[i])
        return hash & 2147483647

    def handler(self):
        if re.search(r'p_skey=(?P[^;]*)', self.cookieStr):
            self.p_skey = re.search(r'p_skey=(?P[^;]*)', self.cookieStr).group('p_skey')
        else:
            self.p_skey = None
        if re.search(r'skey=(?P[^;]*)', self.cookieStr):
            self.skey = re.search(r'skey=(?P[^;]*)', self.cookieStr).group('skey')
        else:
            self.skey = None
        if re.search(r'rv2=(?P[^;]*)', self.cookieStr):
            self.rv2 = re.search(r'rv2=(?P[^;]*)', self.cookieStr).group('rv2')
        else:
            self.rv2 = None

    def run(self):
        self.handler()
        return self.getNewGTK()


if __name__ == '__main__':
    cookiestr = "cookies" # 这是你的登陆后的cookie
    getGTK = GetGTK(cookiestr)
    g_tk = getGTK.run()
    print(g_tk)
获取begintime。
代码如下:
basetime = driver.find_elements_by_xpath('//*[@id="feed_friend_list"]//li[@class="f-single f-s-s"]').pop().get_attribute(
    'id').split('_')[4]
获取begintime可以直接在id里面获取,id中包含了发布动态的时间戳。
有了begintime和g_tk后,我们就可以组装url了,然后就可以用requests加上cookies信息请求url,就可以获取到空间好友动态了。
# 构造url
url = 'https://user.qzone.qq.com/proxy/domain/ic2.qzone.qq.com/cgi-bin/feeds/feeds3_html_more?uin=1392853401&begintime={}&g_tk={}'.format(begintime, g_tk)

# 发起请求
res = requests.get(base_url, cookies=cookie_dict)
print(res.content.decode())
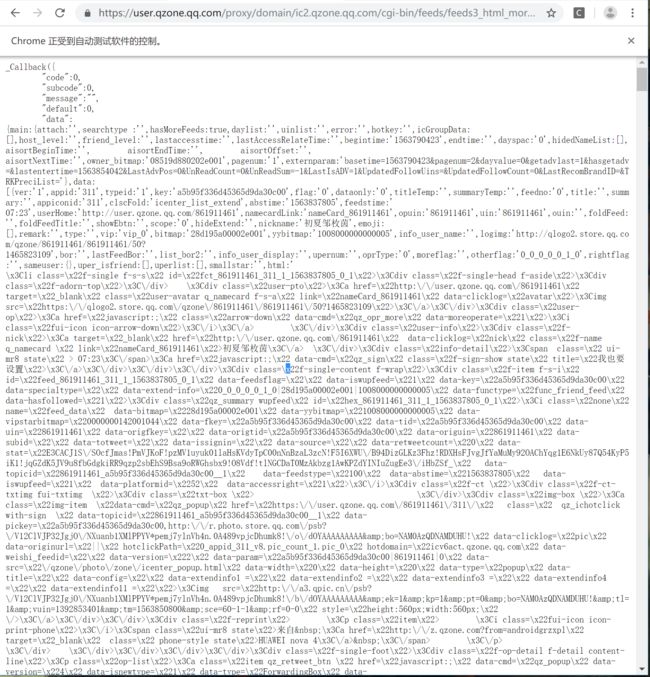
获取的结果如下
再在浏览器中请求这个url,得到结果如下
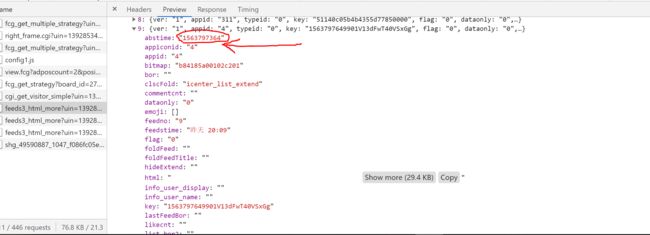
发现用代码抓取的空间动态信息正确,接下来就是用一般的数据处理方法来清洗数据(xpath,re,或者beautifulsoup),要注意的是构造下一个请求的begintime要用到上一个请求结果中最后一条消息的发布时间的时间戳。例如下图中最后一个动态的发布时间戳为1563797364。
下一个Ajax请求的begintime就是1563797364。
这样就可以构造连续的请求来获取空间好友动态消息。
最后附上源代码:
from selenium import webdriver
import time
import requests
# 导入密钥构造类
from get_g_tk import GetGTK
from lxml import etree
import demjson
import pymongo

myclient = pymongo.MongoClient('mongodb://localhost:27017/')
mydb = myclient['QQDongTaiInfo']
mycollection = mydb['QQDongTaiInfo']


class GetQQDongTaiInfo(object):
    chrome_driver = r'E:\迅雷下载\chromedriver_win32\chromedriver.exe'

    def __init__(self, username, password):
        self.driver = webdriver.Chrome(executable_path=GetQQDongTaiInfo.chrome_driver)
        self.cookies = {}
        self.username = username
        self.password = password
        self.base_url = 'https://user.qzone.qq.com/proxy/domain/ic2.qzone.qq.com/cgi-bin/feeds/feeds3_html_more?uin={}&begintime={}&g_tk={}'
        # g_tk为jquery中加密的字段,用登陆的cookie信息进行加密
        self.g_tk = None
        self.begintime = None

    def login_qq_zone(self):
        self.driver.get('https://qzone.qq.com/')

        # 切换网页框架
        self.driver.switch_to.frame(self.driver.find_element_by_id('login_frame'))

        # 切换到账户密码输入界面
        self.driver.find_element_by_id('switcher_plogin').click()

        # 输入账号
        self.driver.find_element_by_id('u').clear()
        self.driver.find_element_by_id('u').send_keys(self.username)

        # 输入密码
        self.driver.find_element_by_id('p').clear()
        self.driver.find_element_by_id('p').send_keys(self.password)

        # 登陆账号
        self.driver.find_element_by_id('login_button').click()
        time.sleep(3)
        self.driver.find_element_by_xpath('//*[@id="tab_menu_friend"]/div[3]').click()
        time.sleep(3)
        self.cookies = {i['name']: i['value'] for i in self.driver.get_cookies()}

    def get_static_html_info(self):
        page_source = self.driver.page_source
        self.begintime = self.driver.find_elements_by_xpath(
            '//*[@id="feed_friend_list"]//li[@class="f-single f-s-s"]').pop().get_attribute(
            'id').split('_')[4]
        html = etree.HTML(page_source)
        # 获取静态网页中的动态消息
        dongtai_contents = html.xpath('//li[@class="f-single f-s-s"]')
        # print(dongtai_content)
        single_info = dict()
        for temp in dongtai_contents:
            # 动态内容
            single_info['content'] = temp.xpath(".//div[starts-with(@id,'feed_')]/div[@class='f-info']/text()")
            # print(single_info['content'])
            # 动态发布者名称
            single_info['publisher_name'] = temp.xpath(".//a[contains(@class,'f-name')]/text()")
            # 动态发布时间戳
            single_info['push_date'] = temp.xpath(".//*[starts-with(@id,'hex_')]/i/@data-abstime")
            # 动态浏览次数
            single_info['view_count'] = temp.xpath(".//a[contains(@class,'state qz_feed_plugin')]/text()")
            # 动态评论
            single_info['comments-content'] = temp.xpath(".//div[@class='comments-content']//text()")
            # 点赞次数
            # print(temp.xpath(".//span[@class='f-like-cnt']/text()"))
            single_info['like'] = temp.xpath(".//span[@class='f-like-cnt']/text()")
            # print(single_info)
            self.save_to_mongdb(single_info)
        self.cookies = {i['name']: i['value'] for i in self.driver.get_cookies()}
        cookie_str = ''
        for key, value in self.cookies.items():
            cookie_str += key + '=' + value + '; '
        self.g_tk = GetGTK(cookie_str).run()

    def get_dynamic_info(self):

        requests_url = self.base_url.format(self.username, self.begintime, self.g_tk)
        print(requests_url)
        res = requests.get(requests_url, cookies=self.cookies).content.decode()
        res_dict = demjson.decode(res[10: -3])
        # 如果没有请求到正确数据,再次发出请求
        try:
            res_datas = res_dict['data']['data']
        except KeyError:
            self.get_dynamic_info()
            return None

        res_datas = [temp for temp in res_datas if isinstance(temp, dict)]
        # res_datas_len = len(res_datas)
        for temp in res_datas:
            single_info = dict()
            html = etree.HTML(temp['html'])
            # 动态内容
            single_info['content'] = html.xpath("//div[@class='f-info']/text()")
            # print(single_info['content'])
            # 动态发布者名称
            single_info['publisher_name'] = temp['nickname']
            # 动态发布时间戳
            single_info['push_date'] = temp['abstime']
            # 动态浏览次数
            single_info['view_count'] = html.xpath("//a[@class='state qz_feed_plugin']/text()")
            # 动态评论
            single_info['comments-content'] = html.xpath("//div[@class='comments-content']//text()")
            # 点赞次数
            # print(temp.xpath(".//span[@class='f-like-cnt']/text()"))
            single_info['like'] = html.xpath(".//span[@class='f-like-cnt']/text()")
            # print(single_info)
            self.save_to_mongdb(single_info)
            if temp == res_datas[-1]:
                self.begintime = single_info['push_date']
                self.get_dynamic_info()

    def save_to_mongdb(self, single_info):
        if mycollection.find({'push_date': single_info['push_date']}).count() == 0:
            mycollection.insert_one(single_info.copy())
            print('插入成功')
        else:
            print('插入失败')

    def run(self):
        self.login_qq_zone()
        self.get_static_html_info()
        self.get_dynamic_info()


if __name__ == "__main__":
    username = '***' # qq账号
    password = '***' # qq密码
    Demo = GetQQDongTaiInfo(username, password)
    Demo.run()
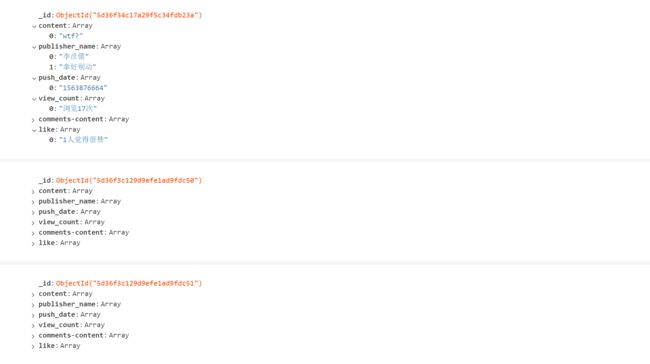
结果保存在了mongdb数据库中,结果如下:
以上就是用selenium+python获取qq空间好友动态的全部流程,谢谢浏览。
