docker 日志
首先查看默认配置下Docker的日志功能。对于一个运行的容器,Docker会将日志发送到容器的标准输出设备(STDOUT)和标准错误设备(STDERR),STDOUT和STDERR实际上就是容器的控制台终端。
以前台的方式运行一个容器:
[root@host1 ~]# docker run -p 80:80 httpd
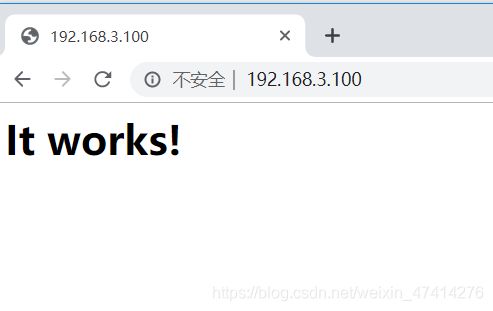
然后通过本地浏览器和docker主机测试访问该容器服务,然后查看日志信息:

可以看到docker主机系统的日志 也可以看到容器的id
使用docker attach命令进入容器查看日志:
[root@host1 ~]# docker attach test
docker attach命令是进入到已经存在的一个shell容器,而docker exec命令则是通过-i和-t参数进入一个新的shell容器中,虽然是同一个容器,但并不是同一个shell,所以当使用docker exec命令进入容器之后,是不能看到即时的日志信息的。
要想自己指定日志类型有2种方法:
1.
[root@host1 ~]# docker     run    -d   --log-driver  none  -p 8080:80 httpd
75efac9ecba531bef528c21ab656db78c0bd4f578d3ea85a9b11f79ddf6bb754
验证:
[root@host1 ~]# docker   logs    -f    75efac9
Error response from daemon: configured logging driver does not support reading
2.写进配置文件里:
vim    /usr/lib/systemd/system/docker.service

ExecStart=/usr/bin/dockerd -H fd://  **--log-driver=none**    --	containerd=/run/containerd/containerd.sock

[root@host1 ~]# systemctl daemon-reload
[root@host1 ~]# systemctl restart  docker

[root@host1 ~]# docker    run   -d   -p 8888:80  httpd
40cf87c7d2df93fab8280ef5ce8f687bf24a3c10e896dfa0301a6e4fe7a358ad
[root@host1 ~]# docker  logs   -f   40cf87c
Error response from daemon: configured logging driver does not support reading
elk环境部署:
一台docker主机,4G内存,2核CPU。
修改内核参数vm.max_map_count的值:
[root@docker ~]# sysctl -a | grep vm.max_map_count
vm.max_map_count = 262144(在文件末尾添加)
[root@host1 ~]# sysctl   -p
vm.max_map_count = 262144
下载lek镜像
docker pull sebp/elk
启动堆栈,运行具有2GB堆大小的Elasticsarch和具有1GB堆大小的Logstash:
[root@host1 ~]# docker run -p 5601:5601 -p 9200:9200 -p 5044:5044 -dit -e ES_HEAP_SIZE="2g" -e LS_HEAP_SIZE="1g" --name elk sebp/elk
安装filebeat:要与elk版本一致
[root@host1 ~]# curl   -L    -O   https://artifacts.elastic.co/downloads/beats/filebeat/filebeat-7.3.1-x86_64.rpm

[root@host1 ~]# rpm   -vih     filebeat-7.3.1-x86_64.rpm
编辑配置文件:
[root@host1 ~]# vim /etc/filebeat/filebeat.yml 添加
filebeat modules enable elasticsearch
初始化filebeat:
filebeat setup
启动filebeat:
systemctl start   filebeat
[root@host1 ~]# firewall-cmd    --add-port=9200/tcp
success
[root@host1 ~]# firewall-cmd    --add-port=5601/tcp
success
[root@host1 ~]# firewall-cmd    --add-port=5044/tcp
success
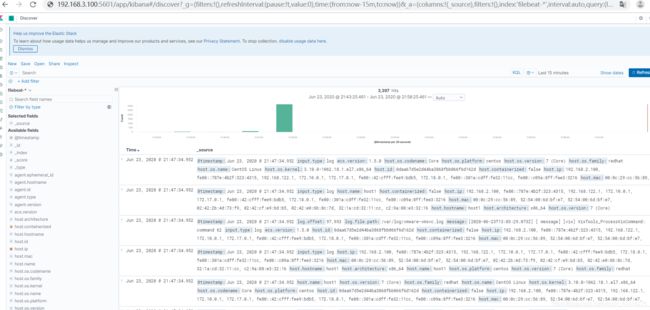
测试:
[root@host1 ~]# docker  run   busybox sh   -c  'while true;do echo "this  is  a  log from busybox!"; sleep  10; done;'
this  is  a  log from busybox!
this  is  a  log from busybox!
下载fluentd:
[root@host1 ~]# docker pull fluent/fluentd
运行容器:
[root@host1 ~]# docker run -d -p 24224:24224 -p 24224:24224/udp -v /test:/fluentd/log fluent/fluentd
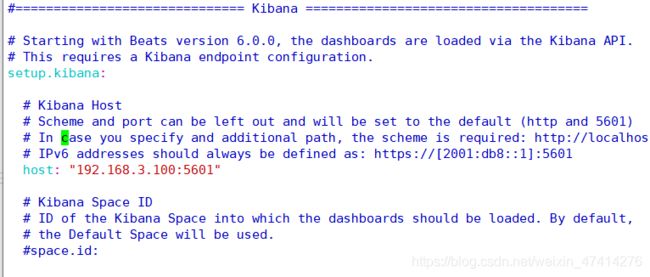
修改配置文件:
[root@host1 ~]# vim /etc/filebeat/filebeat.yml
[root@host1 ~]# firewall-cmd --add-port=24224/tcp
运行两个容器:
[root@host1 ~]# docker  run   -d  --log-driver=fluentd --log-opt  fluentd-address=192.168.3.100:24224 --log-opt  tag="this  is  A"  busybox   sh  -c 'while true; do echo "this  is  busybox A!"; sleep 10; done;'


[root@host1 ~]# docker  run   -d  --log-driver=fluentd --log-opt  fluentd-address=192.168.3.100:24224 --log-opt  tag="this  is  B"  busybox   sh  -c 'while true; do echo "this  is  busybox B!"; sleep 10; done;'


