漏洞复现01-vulhub环境自动部署
最近在研究漏洞原理及复现
参考链接:https://blog.ropnop.com/transferring-files-from-kali-to-windows/
漏洞复现01-vulhub环境自动部署
2020年7月11日21:32:59 【原创】
1. 简介
目的:自动批量拉取 vulhub 镜像
vulhub 官网地址:https://vulhub.org/
root@ubuntu:~# git clone https://github.com/vulhub/vulhub
或者浏览器下载 https://codeload.github.com/vulhub/vulhub/zip/master
vulhub目前包括 157 漏洞环境,但是在需要进行环境部署的时候,往往会出现拉取时间长的问题,所以我们需要在电脑中常备一个完整的靶机环境,通常在需要批量部署的时候,我们就要考虑写脚本了。
话不多少,先分析人工部署的过程
2 安装 docker
我在这里使用的是 ubuntu 2020 Dekstop版
docker 安装参考 https://blog.csdn.net/m82_a1/article/details/98870376
- 卸载原有版本
# 卸载原有版本
sudo apt-get remove docker docker-engine docker-ce docker.io

# 如果需要删除所有镜像,容器和卷(第一次安装请忽略):
sudo rm -rf /var/lib/docker

# 备注:apt-get remove会保留软件的配置文件如果想删除请执行以下操作

# 查看相关软件包是否有残余:
dpkg -l | grep docker

# 使用purage清除配置文件:
sudo apt-get purge docker-ce


# 更新索引包
sudo apt-get update
- 安装 docker
# 安装添加使用 HTTPS 传输的软件包
sudo apt-get -y install apt-transport-https ca-certificates curl software-properties-common

# 添加软件源的GPG密钥(本人选择的中科大)
# 中科大:
curl -fsSL https://mirrors.ustc.edu.cn/docker-ce/linux/ubuntu/gpg | sudo apt-key add -
# 阿里云:
curl -fsSL http://mirrors.aliyun.com/docker-ce/linux/ubuntu/gpg | sudo apt-key add -
# 官方源:
curl -fsSL https://download.docker.com/linux/ubuntu/gpg | sudo apt-key add -


# 向 source.list 中添加Docker软件源(本人选择的中科大)
# 中科大源:
sudo add-apt-repository "deb [arch=amd64] https://mirrors.ustc.edu.cn/docker-ce/linux/ubuntu $(lsb_release -cs) stable"
# 阿里源:
sudo add-apt-repository "deb [arch=amd64] http://mirrors.aliyun.com/docker-ce/linux/ubuntu $(lsb_release -cs) stable"
# 官方源:
sudo add-apt-repository "deb [arch=amd64] https://download.docker.com/linux/ubuntu $(lsb_release -cs) stable"


# 再次更新索引包
sudo apt-get update

# 若想直接安装最新版本执行以下命令即可
sudo apt-get install docker-ce

# 查看docker版本
apt-cache madison docker-ce


# 查看Docker版本信息
docker version
- 安装 docker-ce
apt-cache madison docker-ce
apt-get install docker-ce=

# 例如:
sudo apt-get install docker-ce=5:19.03.9~3-0~ubuntu-focal
- 启动服务
# 启动后台服务(三选一)
sudo service docker restart
/etc/init.d/docker restart
systemctl restart docker

# 镜像加速
# 新版的 Docker 使用 /etc/docker/daemon.json 来配置 Daemon。
# 请在该配置文件中加入(没有该文件的话,请先建一个)Docker中国官方加速:

{
	"registry-mirrors":["https://f3lu6ju1.mirror.aliyuncs.com"]
}
- 安装 docker-compose
参考 https://blog.csdn.net/LUCKWXF/article/details/96131392
apt install python3-pip #(ubuntu)
yum install python3-pip #(centos)

pip3 install docker-compose
3. 人工部署过程
根据官方教程,只需要执行
docker-compose up -d
主要过程是 docker-compose 命令根据 docker-compose.yml 文件中的配置来拉取镜像,所以需要在有 docker-compose.yml 文件的目录下执行拉取镜像命令。

执行步骤如下:
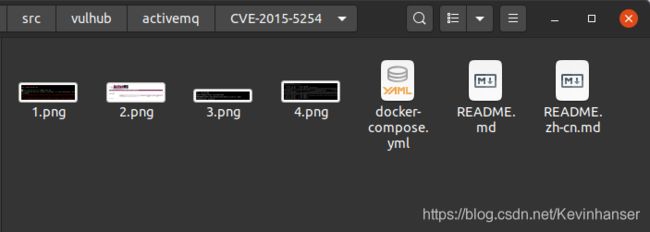
cd /src/vulhub/activemq/CVE-2015-5254
docker-compose up -d

# 使用完毕后,还要停止镜像
docker-compose down

根据网速,每个镜像都会消耗很多时间,如果这157个全部安装完,基本要花费好几天的时间来拉取镜像,不爽!
4. 自动化拉取镜像
每个镜像执行的过程中都会经历三步:
- 切换路径(cd 到某路径)
- docker-compose up -d
- docker-compose down
基于这个思路,制作一个 bash 脚本,内容是自动切换路径,然后自动拉取,再自动停止,然后换下一个…
创建 python3 的文件
cd /home/ubuntu/Desktop/
vim  test.py
内容如下:
import os

for parent, dirnames, filenames in os.walk("/src/vulhub/"):
    print("----------------------------------")

    print(parent)
    if dirnames:
        print(dirnames)

    if "docker-compose.yml" in filenames:
        print("+--+--+--+--+--+--+--+--+--+--+--+--+--+--+--+--+")
        print(parent)
        with open("optput.sh", "a") as file_tmp:
            file_tmp.truncate()
            file_tmp.write("cd "+ parent + "\n")
            file_tmp.write('echo "'+ parent + '"\n')
            file_tmp.write('echo "------------------------------------"\n')
            file_tmp.write("docker-compose up -d\n")
            file_tmp.write("docker-compose down\n\n")
        # continue
运行test.py文件
pythpn3 test.py
会自动生成一个文件 output.sh
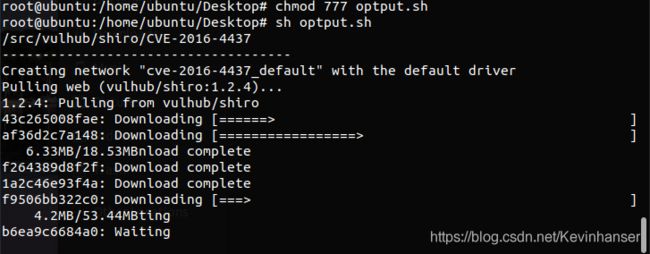
chmod 777 optput.sh
sh optput.sh
然后睡一觉,就全部拉取完成了


