Android 如何在插入外接物理键盘时还能显示软键盘
参考地址:http://blog.csdn.net/wq892373445/article/details/51767022
http://blog.csdn.net/qq_32034593/article/details/53065542
http://blog.csdn.net/DrakeBlue/article/details/39049495
第一种:(第二种方法中也提及了这个类的这个方法,但是修改的参数是mHardKeyboardEnabled,最后不推荐修改这个参数,不知道怎么情况。)
VR项目中,通过无线鼠标连接蓝牙来控制VR,但是蓝牙连接上后点击搜索框时无法弹出输入法键盘,这是有物理键盘造成的, 需屏蔽物理键盘来解决这个问题, 实现如下:
frameworks/base/services/Java/com/Android/server/wm/WindowManagerService.java 中的 computeScreenConfigurationLocked 方法 将hardKeyboardAvailable = false。
  // Determine whether a hard keyboard is available and enabled.
            boolean hardKeyboardAvailable =false;//config.keyboard != Configuration.KEYBOARD_NOKEYS;
            if (hardKeyboardAvailable != mHardKeyboardAvailable) {
                mHardKeyboardAvailable = hardKeyboardAvailable;
                mHardKeyboardEnabled = hardKeyboardAvailable;
                mH.removeMessages(H.REPORT_HARD_KEYBOARD_STATUS_CHANGE);
                mH.sendEmptyMessage(H.REPORT_HARD_KEYBOARD_STATUS_CHANGE);
            }
            if (!mHardKeyboardEnabled) {
                config.keyboard = Configuration.KEYBOARD_NOKEYS;
            }
第二种:
第一次写,写的不好请见谅
参考:
http://blog.csdn.net/DrakeBlue/article/details/39049495
http://blog.csdn.NET/hclydao/article/details/44240799
http://blog.csdn.Net/jdsjlzx/article/details/39495319
物理键盘映射过程:
手机/system/usr/keylayout/*.kl :内核将keyCode映射成有含义的字符串
KeycodeLabels.h : framework 将字符串映射成keyEvent的keyCode
frameworks/…/res/values/attrs.xml
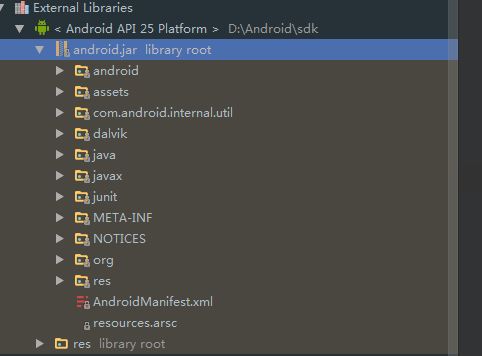
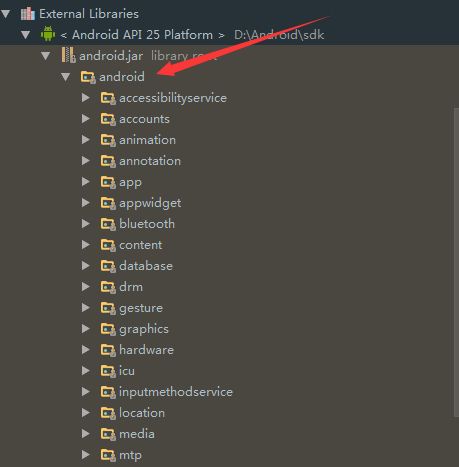
- 主要部分:android.jar
一、问题描述:
当平板连接上蓝牙扫描枪(外接物理键盘)时候,不能弹出软键盘输入,需要打开系统的输入法选择界面关闭硬件物理键盘后才能调用弹出系统软键盘;
理想效果:
在平板连接上蓝牙扫描枪后仍可以调用系统软键盘输入,将系统的物理键盘默认设置为关闭状态,或不需要开启关闭物理键盘,
二、思路
1.首先:你要知道AndroidManifest.xml文件。这里这里有的信息对于理解程序又很大的意义。
2.学会使用grep命令。修改系统的源代码时候这个很重要,
3.当想修改一个程序时,先找到这个程序的位置,大部分只要修改framework 和package 两个文件夹下的内容
4.关键字,例如要修改statuBars。先使用hierarchyviewer查看statuBar属于那个部分。
5.根据图标,使用grep在framework中查找对应的位置。
6.然后就是修改程序了。
三、部分代码
Android版本源码
frameworks/base/services/Java/com/android/server/wm/WindowManagerService.java
关键代码:行6618 computeScreenConfigurationLocked()方法中
[java] view plaincopy在CODE上查看代码片派生到我的代码片
boolean hardKeyboardAvailable = config.keyboard != Configuration.KEYBOARD_NOKEYS;
            if (hardKeyboardAvailable != mHardKeyboardAvailable) {
                mHardKeyboardAvailable = hardKeyboardAvailable;
                mHardKeyboardEnabled = !hardKeyboardAvailable;
                mH.removeMessages(H.REPORT_HARD_KEYBOARD_STATUS_CHANGE);
                mH.sendEmptyMessage(H.REPORT_HARD_KEYBOARD_STATUS_CHANGE);
            }
            if (!mHardKeyboardEnabled) {
                config.keyboard = Configuration.KEYBOARD_NOKEYS;
            }
将mHardKeyboardEnabled直接改成false
这样改软键盘是能用但是物理键盘是用不了的
最后研究代码frameworks\base\services\core\java\com\android\server\wm\WindowManagerService.java
如果把updateShowImeWithHardKeyboard方法中的showImeWithHardKeyboard变量直接置为true,则可以实现软键盘与物理键盘的同时使用,
但此举修改影响范围很大,不推荐。
 public void updateShowImeWithHardKeyboard() {
        //modified by Janning for enble the HardKeyboard start
        final boolean showImeWithHardKeyboard = Settings.Secure.getIntForUser(
                mContext.getContentResolver(), Settings.Secure.SHOW_IME_WITH_HARD_KEYBOARD, 0,
                mCurrentUserId) == 1;
        //final boolean showImeWithHardKeyboard = true;
        //modified by Janning for enble the HardKeyboard end
        synchronized (mWindowMap) {
            if (mShowImeWithHardKeyboard != showImeWithHardKeyboard) {
                mShowImeWithHardKeyboard = showImeWithHardKeyboard;
                mH.sendEmptyMessage(H.SEND_NEW_CONFIGURATION);
            }
        }
    }
- 10
后续继续研究代码发现在WindowManagerService.java的computeScreenConfigurationLocked方法中有通过判断当前物理键盘类型来控制是否同时启用软件盘的处理逻辑:
boolean computeScreenConfigurationLocked(Configuration config) {
        if (!mDisplayReady) {
            return false;
        }

        // TODO(multidisplay): For now, apply Configuration to main screen only.
        final DisplayContent displayContent = getDefaultDisplayContentLocked();

        // Use the effective "visual" dimensions based on current rotation
        final boolean rotated = (mRotation == Surface.ROTATION_90
                || mRotation == Surface.ROTATION_270);
        final int realdw = rotated ?
                displayContent.mBaseDisplayHeight : displayContent.mBaseDisplayWidth;
        final int realdh = rotated ?
                displayContent.mBaseDisplayWidth : displayContent.mBaseDisplayHeight;
        int dw = realdw;
        int dh = realdh;

        if (mAltOrientation) {
            if (realdw > realdh) {
                // Turn landscape into portrait.
                int maxw = (int)(realdh/1.3f);
                if (maxw < realdw) {
                    dw = maxw;
                }
            } else {
                // Turn portrait into landscape.
                int maxh = (int)(realdw/1.3f);
                if (maxh < realdh) {
                    dh = maxh;
                }
            }
        }

        if (config != null) {
            config.orientation = (dw <= dh) ? Configuration.ORIENTATION_PORTRAIT :
                    Configuration.ORIENTATION_LANDSCAPE;
        }

        // Update application display metrics.
        final int appWidth = mPolicy.getNonDecorDisplayWidth(dw, dh, mRotation);
        final int appHeight = mPolicy.getNonDecorDisplayHeight(dw, dh, mRotation);
        final DisplayInfo displayInfo = displayContent.getDisplayInfo();
        synchronized(displayContent.mDisplaySizeLock) {
            displayInfo.rotation = mRotation;
            displayInfo.logicalWidth = dw;
            displayInfo.logicalHeight = dh;
            displayInfo.logicalDensityDpi = displayContent.mBaseDisplayDensity;
            displayInfo.appWidth = appWidth;
            displayInfo.appHeight = appHeight;
            displayInfo.getLogicalMetrics(mRealDisplayMetrics,
                    CompatibilityInfo.DEFAULT_COMPATIBILITY_INFO, null);
            displayInfo.getAppMetrics(mDisplayMetrics);
            mDisplayManagerInternal.setDisplayInfoOverrideFromWindowManager(
                    displayContent.getDisplayId(), displayInfo);
        }
        if (false) {
            Slog.i(TAG, "Set app display size: " + appWidth + " x " + appHeight);
        }

        final DisplayMetrics dm = mDisplayMetrics;
        mCompatibleScreenScale = CompatibilityInfo.computeCompatibleScaling(dm,
                mCompatDisplayMetrics);

        if (config != null) {
            config.screenWidthDp = (int)(mPolicy.getConfigDisplayWidth(dw, dh, mRotation)
                    / dm.density);
            config.screenHeightDp = (int)(mPolicy.getConfigDisplayHeight(dw, dh, mRotation)
                    / dm.density);
            computeSizeRangesAndScreenLayout(displayInfo, rotated, dw, dh, dm.density, config);

            config.compatScreenWidthDp = (int)(config.screenWidthDp / mCompatibleScreenScale);
            config.compatScreenHeightDp = (int)(config.screenHeightDp / mCompatibleScreenScale);
            config.compatSmallestScreenWidthDp = computeCompatSmallestWidth(rotated, dm, dw, dh);
            config.densityDpi = displayContent.mBaseDisplayDensity;

            // Update the configuration based on available input devices, lid switch,
            // and platform configuration.
            config.touchscreen = Configuration.TOUCHSCREEN_NOTOUCH;
            config.keyboard = Configuration.KEYBOARD_NOKEYS;
            config.navigation = Configuration.NAVIGATION_NONAV;

            int keyboardPresence = 0;
            int navigationPresence = 0;
            final InputDevice[] devices = mInputManager.getInputDevices();
            final int len = devices.length;
            for (int i = 0; i < len; i++) {
                InputDevice device = devices[i];
                if (!device.isVirtual()) {
                    final int sources = device.getSources();
                    final int presenceFlag = device.isExternal() ?
                            WindowManagerPolicy.PRESENCE_EXTERNAL :
                                    WindowManagerPolicy.PRESENCE_INTERNAL;

                    if (mIsTouchDevice) {
                        if ((sources & InputDevice.SOURCE_TOUCHSCREEN) ==
                                InputDevice.SOURCE_TOUCHSCREEN) {
                            config.touchscreen = Configuration.TOUCHSCREEN_FINGER;
                        }
                    } else {
                        config.touchscreen = Configuration.TOUCHSCREEN_NOTOUCH;
                    }

                    if ((sources & InputDevice.SOURCE_TRACKBALL) == InputDevice.SOURCE_TRACKBALL) {
                        config.navigation = Configuration.NAVIGATION_TRACKBALL;
                        navigationPresence |= presenceFlag;
                    } else if ((sources & InputDevice.SOURCE_DPAD) == InputDevice.SOURCE_DPAD
                            && config.navigation == Configuration.NAVIGATION_NONAV) {
                        config.navigation = Configuration.NAVIGATION_DPAD;
                        navigationPresence |= presenceFlag;
                    }
                    // 判断该物理设备的类型, InputDevice.KEYBOARD_TYPE_ALPHABETIC 是表示物理键盘设备
                    if (device.getKeyboardType() == InputDevice.KEYBOARD_TYPE_ALPHABETIC) {
                        config.keyboard = Configuration.KEYBOARD_QWERTY;
                        keyboardPresence |= presenceFlag;
                    }
                    // 获取物理设备名称,判断是否是指定的名称,如果是则把 config.keyboard
                    // 的属性置为 Configuration.KEYBOARD_NOKEYS ,如此则可以同时兼容软键盘
                    // 物理键盘与软键盘可以同时启用
                    // Add by Janning start
                    // for show IME with HardKeyboard
                    if (device.getName().equals("XXX-vinput-keypad")) {
                        Slog.w("SLCODE", "the hard device name is: " + device.getName());
                        config.keyboard = Configuration.KEYBOARD_NOKEYS;
                    }
                    // Add by Janning end
                }
            }

            if (config.navigation == Configuration.NAVIGATION_NONAV && mHasPermanentDpad) {
                config.navigation = Configuration.NAVIGATION_DPAD;
                navigationPresence |= WindowManagerPolicy.PRESENCE_INTERNAL;
            }

            // Determine whether a hard keyboard is available and enabled.
            boolean hardKeyboardAvailable = config.keyboard != Configuration.KEYBOARD_NOKEYS;
            if (hardKeyboardAvailable != mHardKeyboardAvailable) {
                mHardKeyboardAvailable = hardKeyboardAvailable;
                mH.removeMessages(H.REPORT_HARD_KEYBOARD_STATUS_CHANGE);
                mH.sendEmptyMessage(H.REPORT_HARD_KEYBOARD_STATUS_CHANGE);
            }
            if (mShowImeWithHardKeyboard) {
                config.keyboard = Configuration.KEYBOARD_NOKEYS;
            }

            // Let the policy update hidden states.
            config.keyboardHidden = Configuration.KEYBOARDHIDDEN_NO;
            config.hardKeyboardHidden = Configuration.HARDKEYBOARDHIDDEN_NO;
            config.navigationHidden = Configuration.NAVIGATIONHIDDEN_NO;
            mPolicy.adjustConfigurationLw(config, keyboardPresence, navigationPresence);
        }

        return true;
    }

    public boolean isHardKeyboardAvailable() {
        synchronized (mWindowMap) {
            return mHardKeyboardAvailable;
        }
    }

    public void updateShowImeWithHardKeyboard() {
        // 此处修改也可以实现物理键盘与软键盘的同时启用,即把showImeWithHardKeyboard 直接置为 true,
        // 但此方法影响太大,不推荐该方案,建议根据设备名称判断 修改config.keyboard 属性值(代码见上文)
        //changed by Janning start
        //modified by Janning for enble the HardKeyboard start
        final boolean showImeWithHardKeyboard = Settings.Secure.getIntForUser(
                mContext.getContentResolver(), Settings.Secure.SHOW_IME_WITH_HARD_KEYBOARD, 0,
                mCurrentUserId) == 1;
        //final boolean showImeWithHardKeyboard = true;
        //modified by Janning for enble the HardKeyboard end
        //changed by Janning end
        synchronized (mWindowMap) {
            if (mShowImeWithHardKeyboard != showImeWithHardKeyboard) {
                mShowImeWithHardKeyboard = showImeWithHardKeyboard;
                mH.sendEmptyMessage(H.SEND_NEW_CONFIGURATION);
            }
        }
}- 1
当插入物理键盘后通知栏会弹出相应的选择键盘布局通知,对于该通知可以选择隐藏:
根据字符串查找到是在 frameworks\base\services\core\java\com\android\server\input\InputManagerService.java 中调用显示该通知的,
进一步分析代码发现是在 deliverInputDevicesChanged 方法中控制通知的显示。
InputManagerService.java
private void deliverInputDevicesChanged(InputDevice[] oldInputDevices) {

         。。。。。。。。。。。。。。。。

            if (missingLayoutForExternalKeyboard) {
                if (missingLayoutForExternalKeyboardAdded) {
                    if (multipleMissingLayoutsForExternalKeyboardsAdded) {
                        // We have more than one keyboard missing a layout, so drop the
                        // user at the generic input methods page so they can pick which
                        // one to set.
                        showMissingKeyboardLayoutNotification(null);
                    } else {
                        // 如果只插入了一个物理键盘则判断该物理键盘的名称是否是指定的,如果是则不让其显示键盘布局的通知
                        // Modify by Janning begin
                        if (keyboardMissingLayout != null
                                && !keyboardMissingLayout.getName().equals("XXXX-vinput-keypad")) {
                            showMissingKeyboardLayoutNotification(keyboardMissingLayout);
                        }
                        // Modify by Janning end
                    }
                }
            } else if (mKeyboardLayoutNotificationShown) {
                hideMissingKeyboardLayoutNotification();
            }
        }
        mTempFullKeyboards.clear();
}- 1
注意 注意 注意,重要的说三遍;
假如以上你都修改了,以为这样都OK了,那你就OUT了
看看下面的你或许根本不知道,慢慢研究吧!骚年
四、以下操作全在ubuntu系统下完成
可以参考:http://blog.csdn.net/y150481863/article/details/8023422
操作步骤(不具体说明):
1.下载好ubuntu系统之后。
2.在找到sdk位置(就是你的SDK 找到你用的那个系统,在到ubuntu修改)。
………………………..(做起来不是这么简单)
3.再用ub系统上生成.jar,再放在SDK里面
第三种:
Android系统在外接物理键盘的时候,可以在Settings的Language&Input设置中,将默认的输入设置设为软键盘还是物理键盘。
Android系统在检测到有外接USB键盘的时候,默认是启用物理键盘,而软键盘将会隐藏。如果需要启用软键盘,需要将物理键盘OFF掉。
现在,我们修改源代码,将这个物理键盘默认改为OFF。
通过Settings的代码,我们找到该Dialog是通过IIputMethodManager.aidl的showInputMethodPickerFromClient()方法通知另外的地方弹出的对话。
而showInputMethodPickerFromClient()方法的实现是在frameworks/base/services/Java/com/android/server/InputMethodManagerService.java中。
1795行,方法//
@Override
public void showInputMethodPickerFromClient(IInputMethodClient client) {
synchronized (mMethodMap) {
if (mCurClient == null || client == null
|| mCurClient.client.asBinder() != client.asBinder()) {
Slog.w(TAG, "Ignoring showInputMethodPickerFromClient of uid "
+ Binder.getCallingUid() + ": " + client);
}
// Always call subtype picker, because subtype picker is a superset of input method
// picker.
mHandler.sendEmptyMessage(MSG_SHOW_IM_SUBTYPE_PICKER);
}
}
该Handler的处理在2050行;
@Override
public boolean handleMessage(Message msg) {
HandlerCaller.SomeArgs args;
switch (msg.what) {
case MSG_SHOW_IM_PICKER:
showInputMethodMenu();
return true;
case MSG_SHOW_IM_SUBTYPE_PICKER:
showInputMethodSubtypeMenu();
return true;
......
......
继续跟踪showInputMethodSubtypeMenu()方法; 2317行
private void showInputMethodSubtypeMenu() {
showInputMethodMenuInternal(true);
}
最后找到关键方法showInputMethodMenuInternal(); 2344行;
这个方法主要是获取系统输入法,然后进行弹框显示。而我们的物理键盘默认设置看在下面代码片段中。
final Switch hardKeySwitch = ((Switch)mSwitchingDialogTitleView.findViewById(
com.android.internal.R.id.hard_keyboard_switch));
Log.d(TAG, "input isEnabled: " + mWindowManagerService.isHardKeyboardEnabled());
hardKeySwitch.setChecked(mWindowManagerService.isHardKeyboardEnabled());
hardKeySwitch.setOnCheckedChangeListener(
new OnCheckedChangeListener() {
@Override
public void onCheckedChanged(
CompoundButton buttonView, boolean isChecked) {
mWindowManagerService.setHardKeyboardEnabled(isChecked);
}
});
我们看到该Switch的Checked设置是在调用的WindowManagerService的一个boolean值的get方法。接着往里走
/frameworks/base/services/java/com/android/server/wm/WindowManagerService.java
关键代码:行6618 computeScreenConfigurationLocked()方法中
boolean hardKeyboardAvailable = config.keyboard != Configuration.KEYBOARD_NOKEYS;
if (hardKeyboardAvailable != mHardKeyboardAvailable) {
mHardKeyboardAvailable = hardKeyboardAvailable;
mHardKeyboardEnabled = !hardKeyboardAvailable;
mH.removeMessages(H.REPORT_HARD_KEYBOARD_STATUS_CHANGE);
mH.sendEmptyMessage(H.REPORT_HARD_KEYBOARD_STATUS_CHANGE);
}
if (!mHardKeyboardEnabled) {
config.keyboard = Configuration.KEYBOARD_NOKEYS;
}
这里将会读取物理键盘是否可用,如果可用将会赋值给mHardKeyboardEnabled为true,然后hardKeySwitch set的值将会是这个可用的true,
我这里将hardKeyboardAvailable取反赋给mHardKeyboardEnabled。


