通用的Bitmap压缩算法,进一步节约内存(推荐)
前几天我写了一篇通过压缩Bitmap,减少OOM的文章,那篇文章的目的是按照imageview的大小来压缩bitmap,让bitmap的大小正好是imageview。但是那种算法的通用性比较差,仅仅能适合fit_xy的情况。对此我进一步分析了下这个问题,并且参考了Volley的源码,最终得出了结论:如果你要让这个压缩后的bitmap完全适合多种imageview拉伸模式,你就必须重写拉伸模式的算法,但这过于小题大做了。讨巧一点的办法就是让这个imageview不完全按照imageview的长宽进行压缩,而仅仅按照imageview的长或宽按比例缩小,得到的是一张和原图比率一样的小图,让imageview加载这个小图就行了。世上没有十全十美的事情,你这个虽然讨巧了,但问题也就来了,在某些模式下可能会有一部分图片没有显示在屏幕上,浪费了一点点内存,在cent模式下,原图的显示效果和小图的显示效果完全不一样。
总结:考虑到多种因素,我还是决定使用比较讨巧的做法,因为它通用性比较高,浪费内存的情况有,但浪费的内存很少(几kb),一般情况下我们不用center模式进行图片的显示,所以我们完全可以考虑这个方式。
工具类:
我参考了volley的代码,重新构建了工具类,下面直接贴出工具类的代码:
package com.kale.bitmaptest;


import android.content.res.Resources;

import android.graphics.Bitmap;

import android.graphics.BitmapFactory;


public class BitUtils {


    private static int mDesiredWidth;

    private static int mDesiredHeight;


    /**

     * @description 从Resources中加载图片

     *

     * @param res

     * @param resId

     * @param reqWidth

     * @param reqHeight

     * @return

     */

    public static Bitmap decodeSampledBitmapFromResource(Resources res, int resId, int reqWidth, int reqHeight) {

        BitmapFactory.Options options = new BitmapFactory.Options();

        // 设置成了true,不占用内存,只获取bitmap宽高

        options.inJustDecodeBounds = true;

        // 初始化options对象

        BitmapFactory.decodeResource(res, resId, options);

        // 得到计算好的options,目标宽、目标高

        options = getBestOptions(options, reqWidth, reqHeight);

        Bitmap src = BitmapFactory.decodeResource(res, resId, options); // 载入一个稍大的缩略图

        return createScaleBitmap(src, mDesiredWidth, mDesiredHeight); // 进一步得到目标大小的缩略图

    }


    /**

     * @description 从SD卡上加载图片

     *

     * @param pathName

     * @param reqWidth

     * @param reqHeight

     * @return

     */

    public static Bitmap decodeSampledBitmapFromFile(String pathName, int reqWidth, int reqHeight) {

        BitmapFactory.Options options = new BitmapFactory.Options();

        options.inJustDecodeBounds = true;

        BitmapFactory.decodeFile(pathName, options);

        options = getBestOptions(options, reqWidth, reqHeight);

        Bitmap src = BitmapFactory.decodeFile(pathName, options);

        return createScaleBitmap(src, mDesiredWidth, mDesiredHeight);

    }


    /**

     * @description 计算目标宽度,目标高度,inSampleSize

     *

     * @param options

     * @param reqWidth

     * @param reqHeight

     * @return BitmapFactory.Options对象

     */

    private static BitmapFactory.Options getBestOptions(BitmapFactory.Options options, int reqWidth, int reqHeight) {

        // 读取图片长宽

        int actualWidth = options.outWidth;

        int actualHeight = options.outHeight;

        // Then compute the dimensions we would ideally like to decode to.

        mDesiredWidth = getResizedDimension(reqWidth, reqHeight, actualWidth, actualHeight);

        mDesiredHeight = getResizedDimension(reqHeight, reqWidth, actualHeight, actualWidth);

        // 根据现在得到计算inSampleSize

        options.inSampleSize = calculateBestInSampleSize(actualWidth, actualHeight, mDesiredWidth, mDesiredHeight);

        // 使用获取到的inSampleSize值再次解析图片

        options.inJustDecodeBounds = false;

        return options;

    }


    /**

     * Scales one side of a rectangle to fit aspect ratio. 最终得到重新测量的尺寸

     *

     * @param maxPrimary

     *            Maximum size of the primary dimension (i.e. width for max

     *            width), or zero to maintain aspect ratio with secondary

     *            dimension

     * @param maxSecondary

     *            Maximum size of the secondary dimension, or zero to maintain

     *            aspect ratio with primary dimension

     * @param actualPrimary

     *            Actual size of the primary dimension

     * @param actualSecondary

     *            Actual size of the secondary dimension

     */

    private static int getResizedDimension(int maxPrimary, int maxSecondary, int actualPrimary, int actualSecondary) {

        double ratio = (double) actualSecondary / (double) actualPrimary;

        int resized = maxPrimary;

        if (resized * ratio > maxSecondary) {

            resized = (int) (maxSecondary / ratio);

        }

        return resized;

    }


    /**

     * Returns the largest power-of-two divisor for use in downscaling a bitmap

     * that will not result in the scaling past the desired dimensions.

     *

     * @param actualWidth

     *            Actual width of the bitmap

     * @param actualHeight

     *            Actual height of the bitmap

     * @param desiredWidth

     *            Desired width of the bitmap

     * @param desiredHeight

     *            Desired height of the bitmap

     */

    // Visible for testing.

    private static int calculateBestInSampleSize(int actualWidth, int actualHeight, int desiredWidth, int desiredHeight) {

        double wr = (double) actualWidth / desiredWidth;

        double hr = (double) actualHeight / desiredHeight;

        double ratio = Math.min(wr, hr);

        float inSampleSize = 1.0f;

        while ((inSampleSize * 2) <= ratio) {

            inSampleSize *= 2;

        }


        return (int) inSampleSize;

    }


    /**

     * @description 通过传入的bitmap,进行压缩,得到符合标准的bitmap

     *

     * @param src

     * @param dstWidth

     * @param dstHeight

     * @return

     */

    private static Bitmap createScaleBitmap(Bitmap tempBitmap, int desiredWidth, int desiredHeight) {

        // If necessary, scale down to the maximal acceptable size.

        if (tempBitmap != null && (tempBitmap.getWidth() > desiredWidth || tempBitmap.getHeight() > desiredHeight)) {

            // 如果是放大图片,filter决定是否平滑,如果是缩小图片,filter无影响

            Bitmap bitmap = Bitmap.createScaledBitmap(tempBitmap, desiredWidth, desiredHeight, true);

            tempBitmap.recycle(); // 释放Bitmap的native像素数组

            return bitmap;

        } else {

            return tempBitmap; // 如果没有缩放,那么不回收

        }

    }


}
这个工具类构造的思想和原本的构造思想完全一致,差别之处在于这里的图片是等比缩放的。
测试代码:
    public void loadBitmap(boolean exactable) {

        int bmSize = 0;

        Bitmap bm = null;

        if (exactable) {

            // 通过工具类来产生一个符合ImageView的缩略图

            bm = BitUtils.decodeSampledBitmapFromResource(getResources(), R.drawable.saber, iv.getWidth(), iv.getHeight());

        } else {

            // 直接加载原图

            bm = BitmapFactory.decodeResource(getResources(), R.drawable.saber);

        }

        iv.setImageBitmap(bm);


        bmSize += bm.getByteCount(); // 得到bitmap的大小

        int kb = bmSize / 1024;

        int mb = kb / 1024;

        kb = kb % 1024;

        Log.d("Bitmap", "bitmap w = " + bm.getWidth() + " h = " + bm.getHeight());

        Log.d("Bitmap", "bitmap size = " + mb + "MB " + kb + "KB");

        Toast.makeText(this, "bitmap size = " + mb + "MB " + kb + "KB", Toast.LENGTH_LONG).show();

    }
通过加载原图和加载缩略图进行比较,最终在log打印出图片的宽高和图片内存占用。
测试结果:
布局文件:

<RelativeLayout xmlns:android="http://schemas.android.com/apk/res/android"

    xmlns:tools="http://schemas.android.com/tools"

    android:layout_width="match_parent"

    android:layout_height="match_parent"

    android:padding="16dp"

    tools:context="${relativePackage}.${activityClass}" >


    <ImageView

        android:id="@+id/imageView"

        android:layout_width="100dp"

        android:layout_height="100dp"

        android:layout_centerHorizontal="true"

        android:layout_centerVertical="true"

        android:src="@drawable/ic_launcher" />


    <Button

        android:id="@+id/original_button"

        android:layout_width="wrap_content"

        android:layout_height="wrap_content"

        android:layout_alignParentBottom="true"

        android:onClick="butonListener"

        android:text="加载原图" />


    <Button

        android:id="@+id/clip_button"

        android:layout_width="wrap_content"

        android:layout_height="wrap_content"

        android:layout_alignBaseline="@+id/original_button"

        android:layout_alignBottom="@+id/original_button"

        android:layout_alignParentRight="true"

        android:onClick="butonListener"

        android:text="加载缩略图" />


</RelativeLayout>
前题:我的手机定义的imageview是100dp,实际是200pix。加载图片的实际大小:850 x 1200
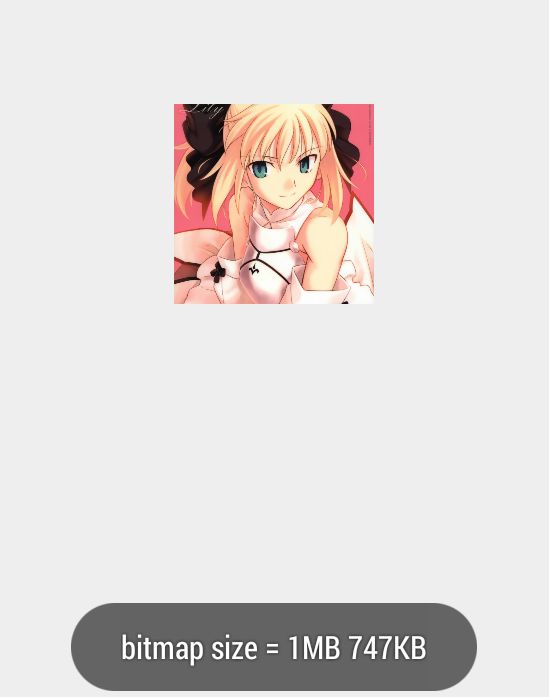
① 加载原图
bitmap宽 = 567,高 = 800;
内存占用:1M 747KB
解释:最终得到的图片大小和原始图片不同,这里应该是BitmapFactory在解码时就已经做了压缩,算是自带的一个智能压缩方案吧。
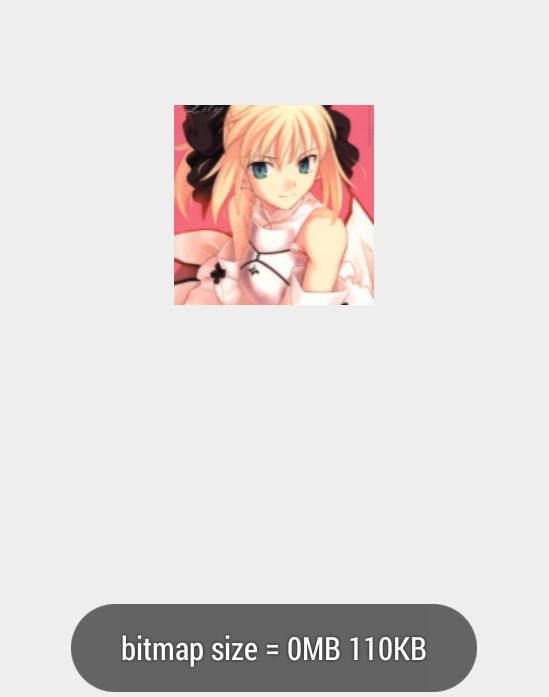
② 用工具类加载缩略图
bitmap宽 = 141,高 = 200;
内存占用:110KB
解释:目标的imageview宽、高均为100dp,在我手机上换算为200pix,这里做了等比缩放处理,所以高为200.最后我们也明显的看出,用这种方式得到的图片比较小,不会轻易出现OOM
完整的activity代码:

package com.kale.bitmaptest;


import android.app.Activity;

import android.app.ActivityManager;

import android.content.Context;

import android.graphics.Bitmap;

import android.graphics.BitmapFactory;

import android.os.Bundle;

import android.util.Log;

import android.view.View;

import android.widget.ImageView;

import android.widget.ImageView.ScaleType;

import android.widget.Toast;


public class MainActivity extends Activity {

    ImageView iv;


    @Override

    protected void onCreate(Bundle savedInstanceState) {

        super.onCreate(savedInstanceState);

        setContentView(R.layout.activity_main);

        iv = (ImageView) findViewById(R.id.imageView);

        iv.setScaleType(ScaleType.CENTER_CROP);

        // center 变了

        getMemoryCacheSize();

    }


    public void butonListener(View v) {

        switch (v.getId()) {

        case R.id.original_button:

            loadBitmap(false); // 加载原图

            break;


        case R.id.clip_button:

            loadBitmap(true); // 加载缩略图

            break;

        }

    }


    public void loadBitmap(boolean exactable) {

        int bmSize = 0;

        Bitmap bm = null;

        if (exactable) {

            // 通过工具类来产生一个符合ImageView的缩略图

            bm = BitUtils.decodeSampledBitmapFromResource(getResources(), R.drawable.saber, iv.getWidth(), iv.getHeight());

        } else {

            // 直接加载原图

            bm = BitmapFactory.decodeResource(getResources(), R.drawable.saber);

        }

        iv.setImageBitmap(bm);

        bmSize += bm.getByteCount(); // 得到bitmap的大小

        int kb = bmSize / 1024;

        int mb = kb / 1024;

        kb = kb % 1024;

        Log.d("Bitmap", "bitmap w = " + bm.getWidth() + " h = " + bm.getHeight());

        Log.d("Bitmap", "bitmap size = " + mb + "MB " + kb + "KB");

        Toast.makeText(this, "bitmap size = " + mb + "MB " + kb + "KB", Toast.LENGTH_LONG).show();

    }


    public int getMemoryCacheSize() {

        // Get memory class of this device, exceeding this amount will throw an

        // OutOfMemory exception.

        final int memClass = ((ActivityManager) getSystemService(Context.ACTIVITY_SERVICE)).getMemoryClass();

        System.out.println("memory = " + memClass + "M");

        return memClass;

    }


    public int dip2px(float dpValue) {

        final float scale = getResources().getDisplayMetrics().density;

        return (int) (dpValue * scale + 0.5f);

    }


}
利弊:
利:
节约内存,降低出现OOM的几率
弊:
降低了图片的清晰度,不适用于center模式的imageview。


左边的是加载的缩略图,右边的是加载的原图。右边的图片明显比坐标的清晰,但锐化过于严重了,左边的虽然小,但是较为模糊。
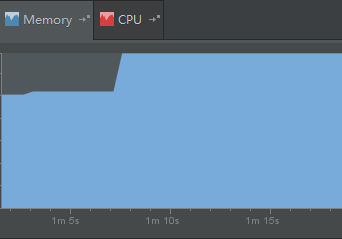
如果你用了android studio,你可以很明显的看出内存的变化:

Android Studio下的测试代码:
package com.example.jack.loadbitmap;


import com.kale.lib.activity.KaleBaseActivity;

import com.kale.lib.utils.BitmapUtil;

import com.kale.lib.utils.EasyToast;


import android.graphics.Bitmap;

import android.graphics.BitmapFactory;

import android.util.Log;

import android.view.View;

import android.widget.Button;

import android.widget.ImageView;


public class MainActivity extends KaleBaseActivity {


    ImageView mImageView;


    Button loadOriginPicBtn;


    Button loadThumbPicBtn;


    @Override

    protected int getContentViewId() {

        return R.layout.activity_main;

    }


    @Override

    protected void findViews() {

        mImageView =  getView(R.id.imageView);

        loadOriginPicBtn = getView(R.id.loadOriginal_button);

        loadThumbPicBtn = getView(R.id.loadThumb_button);

    }


    @Override

    protected void setViews() {

        // 加载原始的图片

        loadOriginPicBtn.setOnClickListener(new View.OnClickListener() {

            @Override

            public void onClick(View v) {

                Bitmap bitmap = BitmapFactory.decodeResource(getResources(), R.drawable.saber);

                setBitmapToImageView(bitmap);

            }

        });


        // 加载压缩后的图片

        loadThumbPicBtn.setOnClickListener(new View.OnClickListener() {

            @Override

            public void onClick(View v) {

                Bitmap bitmap = BitmapUtil.decodeSampledBitmapFromResource(getResources(), R.drawable.saber,

                        mImageView.getWidth(), mImageView.getHeight());

                setBitmapToImageView(bitmap);


            }

        });

    }


    private void setBitmapToImageView(Bitmap bitmap) {

        mImageView.setImageBitmap(bitmap);


        int bmSize = BitmapUtil.getBitmapSize(bitmap);

        int mb = bmSize / 1024 / 1024;

        int kb = bmSize /1014 % 1024;

        String bitmapSizeStr = mb + "MB " + kb + "KB";

        Log.d("Bitmap", "bitmap w = " + bitmap.getWidth() + " h = " + bitmap.getHeight());

        Log.d("Bitmap", bitmapSizeStr);

        EasyToast.makeText(mContext, "bitmap size = " + bitmapSizeStr);

    }


}
源码下载:
http://download.csdn.net/detail/shark0017/8412329
利用AS构建的工程(推荐):http://download.csdn.net/detail/shark0017/8671957
参考自:
http://www.open-open.com/lib/view/open1329994992015.html
