SpringBoot + Elasticsearch + Kibana (7.8.1)入门应用
一、下载安装
- ElasticSearch 下载地址
…/elasticsearch-7.8.1/bin 的 elasticsearch.bat
…/elasticsearch-7.8.1/config/elasticsearch.yml
//# 主要配置
network.host: 127.0.0.1
http.port: 9200
//# 解决跨域访问
http.cors.enabled: true
http.cors.allow-origin: "*"
- Kibana下载地址 一个客户端数据展示项目
kibana-7.8.1-windows-x86_64\bin\kibana.bat
kibana-7.8.1-windows-x86_64\config\kibana.yml
// # es地址
elasticsearch.hosts: ["http://127.0.0.1:9200/"]
// # 汉化
i18n.locale: "zh-CN"
- elasticsearch-head-master下载地址 使用这个客户端需要nodejs环境,需要提前下载。是另一个客户端数据展示项目。可以只单用kibana,也可以配合使用。
使用教程参考github readme
注意:kibana 和 ES 版本要完全一致;jkd8 以上可用
二、使用kibana操作Es的指令示例
put
get
三、Springboot + Es 集成项目搭建
- 新建一个空SpringBoot项目。
- pom.xml
<project xmlns="http://maven.apache.org/POM/4.0.0" xmlns:xsi="http://www.w3.org/2001/XMLSchema-instance"
         xsi:schemaLocation="http://maven.apache.org/POM/4.0.0 https://maven.apache.org/xsd/maven-4.0.0.xsd">
    <modelVersion>4.0.0modelVersion>
    <parent>
        <groupId>org.springframework.bootgroupId>
        <artifactId>spring-boot-starter-parentartifactId>
        <version>2.2.5.RELEASEversion>
        <relativePath/>
    parent>
    <groupId>com.yxpwebgroupId>
    <artifactId>elksartifactId>
    <version>0.0.1-SNAPSHOTversion>
    <name>elksname>
    <description>Demo project for Spring Bootdescription>

    <properties>
        <java.version>1.8java.version>
    properties>

    <dependencies>
        <dependency>
            <groupId>org.springframework.bootgroupId>
            <artifactId>spring-boot-starter-webartifactId>
            <version>2.3.0.RELEASEversion>
        dependency>
        <dependency>
            <groupId>com.alibabagroupId>
            <artifactId>fastjsonartifactId>
            <version>1.2.62version>
        dependency>

        <dependency>
            <groupId>org.springframework.bootgroupId>
            <artifactId>spring-boot-starter-testartifactId>
            <scope>testscope>
            <exclusions>
                <exclusion>
                    <groupId>org.junit.vintagegroupId>
                    <artifactId>junit-vintage-engineartifactId>
                exclusion>
            exclusions>
        dependency>

        <dependency>
            <groupId>org.elasticsearch.clientgroupId>
            <artifactId>elasticsearch-rest-high-level-clientartifactId>
            <version>7.8.1version>
        dependency>
        <dependency>
            <groupId>org.elasticsearchgroupId>
            <artifactId>elasticsearchartifactId>
            <version>7.8.1version>
        dependency>
        <dependency>
            <groupId>org.elasticsearch.clientgroupId>
            <artifactId>elasticsearch-rest-clientartifactId>
            <version>7.8.1version>
        dependency>
    dependencies>

    <build>
        <plugins>
            <plugin>
                <groupId>org.springframework.bootgroupId>
                <artifactId>spring-boot-maven-pluginartifactId>
            plugin>
        plugins>
    build>

project>
注意:引入elasticsearch-rest-high-level-client(7.8.1)的自带版本和我们下载的ES版本不一致,需要手动添加elasticsearch(7.8.1)和elasticsearch-rest-client(7.8.1),否则会有报错,无法使用。用自己引入7.8.1的将原来的6.8.6覆盖。

- 新建User.java 的 pojo 类
@Component
public class User {
    private String name;
    private int age;

    public User(){

    }

    public User(String name, int age){
        this.name = name;
        this.age = age;
    }

    public String getName() {
        return name;
    }

    public void setName(String name) {
        this.name = name;
    }

    public int getAge() {
        return age;
    }

    public void setAge(int age) {
        this.age = age;
    }

    @Override
    public String toString() {
        return "User{" +
                "name='" + name + '\'' +
                ", age=" + age +
                '}';
    }
}
如果用Lombok可以不用getset 方法。但是不建议使用Lombok。
四、使用的@Test注解做初步测试。
- 创建Client注入到spring
@Configuration
@Component
public class ElasticSearchConfig {
    @Bean
    public RestHighLevelClient restHighLevelClient(){
        return new RestHighLevelClient(
                RestClient.builder(
                        new HttpHost("localhost", 9200, "http")));
    }
}
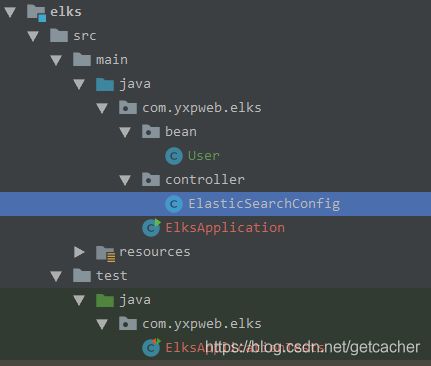
- 测试包下创建测试类 com.yxpweb.elks.ElksApplicationTests,注入客户端。

@SpringBootTest
class ElksApplicationTests {

    @Autowired
    RestHighLevelClient restHighLevelClient;
}
以下代码添加在ElksApplicationTests 类中。
- 创建索引 yxpweb-elk
@Test
    void testCreateIndex() {
        CreateIndexRequest createIndexRequest = new CreateIndexRequest("yxpweb-elk");
        try {
            CreateIndexResponse createIndexResponse = restHighLevelClient.indices().create(createIndexRequest, RequestOptions.DEFAULT);
            System.out.println(createIndexResponse);
        } catch (IOException e) {
            e.printStackTrace();
        }
    }
- 判断索引是否存在
@Test
    void testExistIndex() throws IOException {
        GetIndexRequest getIndexRequest = new GetIndexRequest("yxpweb-elk");
        boolean createIndexResponse = restHighLevelClient.indices().exists(getIndexRequest, RequestOptions.DEFAULT);
        System.out.println(createIndexResponse);
    }
- 通过id删除索引中的数据
DELETE /yxpweb_user/_doc/1
@Test
    void testDeleteDocumentIndex() throws IOException{
        DeleteRequest deleteIndexRequest = new DeleteRequest("yxpweb-elk", "1");
        DeleteResponse deleteResponse = restHighLevelClient.delete(deleteIndexRequest, RequestOptions.DEFAULT);
       //DeleteResponse[index=yxpweb_user,type=_doc,id=1,version=11,result=deleted,shards=ShardInfo{total=2, successful=1, failures=[]}]
        System.out.println(deleteResponse);
    }
即使数据已经被删除,依然会返回结果。version号会被更新。
- 删除索引
@Test
    void testDeleteIndex() throws IOException{
        DeleteIndexRequest deleteIndexRequest = new DeleteIndexRequest("yxpweb-elk");
        deleteIndexRequest.timeout(TimeValue.timeValueMinutes(2));
        deleteIndexRequest.timeout("2m");

        AcknowledgedResponse acknowledgedResponse = restHighLevelClient.indices().delete(deleteIndexRequest, RequestOptions.DEFAULT);

        System.out.println(acknowledgedResponse.isAcknowledged());

    }
- 添加文档
@Test
    void testAddDocument() throws IOException {
        User yxp = new User("yxp", 33);
        IndexRequest indexRequest = new IndexRequest("yxpweb_user");

        indexRequest.id("1");
        indexRequest.timeout(TimeValue.timeValueSeconds(1));
        indexRequest.timeout("1s");

        indexRequest.source(JSON.toJSONString(yxp), XContentType.JSON);

        IndexResponse indexResponse = restHighLevelClient.index(indexRequest, RequestOptions.DEFAULT);

        System.out.println(indexResponse.toString());
        System.out.println(indexResponse.status());


    }
更多操作 参考 API