安装yocto系统过程记录
yocto os可以高度定制,针对不同硬件进行裁剪,高度适配各种设备,因此在嵌入式系统中有广泛应用。
不少开发板,都有os的安装手册,比如会告诉你具体该怎么一步步操作去安装yocto,如果是针对这种硬件,直接去官网下载它的手册即可,我的目标是在intel的某款pc上安装yocto os,没在intel官网找到yocto的安装手册,于是参考yocto官网资料完成了yocto os的安装。主要参考的资料为:
[1] https://www.yoctoproject.org/docs/2.4.2/yocto-project-qs/yocto-project-qs.html#yp-resources
这个是yocto 2.4.2的yocto project quick build文档,写的比较详细,大家可以仔细看看这篇。
[2] https://www.yoctoproject.org/docs/2.7.1/brief-yoctoprojectqs/brief-yoctoprojectqs.html
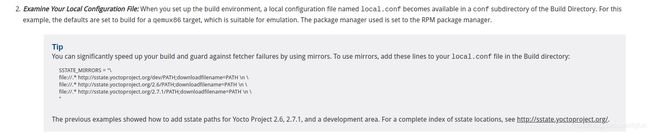
这个是安装yocto 2.7.1的yocto project quick build文档,写的不如2.4.2的quick build详细,但是我使用了这里的mirror去加速拉代码的过程,貌似有点加速效果
整个安装过程,quick start文档已经写的很清晰了,包括每个步骤该干什么。官方的文档也是最权威的,比民间乱七八糟的文档好很多。我这里只列几个值得注意的点:
准备工作
- 安装yocto需要你事先处于某个linux环境中,比如ubuntu/Fedora/openSUSE/CentOS/Debain等等,我是Ubuntu 14.04。或者,也可以通过CROss Platforms,类似于Docker,即,你不是ubuntu之类的系统,也可以通过类似Docker的方式搭建安装yocto的环境。
- 一些必备软件的安装:按照yocto 2.7.1 quick build那个文档,我安装它指定软件时, python3-git始终安装不上,于是就就没装这个软件,即使没装它,后面在build image的过程中也没遇到问题。
QEMU版本OS
- 安装主要分为两种,一种是build qemu image, 另一种是build image for specific hardware:
- 对于前者,qemu是一个虚拟机,你可以在ubuntu等host系统通过qemu虚拟机启动target yocto os,qemu会模拟该yocto os的硬件环境,比如你的yocto os是个arm架构的,你可以直接直接在x86-64架构的ubuntu上通过qemu去启动这个arm架构的os,方便你调试代码,而不用非要把这个os烧到一个arm架构的板子上。
Hardware Specific OS / BSP 介绍
- 对于后者,当你想让yocto os跑在指定硬件上时,就需要build针对该硬件的image,你需要做的是,找到该硬件的BSP,把该BSP添加的build yocto的配置文件里。什么是BSP呢?板级支持包(BSP)(Board Support Package)是介于主板硬件和操作系统中驱动层程序之间的一层,一般认为它属于操作系统一部分,主要是实现对操作系统的支持,为上层的驱动程序提供访问硬件设备寄存器的函数包,使之能够更好的运行于硬件主板。 可见,对于指定的硬件,需要添加该硬件的BSP支持,这样build出的yocto os在该硬件上加速效果才是最好的,比如intel的某个bsp的描述文档如下:
“Using meta-intel has the following benefits over a generic BSP:
tune flags
++++++++++
intel-* MACHINEs each have different compilation flags appropriate for their
targeted hardware sets. intel-corei7-64 has tune flags appropriate for modern
64-bit Intel Core i microarchitecture, and includes instruction sets up to
SSE4.2. intel-core2-32 has tune flags appropriate for legacy 32-bit Intel Core2
microarchitecture, and includes instruction sets up to SSE3.
linux-intel kernel
++++++++++++++++++
The linux-intel kernel is an initiative to bring better Intel® hardware
support to the current LTS linux kernel. It contains a base LTS kernel with
additional backports from upstream Intel drivers. In addition, a default kernel
config containing most features found on Intel boards is supplied via the
yocto-kernel-cache.
graphics stack
++++++++++++++
Meta-intel provides the latest Intel Graphics Linux Stack drivers to support
Intel hardware as defined by the https://01.org/linuxgraphics.
Other software
++++++++++++++
-
intel ucode - provides the latest microcode updates for Intel processors
-
thermald - which proactively controls thermal, using P-states, T-states, and
the Intel power clamp driver.
(https://01.org/linux-thermal-daemon/documentation/introduction-thermal-daemon)
The intel-common kernel package architecture”
可见,针对不同硬件,最好去指定硬件的官网搜索yocto os对应的bsp,这样build出的os在该硬件上加速效果才是最好的。
通过bitbake开始build image
- 一切都准备好之后,就可以build os了,整个build过程很漫长,前期需要从网络中拉各种kernel等software代码,后面需要compile各种software,注意,可以按照文档,用多线程compile去加速build过程,我就是忘了这步,导致我build花了4小时。
我很懒,只想使用pre-built的image
- 如果为了省事,也可以不build yoctos, 官方提供了很多pre-built的yocto os,可以直接下载,按照此文档进行操作即可:https://www.yoctoproject.org/docs/1.2/yocto-project-qs/yocto-project-qs.html

针对intel, 官方提供了generic bsp,也针对该bsp提供了pre-built的image,但是我没用,为什么呢?

因为我总觉得image对应的generic bsp不是hareware specific,可能会在我的设备上会出现问题,于是就自己从头build了个。
U盘刻录,制作启动盘
- 当image build好之后,需要刻录的u盘中,作为系统启动盘去安装os,这块2.4.2的quick start文档有介绍,我参考的是meta-intel的readme:
“b. Booting the intel-common BSP images
If you’ve built your own image, either from the downloaded BSP layer
or from the meta-intel git repository, you’ll find the bootable
image in the build/tmp/deploy/images/xxx directory, where again
‘xxx’ refers to the machine name used in the build.
Under Linux, insert a USB flash drive. Assuming the USB flash drive
takes device /dev/sdf, use dd to copy the image to it. Before the image
can be burned onto a USB drive, it should be un-mounted. Some Linux distros
may automatically mount a USB drive when it is plugged in. Using USB device
/dev/sdf as an example, find all mounted partitions:
$ mount | grep sdf
and un-mount those that are mounted, for example:
$ umount /dev/sdf1
$ umount /dev/sdf2
Now burn the image onto the USB drive:
$ sudo dd if=core-image-sato-intel-corei7-64.wic of=/dev/sdf status=progress
$ sync
$ eject /dev/sdf
This should give you a bootable USB flash device. Insert the device
into a bootable USB socket on the target, and power on. This should
result in a system booted to the Sato graphical desktop.”
这里遇到了个大坑,dd命令,of=/dev/sdb这里,我写成了of=/dev/sdb1,多加了个分区“1”,导致我在安装yocto os时,一直卡在“random crng init done”这个界面,后来改成of=/dev/sdb就好了。
IMAGE介绍
-
关于yocto image,2.4.2文档介绍如下:
“The type of image you build depends on your goals. For example, the previous build created a core-image-sato image, which is an image with Sato support. It is possible to build many image types for the MinnowBoard Turbot. Some possibilities are core-image-base, which is a console-only image. Another choice could be a core-image-full-cmdline, which is another console-only image but has more full-features Linux system functionality installed. For types of images you can build using the Yocto Project, see the “Images” chapter in the Yocto Project Reference Manual.
”
有很多各版本,有minimal, sato等等,sato版本的是带图形界面的,但是image也大,接近3个G. mininal只有命令行,而且很多命令都不支持。我最后装的是core-image-full-cmdline,不过也有不少命令不支持,比如ldd命令等。以后我想我会装各sato版本的。
Yocto最权威的文档
对了,有任何问题可以去这里查找:https://www.yoctoproject.org/docs/。里面包含了各个版本的quick start文档,包含了所有yocto相关知识点的介绍,包括怎么制作layer,各个变量的意义,等等。由于我用不上这么多高深的知识,也就遇到问题去这里查查,主要还是参考的quick start文档。