react native 开发APP(五)页面跳转,带参数跳转,导航条,导航条按钮
react native 页面跳转
官网 https://reactnative.cn/
项目下载地址:https://github.com/hebiao6446/DemoProject
陆续更新中。。。
从A页面push到B页面的前提是
| React native | iOS | Android |
|---|---|---|
| StackNavigator | UINavigationController | Activity |
总结就是页面push都是以栈为基础,当然iOS也有其他的跳转方式这里在这里就不解释了,后面会详细说到
1.react native 从A页面跳转到B页面
先上效果
注意看下,这里的第二个页面是没有BottomTabbar的,也就是没有底栏的四个按钮,但是不排除个别SB的产品需要第二个页面有四个按钮,那咋搞了??
这个很简单,我把代码贴出来就可以
import BaseComponet from "./BaseComponet";
import {Image, StyleSheet, View, Button, TouchableOpacity} from "react-native";
import React from "react";
import {createStackNavigator} from "react-navigation-stack";
import HbColor from "../utils/HbColor";
import NewPushView from "./NewPushView";
class FirstView  extends BaseComponet{
    render(){
        return (


                 {
                        const {navigate} = this.props.navigation;
                        navigate("NewPush");
                    }
                } >


        );
    }
}
const styles = StyleSheet.create({
    contain:{
        backgroundColor:'#ff000022',
        flex:1,
    },

});
const FirstNavi = createStackNavigator({
    First: {
        screen: FirstView,
        navigationOptions: {
            title: '第一页',
            headerStyle: {
                backgroundColor: HbColor.COLOR_e85b53,
            },
            headerTintColor: '#ffffff',
            // headerRight:
        },
    },
    NewPush:{
        screen: NewPushView,
        navigationOptions: {
            title: '新页面',
            headerStyle: {
                backgroundColor: HbColor.COLOR_3D8BAA,
            },
            headerTintColor: '#ffffff',
            // headerRight:
        },
    }
}, {
    navigationOptions: ({
                            navigation
                        }) => ({
        //如果第二个页面还需要底部的四个按钮,那么把下面段代码注释掉
        tabBarVisible: navigation.state.index > 0 ? false : true,
    })
});

export default FirstNavi;
有一点我们要主页的是 ,比如从A页面跳转到B页面,那么AB两个页面都必须在 createStackNavigator 这个里面注册下也就是 你需要把所有页面的路由注册一遍
跳转的核心代码
  const {navigate} = this.props.navigation;
  navigate("NewPush");
如果你是刚开始接触react native, 你会好奇为啥不用按钮(Button)了 ? 要用这TouchableOpacity ,这里我说下控件与布局相关的东西请自行百度
NewPush 这个东西就是你注册路由时的名称
NewPush:{
        screen: NewPushView,
        navigationOptions: {
            title: '新页面',
            headerStyle: {
                backgroundColor: HbColor.COLOR_3D8BAA,
            },
            headerTintColor: '#ffffff',
            // headerRight:
        },
    }
底栏是否需要隐藏请自便
navigationOptions: ({
                            navigation
                        }) => ({
        //如果第二个页面还需要底部的四个按钮,那么把下面段代码注释掉
        tabBarVisible: navigation.state.index > 0 ? false : true,
    })
2.react native 从A页面跳转到B页面,带参数
带参数传递其实挺简单,但是其实就是在不带参数的后面加个参数
 let data = {name:'金三pang'};
 const {navigate} = this.props.navigation;
 navigate("NewPush",data);
比如我需要传递一个name到第二个页面,我只需要把name封装下就可以,这是传递挺简单的,那么如何获取了 ?? 我们到第二个页面操作下
先看效果
上代码
import BaseComponet from "./BaseComponet";
import {Image, StyleSheet, View,Button,Text} from "react-native";
import React from "react";
import {createStackNavigator} from "react-navigation-stack";
import HbColor from "../utils/HbColor";
export default class NewPushView  extends BaseComponet{

    constructor(pros){
        super(pros);
        this.state = {
            npName:'',
        };
    }
    render(){
        return (

                {this.state.npName}

        );
    }
    componentDidMount(): void {
        let name = this.props.navigation.state.params.name;
        this.setState({
            npName:name,
        })
    }
}
const styles = StyleSheet.create({
    contain:{
        backgroundColor:'#00ff0022',
        flex:1,
    },
});
这里是获取上个页面参数的关键
let name = this.props.navigation.state.params.name;
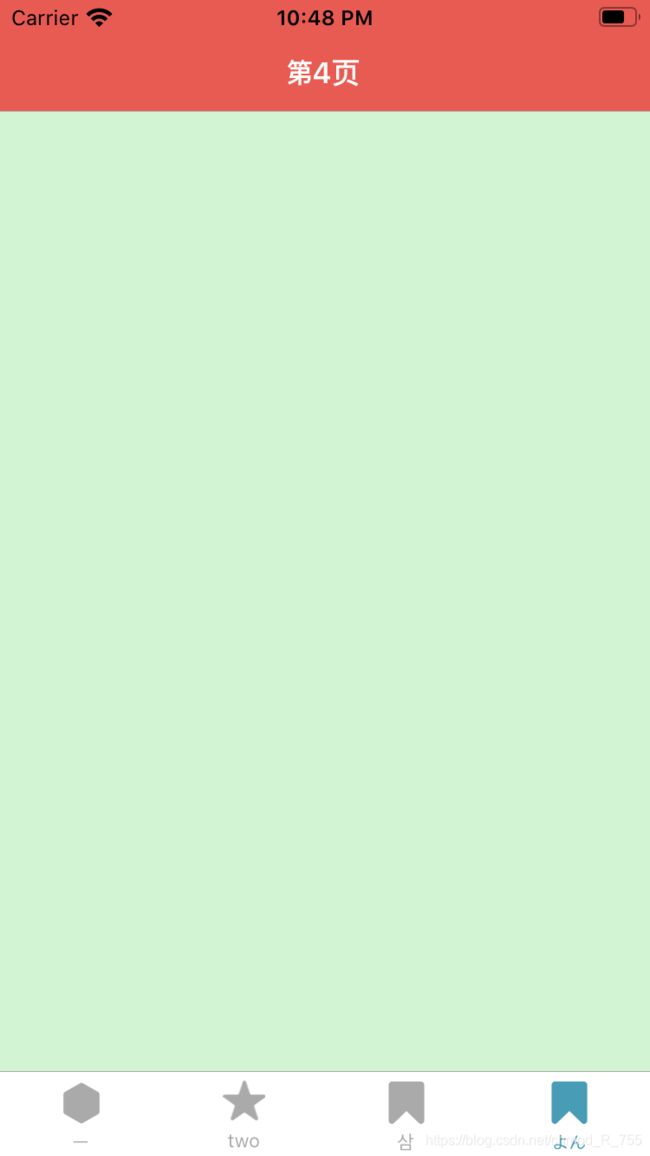
3.react native 导航栏的配置
先看代码
const FourthNavi = createStackNavigator({
    Fourth: {
        screen: FourthView,
        navigationOptions: {
            title: '第4页',
            headerStyle: {
                backgroundColor: HbColor.COLOR_e85b53,
            },
            headerTintColor: '#ffffff',
        },
    },
}, {
    navigationOptions: ({
                            navigation
                        }) => ({
        tabBarVisible: navigation.state.index > 0 ? false : true,
    })
});
在解释说明
| 属性 | 取值 | 说明 |
|---|---|---|
| title | string | 标题 |
| headerTitle | string | 标题 |
| headerTitleAlign | ‘left’ , ‘center’ | 标题对齐方式 |
| headerTitleStyle | React.ComponentProps | 标题样式 |
| headerTitleContainerStyle | StyleProp | 标题内容样式 |
| headerTintColor | string | 设置导航栏颜色 |
| headerTitleAllowFontScaling | boolean | 标题允许字体缩放 |
| headerBackAllowFontScaling | boolean | 返回允许字体缩放 |
| headerBackTitle | string | 返回文字按钮标题 |
| headerBackTitleStyle | StyleProp | 返回文字按钮样式 |
| headerBackTitleVisible | boolean | 返回按钮是否可见 |
| headerTruncatedBackTitle | string | 标题被截断的后标题 |
| headerLeft | React.ReactNode | 左边Itembar样式 |
| headerLeftContainerStyle | StyleProp | 标题左容器样式 |
| headerRight | React.ReactNode | 右边Itembar样式 |
| headerRightContainerStyle | StyleProp | 标题右容器样式 |
| headerBackImage | ‘backImage’ | 返回按钮自定义图片 |
| headerPressColorAndroid | string | 标题按颜色Android |
| headerBackground | React.ReactNode | 标题背景 |
| headerStyle | StyleProp | 标题样式 |
| headerTransparent | boolean | 标题透明 |
| headerStatusBarHeight | number | 标题状态栏高度 |
上面有几个属性对于初学者来说比较操蛋
React.ReactNode 这个可以理解为任意View
StyleProp 这个里面包含了很多属性 ,具体看下表
| 属性 | 说明 |
|---|---|
| alignContent | 对齐内容 |
| alignItems | 对齐项 |
| alignSelf | 对齐自身 |
| aspectRatio | 白点 |
| backfaceVisibility | 背面可见度 |
| backgroundColor | 背景颜色 |
| borderBottomColor | 边框底色 |
| borderBottomEndRadius | 边界底端半径 |
| borderBottomLeftRadius | 边界底部左半径 |
| borderBottomRightRadius | 边界右下半径 |
| borderBottomStartRadius | 边界左上半径 |
| borderBottomWidth | 边界底部宽度 |
| borderColor | 边界颜色 |
| borderEndColor | 边框颜色 |
| borderEndWidth | 边框宽度 |
| borderLeftColor | 边框颜色左 |
| borderLeftWidth | 边框宽度左 |
| borderRadius | 边界半径 |
| borderRightColor | |
| borderRightWidth | |
| borderStartColor | |
| borderStartWidth | |
| borderStyle | |
| borderTopColor | |
| borderTopEndRadius | |
| borderTopLeftRadius | |
| borderTopRightRadius | |
| borderTopStartRadius | |
| borderTopWidth | |
| borderWidth | |
| bottom | |
| color | |
| decomposedMatrix | 分解矩阵 |
| direction | 方向 |
| display | 显示 |
| elevation | |
| end | |
| flex | |
| flexBasis | |
| flexDirection | |
| flexGrow | |
| flexShrink | |
| flexWrap | |
| fontFamily | |
| fontSize | |
| fontStyle | |
| fontVariant | |
| fontWeight | |
| height | |
| includeFontPadding | |
| justifyContent | |
| left | |
| letterSpacing | |
| lineHeight | |
| margin | |
| marginBottom | |
| marginEnd | |
| marginHorizontal | |
| marginLeft | |
| marginRight | |
| marginStart | |
| marginTop | |
| marginVertical | |
| maxHeight | |
| maxWidth | |
| minHeight | |
| minWidth | |
| opacity | |
| overflow | |
| overlayColor | |
| padding | |
| paddingBottom | |
| paddingEnd | |
| paddingHorizontal | |
| paddingLeft | |
| paddingRight | |
| paddingStart | |
| paddingTop | |
| paddingVertical | |
| position | |
| resizeMode | |
| right | |
| rotation | |
| scaleX | |
| scaleY | |
| shadowColor | |
| shadowOffset | |
| shadowOpacity | |
| shadowRadius | |
| start | |
| textAlign | |
| textAlignVertical | |
| textDecorationColor | |
| textDecorationLine | |
| textDecorationStyle | |
| textShadowColor | |
| textShadowOffset | |
| textShadowRadius | |
| textTransform | |
| tintColor | |
| top | |
| transform | |
| transformMatrix | |
| translateX | |
| translateY | |
| width | |
| writingDirection | |
| zIndex |
这里只用到 backgroundColor,其他属性就不一一介绍了
 headerStyle: {
                backgroundColor: HbColor.COLOR_e85b53,
   },
一波导航条的属性介绍到这里了 , 我们来自定义下导航条上面的按钮
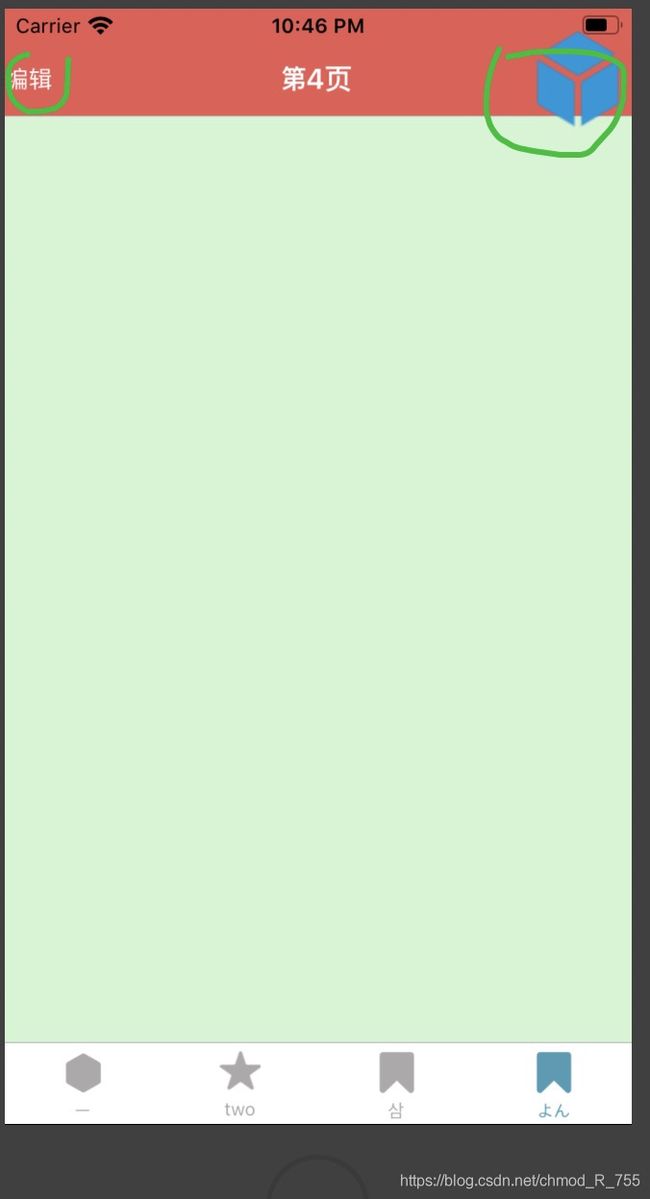
4.react native 导航栏的上面的按钮设置
然后看代码
import React, {Component} from 'react';
import {Image, TouchableOpacity,Text} from "react-native";

export default class LeftItemBar extends Component{
    constructor(pros) {
        super(pros)
    }
    render(){
        return {
            alert("xx");
        }} >编辑
    }
}
左右两边的按钮
import React, {Component} from 'react';
import {
Alert,
Image,
StyleSheet,
Text,
TextInput,
TouchableOpacity,
TouchableWithoutFeedback,
View
} from "react-native";
import HbImages from "../utils/HbImages";
export default class RightItemBar extends Component{
render(){
return 然后就是把按钮弄到导航条上。。。
import BaseComponet from "./BaseComponet";
import {Image, StyleSheet, View,Text} from "react-native";
import React from "react";
import {createStackNavigator} from "react-navigation-stack";
import HbColor from "../utils/HbColor";
import RightItemBar from "../subview/RightItemBar";
import LeftItemBar from "../subview/LeftItemBar";
import FourEditView from "./FourEditView";
class FourthView extends BaseComponet{
render(){
return (
);
}
}
const styles = StyleSheet.create({
contain:{
backgroundColor:'#00ff0022',
flex:1,
},
});
const FourthNavi = createStackNavigator({
Fourth: {
screen: FourthView,
navigationOptions: (navigation) => ({
title: '第4页',
headerStyle: {
backgroundColor: HbColor.COLOR_e85b53,
},
headerTintColor: '#ffffff',
headerRight:这里是设置导航条按钮的地方
headerRight:5.react native 导航栏标题修改
我们之前说到设置导航条上面的文字,按钮等等东西 , 但是我们发现一个问题,先看代码
const FirstNavi = createStackNavigator({
    First: {
        screen: FirstView,
        navigationOptions: {
            title: '第一页',
            headerStyle: {
                backgroundColor: HbColor.COLOR_e85b53,
            },
            headerTintColor: '#ffffff',
        },
    },
    NewPush:{
        screen: NewPushView,
        navigationOptions: {
            title: '新页面',
            headerStyle: {
                backgroundColor: HbColor.COLOR_3D8BAA,
            },
            headerTintColor: '#ffffff',
            // headerRight:
        },
    }
}, {
    navigationOptions: ({
                            navigation
                        }) => ({
        //如果第二个页面还需要底部的四个按钮,那么把下面段代码注释掉
        tabBarVisible: navigation.state.index > 0 ? false : true,
    })
});

export default FirstNavi;
也就是这里面的标题是在createStackNavigator这个里面设置的,设想下场景,如果需要动态标题了 ??? 如果标题是根据上个页面来的 了 ? 那不就瞎了吗 ?
更多的时候我们需要在当前页面设置自己页面的标题 或者设置动态标题 ,你想过的react native肯定想过 ,多了不解释,直接上代码
import BaseComponet from "./BaseComponet";
import {Image, StyleSheet, View, Button, TouchableOpacity} from "react-native";
import React from "react";
import {createStackNavigator} from "react-navigation-stack";
import HbColor from "../utils/HbColor";
import NewPushView from "./NewPushView";
class FirstView  extends BaseComponet{
    render(){
        return (

                 {
                        let data = {name:'金三pang'};
                        const {navigate} = this.props.navigation;
                        navigate("NewPush",data);
                    }
                } >


        );
    }
    static navigationOptions = ({navigation,screenProps}) =>  {
        return ({
            headerTitle:"动态标题",
        })
    }
}
react native 提供了静态的属性(方法)navigationOptions 那么这里面有新的问题了 ,在大部分语言中 ,非静态可以调用静态,但是静态方法无法直接调用非静态
如果,我需要动态改变导航条标题的话,改如何弄了 ? 显然不能通过直接获取state,我们看下这里面其实有两个参数
static navigationOptions = ({navigation,screenProps})
基本可以断定我们要的东西从这里面来的。
先看效果,再贴代码一目了然
效果不解释了。 。。。 直接上代码
import BaseComponet from "./BaseComponet";
import {Image, StyleSheet, View, Button, TouchableOpacity,Text} from "react-native";
import React from "react";
import {createStackNavigator} from "react-navigation-stack";
import HbColor from "../utils/HbColor";
import NewPushView from "./NewPushView";
import LeftItemBar from "../subview/LeftItemBar";
class FirstView extends BaseComponet{
constructor() {
super();
this.state = {
fvName:"动态标题1",
};
}
render(){
return (
{
let data = {name:'金三pang'};
const {navigate} = this.props.navigation;
navigate("NewPush",data);
}
} >
{
this.setTitle('标题修改了');
}
} >
改标题
);
}
componentDidMount(): void {
this.setTitle('动态标题33');
this.props.navigation.setParams({navigatePress:this.clickBarButton})
}
setTitle(str){
const { setParams } = this.props.navigation;
setParams({ title: str });
}
clickBarButton(){
alert('bar button');
}
static navigationOptions = ({navigation,screenProps}) => {
const { params } = navigation.state;
return ({
headerTitle:params?params.title:"wz",
headerLeft:{
console.log(navigation);
let data = {name:'编辑动态标题'};
navigation.push("NewPush",data);
}} >确定 ,
headerRight:{
// navigation.state.params.navigatePress()
params?params.navigatePress():{};
//
}} >方法 ,
})
}
}
const styles = StyleSheet.create({
contain:{
backgroundColor:'#ff000022',
flex:1,
},
});
const FirstNavi = createStackNavigator({
First: {
screen: FirstView,
navigationOptions: {
title: '第一页',
headerStyle: {
backgroundColor: HbColor.COLOR_e85b53,
},
headerTintColor: '#ffffff',
// headerRight:
},
},
NewPush:{
screen: NewPushView,
navigationOptions: {
title: '新页面',
headerStyle: {
backgroundColor: HbColor.COLOR_3D8BAA,
},
headerTintColor: '#ffffff',
// headerRight:
},
}
}, {
navigationOptions: ({
navigation
}) => ({
//如果第二个页面还需要底部的四个按钮,那么把下面段代码注释掉
tabBarVisible: navigation.state.index > 0 ? false : true,
})
});
export default FirstNavi;
项目下载地址:https://github.com/hebiao6446/DemoProject
陆续更新中。。。
会到不会是个过程,我们程序猿都在经历着这个过程,我能做到的是尽量详细的毫无保留的截图和解释,程序猿何必要为难程序猿了 ?

