EasySwoole 学习笔记 一
EasySwoole学习笔记
一 安装
1. EasySwoole 官网地址 https://www.easyswoole.com
2. Swoole 官网地址 https://www.swoole.com/
安装EasySwoole 具体步骤参照官网文档 https://www.easyswoole.com/Introduction/install.html 建议使用虚拟机 方便代码编辑调试 笔者使用的是Centos7 虚拟机安装 php版本 7.2.22 swoole 版本 4.4.5 EasySwoole 版本 3.3.1-dev
安装完成之后 进入 框架根目录 启动应用 php easyswoole start
# 启动应用 非守护模式 非守护模式停止 直接 ctrl + c
php easyswoole start
# 启动应用 守护模式
php easyswoole start d
# 停止easySwoole(守护模式下使用)
php easyswoole stop
# 热重启easySwoole(守护模式下使用)
php easyswoole reload
# 重启easySwoole(守护模式下使用)
php easyswoole restart
访问你的你的 IP:9501 不出意外就可以看到EasySwoole 的欢迎页面了 框架默认端口9501 可以在dev.php 项目配置文件修改
如果浏览器卡住不动大概率是被Linux 的防火墙给屏蔽了 可以尝试关闭防火墙 以笔者cenots7 为例 systemctl stop firewalld
如果出现 failed to listen server port[0.0.0.0:9501], Error: Address already in use 酱紫的错误 是端口被占用 关闭占用端口程序或者修改dev.php MAIN_SERVER 下 PROT 端口号即可
TIPS 如何方便的编辑LINUX 或者 LINUX 虚拟机中的文件 不需要可直接跳过这一步
如果你是使用的 虚拟机 那么可以使用两种方法编辑虚拟机中的项目文件
1. 使用 VMware 中的共享文件夹的功能 将本地文件系统映射到虚拟机中 直接修改本地文件就OK了
2. 使用IDE phpstorm 提供的编辑远程服务器功能
因为EasySwoole 不建议使用 虚拟机的共享文件夹功能 它是这么说的 https://www.easyswoole.com/Introduction/install.html
不可把虚拟机共享目录作为安装目录,否则会因为权限不足无法创建socket,产生报错:listen xxxxxx.sock fail
所以笔者介绍下第二种方法
在linux虚拟机或者服务器上安装好框架 在Windows中进行编辑
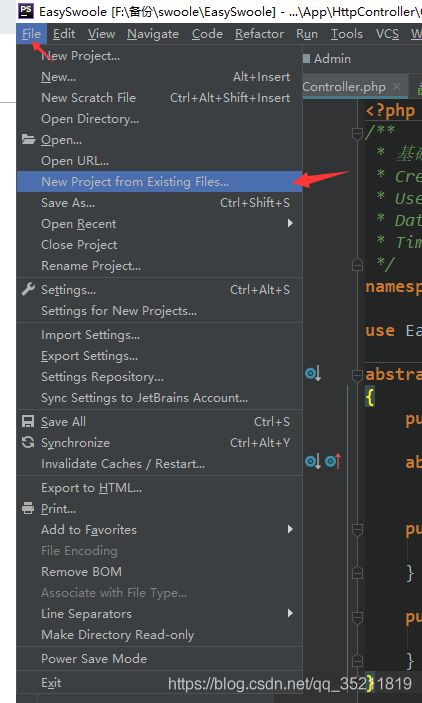
选择 File > New Project form Existing Files
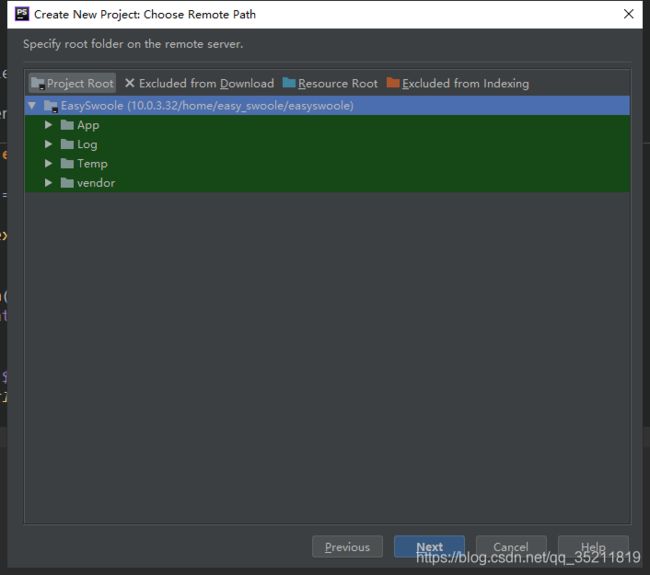
选择第四个
填写项目名称和本地路径
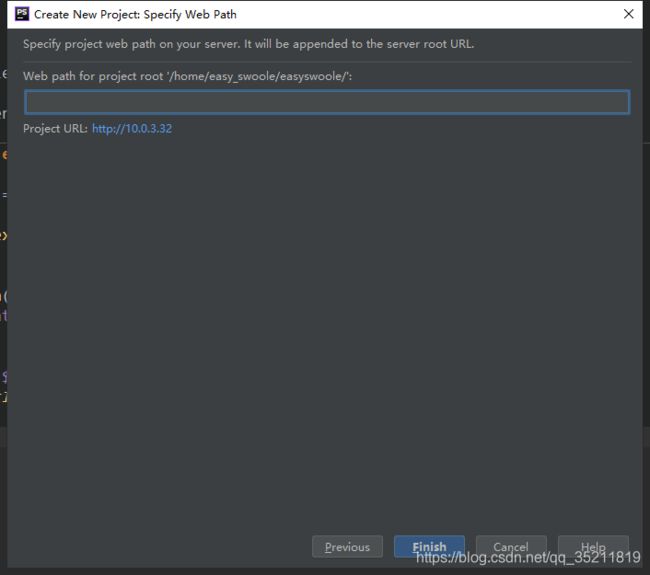
填写服务器信息
Next
Finish 完成 Ok
设置Ctrl + s 保存修改到服务器
选择 Ctrl + S
到这里就设置完毕了 远程Linux 服务器也是可以这样使用的
二 基本控制器使用
框架默认控制器文件在App\HttpController 目录下的Index.php 文件中
EasySwoole 控制器需要继承 \EasySwoole\Http\AbstractInterface\Controller 接口 可以使用框架自带的Http的操作API 并且必须实现Index方法
默认执行的Index方法
function index()
{
    // EASYSWOOLE_ROOT 常量是指向项目根目录的路径
    $file = EASYSWOOLE_ROOT.'/vendor/easyswoole/easyswoole/src/Resource/Http/welcome.html';
    if(!is_file($file)){
        $file = EASYSWOOLE_ROOT.'/src/Resource/Http/welcome.html';
    }
    // $this->response()->write() 方法输出Http 消息
    $this->response()->write(file_get_contents($file));
}
这里框架生成的默认控制器 读取了 welcome.html文件并将其发送到客户端 这里必须使用 $this->response()->write() 方法输出 而不能使用过 echo var_dump 之类的输出函数 否则会将其输出至控制台
Http响应相关基本API
$this->response() //获取响应对象

// 发送客户端数据
$this->response()->write('hello world');

// Http重定向
$this->response()->redirect("/newURL/index.html");

// 设置Cookie
$this->response()->setCookie('cookie_name', 'cookie_value', time() + 60 * 60 * 24, '/');

// 结束对该次HTTP发送数据 结束之后 无法向客户端发送数据
$this->response()->end();

// 检查是否结束发送数据 返回的是 bool
$this->response()->isEndResponse()

// 向客户端发送一个http状态码
$this->response()->withStatus(404);

// 用于向HTTP客户端发送一个header
$this->response()->withHeader('Content-type','application/json;charset=utf-8');

//用于获取原始的swoole_http_response实例
$this->response()->getSwooleResponse();

// 发送文件 注意 光调用这个函数文件不会被下载而是会显示到浏览器 需要设置下载文件的Header头才可以自动下载
$this->response()->sendFile('/home/sqlmap/sqlmapproject-sqlmap-8d608df/sqlmap.py');

// 下载需要设置的额外Header
$this->response()->withHeader('Content-Type', 'application/download');
$this->response()->withHeader('Content-Disposition', 'attachment;filename=file_name');
Http请求相关基本API
// 用于获取用户通过POST或者GET提交的参数 若POST与GET存在同键名参数,则以GET为准
// 例如 访问 /index/index?a=1&b=1
$data = $request->getRequestParams();
var_dump($data);
/* 输出
array(2) {
  ["a"]=>
  string(1) "1"
  ["b"]=>
  string(1) "2"
}
*/

// 用于获取用户通过POST或者GET提交的某一个参数
$data = $request->getRequestParam('key');

// 该方法用于获取HTTP请求中的cookie信息
$request->getCookieParams();

// 该方法用于获取客户端上传的全部文件信息 返回 \EasySwoole\Http\Message\UploadFile
$request->getUploadedFiles();
$request->getUploadedFile('img');

// 该方法用于获取以非form-data或x-www-form-urlenceded编码格式POST提交的原始数据,相当于PHP中的$HTTP_RAW_POST_DATA
$this->request()->getBody()->__toString();

// 获得get内容
$get = $request->getQueryParams();

// 获得post内容
$post = $request->getParsedBody();

// 获得头部
$header = $request->getHeaders();

// 获得server
$server = $request->getServerParams();

// 获得cookie
$cookie = $request->getCookieParams();
多模块的使用方法 一般Http项目基本包含前后台 分为两个大的模块去实现的 在EasySwoole中 只需要在App\HttpController文件夹下新建文件夹 Home 和 Admin 两个文件夹 每个文件夹新建一个Index控制器目录结构如下
// Home/Index.php
response()->write('model is Home');
    }
}

// Admin/Index.php
response()->write('model is Admin');
    }
}
注意命名空间 \App\HttpController\Controller 类是自己创建的控制器基类
访问 /home/Index/index 输出 model is Home
访问 /admin/Index/index 输出 model is Admin
三. 使用视图和模板
视图官网文档 https://www.easyswoole.com/Components/template.html
这里笔者使用的是TP的模板引擎 https://github.com/top-think/think-template
1. 安装相关依赖
composer require easyswoole/template
composer require topthink/think-template
2. 实现渲染引擎
在 App 目录下 新建 System 目录 存放 渲染引擎实现的代码 ThinkTemplate.php
 EASYSWOOLE_ROOT . '/App/HttpTemplate/', // 模板存放文件夹根目录
            'cache_path' => $temp_dir, // 模板文件缓存目录
            'view_suffix' => 'html' // 模板文件后缀
        ];
        $this->_topThinkTemplate = new \think\Template($config);
    }

    public function afterRender(?string $result, string $template, array $data = [], array $options = [])
    {
    }
    // 当模板解析出现异常时调用
    public function onException(\Throwable $throwable): string
    {
        $msg = $throwable->getMessage() . " is file " . $throwable->getFile() . ' of line' . $throwable->getLine();
        return $msg;
    }
    // 渲染逻辑实现
    public function render(string $template, array $data = [], array $options = []): ?string
    {
        foreach ($data as $k => $v) {
            $this->_topThinkTemplate->assign([$k => $v]);
        }
        // Tp 模板渲染函数都是直接输出 需要打开缓冲区将输出写入变量中 然后渲染的结果
        ob_start();
        $this->_topThinkTemplate->fetch($template);
        $content = ob_get_contents();
        ob_end_clean();
        return $content;
    }
}
3. 注册渲染引擎
需要对模板引擎进行实例化并且注入到EasySwoole 的视图中 在项目根目录 EasySwooleEvent.php 中 mainServerCreate 事件函数中进行注入代码如下
// 设置Http服务模板类
Render::getInstance()->getConfig()->setRender(new ThinkTemplate());
Render::getInstance()->getConfig()->setTempDir(EASYSWOOLE_TEMP_DIR);
Render::getInstance()->attachServer(ServerManager::getInstance()->getSwooleServer());
4. 测试调用写的模板
在App目录下创建 HttpTemplate 目录 PS:之前在 ThinkTemplate.php 文件中设置的路径
创建文件 /App/HttpTemplate/Admin/Index/index.html 路径与模块 控制器 响应函数相对应 你也可以按照自己的喜欢来
tao
{foreach $user_list as $key => $val}
- {$key} => {$val}
{/foreach}
在 App\HttpController\Admin 中调用
use EasySwoole\Template\Render;
public function index()
    {
        $user_list = [
            '1', '2', '3', '4', '5'
        ];
        $this->response()->write(Render::getInstance()->render('Admin/Index/index', ['user_list' => $user_list]));
    }
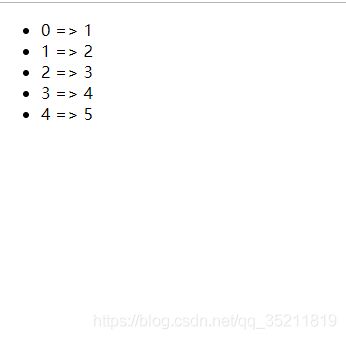
结果如下
但是这样的模板传值非常麻烦有木有 还必须要放在一个数组中一次性传给 Render 对象 我们可以将操作封装到基类控制器 实现类似于TP框架的操作 代码如下
template_data[$name] = $value;
    }

    public function fetch($template_name) {
        return Render::getInstance()->render($template_name, $this->template_data);
    }
}
这样我们就可以使用TP的风格进行模板传值了 效果和上面时一样的 PS:暂时需要指定模板的路径
function index()
    {
        $user_list = [
            '1', '2', '3', '4', '5'
        ];
        $this->assign('user_list', $user_list);
        $this->response()->write($this->fetch('Admin/Index/index'));
    }
最后的目录结构


