在jsp里使用在线编辑器ckeditor
jsp中
标签内引入js文件在body里面使用
页面即可显示在线编辑器了
在计算中使用CKEDITOR.instances.replyBody.getData()即可取到在线编辑器中的内容
下面附上ckeditor编辑器的使用api连接
ckeditor api
下面介绍一下使用ckeditor上传本地图片的方法,因为默认情况下ckeditor上传本地图片的功能是没有开启的
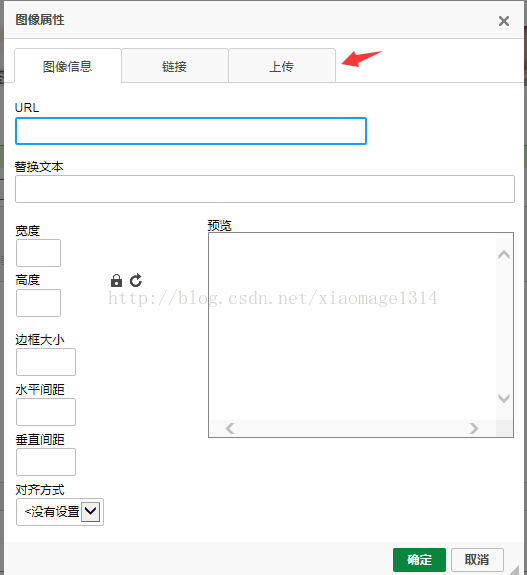
你点击上传图片按钮会弹出如下图片
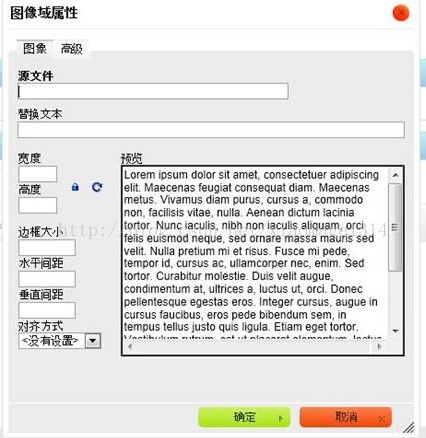
上传预览的一堆英文鸟语实在是不想看到,怎么办呢
找到ckeditor/plugins/image/dialogs/image.js这个文件,搜索config.image_previewText把后面''单引号之间的内容去掉即可
然后仔细看这个上传图片的上传框上传图片还得自己写url地址,不能想直接弹出个本地对话框一样选择本地的图片
没关系这个功能只需要在image.js,没错还是上面步骤的js文件找到 id:"Upload",hidden:!0把!0改成!1或者0都行都表示false,当然还有一些其他版本的ckeditor是下面的字眼
id:'Upload',hidden:true将后面的ture改成false即可出现下面的上传图片的对话框了
到这里只是配置了页面,接下来我们还要配置一下上传到服务器的action
找到ckeditor/config.js在最后面加上一行 config.filebrowserUploadUrl="ckeditorUpload";
其中ckeditorUpload为自己的action
下面附上ckeditorUpload的代码
public class CkeditorUpload extends ActionSupport {
private File upload;
private String uploadContentType;
private String uploadFileName;
public File getUpload() {
return upload;
}
public void setUpload(File upload) {
this.upload = upload;
}
public String getUploadContentType() {
return uploadContentType;
}
public void setUploadContentType(String uploadContentType) {
this.uploadContentType = uploadContentType;
}
public String getUploadFileName() {
return uploadFileName;
}
public void setUploadFileName(String uploadFileName) {
this.uploadFileName = uploadFileName;
}
public String execute() throws Exception {
HttpServletResponse response = ServletActionContext.getResponse();
HttpServletRequest request = ServletActionContext.getRequest();
String path = request.getContextPath();
String basePath = request.getScheme() + "://"
+ request.getServerName() + ":" + request.getServerPort()
+ path + "/";
response.setCharacterEncoding("GBK");
PrintWriter out = response.getWriter();
// CKEditor提交的很重要的一个参数
String callback = ServletActionContext.getRequest().getParameter("CKEditorFuncNum");
String expandedName = ""; //文件扩展名
if (uploadContentType.equals("image/pjpeg") || uploadContentType.equals("image/jpeg")) {
//IE6上传jpg图片的headimageContentType是image/pjpeg,而IE9以及火狐上传的jpg图片是image/jpeg
expandedName = ".jpg";
}else if(uploadContentType.equals("image/png") || uploadContentType.equals("image/x-png")){
//IE6上传的png图片的headimageContentType是"image/x-png"
expandedName = ".png";
}else if(uploadContentType.equals("image/gif")){
expandedName = ".gif";
}else if(uploadContentType.equals("image/bmp")){
expandedName = ".bmp";
}else{
out.println("");
return null;
}
if(upload.length() > 2*1024*1024){
out.println("");
return null;
}
InputStream is = new FileInputStream(upload);
String uploadPath = ServletActionContext.getServletContext()
.getRealPath("/upload"); //图片存放路径
String fileName = java.util.UUID.randomUUID().toString(); //采用时间+UUID的方式随即命名
fileName += expandedName;
File toFile = new File(uploadPath, fileName);
OutputStream os = new FileOutputStream(toFile);
byte[] buffer = new byte[1024];
int length = 0;
while ((length = is.read(buffer)) > 0) {
os.write(buffer, 0, length);
}
is.close();
os.close();
// 返回“图像”选项卡并显示图片
out.println("");
return null;
}
}
ps:最后返回的js代码 out.println("window.parent.CKEDITOR.tools.callFunction(" + callback + ",'" + basePath+"/upload/" + fileName + "','')");
路径一定要和你保存图片指定的路径一致,不然在预览框显示不了,而且会提示你“缺少源文件地址”的错误提示
好了,到这里可以使用ckeditor上传本地图片了,是不是很简单,有种跃跃欲试的感觉,行动吧。。。
