Python爬虫的两套解析方法和四种爬虫实现
对于大多数朋友而言,爬虫绝对是学习 python 的最好的起手和入门方式。因为爬虫思维模式固定,编程模式也相对简单,一般在细节处理上积累一些经验都可以成功入门。本文想针对某一网页对 python 基础爬虫的两大解析库( BeautifulSoup 和 lxml )和几种信息提取实现方法进行分析,以开 python 爬虫之初见。
基础爬虫的固定模式
笔者这里所谈的基础爬虫,指的是不需要处理像异步加载、验证码、代理等高阶爬虫技术的爬虫方法。一般而言,基础爬虫的两大请求库 urllib 和 requests 中 requests 通常为大多数人所钟爱,当然 urllib 也功能齐全。两大解析库 BeautifulSoup 因其强大的 HTML 文档解析功能而备受青睐,另一款解析库 lxml 在搭配 xpath 表达式的基础上也效率提高。就基础爬虫来说,两大请求库和两大解析库的组合方式可以依个人偏好来选择。
在学习python中有任何困难不懂的可以加入我的python交流学习QQ群:932749660,多多交流问题,互帮互助,群里有不错的学习教程和开发工具。资源分享
笔者喜欢用的爬虫组合工具是:
-
requests+BeautifulSoup -
requests+lxml
同一网页爬虫的四种实现方式
笔者以腾讯新闻首页的新闻信息抓取为例。
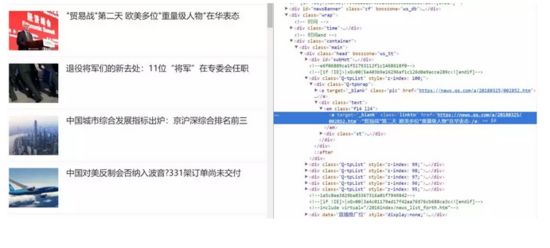
首页外观如下:
比如说我们想抓取每个新闻的标题和链接,并将其组合为一个字典的结构打印出来。首先查看 HTML 源码确定新闻标题信息组织形式。
可以目标信息存在于 em 标签下 a 标签内的文本和 href 属性中。可直接利用 requests 库构造请求,并用 BeautifulSoup 或者 lxml 进行解析。
-
方式一:
requests+BeautifulSoup+selectcss选择器
# select method
import requests
from bs4 import BeautifulSoup
headers = {'User-Agent': 'Mozilla/5.0 (Windows NT 10.0; Win64; x64) AppleWebKit/537.36 (KHTML, like Gecko) Chrome/64.0.3282.119 Safari/537.36'}

url = 'http://news.qq.com/'

Soup = BeautifulSoup(requests.get(url=url, headers=headers).text.encode("utf-8"), 'lxml')

em = Soup.select('em[class="f14 l24"] a')
for i in em:

    title = i.get_text()

    link = i['href']

    print({'标题': title,
'链接': link

    })select method
import requests
from bs4 import BeautifulSoup
headers = {'User-Agent': 'Mozilla/5.0 (Windows NT 10.0; Win64; x64) AppleWebKit/537.36 (KHTML, like Gecko) Chrome/64.0.3282.119 Safari/537.36'}

url = 'http://news.qq.com/'

Soup = BeautifulSoup(requests.get(url=url, headers=headers).text.encode("utf-8"), 'lxml')

em = Soup.select('em[class="f14 l24"] a')
for i in em:

    title = i.get_text()

    link = i['href']

    print({'标题': title,
'链接': link

    })
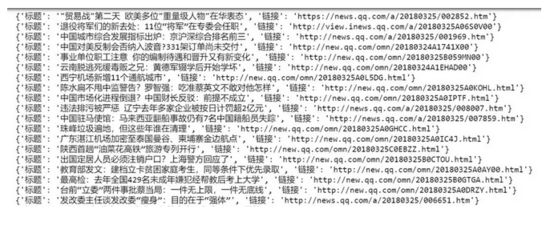
很常规的处理方式,抓取效果如下:
-
方式二:
requests+BeautifulSoup+find_all进行信息提取
# find_all method
import requests
from bs4 import BeautifulSoup
headers = {'User-Agent': 'Mozilla/5.0 (Windows NT 10.0; Win64; x64) AppleWebKit/537.36 (KHTML, like Gecko) Chrome/64.0.3282.119 Safari/537.36'}

url = 'http://news.qq.com/'

Soup = BeautifulSoup(requests.get(url=url, headers=headers).text.encode("utf-8"), 'lxml')

em = Soup.find_all('em', attrs={'class': 'f14 l24'})for i in em:

    title = i.a.get_text()

    link = i.a['href']

    print({'标题': title,
           '链接': link

    })
import requests
from bs4 import BeautifulSoup
headers = {'User-Agent': 'Mozilla/5.0 (Windows NT 10.0; Win64; x64) AppleWebKit/537.36 (KHTML, like Gecko) Chrome/64.0.3282.119 Safari/537.36'}

url = 'http://news.qq.com/'

Soup = BeautifulSoup(requests.get(url=url, headers=headers).text.encode("utf-8"), 'lxml')

em = Soup.find_all('em', attrs={'class': 'f14 l24'})for i in em:

    title = i.a.get_text()

    link = i.a['href']

    print({'标题': title,
           '链接': link

    })
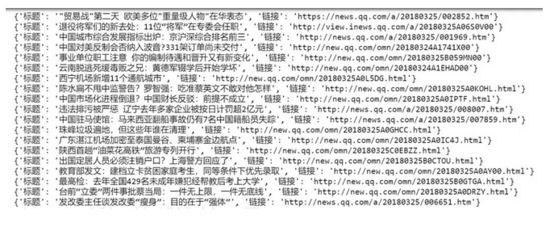
同样是 requests + BeautifulSoup 的爬虫组合,但在信息提取上采用了 find_all 的方式。效果如下:
-
方式三:
requests+lxml/etree+xpath表达式
# lxml/etree method
import requests
from lxml import etree


headers = {    'User-Agent': 'Mozilla/5.0 (Windows NT 10.0; Win64; x64) AppleWebKit/537.36 (KHTML, like Gecko) Chrome/64.0.3282.119 Safari/537.36'}

url = 'http://news.qq.com/'

html = requests.get(url = url, headers = headers)

con = etree.HTML(html.text)


title = con.xpath('//em[@class="f14 l24"]/a/text()')

link = con.xpath('//em[@class="f14 l24"]/a/@href')
for i in zip(title, link):

    print({'标题': i[0],
'链接': i[1]

    })
import requests
from lxml import etree


headers = {    'User-Agent': 'Mozilla/5.0 (Windows NT 10.0; Win64; x64) AppleWebKit/537.36 (KHTML, like Gecko) Chrome/64.0.3282.119 Safari/537.36'}

url = 'http://news.qq.com/'

html = requests.get(url = url, headers = headers)

con = etree.HTML(html.text)


title = con.xpath('//em[@class="f14 l24"]/a/text()')

link = con.xpath('//em[@class="f14 l24"]/a/@href')
for i in zip(title, link):

    print({'标题': i[0],
'链接': i[1]

    })
使用 lxml 库下的 etree 模块进行解析,然后使用 xpath 表达式进行信息提取,效率要略高于 BeautifulSoup + select 方法。这里对两个列表的组合采用了 zip 方法。效果如下:
-
方式四:
requests+lxml/html/fromstring+xpath表达式
# lxml/html/fromstring method
import requests
import lxml.html as HTML


headers = {'User-Agent': 'Mozilla/5.0 (Windows NT 10.0; Win64; x64) AppleWebKit/537.36 (KHTML, like Gecko) Chrome/64.0.3282.119 Safari/537.36'}

url = 'http://news.qq.com/'

con = HTML.fromstring(requests.get(url = url, headers = headers).text)

title = con.xpath('//em[@class="f14 l24"]/a/text()')

link = con.xpath('//em[@class="f14 l24"]/a/@href')
for i in zip(title, link):

    print({'标题': i[0],'链接': i[1]

    })
import requests
import lxml.html as HTML


headers = {'User-Agent': 'Mozilla/5.0 (Windows NT 10.0; Win64; x64) AppleWebKit/537.36 (KHTML, like Gecko) Chrome/64.0.3282.119 Safari/537.36'}

url = 'http://news.qq.com/'

con = HTML.fromstring(requests.get(url = url, headers = headers).text)

title = con.xpath('//em[@class="f14 l24"]/a/text()')

link = con.xpath('//em[@class="f14 l24"]/a/@href')
for i in zip(title, link):

    print({'标题': i[0],'链接': i[1]

    })
跟方法三类似,只是在解析上使用了 lxml 库下的 html.fromstring 模块。抓取效果如下:
很多人觉得爬虫有点难以掌握,因为知识点太多,需要懂前端、需要python熟练、还需要懂数据库,更不用说正则表达式、XPath表达式这些。其实对于一个简单网页的数据抓取,不妨多尝试几种抓取方案,举一反三,也更能对python爬虫有较深的理解。长此以往,对于各类网页结构都有所涉猎,自然经验丰富,水到渠成。
在学习python中有任何困难不懂的可以加入我的python交流学习QQ群:932749660,多多交流问题,互帮互助,群里有不错的学习教程和开发工具。资源分享
转载至:https://ask.hellobi.com/blog/louwill12/12345


