helm3(一)
helm介绍
helm是一个简化安装和管理Kubernetes应用程序的工具,可以将其视为Kubernetes的apt/yum/homebrew。
helm是用于管理charts的工具,charts是预先配置的Kubernetes资源的软件包。
官网:https://helm.sh,最新版本:v3.3.0
helm用途:
1. 查找并使用Helm Charts将应用程序部署在Kubernetes上

2. 通过Helm Charts将应用程序共享

3. 对Kubernetes应用程序实现可重复构建

4. 简便管理Kubernetes清单文件

5. 管理Helm包的发布
helm概念:
Chart:Helm应用(package),包括对资源的定义及相关镜像的引用,还有模板文件、values文件等

Repository:Chart仓库,http/https服务器,Chart的程序包放在这里

Release:Chart的部署实例,每个Chart可以部署一个或多个Release
helm版本:
在 Helm 2 中,Tiller 是作为一个 Deployment 部署在 kube-system 命名空间中,很多情况下,我们会为 Tiller 准备一个 ServiceAccount ,这个 ServiceAccount 通常拥有集群的所有权限。
用户可以使用本地 Helm 命令,自由地连接到 Tiller 中并通过 Tiller 创建、修改、删除任意命名空间下的任意资源。

在 Helm 3 中,Tiller 被移除了。新的 Helm 客户端会像 kubectl 命令一样,读取本地的 kubeconfig 文件,使用我们在 kubeconfig 中预先定义好的权限来进行一系列操作。
chart是包含至少两项内容的helm软件包:
软件包说明(Chart.yaml)

一个或多个模板,其中包含Kubernetes清单文件
安装helm
- 安装helm:
tar包安装:
mkdir /software cd /software

wget https://get.helm.sh/helm-v3.3.0-linux-amd64.tar.gz

tar xf helm-v3.3.0-linux-amd64.tar.gz

cp linux-amd64/helm /usr/local/bin/helm
脚本安装:
curl https://raw.githubusercontent.com/helm/helm/master/scripts/get-helm-3 | bash
源码安装:
git clone https://github.com/helm/helm.git

cd helm && make
- 命令补全:
echo "source <(helm completion bash)" >> ~/.bash_profile

source !$
- 查看版本:
helm version

version.BuildInfo{
     Version:"v3.3.0", GitCommit:"8a4aeec08d67a7b84472007529e8097ec3742105", GitTreeState:"dirty", GoVersion:"go1.14.7"}
helm命令
- helm命令:
completion      命令补全
create          创建一个给定名称的chart
dependency      管理chart的依赖关系
env             helm环境信息
get             获取给定release的扩展信息
help            命令帮助
history         获取release历史
install         部署chart
lint            对chart进行语法检查
list            releases列表,list可简写为ls
package         打包chart
plugin          install、list、uninstall Helm插件
pull            从repo中下载chart并(可选)将其解压到本地目录
repo            add、list、remove、update、index Helm的repo
rollback        回滚release到一个以前的版本
search          查询在charts中的关键字
show            显示chart的信息
status          显示给定release的状态
template        本地渲染模板
test            测试运行release
uninstall       删除release
upgrade         升级release
verify          验证给定路径的chart是否已签名且有效
version         显示helm的版本信息
- 添加repo:
helm repo add stable http://mirror.azure.cn/kubernetes/charts

helm repo add aliyun https://kubernetes.oss-cn-hangzhou.aliyuncs.com/charts

helm repo add incubator https://kubernetes-charts-incubator.storage.googleapis.com

helm repo list

helm repo update
helm search repo stable             #查询stable repo可用的charts

helm repo remove incubator              #删除incubator repo
- 查看chart信息:
helm show chart stable/mysql

helm show all stable/mysql
- 安装charts:
helm install redis stable/redis -n default              #部署chart到k8s

helm ls             #查看所有release

NAME 	NAMESPACE	REVISION	UPDATED                                	STATUS  	CHART       	APP VERSION
redis	default  	1       	2020-08-18 15:37:32.388925542 +0800 CST	deployed	redis-10.5.7	5.0.7

helm status redis               #查看release状态

helm uninstall redis                #删除release
自定义chart
charts除了可以在repo中下载,还可以自己自定义,创建完成后通过helm部署到k8s。
- 拉取chart:
helm pull stable/mysql

ls

mysql-1.6.6.tgz

tar xf mysql-1.6.6.tgz

tree mysql

mysql
├── Chart.yaml
├── README.md
├── templates
│   ├── configurationFiles-configmap.yaml
│   ├── deployment.yaml
│   ├── _helpers.tpl
│   ├── initializationFiles-configmap.yaml
│   ├── NOTES.txt
│   ├── pvc.yaml
│   ├── secrets.yaml
│   ├── serviceaccount.yaml
│   ├── servicemonitor.yaml
│   ├── svc.yaml
│   └── tests
│       ├── test-configmap.yaml
│       └── test.yaml
└── values.yaml

2 directories, 15 files
可以看到,一个chart包就是一个文件夹的集合,文件夹名称就是chart包的名称。
chart是包含至少两项内容的helm软件包:
软件包说明(Chart.yaml)

一个或多个模板,其中包含Kubernetes清单文件:

    NOTES.txt:chart的“帮助文本”,在用户运行 helm install 时显示给用户

    deployment.yaml:创建deployment的基本manifest

    service.yaml:为deployment创建service的基本manifest

    ingress.yaml: 创建ingress对象的资源清单文件

    _helpers.tpl:放置模板助手的地方,可以在整个chart中重复使用
- 创建chart:
以nginx为例,创建自定义的chart。
helm create nginx

tree nginx

nginx
├── charts
├── Chart.yaml
├── templates
│   ├── deployment.yaml
│   ├── _helpers.tpl
│   ├── hpa.yaml
│   ├── ingress.yaml
│   ├── NOTES.txt
│   ├── serviceaccount.yaml
│   ├── service.yaml
│   └── tests
│       └── test-connection.yaml
└── values.yaml

3 directories, 10 files

cat nginx/templates/deployment.yaml
apiVersion: apps/v1
kind: Deployment
metadata:
  name: {
     {
      include "nginx.fullname" . }}
  labels:
    {
     {
     - include "nginx.labels" . | nindent 4 }}
spec:
{
     {
     - if not .Values.autoscaling.enabled }}
  replicas: {
     {
      .Values.replicaCount }}
{
     {
     - end }}
  selector:
    matchLabels:
      {
     {
     - include "nginx.selectorLabels" . | nindent 6 }}
  template:
    metadata:
    {
     {
     - with .Values.podAnnotations }}
      annotations:
        {
     {
     - toYaml . | nindent 8 }}
    {
     {
     - end }}
      labels:
        {
     {
     - include "nginx.selectorLabels" . | nindent 8 }}
    spec:
      {
     {
     - with .Values.imagePullSecrets }}
      imagePullSecrets:
        {
     {
     - toYaml . | nindent 8 }}
      {
     {
     - end }}
      serviceAccountName: {
     {
      include "nginx.serviceAccountName" . }}
      securityContext:
        {
     {
     - toYaml .Values.podSecurityContext | nindent 8 }}
      containers:
        - name: {
     {
      .Chart.Name }}
          securityContext:
            {
     {
     - toYaml .Values.securityContext | nindent 12 }}
          image: "{
     { .Values.image.repository }}:{
     { .Values.image.tag | default .Chart.AppVersion }}"
          imagePullPolicy: {
     {
      .Values.image.pullPolicy }}
          ports:
            - name: http
              containerPort: 80
              protocol: TCP
          livenessProbe:
            httpGet:
              path: /
              port: http
          readinessProbe:
            httpGet:
              path: /
              port: http
          resources:
            {
     {
     - toYaml .Values.resources | nindent 12 }}
      {
     {
     - with .Values.nodeSelector }}
      nodeSelector:
        {
     {
     - toYaml . | nindent 8 }}
      {
     {
     - end }}
      {
     {
     - with .Values.affinity }}
      affinity:
        {
     {
     - toYaml . | nindent 8 }}
      {
     {
     - end }}
      {
     {
     - with .Values.tolerations }}
      tolerations:
        {
     {
     - toYaml . | nindent 8 }}
      {
     {
     - end }}
在templates目录下yaml文件中的变量,是在nginx/values.yaml中定义的,只需要修改nginx/values.yaml的内容,也就完成了templates目录下yaml文件的配置。
- 修改chart:
vim nginx/Chart.yaml
apiVersion: v2
name: nginx
description: A Helm chart for Kubernetes
type: application               #chart类型,application或library
version: 0.1.0              #chart版本
appVersion: 1.0.0               #application部署版本
vim tomcat/values.yaml
replicaCount: 1

image:
  repository: nginx
  pullPolicy: IfNotPresent
  tag: "latest"

imagePullSecrets: []
nameOverride: ""
fullnameOverride: ""

serviceAccount:
  create: true
  annotations: {
     }
  name: ""

podAnnotations: {
     }

podSecurityContext: {
     }
  # fsGroup: 2000

securityContext: {
     }
  # capabilities:
  #   drop:
  #   - ALL
  # readOnlyRootFilesystem: true
  # runAsNonRoot: true
  # runAsUser: 1000

service:
  type: ClusterIP
  port: 80

ingress:
  enabled: true
  annotations: {
     }
    # kubernetes.io/ingress.class: nginx
    # kubernetes.io/tls-acme: "true"
  hosts:
    - host: nginx.lzxlinux.cn               #指定ingress域名及路径
      paths: [/]
  tls: []
  #  - secretName: chart-example-tls
  #    hosts:
  #      - chart-example.local

resources:
  limits:
    cpu: 100m
    memory: 128Mi
  requests:
    cpu: 100m
    memory: 128Mi

autoscaling:
  enabled: false
  minReplicas: 1
  maxReplicas: 100
  targetCPUUtilizationPercentage: 80
  # targetMemoryUtilizationPercentage: 80

nodeSelector: {
     }

tolerations: []

affinity: {
     }
- 部署chart:
helm install nginx nginx --dry-run --debug                #渲染输出,不进行安装

helm install nginx nginx -n default             #部署chart,release版本默认为1
helm ls

NAME 	NAMESPACE	REVISION	UPDATED                               	STATUS  	CHART      	APP VERSION
nginx	default  	1       	2020-08-19 16:39:48.80635996 +0800 CST	deployed	nginx-0.1.0	1.0.0

kubectl get pod

NAME                     READY   STATUS    RESTARTS   AGE
nginx-74865b6d4c-867vm   1/1     Running   0          28s

kubectl get svc

NAME         TYPE        CLUSTER-IP      EXTERNAL-IP   PORT(S)   AGE
kubernetes   ClusterIP   10.96.0.1       <none>        443/TCP   8d
nginx        ClusterIP   10.108.89.192   <none>        80/TCP    34s

kubectl get ingress

NAME    CLASS    HOSTS               ADDRESS   PORTS   AGE
nginx   <none>   nginx.lzxlinux.cn             80      38s
- 访问:
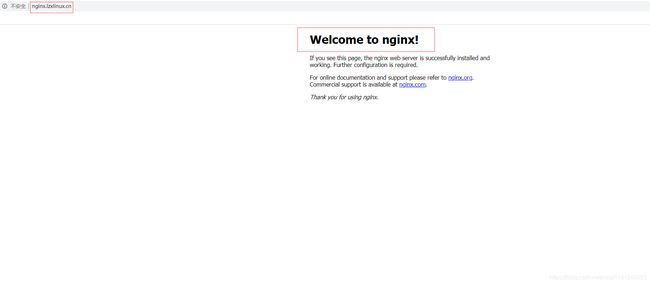
任选一node节点ip,在Windows电脑hosts文件中添加本地dns:
192.168.30.129 nginx.lzxlinux.cn
- 修改为NodePort访问:
vim nginx/values.yaml
replicaCount: 1

image:
  repository: nginx
  pullPolicy: IfNotPresent
  tag: "latest"

imagePullSecrets: []
nameOverride: ""
fullnameOverride: ""

serviceAccount:
  create: true
  annotations: {
     }
  name: ""

podAnnotations: {
     }

podSecurityContext: {
     }
  # fsGroup: 2000

securityContext: {
     }
  # capabilities:
  #   drop:
  #   - ALL
  # readOnlyRootFilesystem: true
  # runAsNonRoot: true
  # runAsUser: 1000

service:
  type: NodePort
  port: 80
  nodePort: 30080

ingress:
  enabled: false
  annotations: {
     }
    # kubernetes.io/ingress.class: nginx
    # kubernetes.io/tls-acme: "true"
  hosts:
    - host: nginx.lzxlinux.cn
      paths: [/]
  tls: []
  #  - secretName: chart-example-tls
  #    hosts:
  #      - chart-example.local

resources:
  limits:
    cpu: 100m
    memory: 128Mi
  requests:
    cpu: 100m
    memory: 128Mi

autoscaling:
  enabled: false
  minReplicas: 1
  maxReplicas: 100
  targetCPUUtilizationPercentage: 80
  # targetMemoryUtilizationPercentage: 80

nodeSelector: {
     }

tolerations: []

affinity: {
     }
vim nginx/templates/service.yaml
apiVersion: v1
kind: Service
metadata:
  name: {
     {
      include "nginx.fullname" . }}
  labels:
    {
     {
     - include "nginx.labels" . | nindent 4 }}
spec:
  type: {
     {
      .Values.service.type }}
  ports:
    - port: {
     {
      .Values.service.port }}
      targetPort: http
      protocol: TCP
      name: http
      nodePort: {
     {
      .Values.service.nodePort }}              #指定nodePort
  selector:
    {
     {
     - include "nginx.selectorLabels" . | nindent 4 }}
helm upgrade nginx nginx                #升级release,release版本加1

kubectl get svc

NAME         TYPE        CLUSTER-IP      EXTERNAL-IP   PORT(S)        AGE
kubernetes   ClusterIP   10.96.0.1       <none>        443/TCP        8d
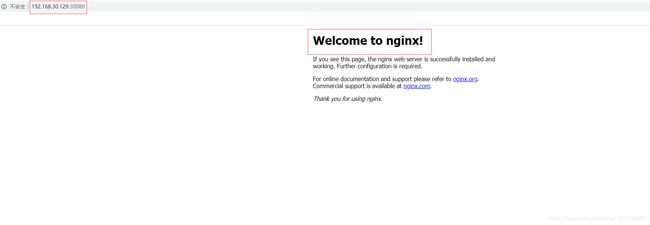
nginx        NodePort    10.108.89.192   <none>        80:30080/TCP   14m
- 回滚:
可以根据release版本回滚,
helm history nginx              #查看release版本历史

REVISION	UPDATED                 	STATUS    	CHART      	APP VERSION	DESCRIPTION
1       	Wed Aug 19 16:39:48 2020	superseded	nginx-0.1.0	1.0.0      	Install complete
2       	Wed Aug 19 16:52:14 2020	deployed  	nginx-0.1.0	1.0.0      	Upgrade complete

helm rollback nginx 1               #回滚release到版本1

Rollback was a success! Happy Helming!

helm history nginx

REVISION	UPDATED                 	STATUS    	CHART      	APP VERSION	DESCRIPTION
1       	Wed Aug 19 16:39:48 2020	superseded	nginx-0.1.0	1.0.0      	Install complete
2       	Wed Aug 19 16:52:14 2020	superseded	nginx-0.1.0	1.0.0      	Upgrade complete
3       	Wed Aug 19 16:58:36 2020	deployed  	nginx-0.1.0	1.0.0      	Rollback to 1
kubectl get svc

NAME         TYPE        CLUSTER-IP      EXTERNAL-IP   PORT(S)   AGE
kubernetes   ClusterIP   10.96.0.1       <none>        443/TCP   8d
nginx        ClusterIP   10.108.89.192   <none>        80/TCP    19m

kubectl get ingress

NAME    CLASS    HOSTS               ADDRESS   PORTS   AGE
nginx   <none>   nginx.lzxlinux.cn             80      56s
可以看到,nginx release已经回滚到版本1。
通常情况下,在配置好templates目录下的kubernetes清单文件后,后续维护只需要修改Chart.yaml和values.yaml即可。
helm仓库
helm可以使用harbor作为本地仓库,将自定义的chart推送至harbor仓库。
- 安装harbor:
curl -L https://github.com/docker/compose/releases/download/1.24.1/docker-compose-$(uname -s)-$(uname -m) -o /usr/local/bin/docker-compose

chmod +x /usr/local/bin/docker-compose

mkdir /software && cd /software

wget https://storage.googleapis.com/harbor-releases/release-1.9.0/harbor-offline-installer-v1.9.1.tgz

tar zxf harbor-offline-installer-v1.9.1.tgz

cd harbor/

vim harbor.yml
hostname: 192.168.30.132
harbor_admin_password: Harbor12345              #admin用户初始密码
data_volume: /data              #数据存储路径,自动创建
chart:
  absolute_url: enabled
log:
  level: info
  local:
    rotate_count: 50
    rotate_size: 200M
    location: /var/log/harbor               #日志路径
./install.sh --with-clair --with-chartmuseum
- push插件:
helm plugin install https://github.com/chartmuseum/helm-push

helm plugin ls

NAME	VERSION	DESCRIPTION
push	0.8.1  	Push chart package to ChartMuseum
- 添加repo:
harbor新建项目base,
helm repo add harbor http://192.168.30.132/chartrepo/base --username=admin --password=Harbor12345

helm repo ls

NAME  	URL
stable	http://mirror.azure.cn/kubernetes/charts
aliyun	https://kubernetes.oss-cn-hangzhou.aliyuncs.com/charts
harbor	http://192.168.30.132/chartrepo/base

cd /software

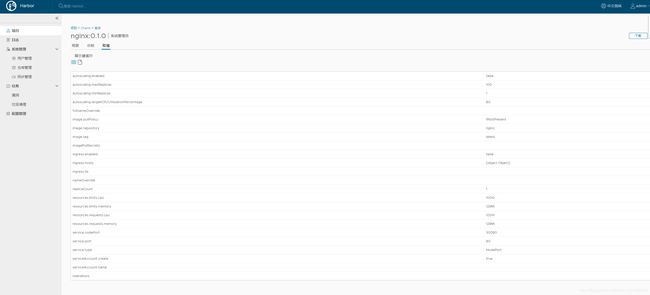
helm push nginx harbor

Pushing nginx-0.1.0.tgz to harbor...
Done.
这里的 repo 的地址是library这个项目。


