pacemaker+corosync实现nginx的负载均衡和高可用
一 架构图和原理

1)pacemaker+corosync/heartbeat 软件架构
1、Pacemaker - 集群资源管理器(CRM),负责启动和停止服务,而且保证它们是一直运行着的以及某个时刻某服务只在一个节点上运行(避免多服务同时操作数据造成的混乱),利用集群基础构建提供的信息和成员管理能力,探测并恢复节点以及在其控制下的资源的失效切换,以实现高可用性。

2、Corosync - 消息层组件,管理成员关系、消息和仲裁。

3、Resource Agents - 资源代理,用来控制服务启停,监控服务状态的脚本集合,这些脚本将被LRM调用从而实现各种资源启动、停止、监控等等。任何资源代理都要使用同一种风格,接收四个参数:{start|stop|restart|status},包括配置IP地址的也是。
2)corosync和heartbeat对比
1 共同点:
都属于消息网络层,对外提供服务和主机的心跳检测,在监控的主服务被发现当机之后,即时切换到从属的备份节点,保证系统的可用性.
2 不同点
Heartbeat只能为所有的资源配置一个主服务,而corosync则允许为不同的资源组配置不同的主服务。
Heartbeat在主服务server1当机之后,切换到从服务节点server2;还会把之前的主节点server1继续放入从属节点列表之内。而corosync则不会存在这个情况
在corosync中,其会自行处理配置文件的同步问题,heartbeat则无此功能。
Heartbeat只支持2个节点,而corosync则支持多个节点的集群,支持把资源进行分组,按照组进行资源的管理,设置主服务,自行进行启停
    故此可见,一般来说都是选择corosync来进行心跳的检测,搭配pacemaker的资源管理系统来构建高可用的系统。
二 实验步骤
本次实验都是在防火墙和senliux关闭情况下操作的
1 nginx 服务搭建(server1 server4)
- 安装nginx服务及其安装包
yum install -y gcc gcc-c++ pcre pcre-devel openssl openssl-devel zlib zlib-devel acpid
注意:软件包在编译安装nginx时必须安装,否则报错
gcc / gcc-c++:gcc编译器,编译nginx需要。

pcre / pcre-devel:Perl 语言兼容正则表达式(Perl Compatible Regular Expressions,用C语言编写的正则表达式函数库),nginx的rewrite模块正则表达式使用。

openssl / openssl-devel:nginx的ssl模块使用。

zlib / zlib-devel:nginx的gzip模块使用。

acpid:电源管理软件包
2)下载安装包,解压和源码安装
tar zxvf nginx-1.15.3.tar.gz -C /usr/local/
cd /usr/local/nginx-1.15.3/
./configure --prefix=/usr/local/nginx --with-http_ssl_module --with-http_stub_status_module --with-file-aio --with-threads
make && make install
cd /usr/local/nginx
du -sh

会发现安装目录下占用了比较大的内存,我们做一些优化
cd /usr/local/nginx-1.15.3/
make clean 清楚编译时的一些c代码文件
cd /usr/local/nginx
rm -rf * 准备重新编译
cd /usr/local/nginx-1.15.3/
vim src/core/nginx.h

vim auto/cc/gcc 修改 172 #CFLAGS="$CFLAGS -g"
./configure --prefix=/usr/local/nginx --with-http_ssl_module --with-http_stub_status_module --with-file-aio --with-threads 重新编译
make && make install
![]()
3 )编辑开机启动文件
编辑 /etc/init.d/nginx 脚本(该脚本由nginx官方提供,根据配置进行相应更改),使用chkconfig命令来实现开机自启动。 该方法可以使用 /etc/init.d/nginx{start|stop|status|restart|condrestart|try-restart|reload|force-reload|configtest} 或 service 命令集中式管理。
vim /etc/init.d/nginx
#!/bin/sh
#
# nginx - this script starts and stops the nginx daemin
#
# chkconfig:   - 85 15
# description:  Nginx is an HTTP(S) server, HTTP(S) reverse \
#               proxy and IMAP/POP3 proxy server
# processname: nginx
# config:      /usr/local/nginx/conf/nginx.conf
# pidfile:     /usr/local/nginx/logs/nginx.pid

# Source function library.
. /etc/rc.d/init.d/functions

# Source networking configuration.
. /etc/sysconfig/network

# Check that networking is up.
[ "$NETWORKING" = "no" ] && exit 0

nginx="/usr/local/nginx/sbin/nginx"
prog=$(basename $nginx)

NGINX_CONF_FILE="/usr/local/nginx/conf/nginx.conf"

lockfile=/var/lock/subsys/nginx

start() {
    [ -x $nginx ] || exit 5
    [ -f $NGINX_CONF_FILE ] || exit 6
    echo -n $"Starting $prog: "
    daemon $nginx -c $NGINX_CONF_FILE
    retval=$?
    echo
    [ $retval -eq 0 ] && touch $lockfile
    return $retval
}

stop() {
    echo -n $"Stopping $prog: "
    killproc $prog -QUIT
    retval=$?
    echo
    [ $retval -eq 0 ] && rm -f $lockfile
    return $retval
}

restart() {
    configtest || return $?
    stop
    start
}

reload() {
    configtest || return $?
    echo -n $"Reloading $prog: "
    killproc $nginx -HUP
    RETVAL=$?
    echo
}

force_reload() {
    restart
}

configtest() {
  $nginx -t -c $NGINX_CONF_FILE
}

rh_status() {
    status $prog
}

rh_status_q() {
    rh_status >/dev/null 2>&1
}

case "$1" in
    start)
        rh_status_q && exit 0
        $1
        ;;
    stop)
        rh_status_q || exit 0
        $1
        ;;
    restart|configtest)
        $1
        ;;
    reload)
        rh_status_q || exit 7
        $1
        ;;
    force-reload)
        force_reload
        ;;
    status)
        rh_status
        ;;
    condrestart|try-restart)
        rh_status_q || exit 0
            ;;
    *)
        echo $"Usage: $0 {start|stop|status|restart|condrestart|try-restart|reload|force-reload|configtest}"
        exit 2
esac
chmod 755 /etc/init.d/nginx
chkconfig --level 35 nginx on # chkconfig命令更改nginx运行级别,设置开机自启动
service nginx start
添加nginx用户

4 )编辑nginx需要配置文件
user  nginx nginx;
worker_processes  2;
worker_cpu_affinity 01 10;
http{
upstream  test  {
              #ip_hash;
                            server   172.25.1.3:80 max_fails=2 fail_timeout=30s ;
                            server   172.25.1.4:80 max_fails=2 fail_timeout=30s ;
                                              }
}
 server {
         listen 80;
         server_name www.test.org;
         location / {
         proxy_pass http://test;
        }
/etc/init.d/nginx reload
/etc/init.d/nginx restart
5 )server4 安装ngnix 做同样的配置
2 后端web服务器安装及配置
1)安装httpd (server2 server3)
yum install httpd -y
vim /var/www/html


/etc/init.d/httpd start
3 pacemaker+corosync 环境构建
1)安装软件(server1 server4)
yum install -y pacemaker corosync
2 ) 服务配置
cd /etc/corosync/
cp corosync.conf.example corosync.conf
vim /etc/corosync/corosync.conf
# Please read the corosync.conf.5 manual page
compatibility: whitetank

totem {
        version: 2
        secauth: off
        threads: 0
        interface {
                ringnumber: 0
                bindnetaddr: 172.25.1.0  #
                mcastaddr: 226.94.1.1
                mcastport: 5400
                ttl: 1
        }
}

logging {
        fileline: off
        to_stderr: no
        to_logfile: yes
        to_syslog: yes
        logfile: /var/log/cluster/corosync.log
        debug: off
        timestamp: on
        logger_subsys {
                subsys: AMF
                debug: off
        }
}

amf {
        mode: disabled
}
service{
     name:pacemaker
     ver:0
}
/etc/init.d/corosync start
/etc/init.d/corosync reload
3) 查看fence效果
crm_verify -LV 如果有报错需要在crm来修改参数
4 ) 安装crm命令包
yum install -y crmsh-1.2.6-0.rc2.2.1.x86_64.rpm pssh-2.3.1-2.1.x86_64.rpm (两个最好一起安装,两个具有互相依赖性)
如果出现以下的报错

可能有两种原因:
1 corosync 服务没有启动
2 还存在一些和corosync功能相近的服务的进程
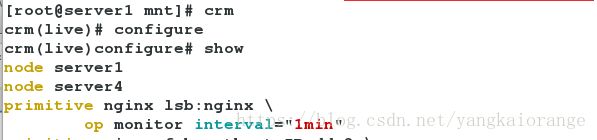
5 )crm 中添加VIP fence nginx
[root@server1 nginx]# crm
crm(live)# configure
crm(live)configure# primitive vip ocf:heartbeat:IPaddr2 params ip=172.25.1.200 cidr_netmask=32 op monitor interval=30s
crm(live)configure# stonith-enabled=true
crm(live)configure#no-quorum-policy=ignore
crm(live)configure# vmfence stonith:fence_xvm params pcmk_host_map=server1:vm1;server4:vm4 op monitor interval="1min"
crm(live)configure#resource-stickiness=100
crm(live)configure#primitive nginx lsb:nginx op monitor interval=1min
crm(live)configure# group web vip nginx
crm(live)configure# commit
crm(live)configure#bye
- server4 做同样的操作
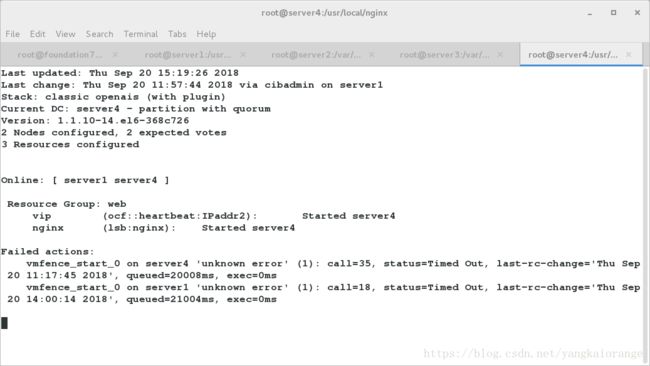
crm_mon
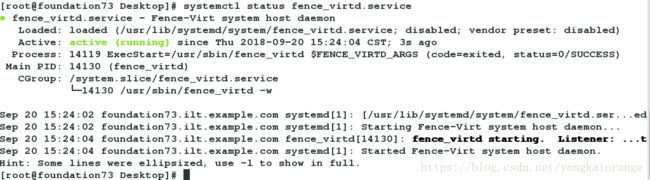
4 负载均衡和高可用测试 物理机
保证物理机的服务启动
负载均衡测试

 高可用测试
高可用测试