ArcGIS Enterprise10.7.1 单机部署详细步骤——以CentOS7为例
写在前面的话:安装ArcGIS Enterprise前一定要确定好机器名域名,且域名不可以是arcgis.com或者是esri.com
还有很多朋友在纠结是不是软件的安装顺序不能乱,一定得是Server、DataStore、Portal这样的,其实不然,软件安装哪个在前哪个在后都不影响,最关键的是配置,配置是有一定的先后顺序的。
一定要安装两个WebAdaptor,一个给Server用,一个给Portal用,切不可两个组件用一个WebAdaptor
本教程适用于10.5——10.8版本,本教程中以10.7.1为例
执行本安装教程需要有基础的知识储备:
如分清楚什么时候在root账户下操作,什么时候在arcgis账户下操作,通过命令行能看出来
基础的linux机器操作技能
知道webadapter必须在装webadapter的机器上配置
会配置tomcat和jdk,会修改server.xml及生成证书等
目录
1、安装前准备
1.1、确定机器名、域名、IP
1.2、防火墙关闭或开特定端口(本文以关闭防火墙为例)
1.3、创建用户和组
1.4、用到的软件或安装包
2、安装软件
2.1、解压软件
2.1.1、ArcGIS Enterprise部分
2.1.2、jdk和tomcat部分
2.2、安装前准备及安装步骤
2.2.1、ArcGIS Enterprise部分
2.2.2、Jave部分
2.2.3、证书及tomcat设置
2.3、正式安装
3、配置软件
3.1、创建Server站点
3.2、设置DataStore与Server注册
3.3、创建Portal站点
3.4、配置WebAdaptor
1、安装前准备
1.1、确定机器名、域名、IP
机器名和域名在安装后不可更改,因此一定要确定好,且域名不可以是arcgis.com或者是esri.com,会在后面使用出现莫名其妙的问题,不一定是安装时期出现问题。
有DNS服务器,忽略此条,没有DNS服务器,需要在/etc/hosts添加域名和ip的映射
修改机器名:
[root@ga1 ~]# vi /etc/hostname
输入需要设置的机器名,保存退出即可
修改hosts文件
命令为:
[root@ga1 ~]# vi /etc/hosts
内容为:
127.0.0.1   localhost localhost.localdomain localhost4 localhost4.localdomain4
::1         localhost localhost.localdomain localhost6 localhost6.localdomain6
192.168.100.67 ga1.esrichina.com ga1
运行hostname和hostname -f 检查机器名是否符合规范
1.2、防火墙关闭或开特定端口(本文以关闭防火墙为例)
停止防火墙
[root@ga1 ~]# systemctl stop firewalld.service
禁止防火墙开机启动
[root@ga1 ~]# systemctl disable firewalld.service
检查防火墙状态是否正确
[root@ga1 ~]# systemctl status firewalld.service
需要开启的端口详见:ArcGIS Server端口信息 Portal for ArcGIS端口信息 ArcGIS Datastore端口信息
1.3、创建用户和组
[root@ga1 ~]# groupadd esrichina
[root@ga1 ~]# useradd -g esrichina -m arcgis
[root@ga1 ~]# passwd arcgis
1.4、用到的软件或安装包
ArcGIS Server、ArcGIS Datastore、Portal for ArcGIS、ArcGIS WebAdaptor、JDK、Tomcat
关于JDK和Tomcat需要的版本详见:配置JAVA和Tomcat所需版本
2、安装软件
2.1、解压软件
2.1.1、ArcGIS Enterprise部分
依次运行tar -zxvf将1.4中提到的所有安装包解压
[root@ga1 software]# tar -zxvf ArcGIS_Server_Linux_1071_169796.tar.gz
依次运行chown和chmod修改权限和所属用户
[root@ga1 software]# chown -R arcgis:esrichina ArcGISServer/
[root@ga1 software]# chmod -R 755 ArcGISServer/
[root@ga1 software]# chown -R arcgis:esrichina ArcGISDataStore_Linux/
[root@ga1 software]# chmod -R 755 ArcGISDataStore_Linux/
[root@ga1 software]# chown -R arcgis:esrichina PortalForArcGIS/
[root@ga1 software]# chmod -R 755 PortalForArcGIS/
[root@ga1 software]# chown -R arcgis:esrichina WebAdaptor/
[root@ga1 software]# chmod -R 755 WebAdaptor/
2.1.2、jdk和tomcat部分
因在2.1.1中已经解压,本部分中只需要将jdk和tomcat文件夹名称修改一下即可,方便后面的设置
[root@ga1 software]# mv jdk1.8.0_212/ jdk8
[root@ga1 software]# mv apache-tomcat-9.0.19/ tomcat9
2.2、安装前准备及安装步骤
2.2.1、ArcGIS Enterprise部分
修改limits.conf文件
[root@ga1 software]# vi /etc/security/limits.conf
添加如下内容:
    arcgis soft nofile 65535
    arcgis hard nofile 65535
    arcgis soft nproc 25059
    arcgis hard nproc 25059
如需配置时空库,则需要修改vm.swappiness 和 vm.max_map_count的值,以满足时空大数据分析的需要
[root@ga1 arcgis]# echo 'vm.max_map_count = 262144' >> /etc/sysctl.conf
[root@ga1 arcgis]# echo 'vm.swappiness = 1' >> /etc/sysctl.conf
运行如下命令使其生效
[root@ga1 arcgis]# /sbin/sysctl -p2.2.2、Jave部分
配置jdk环境变量
编辑/etc/profile,配置JDK环境变量
添加如下内容
JAVA_HOME=/home/arcgis/software/jdk8
CLASSPATH=.:$JAVA_HOME/lib/tools.jar:$JAVA_HOME/lib/dt.jar
PATH=$JAVA_HOME/bin:$PATH
export JAVA_HOME CLASSPATH PATH
运行如下命令使其生效
[root@ga1 ~]# source /etc/profile运行如下命令验证其配置是否正确
[root@ga1 ~]# java -version
出现如下界面说明配置成功
java version "1.8.0_212"
Java(TM) SE Runtime Environment (build 1.8.0_212-b10)
Java HotSpot(TM) 64-Bit Server VM (build 25.212-b10, mixed mode)
2.2.3、证书及tomcat设置
生成证书
[root@ga1 ~]# openssl genrsa -out 67zhengshu.key 2048
Generating RSA private key, 2048 bit long modulus
.........+++
.....+++
e is 65537 (0x10001)
[root@ga1 ~]# openssl req -new -key 67zhengshu.key -out 67zhengshu.csr
You are about to be asked to enter information that will be incorporated
into your certificate request.
What you are about to enter is what is called a Distinguished Name or a DN.
There are quite a few fields but you can leave some blank
For some fields there will be a default value,
If you enter '.', the field will be left blank.
-----
Country Name (2 letter code) [XX]:CN
State or Province Name (full name) []:Beijing
Locality Name (eg, city) [Default City]:EsriChina
Organization Name (eg, company) [Default Company Ltd]:EsriChina
Organizational Unit Name (eg, section) []:EsriChina
Common Name (eg, your name or your server's hostname) []:192.168.100.67
Email Address []:[email protected]

Please enter the following 'extra' attributes
to be sent with your certificate request
A challenge password []:1234
An optional company name []:esrichina
[root@ga1 ~]# echo "subjectAltName=DNS:ga1.esrichina.com" >cert_extensions
[root@ga1 ~]# openssl x509 -req -sha256 -in 67zhengshu.csr -signkey 67zhengshu.key -extfile cert_extensions -out 67zhengshu.crt -days 3650
Signature ok
subject=/C=CN/ST=Beijing/L=EsriChina/O=EsriChina/OU=EsriChina/CN=192.168.100.67/[email protected]
Getting Private key
[root@ga1 ~]# openssl pkcs12 -inkey 67zhengshu.key -in 67zhengshu.crt -export -out 67zhengshu.pfx
Enter Export Password:
Verifying - Enter Export Password:
编辑tomcat的server.xml,对其启用ssl,将8080端口改为80端口,将8443端口改为443端口
如不会修改可直接将下面的内容替换到server.xml中,并修改证书路径和对应密码即可(注:操作前需先备份server.xml文件)
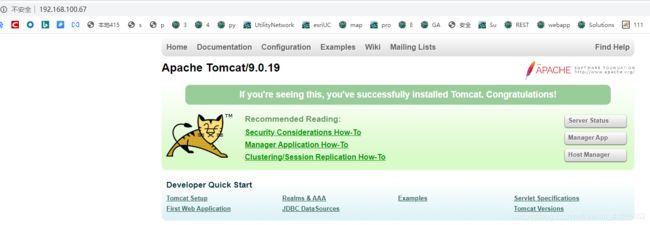
启动和验证tomcat
[root@ga1 bin]# ./startup.sh
Using CATALINA_BASE:   /home/arcgis/software/tomcat9
Using CATALINA_HOME:   /home/arcgis/software/tomcat9
Using CATALINA_TMPDIR: /home/arcgis/software/tomcat9/temp
Using JRE_HOME:        /home/arcgis/software/jdk8
Using CLASSPATH:       /home/arcgis/software/tomcat9/bin/bootstrap.jar:/home/arcgis/software/tomcat9/bin/tomcat-juli.jar
Tomcat started.
出现如下页面则证明tomcat配置正确
2.3、正式安装
注:全部以静默方式安装到默认位置,有更改需求可参考下方链接或运行-h 查看帮助修改
server安装命令
[arcgis@ga1 ArcGISServer]$ ./Setup -m silent -l yes -a /home/arcgis/software/ArcGISGISServerAdvanced_ArcGISServer_722288.ecp
datastore安装命令
[arcgis@ga1 ArcGISDataStore_Linux]$ ./Setup -m silent -l yesportal安装命令
[arcgis@ga1 PortalForArcGIS]$ ./Setup -m silent -l yes
webadapter安装命令
[arcgis@ga1 WebAdaptor]$ ./Setup -m silent -l yes静默安装命令: Server安装命令 DataStore安装命令 Portal安装命令 WebAdapter安装命令
3、配置软件
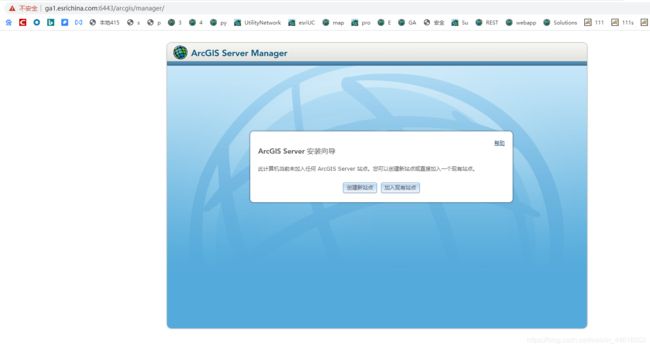
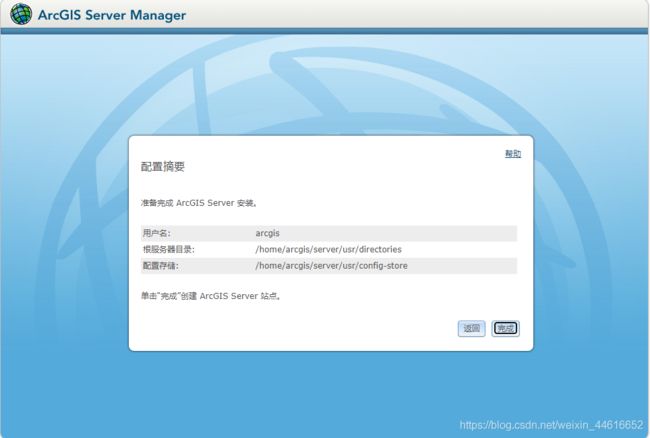
3.1、创建Server站点


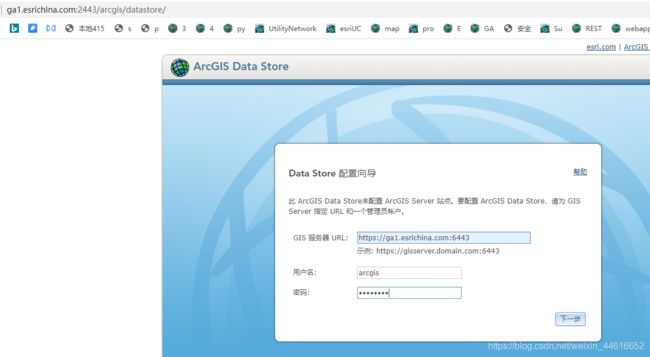
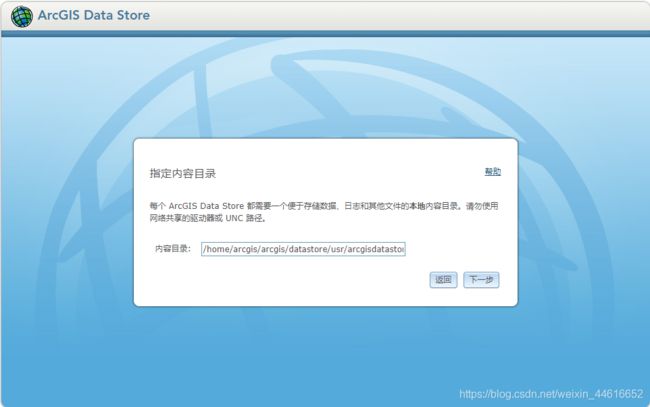
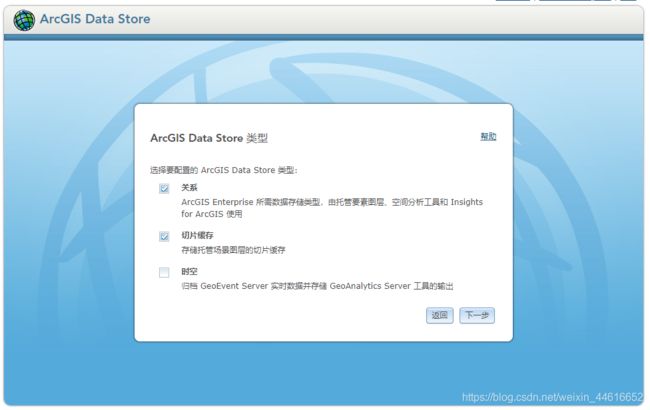
3.2、设置DataStore与Server注册

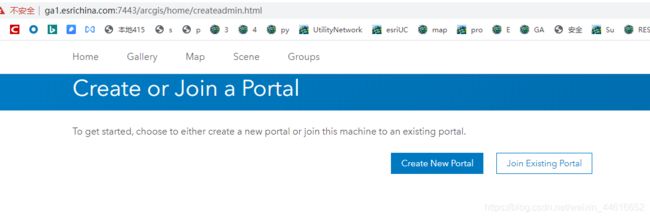
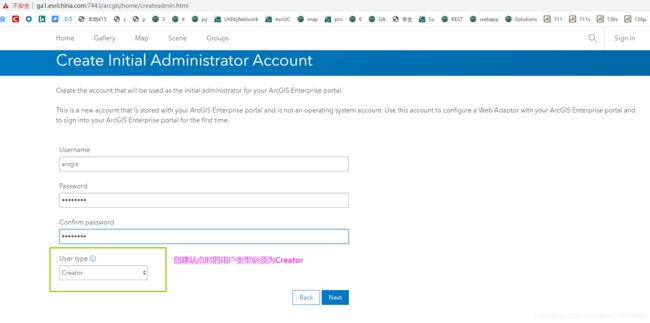
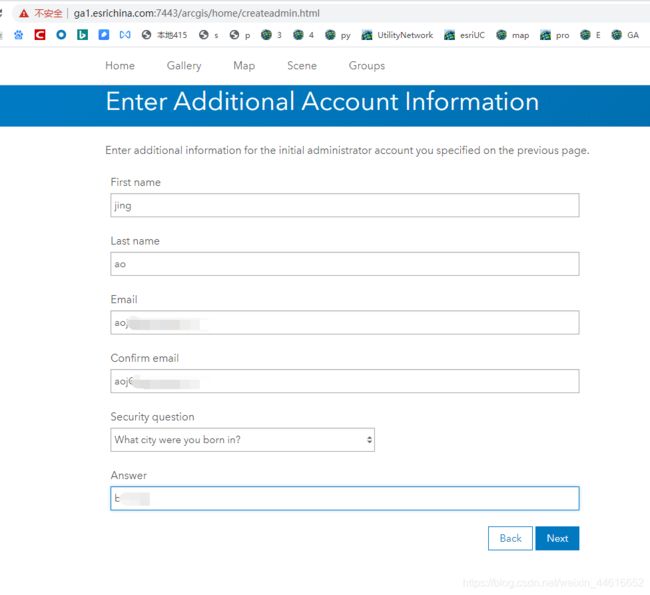
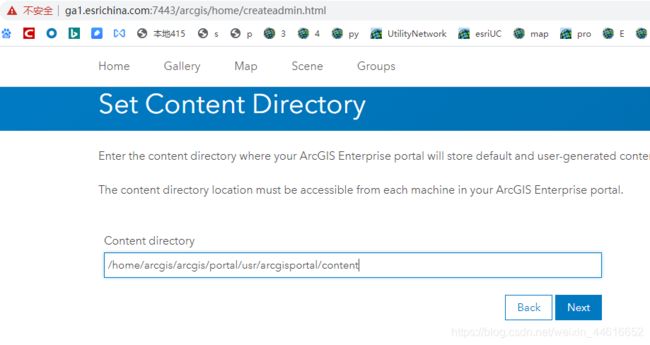
3.3、创建Portal站点


3.4、配置WebAdaptor
将webadapter中名为arcgis.war拷贝到tomcat中,并分别命名为arcgis和server,以实现对server和portal的配置
[root@ga1 ~]# cp /home/arcgis/webadaptor10.7.1/java/arcgis.war /home/arcgis/software/tomcat9/webapps/arcgis.war
[root@ga1 ~]# cp /home/arcgis/webadaptor10.7.1/java/arcgis.war /home/arcgis/software/tomcat9/webapps/server.war
分别为server和portal配置webadapter
[arcgis@ga1 tools]$ ./configurewebadaptor.sh -m server -w https://ga1.esrichina.com/server/webadaptor -g https://ga1.esrichina.com:6443 -u arcgis -p Super123 -a true
Successfully Registered.
[arcgis@ga1 tools]$ ./configurewebadaptor.sh -m portal -w https://ga1.esrichina.com/arcgis/webadaptor -g https://ga1.esrichina.com:7443 -u arcgis -p Super123
Successfully Registered.
server和portal配置联合托管

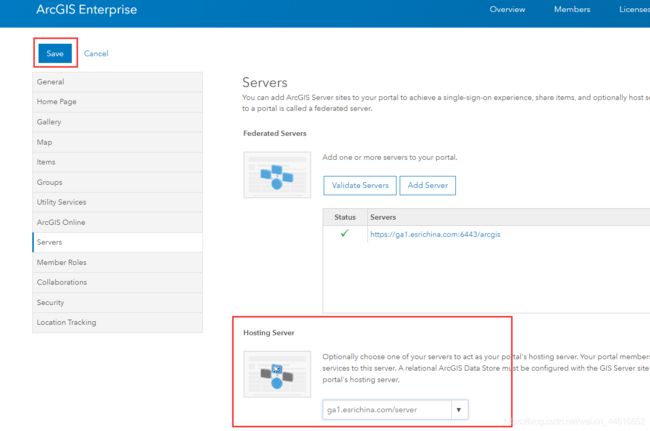
至此,ArcGIS Enterprise单机版基础部署全部完成