Spring Cloud【Finchley】实战-01注册中心及商品微服务
文章目录
- Spring Cloud【Finchley】专栏
- 概述
- 版本说明
- 搭建Eureka Server注册中心
- 工程结构
- Step1. pom添加依赖
- Step2.application.yml 配置Eureka的信息
- Step3. 启动类增加@EnableEurekaServer
- Step4 启动测试
- Github地址
- 数据模型-商品微服务
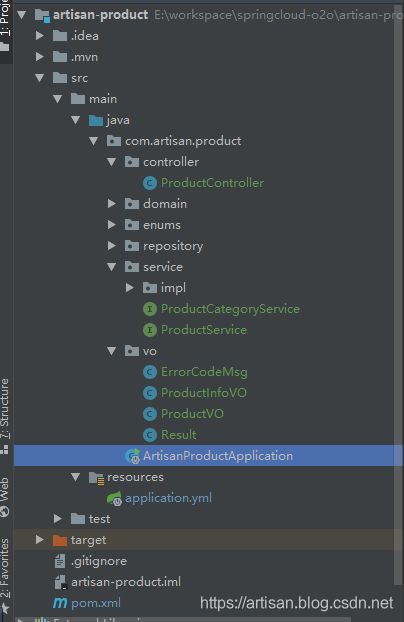
- Product 微服务构建
- 新建工程作为 Eureka Client,注册到Eureka Server上
- Step1. pom.xml 添加依赖
- Step2 启动类增加@EnableEurekaClient注解
- Step3 .启动 验证
- API-约定前后台数据交互格式
- pom.xml引入依赖
- 配置文件增加数据库配置
- 实体类 Product
- Dao层 ProductRepository
- 单元测试
- 实体类 ProductCategory
- Service层
- ProductService 接口
- ProductService 接口实现类
- ProductStatusEnum
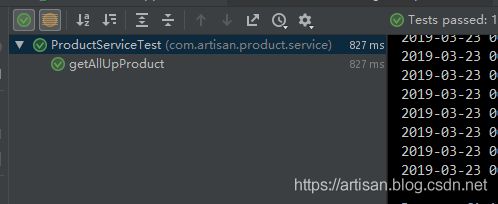
- 对接口进行单元测试
- ProductCategoryService 接口
- ProductCategoryService 接口实现类
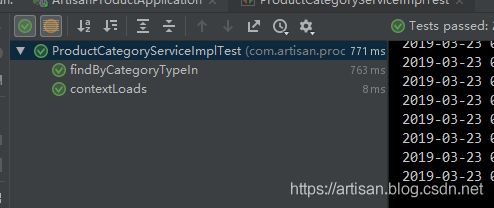
- 单元测试
- Controller层
- VO封装
- ResultVO 前后台交互的统一格式模板
- ProductVO :返回给前台的商品信息格式,包含目录信息
- ProductInfoVO 具体产品的数据VO
- Controller层逻辑
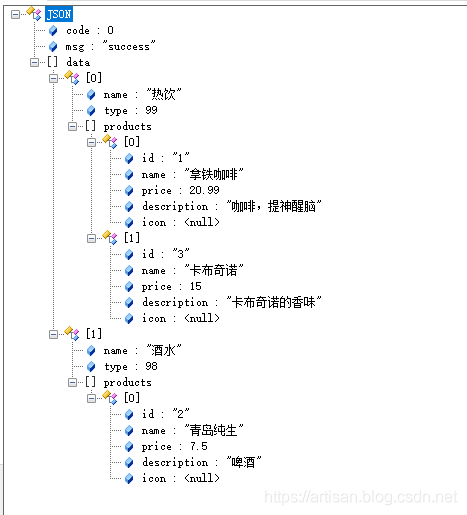
- 启动测试
- 知识点总结
- Java8的Stream
- Beanutils.copyProperties( )
- Github地址
Spring Cloud【Finchley】专栏
如果还没有系统的学过Spring Cloud ,先到我的专栏去逛逛吧
Spring Cloud 【Finchley】手札
概述
点餐系统,重点体会使用Spring Cloud微服务组件如何拆分系统
优秀的系统都是演进而来的,不要害怕出错,大胆折腾吧。
我们先来针对商品微服务进行设计和构建
版本说明
- spring boot : 2.0.3.RELEASE
- spring cloud: Finchley.RELEASE
搭建Eureka Server注册中心
如果没有了解过Eureka ,建议先学习下
Spring Cloud【Finchley】-02服务发现与服务注册Eureka + Eureka Server的搭建
Spring Cloud【Finchley】-13 Eureka Server HA高可用 2个/3个节点的搭建及服务注册调用
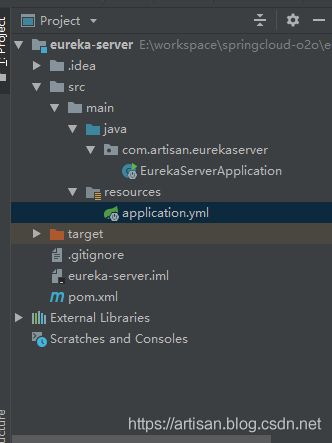
工程结构
Step1. pom添加依赖
<project xmlns="http://maven.apache.org/POM/4.0.0" xmlns:xsi="http://www.w3.org/2001/XMLSchema-instance"
         xsi:schemaLocation="http://maven.apache.org/POM/4.0.0 http://maven.apache.org/xsd/maven-4.0.0.xsd">
    <modelVersion>4.0.0modelVersion>

    <groupId>com.artisangroupId>
    <artifactId>eureka-serverartifactId>
    <version>0.0.1-SNAPSHOTversion>
    <name>eureka-servername>
    <description>eureka serverdescription>


    <parent>
        <groupId>org.springframework.bootgroupId>
        <artifactId>spring-boot-starter-parentartifactId>
        <version>2.0.3.RELEASEversion>
        <relativePath/>
    parent>


    <properties>
        <project.build.sourceEncoding>UTF-8project.build.sourceEncoding>
        <project.reporting.outputEncoding>UTF-8project.reporting.outputEncoding>
        <java.version>1.8java.version>
   properties>

    <dependencies>
        <dependency>
            <groupId>org.springframework.cloudgroupId>
            <artifactId>spring-cloud-starter-netflix-eureka-serverartifactId>
        dependency>
    dependencies>

    <dependencyManagement>
        <dependencies>
            <dependency>
                <groupId>org.springframework.cloudgroupId>
                <artifactId>spring-cloud-dependenciesartifactId>
                <version>Finchley.RELEASEversion>
                <type>pomtype>
                <scope>importscope>
            dependency>
        dependencies>
    dependencyManagement>

    <build>
        <plugins>
            <plugin>
                <groupId>org.springframework.bootgroupId>
                <artifactId>spring-boot-maven-pluginartifactId>
            plugin>
        plugins>
    build>

project>
Step2.application.yml 配置Eureka的信息
# app name
spring:
  application:
    name: eureka-server

# 启动端口
server:
  port: 8761

# 单节点的eureka (后续会改成集群模式)
eureka:
  client:
    # 是否将自己注册到Eureka Server ,默认为true.因为当前应用是作为Eureka Server用,因此设置为false
    register-with-eureka: false
    # eureka.client.fetch-registry:是否从Eureka Server获取注册信息,默认为true.
    # 因为我们这里目前是个单节点的Eureka Server ,不需要与其他的Eureka Server节点的数据,因此设为false
    fetch-registry: false
    # 置与Eureka Server交互的地址,查询服务和注册服务都依赖这个地址。
    # 默认为 http://localhost:8761/eureka ,多个地址可使用 , 分隔
    service-url:
      defaultZone: http://localhost:8761/eureka
Step3. 启动类增加@EnableEurekaServer
package com.artisan.eurekaserver;

import org.springframework.boot.SpringApplication;
import org.springframework.boot.autoconfigure.SpringBootApplication;
import org.springframework.cloud.netflix.eureka.server.EnableEurekaServer;

@SpringBootApplication
@EnableEurekaServer
public class EurekaServerApplication {

    public static void main(String[] args) {
        SpringApplication.run(EurekaServerApplication.class, args);
    }

}
Step4 启动测试
启动application,访问 http://localhost:8761/
Github地址
https://github.com/yangshangwei/springcloud-o2o/tree/master/eureka-server
数据模型-商品微服务
我们先来整理商品微服务模块的库表设计。
- 商品目录
- 商品
商品要归属于某个商品目录,我们通过在category_type字段来将产品product和产品目录product_category关联起来。
-- ----------------------------
-- Table structure for product_category
-- ----------------------------
DROP TABLE IF EXISTS `product_category`;
CREATE TABLE `product_category` (
  `category_id` int(11) NOT NULL AUTO_INCREMENT,
  `category_name` varchar(255) DEFAULT NULL COMMENT '产品目录名称',
  `category_type` int(11) NOT NULL COMMENT '产品目录类型,用于存储特定类型的商品',
  `create_time` datetime DEFAULT NULL ON UPDATE CURRENT_TIMESTAMP,
  `update_time` datetime DEFAULT NULL ON UPDATE CURRENT_TIMESTAMP,
  PRIMARY KEY (`category_id`)
) ENGINE=InnoDB AUTO_INCREMENT=4 DEFAULT CHARSET=utf8mb4;

-- ----------------------------
-- Records of product_category
-- ----------------------------
INSERT INTO `product_category` VALUES ('1', '热饮', '99', '2019-03-20 22:47:41', '2019-03-20 22:47:41');
INSERT INTO `product_category` VALUES ('2', '酒水', '98', '2019-03-20 22:48:13', '2019-03-20 22:48:13');
INSERT INTO `product_category` VALUES ('3', '甜品', '97', '2019-03-20 22:47:51', '2019-03-20 22:47:51');
-- ----------------------------
-- Table structure for product
-- ----------------------------
DROP TABLE IF EXISTS `product`;
CREATE TABLE `product` (
  `product_id` int(11) NOT NULL AUTO_INCREMENT,
  `product_name` varchar(255) NOT NULL,
  `product_stock` int(11) NOT NULL COMMENT '库存',
  `product_price` decimal(8,2) DEFAULT NULL,
  `product_description` varchar(255) DEFAULT NULL,
  `product_icon` varchar(255) DEFAULT NULL,
  `product_status` tinyint(3) DEFAULT '0' COMMENT '商品状态, 0正常  1下架',
  `category_type` int(11) DEFAULT NULL COMMENT '产品目录',
  `create_time` datetime DEFAULT NULL ON UPDATE CURRENT_TIMESTAMP,
  `update_time` datetime DEFAULT NULL ON UPDATE CURRENT_TIMESTAMP,
  PRIMARY KEY (`product_id`)
) ENGINE=InnoDB AUTO_INCREMENT=4 DEFAULT CHARSET=utf8mb4;

-- ----------------------------
-- Records of product
-- ----------------------------
INSERT INTO `product` VALUES ('1', '拿铁咖啡', '99', '20.99', '咖啡,提神醒脑', null, '0', '99', '2019-03-20 22:49:47', '2019-03-20 22:49:50');
INSERT INTO `product` VALUES ('2', '青岛纯生', '200', '7.50', '啤酒', null, '0', '98', '2019-03-20 22:50:48', '2019-03-20 22:50:55');
INSERT INTO `product` VALUES ('3', '卡布奇诺', '87', '15.00', '卡布奇诺的香味', null, '0', '99', '2019-03-20 22:51:53', '2019-03-20 22:51:56');
Product 微服务构建
新建工程作为 Eureka Client,注册到Eureka Server上
Step1. pom.xml 添加依赖
	  <dependency>
            <groupId>org.springframework.cloudgroupId>
            <artifactId>spring-cloud-starter-netflix-eureka-clientartifactId>
        dependency>

        <dependency>
            <groupId>org.springframework.bootgroupId>
            <artifactId>spring-boot-starter-webartifactId>
        dependency>
Step2 启动类增加@EnableEurekaClient注解
package com.artisan.product;

import org.springframework.boot.SpringApplication;
import org.springframework.boot.autoconfigure.SpringBootApplication;
import org.springframework.cloud.netflix.eureka.EnableEurekaClient;

@SpringBootApplication
@EnableEurekaClient
public class ArtisanProductApplication {

    public static void main(String[] args) {
        SpringApplication.run(ArtisanProductApplication.class, args);
    }

}
Step3 .启动 验证
先启动eureka-server这个服务,然后启动 artisan-product这个服务。访问eureka的地址 http://localhost:8761/
API-约定前后台数据交互格式
请求Get方式 - /product/list
返回:
{
	"code":0,
	"msg":"成功",
	"data":[
		{
			"name":"商品目录名称",
			"type":"商品目录类型",
			"product":[
				{
					"id":"商品id",
				    "name":"商品名称",
					"price": 100,
					"description":"商品描述",
					"icon":"商品图片地址"
				}
			]

		}
	]
}
[] 表示数组,可以返回多条
约定查询 只查询上架的商品。
分析上述格式,结合我们的数据模型,可知会涉及到商品目录及商品两个表。
pom.xml引入依赖
- 持久层使用 spring-data-jpa
- 数据库使用mysql
- 为了简化代码,引入了lombok (IDEA记得安装lombok插件)
	<dependency>
            <groupId>org.springframework.bootgroupId>
            <artifactId>spring-boot-starter-data-jpaartifactId>
        dependency>

        <dependency>
            <groupId>mysqlgroupId>
            <artifactId>mysql-connector-javaartifactId>
        dependency>

        <dependency>
            <groupId>org.projectlombokgroupId>
            <artifactId>lombokartifactId>
        dependency>
配置文件增加数据库配置
server:
  port: 8080

spring:
  application:
    name: artisan-product

# datasource
  datasource:
    driver-class-name: com.mysql.jdbc.Driver
    url: jdbc:mysql://localhost:3306/o2o?serverTimezone=UTC&useUnicode=true&characterEncoding=utf8&useSSL=false
    username: root
    password: root
  # jpa 输出sql
  jpa:
    show-sql: true
# Eureka
eureka:
  client:
    service-url:
      defaultZone: http://localhost:8761/eureka/
实体类 Product
库表建好了,那接下来就要建立和库表对应的实体类了
package com.artisan.product.domain;


import lombok.Data;

import javax.persistence.*;
import java.math.BigDecimal;
import java.util.Date;

// lombok
@Data

// @Table指定这个实体对应数据库的表名
// product_info ProductInfo这种格式的可以省略不写 ,如果 实体类叫product , 表名叫t_product 那么就要显式指定了
@Table(name = "product")

// @Entity表示这个类是一个实体类
@Entity
public class Product {

    // @Id标识主键 及主键生成策略
    @Id
    @GeneratedValue(strategy = GenerationType.IDENTITY)
    private String productId;

    private String productName;
    private Integer productStock;
    private BigDecimal productPrice;
    private String productDescription;
    private String productIcon;
    private Integer productStatus;
    private Integer categoryType;
    private Date createTime;
    private Date updateTime;


}
Dao层 ProductRepository
接口, 继承 JpaRepository
package com.artisan.product.repository;

import com.artisan.product.domain.Product;
import org.springframework.data.jpa.repository.JpaRepository;

import java.util.List;

/**
 * JpaRepository  第一个参数为具体的domain对象,第二个参数为主键类型
 */
public interface ProductRepository  extends JpaRepository<Product, String> {

    // 根据产品状态查询产品
    List<Product>  findByProductStatus(Integer productStatus);
}
单元测试
在ProductRepository 中 右键 – Go To --Test --Create New Test 新建个单元测试
Spring Boot的单元测试别忘了这俩注解
@RunWith(SpringRunner.class)
@SpringBootTest
或者继承ArtisanProductApplicationTests ,加上@Component注解
@Component
public class ProductCategoryServiceImplTest extends ArtisanProductApplicationTests
package com.artisan.product.repository;

import com.artisan.product.domain.Product;
import org.junit.Assert;
import org.junit.Test;
import org.junit.runner.RunWith;
import org.springframework.beans.factory.annotation.Autowired;
import org.springframework.boot.test.context.SpringBootTest;
import org.springframework.test.context.junit4.SpringRunner;

import java.util.List;

import static org.junit.Assert.*;

@RunWith(SpringRunner.class)
@SpringBootTest
public class ProductRepositoryTest {

    @Autowired
    ProductRepository productRepository;

    @Test
    public void findByProductStatus() {

       List<Product> list =  productRepository.findByProductStatus(0);

        Assert.assertEquals(3,list.size());
    }
}
实体类 ProductCategory
过程同上,这里不赘述了 ,代码如下
domain实体类
package com.artisan.product.domain;

import lombok.Data;

import javax.persistence.*;
import java.util.Date;


@Data
@Table(name = "product_category")
@Entity
public class ProductCategory {

    @Id
    @GeneratedValue(strategy = GenerationType.IDENTITY)
    private String categoryId;

    private String categoryName;
    private Integer categoryType;
    private Date createTime;
    private Date updateTime;


}
Dao接口
package com.artisan.product.repository;

import com.artisan.product.domain.ProductCategory;
import org.springframework.data.jpa.repository.JpaRepository;

import java.util.List;

public interface ProductCategoryRepository extends JpaRepository<ProductCategory, String> {


    List<ProductCategory> findByCategoryTypeIn(List<Integer> categoryTypeList);
}
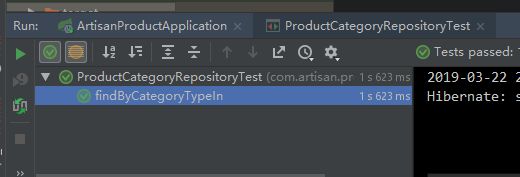
单元测试
package com.artisan.product.repository;

import com.artisan.product.domain.ProductCategory;
import com.netflix.discovery.converters.Auto;
import org.junit.Assert;
import org.junit.Test;
import org.junit.runner.RunWith;
import org.springframework.beans.factory.annotation.Autowired;
import org.springframework.boot.test.context.SpringBootTest;
import org.springframework.test.context.junit4.SpringRunner;

import java.util.Arrays;
import java.util.List;

import static org.junit.Assert.*;

@RunWith(SpringRunner.class)
@SpringBootTest
public class ProductCategoryRepositoryTest {

    @Autowired
    private ProductCategoryRepository productCategoryRepository;

    @Test
    public void findByCategoryTypeIn() {

        List<ProductCategory> list = productCategoryRepository.findByCategoryTypeIn(Arrays.asList(99, 98, 97));

        Assert.assertEquals(3,list.size());
    }
}
Service层
ProductService 接口
package com.artisan.product.service;

import com.artisan.product.domain.Product;

import java.util.List;

public interface ProductService {

    // 查询上架商品
    List<Product>   getAllUpProduct();
}
ProductService 接口实现类
package com.artisan.product.service.impl;

import com.artisan.product.domain.Product;
import com.artisan.product.enums.ProductStatusEnum;
import com.artisan.product.repository.ProductRepository;
import com.artisan.product.service.ProductService;
import org.springframework.beans.factory.annotation.Autowired;
import org.springframework.stereotype.Service;

import java.util.List;


@Service
public class ProductServiceImpl implements ProductService {

    @Autowired
    private ProductRepository productRepository;

    @Override
    public List<Product> getAllUpProduct() {
        return productRepository.findByProductStatus(ProductStatusEnum.UP.getCode());
    }
}
ProductStatusEnum
为了方便,将状态封装到了Enum中
package com.artisan.product.enums;

import lombok.Getter;

@Getter
public enum ProductStatusEnum {

    UP(0,"上架"),
    DOWN(1,"下架");

    private int code ;
    private String msg;

    ProductStatusEnum(int code, String msg){
        this.code = code;
        this.msg = msg;
    }
}
对接口进行单元测试
package com.artisan.product.service;

import com.artisan.product.ArtisanProductApplicationTests;
import com.artisan.product.domain.Product;
import com.artisan.product.enums.ProductStatusEnum;
import com.artisan.product.repository.ProductRepository;
import org.junit.Assert;
import org.junit.Test;
import org.springframework.beans.factory.annotation.Autowired;
import org.springframework.stereotype.Component;

import java.util.List;

import static org.junit.Assert.*;


@Component
public class ProductServiceTest extends ArtisanProductApplicationTests {

    @Autowired
    private ProductRepository productRepository;

    @Test
    public void getAllUpProduct() {
        List<Product> list =  productRepository.findByProductStatus(ProductStatusEnum.UP.getCode());
        Assert.assertEquals(3,list.size());
    }
}
ProductCategoryService 接口
package com.artisan.product.service;

import com.artisan.product.domain.ProductCategory;

import java.util.List;

public interface ProductCategoryService {

    List<ProductCategory> findByCategoryTypeIn(List<Integer> categoryTypeList);
}
ProductCategoryService 接口实现类
package com.artisan.product.service.impl;

import com.artisan.product.domain.ProductCategory;
import com.artisan.product.repository.ProductCategoryRepository;
import com.artisan.product.service.ProductCategoryService;
import org.springframework.beans.factory.annotation.Autowired;
import org.springframework.stereotype.Service;

import java.util.List;

@Service
public class ProductCategoryServiceImpl implements ProductCategoryService {


    @Autowired
    private ProductCategoryRepository productCategoryRepository;

    @Override
    public List<ProductCategory> findByCategoryTypeIn(List<Integer> categoryTypeList) {
        return productCategoryRepository.findByCategoryTypeIn(categoryTypeList);
    }

}
单元测试
package com.artisan.product.service.impl;

import com.artisan.product.ArtisanProductApplicationTests;
import com.artisan.product.domain.ProductCategory;
import com.artisan.product.repository.ProductCategoryRepository;
import org.junit.Assert;
import org.junit.Test;
import org.springframework.beans.factory.annotation.Autowired;
import org.springframework.stereotype.Component;

import java.util.Arrays;
import java.util.List;

import static org.junit.Assert.*;

@Component
public class ProductCategoryServiceImplTest extends ArtisanProductApplicationTests {

    @Autowired
    private ProductCategoryRepository productCategoryRepository;

    @Test
    public void findByCategoryTypeIn() {

       List<ProductCategory> list =  productCategoryRepository.findByCategoryTypeIn(Arrays.asList(99,98,97));
        Assert.assertEquals(3,list.size());

    }
}
Controller层
先来观察下,返回给前端的数据
code , msg , 泛型的data 是最外层的数据,那封装下吧 。 可以理解为也是一个VO(View Object)对象,包含3个节点(code msg 泛型的data)
同时data节点 [] ,自然是个数组了,可包含多个{}对象。
为了避免引起误解,我们把 ![]() 改为products .
改为products .
VO封装
ResultVO 前后台交互的统一格式模板
package com.artisan.product.vo;

import lombok.Getter;

@Getter
public class Result<T> {

    private Integer code ;
    private String msg ;
    private T data;

    /**
     * 成功时候的调用
     * */
    public static <T> Result<T> success(T data){
        return new  Result<T>(data);
    }


    private Result(T data) {
        this.code = 0;
        this.msg = "success";
        this.data = data;
    }


    /**
     * 失败时候的调用
     * */
    public static <T> Result<T> error(ErrorCodeMsg cm){
        return new  Result<T>(cm);
    }


    private Result(ErrorCodeMsg cm) {
        if(cm == null) {
            return;
        }
        this.code = cm.getCode();
        this.msg = cm.getMsg();
    }
}
用到了 ErrorCodeMsg
package com.artisan.product.vo;

import lombok.Getter;

@Getter
public class ErrorCodeMsg {

    private int code;
    private String msg;

    // 异常
    public static ErrorCodeMsg SERVER_ERROR = new ErrorCodeMsg(-1, "服务端异常");


    private ErrorCodeMsg(int code, String msg) {
        this.code = code;
        this.msg = msg;
    }

}
ProductVO :返回给前台的商品信息格式,包含目录信息
package com.artisan.product.vo;

import com.fasterxml.jackson.annotation.JsonProperty;
import lombok.Data;

import java.util.List;

@Data
public class ProductVO {

    //  @JsonProperty注解用于属性上,作用是把该属性的名称序列化为另外一个名称,
    // 如把categoryName属性序列化为name
    // 【这里约定给前台返回的节点名为name, 但是为了方便理解这个name到底是什么的name,在vo中定义了方便理解的属性名】
    @JsonProperty("name")
    private String categoryName;

    @JsonProperty("type")
    private Integer categoryType;

    // 因为这个节点下可能返回多个ProductInfoVO,因此定义一个List集合
    @JsonProperty("products")
    private List<ProductInfoVO> productInfoVOList ;

}
ProductInfoVO 具体产品的数据VO
package com.artisan.product.vo;

import com.fasterxml.jackson.annotation.JsonProperty;
import lombok.Data;

import java.math.BigDecimal;

@Data
public class ProductInfoVO {

    @JsonProperty("id")
    private String productId;

    @JsonProperty("name")
    private String productName;

    @JsonProperty("price")
    private BigDecimal productPrice;

    @JsonProperty("description")
    private String productDescription;

    @JsonProperty("icon")
    private String productIcon;
}
Controller层逻辑
分析约定的前后台交互的JSON格式:
- 每个ProductVO中我们需要获取产品目录名称及产品目录的category_type ,
调用ProductCategoryService#categoryService方法即可。 - categoryService的入参为categoryTypeList,因此需要调用
ProductService#getAllUpProduct获取所有上架商品对应的categoryType. - 获取到了后台的数据后,按照约定的格式拼装返回JSON串即可
package com.artisan.product.controller;

import com.artisan.product.domain.Product;
import com.artisan.product.domain.ProductCategory;
import com.artisan.product.service.ProductCategoryService;
import com.artisan.product.service.ProductService;
import com.artisan.product.vo.ProductInfoVO;
import com.artisan.product.vo.ProductVO;
import com.artisan.product.vo.Result;
import org.springframework.beans.BeanUtils;
import org.springframework.beans.factory.annotation.Autowired;
import org.springframework.web.bind.annotation.GetMapping;
import org.springframework.web.bind.annotation.RequestMapping;
import org.springframework.web.bind.annotation.RestController;

import java.util.ArrayList;
import java.util.List;
import java.util.stream.Collectors;

@RestController
@RequestMapping("/product")
public class ProductController {

    @Autowired
    private ProductService productService;

    @Autowired
    private ProductCategoryService categoryService;


    @GetMapping("/list")
    private Result list() {

        //1. 查询所有在架的商品
        List<Product> productInfoList = productService.getAllUpProduct();

        //2. 获取类目type列表
        List<Integer> categoryTypeList = productInfoList.stream()
                .map(Product::getCategoryType)
                .collect(Collectors.toList());

        //3. 从数据库查询类目
        List<ProductCategory> categoryList = categoryService.findByCategoryTypeIn(categoryTypeList);

        //4. 构造数据
        List<ProductVO> productVOList = new ArrayList<>();
        for (ProductCategory productCategory : categoryList) {
            ProductVO productVO = new ProductVO();
            // 设置属性
            productVO.setCategoryName(productCategory.getCategoryName());
            productVO.setCategoryType(productCategory.getCategoryType());

            // ProductInfoVO 集合
            List<ProductInfoVO> productInfoVOList = new ArrayList<>();
            for (Product product : productInfoList) {
                // 挂到对应的的categoryType下
                if (product.getCategoryType().equals(productCategory.getCategoryType())) {
                    ProductInfoVO productInfoVO = new ProductInfoVO();
                    // 将属性copy到productInfoVO,避免逐个属性set,更简洁
                    BeanUtils.copyProperties(product, productInfoVO);
                    productInfoVOList.add(productInfoVO);
                }
            }
            productVO.setProductInfoVOList(productInfoVOList);
            productVOList.add(productVO);
        }

        return Result.success(productVOList);
    }

}
启动测试
访问 http://localhost:8080/product/list
{
    "code": 0,
    "msg": "success",
    "data": [
        {
            "name": "热饮",
            "type": 99,
            "products": [
                {
                    "id": "1",
                    "name": "拿铁咖啡",
                    "price": 20.99,
                    "description": "咖啡,提神醒脑",
                    "icon": null
                },
                {
                    "id": "3",
                    "name": "卡布奇诺",
                    "price": 15,
                    "description": "卡布奇诺的香味",
                    "icon": null
                }
            ]
        },
        {
            "name": "酒水",
            "type": 98,
            "products": [
                {
                    "id": "2",
                    "name": "青岛纯生",
                    "price": 7.5,
                    "description": "啤酒",
                    "icon": null
                }
            ]
        }
    ]
}
知识点总结
Java8的Stream
 //2. 获取类目type列表
 List<Integer> categoryTypeList = productInfoList.stream()
         .map(Product::getCategoryType)
         .collect(Collectors.toList());
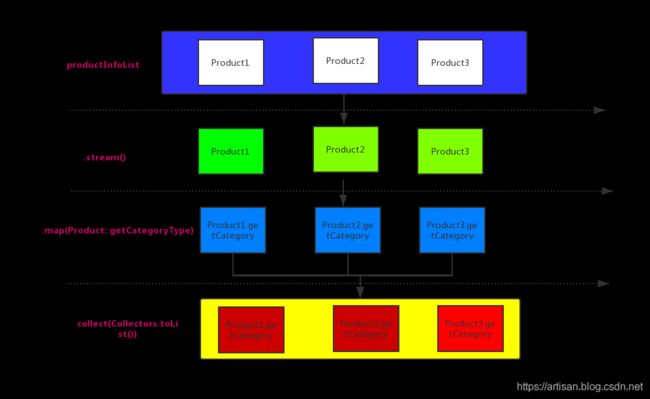
使用Java8中的Stream可以方便的对集合对象进行各种便利、高效的聚合操作,或者大批量数据操作。
map生成的是个一对一映射,相当于for循环
注意:流只能使用一次,使用结束之后,这个流就无法使用了。
点击查看更多示例
Beanutils.copyProperties( )
  // 将属性copy到productInfoVO,避免逐个属性set,更简洁
  BeanUtils.copyProperties(product, productInfoVO);
org.springframework.beans.BeanUtils# copyProperties作用是将一个Bean对象中的数据封装到另一个属性结构相似的Bean对象中。
同时org.apache.commons.beanutils.BeanUtils也有个copyProperties
需要注意的是这俩的copyProperties方法参数位置不同
 org.springframework.beans.BeanUtils#copyProperties(sourceDemo, targetDemo)

 org.apache.commons.beanutils.BeanUtils#copyProperties(targetDemo, sourceDemo)
Github地址
https://github.com/yangshangwei/springcloud-o2o/tree/master/artisan-product
