3. Vue入门实战教程之vue-element-admin初体验
Vue入门实战教程之vue-element-admin初体验
-
- 1.1 写在前面的话
- 1.2 vue-element-admin 后台管理框架
-
- 1.2.1 开发环境搭建
-
- 1.2.1.1 关于node 版本选择和安装
- 1.2.1.2 Git
- 1.2.2 下载代码
- 1.2.3 跑起来
- 1.2.4 体验它
- 1.2.5 分析它
-
- 1.2.5.1 项目目录结构
- 1.2.6 Q & A
-
- 1.2.6.1 网络请求封装
- 1.2.6.2 如何取消Mock 数据?
- 1.2.6.3 如何解决跨域问题?
-
- 1.2.6.3.1 理解的官方解决方案
- 1.2.6.3.2 我的解决方案
- 1.2.6.4 如何打包部署到生产环境?
1.1 写在前面的话
其实作为后端开发,我们本不该花费过多精力去研究Vue。
但是如果去的不是大厂,而是初创公司,那么对于研发的职责并没有那么清晰的边界,我们除了开发后台相关的业务逻辑之外,还需要一个强大的后台管理框架来支撑我们的梦想。
尽管网上有大量的基于Jquery 和BootStrap 的框架供我们后端拿来使用,博主之前也是使用H+ ,H-ui-Admin 等开源后台管理框架,但是当在我试用了Vue的数据双向绑定之后,感觉真香。
于是博主决定尝试学习新技术,寻找一个更为强大的基于Vue 的后台管理框架。
1.2 vue-element-admin 后台管理框架
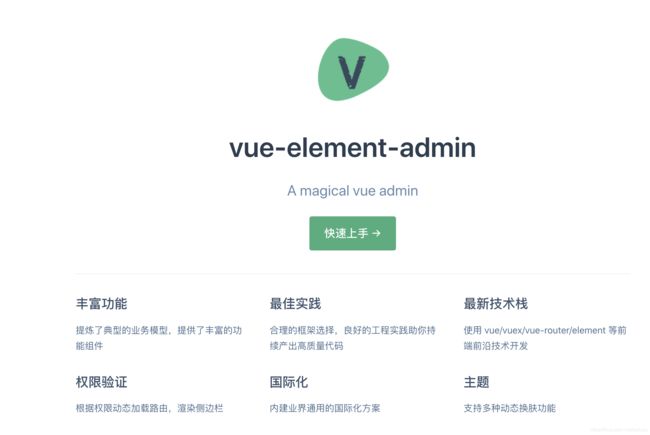
后来我在一个前端好朋友那里淘到了这款神器级的后台管理UI框架——vue-element-admin.
这个框架好处在于功能相当强大的同时,基本上把vue 2.x 目前最先进的各种技术都应用的淋漓尽致。
国外用户可访问:https://panjiachen.github.io/vue-element-admin/#/dashboard。
国内用户可访问:https://panjiachen.gitee.io/vue-element-admin/#/dashboard
如果你不知道怎么使用它的话,它也提供了非常完善的中文文档和英文文档。
GitHub首页地址:https://github.com/PanJiaChen/vue-element-admin
如果你是第一次上手vue的话可以看下之前的两篇博文:
- 1. Vue入门实战教程之vue初体验
- 2. Vue入门实战教程之实例生命周期
1.2.1 开发环境搭建
好了废话不多说,我们先来搭建下开发环境。
我们首先需要在本地安装 node 和 git。
由于本项目技术栈基于
ES2015+、vue、vuex、vue-router、vue-cli、axios和element-ui,所有的请求数据都使用Mock.js进行模拟,因此提前了解和学习这些知识会对使用本项目有很大的帮助。
1.2.1.1 关于node 版本选择和安装
当我们打开node 官网,可以看到有两个版本可供选择,这里建议选择长期支持版本:
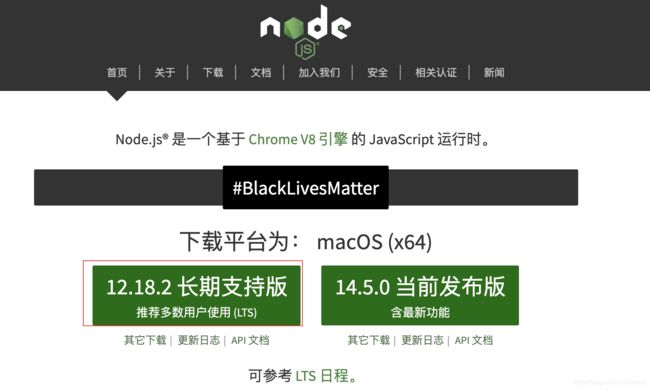
博主的电脑是Mac OSX ,因此这里显示的是macOS 版本,如果你的电脑是Windows ,这里应该显示的是Windows.
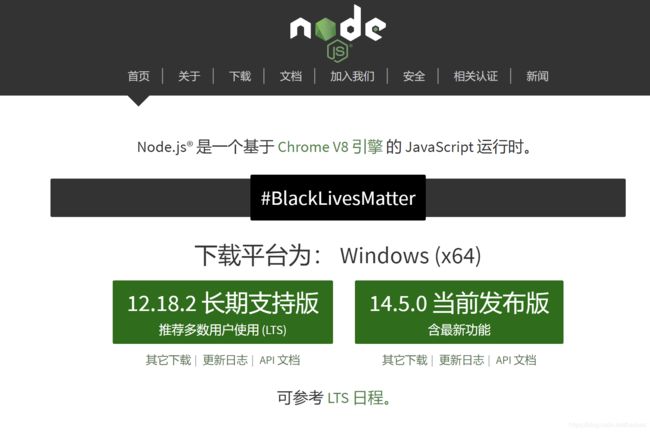
总之不管你的电脑是什么平台,选择适合自己操作系统的版本进行安装node.js 即可。
Node.js 的本质是一个JS 运行库。
值的注意的是当安装Node.js 时会自动安装npm 包管理器。
nnm 是JS 依赖包管理器,类似Mac OSX 下的HomeBrew, Centos 7 下的yum 包管理器。
至于安装步骤没什么可说的,基本上都是一步一步下一步,完成即可。
1.2.1.2 Git
其次我们还需要一个版本控制管理工具,用于下载和管理我们的项目,当然这不是这个项目使用的必要条件,但是最好安装。
git 官网: https://git-scm.com/
如果你对git不是很了解,建议阅读我在云栖社区写的一篇入门学习教程:版本控制之Git 修炼手册
关于如何代码入库配置git ,可以阅读博主的另外一篇博文:阿里云Code SSH KEY 代码入库
1.2.2 下载代码
- 克隆项目
git clone https://github.com/PanJiaChen/vue-element-admin.git
1.2.3 跑起来
接下来我们将这个框架启动起来,方法也很简单。
- 首先我们通过如下命令进入项目目录
cd vue-element-admin
- 临时使用国内淘宝镜像下载相关依赖,可解决国内下载速度缓慢问题
npm install --registry=https://registry.npm.taobao.org
- 安装依赖
npm installTips:有了上面命令,这条命令可以省略。
- 本地开发启动项目
npm run dev
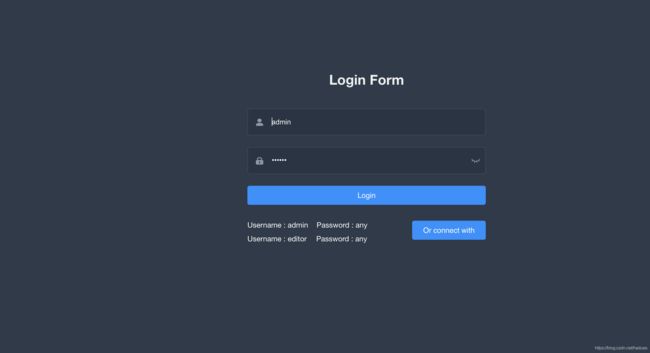
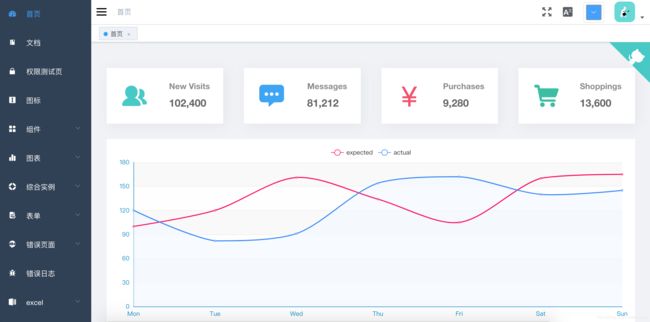
1.2.4 体验它
1.2.5 分析它
接下来我们一起来看看它的目录结构,了解每个文件夹是做什么用的,方便我们后续二次开发。
1.2.5.1 项目目录结构
首先用自己最喜欢的前端开发IDE Visual Code 或者 WebStorm 导入或打开这个项目。
PS: 这里博主更喜欢Jetbrain 家的 WebStrom 。
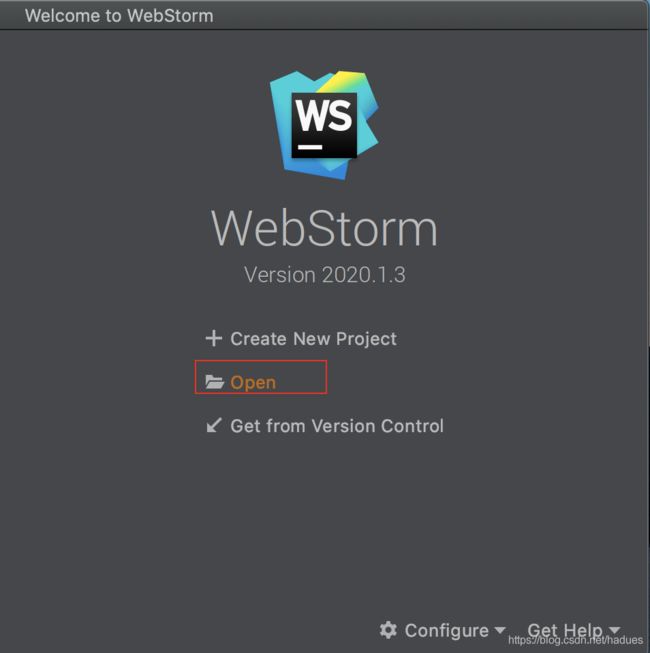
点击open ,浏览找到我们刚才下载好的项目文件夹后选择打开。
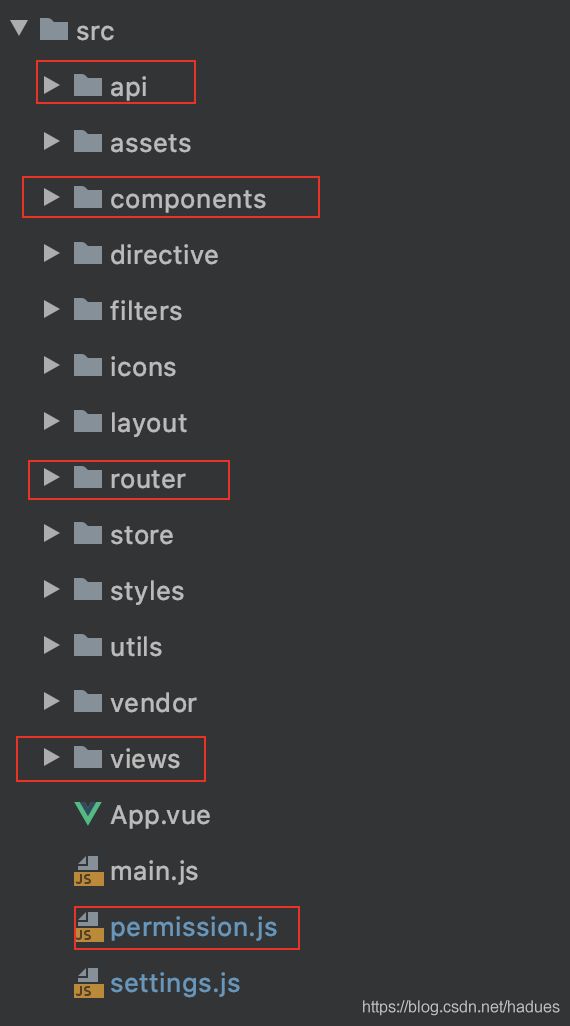
这样导入成功后可以看到类似如下的目录结构:
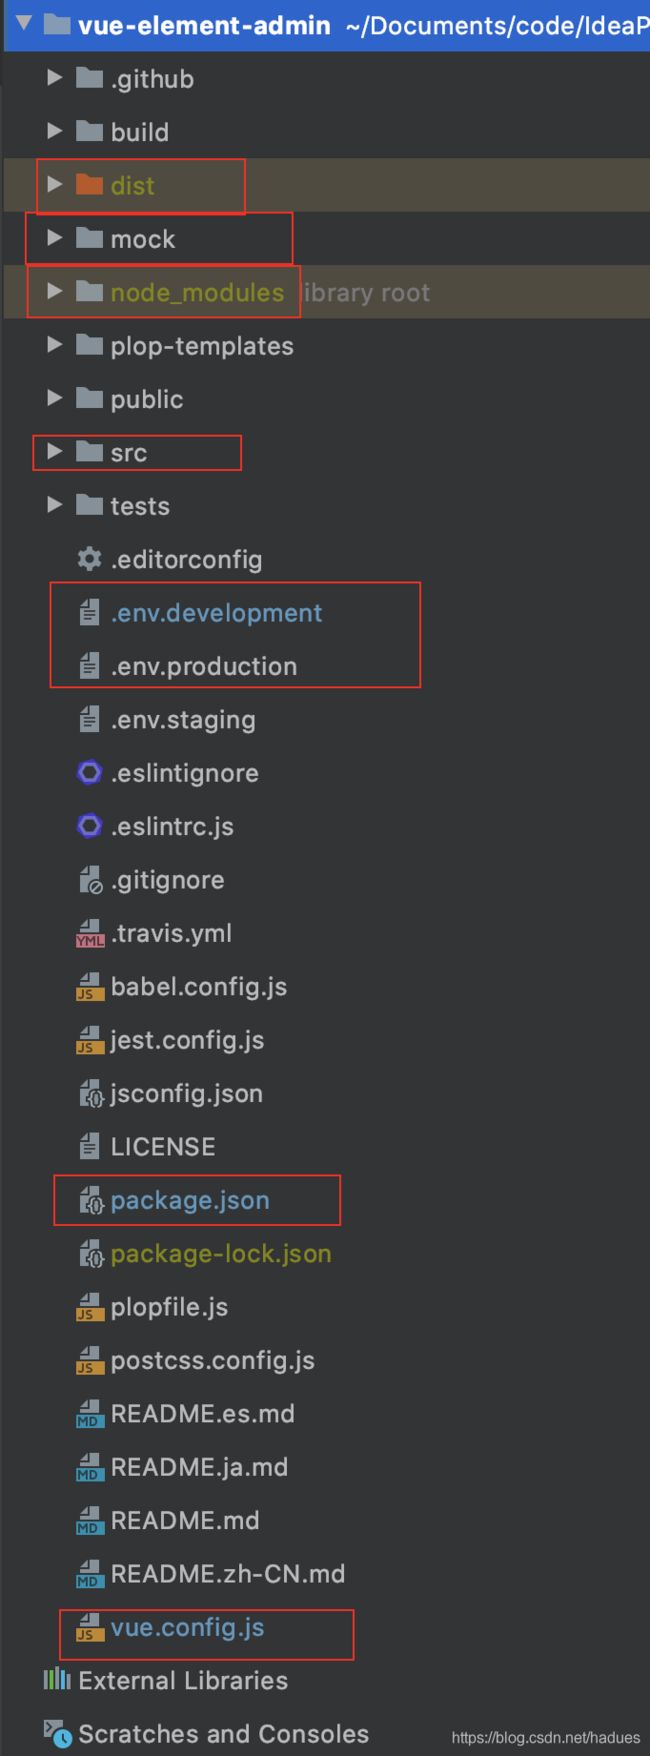
这几个目录的重要含义如下所示:
dist: 构建完成后发布到生产环境的时候复制这个文件夹下的文件即可,html 和JS 默认会混合压缩打包到这个文件夹下。mock: 模拟后端返回结果请求的API,相当于前端自己写的一个伪后台,提供API请求结果。node_modules: 依赖类库,相当于我们后端的dependencies 下依赖的各种类库。src: 我们开发代码的主要目录- 环境配置文件
.env.development:配置开发环境的相关配置包括请求后台的API 基地址,类似后端的application-dev.yml.env.production:配置生产环境的相关配置包括请求后台的API 基地址application-prod.ymlvue.config.js: 配置后台请求基地址和请求代理的地方,因为静态页面和后端代码分离了,涉及到跨域。package.json: 可以理解成我们后端的pom.xml ,这里还可以配置JS脚本配置,用来简化执行命令。比如刚才启动使用的npm run dev等价于npm run vue-cli-service serve
接下来我们看下src 目录下的结构
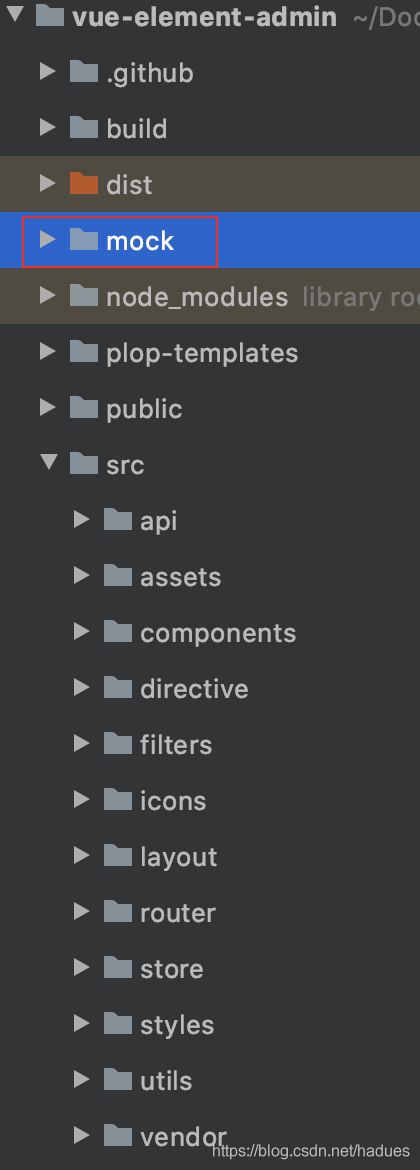
这几个目录的用途如下:
api: 前端写Ajax 请求后端API 的地方,这种思想特别好,API与代码分离,管理和复用API就变得方便多了。components: 可以复用的前端组件,比如分页,markdown 之类的组件,一般是和业务无关的公用组件。router:路由, 简单来讲就是页面的跳转不再是后端在Controller中通过thymeleaf 控制而是前端自己配置怎么跳转。views:写前端HTML5页面的地方permission.js:由于前后端分离,前端需要自己控制权限拦截。比如登陆页面不拦截,其他页面需要登陆才可以访问
除此之外,还可以发现在项目目录下还有一个叫做mock 的文件夹,这个文件夹下存放的是前端模拟后端返回数据的库。
这样一个好处是当后端API还没有写好的时候,前端可以先用假数据进行开发和调整样式。
1.2.6 Q & A
上面我们提到这个框架 mock 了一些假的数据,但是到了我们Java后端开发这里,肯定需要自己应该实现这些API。
1.2.6.1 网络请求封装
但是在开始将mock的假数据替换为真的接口之前,我们需要先了解这个框架是如何进行网络请求的。
vue-element-admin 为所有的接口请求复用了一个工具类,该文件存在于src/utils/request.js中。
打开后我们可以看到如下内容:
import axios from 'axios'
import {
      MessageBox, Message } from 'element-ui'
import store from '@/store'
import {
      getToken } from '@/utils/auth'

// 创建axios实例
const service = axios.create({

  // api的base_url
  baseURL: process.env.VUE_APP_BASE_API, // url = base url + request url
  // withCredentials: true, // send cookies when cross-domain requests
  // 请求超时时间
  timeout: 5000 // request timeout
})

// request拦截器
service.interceptors.request.use(
  config => {

    // do something before request is sent
    if (store.getters.token) {

      //  让每个请求携带token--['X-Token']为自定义key 请根据实际情况自行修改
      // let each request carry token
      // ['X-Token'] is a custom headers key
      // please modify it according to the actual situation
      config.headers['X-Token'] = getToken()
    }
    return config
  },
  error => {

    // do something with request error
    console.log(error) // for debug
    return Promise.reject(error)
  }
)

// response 拦截器
service.interceptors.response.use(
  /**
   * If you want to get http information such as headers or status
   * Please return  response => response
  */

  /**
   * Determine the request status by custom code
   * Here is just an example
   * You can also judge the status by HTTP Status Code
   */
  response => {

    const res = response.data

    // if the custom code is not 20000, it is judged as an error.
    if (res.code !== 20000) {

      Message({

        message: res.message || 'Error',
        type: 'error',
        duration: 5 * 1000
      })
      // 50008: Illegal token; 50012: Other clients logged in; 50014: Token expired;
      if (res.code === 50008 || res.code === 50012 || res.code === 50014) {

        // to re-login
        MessageBox.confirm('你已被登出,可以取消继续留在该页面,或者重新登录', '确定登出', {

          confirmButtonText: '重新登陆',
          cancelButtonText: '取消',
          type: 'warning'
        }).then(() => {

          store.dispatch('user/resetToken').then(() => {

            // 为了重新实例化vue-router对象 避免bug
            location.reload()
          })
        })
      }
      return Promise.reject(new Error(res.message || 'Error'))
    } else {

      return res
    }
  },
  error => {

    console.log('err' + error) // for debug
    Message({

      message: error.message,
      type: 'error',
      duration: 5 * 1000
    })
    return Promise.reject(error)
  }
)

export default service
我们可以从这个类中得到什么有用的信息呢?
- 第一点,通用的接口数据返回结构规范
code: 后端返回的响应码message: 后端返回的消息data: 后端返回的存放实际的数据
因此我们可以为其设计封装一个Java 实体类
import lombok.Data;
import org.springframework.stereotype.Component;

import java.io.Serializable;

/**
 * vue-element-admin 框架统一返回结果
 * @author qing-feng.zhao
 */
@Component
@Data
public class VueElementAdminResponse implements Serializable {

    private static final long serialVersionUID = -8668034013803393986L;
    private Integer code;
    private String message;
    private Object data;
}
这里使用了lombok,如果不懂用法的请看我的另外一篇博文: 3.Spring Boot 2.x 最佳实践之 lombok集成
- 第二点:关于响应码的需要遵守的约定
我们从这个js文件中还可以看出,如果响应码是20000 那么响应成功
如果响应结果是50008,50012,50014 那么表示登陆凭据失效需要重新登陆。
至于其他code 我们可以和前端约定好即可。
- 第三点: 权限认证
我们知道有些接口比如登陆注销是可以直接访问的,但是其他接口是必须进行权限验证后才可以访问。
但是现在由于大多数都是前后端分离,项目可能分别部署在不同的服务器上,因此我们要么使用分布式session 解决方案,要么使用JWT (Java web token, 基于 token)的解决方案。
这个框架默认使用了基于token的解决方案。
因此它的做法是在除了登陆,注销,首页之外的所有请求的header中添加了 X-Token 字段存放token.
如果我们想要配置有些路径不被拦截,该怎么做呢?
这就涉及到vue中的路由概念,所谓路由也就是说前端自己来控制页面的跳转而不是我们在后端 Controller 中来控制。
我们可以打开src/router/index.js 一探究竟
import Vue from 'vue'
import Router from 'vue-router'
/* Layout */
import Layout from '@/layout'
/* Router Modules */
import mallRouter from "@/router/modules/mall";
import advertRouter from "@/router/modules/advert";
import videoRouter from "@/router/modules/video";
import matchRouter from "@/router/modules/match";
import userRouter from "@/router/modules/user";
import profileRouter from "@/router/modules/profile";
import certificateConfigRouter from "@/router/modules/certificate-config";
import customerRouter from "@/router/modules/customer";
import documentRouter from "@/router/modules/documentation";
import componentsRouter from "@/router/modules/components";
import tableRouter from "@/router/modules/table";
import exampleRouter from "@/router/modules/example";

Vue.use(Router)

/**
 * Note: sub-menu only appear when route children.length >= 1
 * Detail see: https://panjiachen.github.io/vue-element-admin-site/guide/essentials/router-and-nav.html
 *
 * hidden: true                   if set true, item will not show in the sidebar(default is false)
 * alwaysShow: true               if set true, will always show the root menu
 *                                if not set alwaysShow, when item has more than one children route,
 *                                it will becomes nested mode, otherwise not show the root menu
 * redirect: noRedirect           if set noRedirect will no redirect in the breadcrumb
 * name:'router-name'             the name is used by  (must set!!!)
 * meta : {
    roles: ['admin','editor']    control the page roles (you can set multiple roles)
    title: 'title'               the name show in sidebar and breadcrumb (recommend set)
    icon: 'svg-name'/'el-icon-x' the icon show in the sidebar
    noCache: true                if set true, the page will no be cached(default is false)
    affix: true                  if set true, the tag will affix in the tags-view
    breadcrumb: false            if set false, the item will hidden in breadcrumb(default is true)
    activeMenu: '/example/list'  if set path, the sidebar will highlight the path you set
  }
 */

/**
 * constantRoutes
 * a base page that does not have permission requirements
 * all roles can be accessed
 * 所有权限通用路由表
 * 如首页和登录页和一些不用权限的公用页面
 */
export const constantRoutes = [
  {

    path: '/redirect',
    component: Layout,
    hidden: true,
    children: [
      {

        path: '/redirect/:path(.*)',
        component: () => import('@/views/redirect/index')
      }
    ]
  },
  {

    path: '/login',
    component: () => import('@/views/login/index'),
    hidden: true
  },
  {

    path: '/auth-redirect',
    component: () => import('@/views/login/auth-redirect'),
    hidden: true
  },
  {

    path: '/404',
    component: () => import('@/views/error-page/404'),
    hidden: true
  },
  {

    path: '/401',
    component: () => import('@/views/error-page/401'),
    hidden: true
  },
  {

    path: '/',
    component: Layout,
    redirect: '/dashboard',
    children: [
      {

        path: 'dashboard',
        component: () => import('@/views/dashboard/index'),
        name: 'Dashboard',
        meta: {
      title: '仪表盘', icon: 'dashboard', affix: true }
      }
    ]
  },
  profileRouter,
  documentRouter,
  //guideRouter,
]

/**
 * asyncRoutes
 * the routes that need to be dynamically loaded based on user roles
 * 异步挂载的路由
 * 动态需要根据权限加载的路由表
 */
export const asyncRoutes = [
  //permissionRouter,
  /** when your routing map is too long, you can split it into small modules **/
  iconRouter,
  componentsRouter,
  chartsRouter,
  nestedRouter,
  tableRouter,
  exampleRouter,
  tableRouter,
  errorRouter,
  errorLogRouter,
  excelRouter,
  zipRouter,
  pdfRouter,
  pdfDownloadRouter,
  themeRouter,
  clipboardRouter,
  externalLinkRouter,
  // 404 page must be placed at the end !!!
  //里有一个需要非常注意的地方就是 404 页面一定要最后加载,如果放在constantRouterMap一同声明了404,后面的所以页面都会被拦截到404
  {
      path: '*', redirect: '/404', hidden: true }
]

// 实例化vue的时候只挂载constantRouter
const createRouter = () => new Router({

  // mode: 'history', // require service support
  scrollBehavior: () => ({
      y: 0 }),
  routes: constantRoutes
})

const router = createRouter()

// Detail see: https://github.com/vuejs/vue-router/issues/1234#issuecomment-357941465
export function resetRouter() {

  const newRouter = createRouter()
  router.matcher = newRouter.matcher // reset router
}

export default router
这里我稍微做了优化,将所有配置比葫芦画瓢抽离到了不同的文件中,这个不难,自己观察下你会懂得。
如果拦截到浏览器访问是/login 将访问 src/views/login/index 下的页面。
其次,通过这个路由配置中我们可以看到,凡是匹配到 /login,/auth-redirect,/401,/404 ,/ 这几个路径都不会权限拦截。
其他的所有请求都需要后端验证下token,来判断接口是否有权限进行访问。
那么后台当拦截到/login 请求的时候,我们应该返回什么数据返回给vue-element-admin呢?
我们先来看下假数据,打开mock 文件夹可以找到 user.js 文件
我们可以看到这个假的API 提供的假数据如下所示:
之所以说是假接口假数据,这是因为这里写的接口都是没有和数据库进行真实交互的。
我们接下来将使用Java操作数据库来接管这一切。
const tokens = {

  admin: {

    token: 'admin-token'
  },
  editor: {

    token: 'editor-token'
  }
}

const users = {

  'admin-token': {

    roles: ['admin'],
    introduction: 'I am a super administrator',
    avatar: 'https://wpimg.wallstcn.com/f778738c-e4f8-4870-b634-56703b4acafe.gif',
    name: 'Super Admin'
  },
  'editor-token': {

    roles: ['editor'],
    introduction: 'I am an editor',
    avatar: 'https://wpimg.wallstcn.com/f778738c-e4f8-4870-b634-56703b4acafe.gif',
    name: 'Normal Editor'
  }
}

module.exports = [
  // user login
  {

    url: '/vue-element-admin/user/login',
    type: 'post',
    response: config => {

      const {
      username } = config.body
      const token = tokens[username]

      // mock error
      if (!token) {

        return {

          code: 60204,
          message: 'Account and password are incorrect.'
        }
      }

      return {

        code: 20000,
        data: token
      }
    }
  },

  // get user info
  {

    url: '/vue-element-admin/user/info\.*',
    type: 'get',
    response: config => {

      const {
      token } = config.query
      const info = users[token]

      // mock error
      if (!info) {

        return {

          code: 50008,
          message: 'Login failed, unable to get user details.'
        }
      }

      return {

        code: 20000,
        data: info
      }
    }
  },

  // user logout
  {

    url: '/vue-element-admin/user/logout',
    type: 'post',
    response: _ => {

      return {

        code: 20000,
        data: 'success'
      }
    }
  }
]
也就是说当我们打开登陆界面,输入账号和密码点击登陆按钮的时候会触发这个请求
http://localhost:9527/vue-element-admin/user/login
如果token 和数据库比对后不正确,那么需要返回
{

code: 50008,
message: 'Login failed, unable to get user details.'
data:null
}
如果登陆成功返回
{

code: 20000,
message:null,
data: info
}
这里先简单提供一个后端登陆接口示例:
    @ApiOperation(value = "登陆接口")
    @PostMapping(value = "/vue-element-admin/user/login")
    public VueElementAdminResponse loginAdmin(@RequestBody VueElementAdminUserLogin vueElementAdminUserLogin){

        this.vueElementAdminUserService.initVueElementAdmin();
        log.info("登录请求参数:{}",vueElementAdminUserLogin);
        //处理请求参数

        vueElementAdminUserLogin.setUsername(SmartStringUtils.trimToNull(vueElementAdminUserLogin.getUsername()));
        vueElementAdminUserLogin.setPassword(SmartStringUtils.trimToNull(vueElementAdminUserLogin.getPassword()));
        if(StringUtils.isEmpty(vueElementAdminUserLogin.getUsername())){

            this.vueElementAdminResponse.setCode(20001);
            this.vueElementAdminResponse.setMessage("登录账号不可为空");
            this.vueElementAdminResponse.setData(null);
        }
        if(StringUtils.isEmpty(vueElementAdminUserLogin.getPassword())){

            this.vueElementAdminResponse.setCode(20001);
            this.vueElementAdminResponse.setMessage("登录密码不可为空");
            this.vueElementAdminResponse.setData(null);
        }
        Optional<VueElementAdminUserEntity> vueElementAdminUserEntityOptional=this.vueElementAdminUserService.loginVueElementAdmin(vueElementAdminUserLogin);
        if(vueElementAdminUserEntityOptional.isPresent()){

            //生成Token
            String token=SmartStringUtils.getUuid();
            //更新Token
            VueElementAdminUserEntity vueElementAdminUserEntity=vueElementAdminUserEntityOptional.get();
            vueElementAdminUserEntity.setToken(token);
            this.vueElementAdminUserService.saveVueElementAdminUser(vueElementAdminUserEntity);

            //返回结果
            Map<String,Object> resultMap=new HashMap<>(1);
            resultMap.put("token",token);
            log.info("请求成功:{}",resultMap);
            this.vueElementAdminResponse.setMessage("登录成功");
            this.vueElementAdminResponse.setCode(20000);
            this.vueElementAdminResponse.setData(resultMap);
        }else{

            this.vueElementAdminResponse.setCode(60204);
            this.vueElementAdminResponse.setMessage("Account and password are incorrect.");
            this.vueElementAdminResponse.setData(null);
        }
        return this.vueElementAdminResponse;
    }
- 点击查看源文件
- 点击查看 vue-element-admin-java-api
- 关于这一部分的更详细设计开发,下篇博文我们会详细讲解java后台如何开发开发接口适配这个
vue-element-admin.
然后前端在哪里处理的这部分响应呢?打开src/permission.js 可以找到答案。
import router from './router'
import store from './store'
import {
      Message } from 'element-ui'
import NProgress from 'nprogress' // progress bar
import 'nprogress/nprogress.css' // progress bar style
import {
      getToken } from '@/utils/auth' // get token from cookie
import getPageTitle from '@/utils/get-page-title'

NProgress.configure({
      showSpinner: false }) // NProgress Configuration

const whiteList = ['/login', '/auth-redirect'] // no redirect whitelist

router.beforeEach(async(to, from, next) => {

  // start progress bar
  NProgress.start()

  // set page title
  document.title = getPageTitle(to.meta.title)

  // determine whether the user has logged in
  const hasToken = getToken()

  if (hasToken) {

    if (to.path === '/login') {

      // if is logged in, redirect to the home page
      next({
      path: '/' })
      NProgress.done() // hack: https://github.com/PanJiaChen/vue-element-admin/pull/2939
    } else {

      // determine whether the user has obtained his permission roles through getInfo
      const hasRoles = store.getters.roles && store.getters.roles.length > 0
      if (hasRoles) {

        next()
      } else {

        try {

          // get user info
          // note: roles must be a object array! such as: ['admin'] or ,['developer','editor']
          const {
      roles } = await store.dispatch('user/getInfo')

          // generate accessible routes map based on roles
          const accessRoutes = await store.dispatch('permission/generateRoutes', roles)

          // dynamically add accessible routes
          router.addRoutes(accessRoutes)

          // hack method to ensure that addRoutes is complete
          // set the replace: true, so the navigation will not leave a history record
          next({
      ...to, replace: true })
        } catch (error) {

          // remove token and go to login page to re-login
          await store.dispatch('user/resetToken')
          Message.error(error || 'Has Error')
          next(`/login?redirect=${
       to.path}`)
          NProgress.done()
        }
      }
    }
  } else {

    /* has no token*/

    if (whiteList.indexOf(to.path) !== -1) {

      // in the free login whitelist, go directly
      next()
    } else {

      // other pages that do not have permission to access are redirected to the login page.
      next(`/login?redirect=${
       to.path}`)
      NProgress.done()
    }
  }
})

router.afterEach(() => {

  // finish progress bar
  NProgress.done()
})
1.2.6.2 如何取消Mock 数据?
我们前面提到,凡是请求http://localhost:9527/dev-api 的所有请求都会被mock 框架所拦截。
那么针对这个框架如何取消(解开封印)默认的Mock 假数据呢?
然后我们需要打开一个叫做vue.config.js 的文件,找到第39行before: require('./mock/mock-server.js')注释掉
如下所示:
module.exports = {

  /**
   * You will need to set publicPath if you plan to deploy your site under a sub path,
   * for example GitHub Pages. If you plan to deploy your site to https://foo.github.io/bar/,
   * then publicPath should be set to "/bar/".
   * In most cases please use '/' !!!
   * Detail: https://cli.vuejs.org/config/#publicpath
   */
  publicPath: '/',
  outputDir: 'dist',
  assetsDir: 'static',
  lintOnSave: process.env.NODE_ENV === 'development',
  productionSourceMap: false,
  devServer: {

    port: port,
    open: true,
    overlay: {

      warnings: false,
      errors: true
    },
    //before: require('./mock/mock-server.js')
  },
这句话代码很简单,意味着当调用所有请求之前,调用这个mock-server 里面的接口提供的假数据。
我们把它注释到就可以了。
1.2.6.3 如何解决跨域问题?
然后接下来我们将会遇到一个新的问题:
首先,我们知道通过在这个框架的根目录执行npm run dev 可以在本地启动一个静态资源文件处理服务器后,默认访问
http://localhost:9527/
而我们的API 如果是本地开发,很可能最开始是 http://localhost:8080/
这样由于不是同一个端口,就可能存在跨域请求的问题。
那么如何解决这种问题呢?
如果是在服务器上,可以使用nginx 反向代理即可。
但是如果在本地环境开发呢?
- 早期解决方案比较麻烦,需要配置proxy 之类的。
- 但是在v4.0 之后提出了新的解决方案。
- 这个框架在在v4.0版本之后,在本地会启动一个mock-server来模拟数据,线上环境还是继续使用mockjs来进行模拟(因为本项目是一个纯前端项目,你也可以自己搭建一个线上server 来提供数据)。不管是本地还是线上所有的数据模拟都是基于mockjs生成的,所以只要写一套 mock数据,就可以在多环境中使用。
- 该方案的好处是,在保留 mockjs的优势的同时,解决之前的痛点。由于我们的 mock是完全基于webpack-dev-serve来实现的,所以在你启动前端服务的同时,mock-server就会自动启动,而且这里还通过 chokidar 来观察 mock
文件夹内容的变化。在发生变化时会清除之前注册的mock-api接口,重新动态挂载新的接口,从而支持热更新。有兴趣的可以自己看一下代码mock-server.js。由于是一个真正的server,所以你可以通过控制台中的network,清楚的知道接口返回的数据结构。并且同时解决了之前mockjs会重写 XMLHttpRequest对象,导致很多第三方库失效的问题。- 本项目的所有请求都是通过封装的request.js进行发送的,通过阅读源码可以发现所有的请求都设置了一个baseURL,而这个baseURL又是通过读取process.env.VUE_APP_BASE_API这个环境变量来动态设置的,这样方便我们做到不同环境使用不同的 api 地址。
1.2.6.3.1 理解的官方解决方案
简单来说呢,就是通过注入一个变量来解决跨域问题。
具体怎么操作呢?
首先我们可以打开.env.dev

然后修改VUE_APP_BASE_API 的变量的默认值为我们后端的真实API地址。
如下所示:
# just a flag
ENV = 'dev'

# base api
#VUE_APP_BASE_API = '/dev-api'
VUE_APP_BASE_API = 'http://127.0.0.1:8000/dev-api'
这样就算我们在本地访问http://localhost:9527/ 虽然所有页面的跳转会走http://localhost:9527,但是所有API接口请求都会被http://127.0.0.1:8000/dev-api 处理。
这是怎么做到的呢?
我们可以尝试打开src/utils/request.js 文件,这个文件里为所有的Ajax 异步请求API基地址做了一个封装.
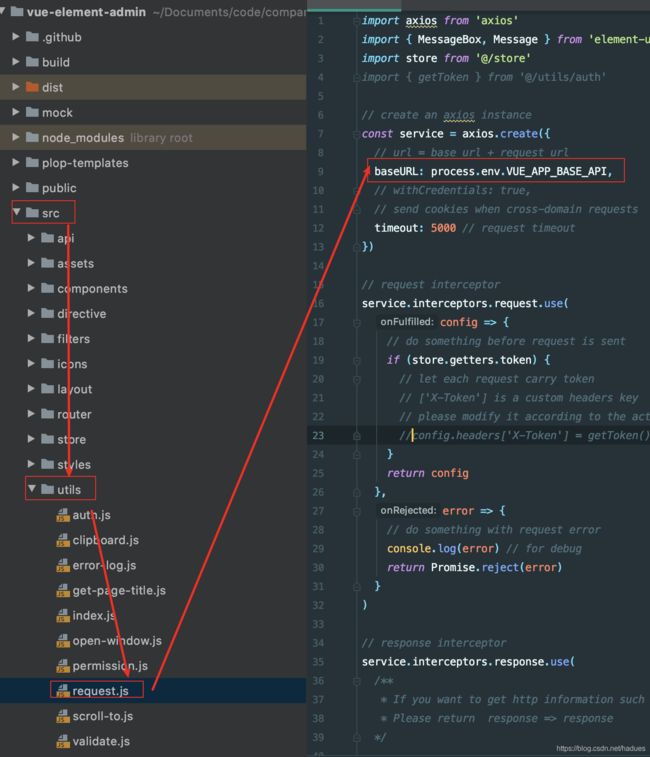
这样就完美解决了跨域问题。
总之,很简单,
- 如果是开发环境,修改.env.dev 文件
# just a flag
ENV = 'dev'

# base api
#VUE_APP_BASE_API = '/dev-api'
VUE_APP_BASE_API = 'http://127.0.0.1:8000/dev-api'
- 如果是线上环境,那么修改.env.prod 文件
# just a flag
ENV = 'prod'

# base api
VUE_APP_BASE_API = 'http://www.xxx.com/prod-api'
这样的话,页面跳转就算都请求的是http://localhost:9527/
但是所有的接口基地址都是VUE_APP_BASE_API 配置的URL 开头,这样似乎就绕开了跨域问题。
1.2.6.3.2 我的解决方案
然而在实际尝试中,不知为何上面那种做法时灵时不灵。
为了应对不同的环境使用不同的反向代理,因此楼主摸索了一种全新的解法,
具体做法就是:
- 首先修改vue-config.js使用本地代理
devServer: {

    port: port,
    open: true,
    overlay: {

      warnings: false,
      errors: true
    },
    //本地反向代理解决跨域问题
    proxy: {

      // change xxx-api/login => mock/login
      // detail: https://cli.vuejs.org/config/#devserver-proxy
      [process.env.VUE_APP_BASE_API]: {

        target: process.env.VUE_APP_PROXY_API,
        changeOrigin: true,
        pathRewrite: {

          ['^' + process.env.VUE_APP_BASE_API]: ''
        }
      }
    },
    //before: require('./mock/mock-server.js')
  },
target: 这里的URL 我们不写死,而是用一个变量。
- 然后在每个环境配置文件中修改如下:
.env.dev配置如下所示
# 激活哪个配置文件
NODE_ENV= dev

# base api
VUE_APP_BASE_API = '/dev-api'

# proxy api
VUE_APP_PROXY_API='https://api.xxx.com/dev-api'
这样的话,凡是匹配到/dev-api 开头的API请求都使用https://api.xxx.com/dev-api 进行处理。
.env.test 配置文件中修改如下:
# 激活哪个配置文件
NODE_ENV= test

# base api
VUE_APP_BASE_API = '/test-api'

# proxy api
VUE_APP_PROXY_API='https://api.xxx.com/test-api'
这样的话,凡是匹配到/test-api 开头的API请求都使用https://api.xxx.com/test-api 进行处理。
最后不要忘了package.json 文件中配置下:
  "scripts": {

    "local": "vue-cli-service serve --mode local",
    "dev": "vue-cli-service serve --mode dev",
    "test": "vue-cli-service serve --mode test",
    "uat": "vue-cli-service serve --mode uat",
    "prod": "vue-cli-service serve --mode prod",
    "lint": "eslint --ext .js,.vue src",
    "build:test": "vue-cli-service build --mode test",
    "build:prod": "vue-cli-service build --mode prod",
    "build:uat": "vue-cli-service build --mode uat",
    "preview": "node build/index.js --preview",
    "new": "plop",
    "svgo": "svgo -f src/icons/svg --config=src/icons/svgo.yml",
    "test:unit": "jest --clearCache && vue-cli-service test:unit",
    "test:ci": "npm run lint && npm run test:unit"
  },
当做了以上配置后,我们就可以:
-
当想要启用开发环境时候就输入命令
npm run dev -
当想要启用测试环境的时候就使用
npm run test
1.2.6.4 如何打包部署到生产环境?
如果想打包部署到生产环境,那么执行npm run build:prod 命令即可
注意:打包发布需要用build,本地启用需要用run 命令
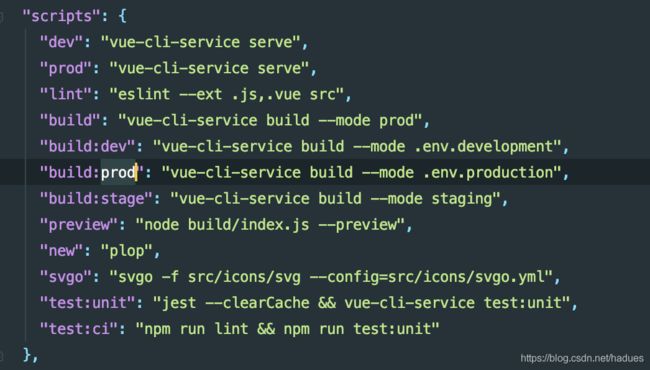
如果你执行出错,那么记得看下package.json 中的配置是否和我改写的一样
重点是这一行"prod": "vue-cli-service serve --mode prod",
package.json 中scripts 部分修改如下:
  "scripts": {

    "server": "vue-cli-service serve",
    "lint": "eslint --ext .js,.vue src",
    "build:": "vue-cli-service build",
    "dev": "vue-cli-service serve --mode dev",
    "test": "vue-cli-service serve --mode test",
    "uat": "vue-cli-service serve --mode uat",
    "prod": "vue-cli-service serve --mode prod",
    "build:uat": "vue-cli-service build --mode uat",
    "build:test": "vue-cli-service build --mode test",
    "build:prod": "vue-cli-service build --mode prod",
    "build:stage": "vue-cli-service build --mode staging",
    "preview": "node build/index.js --preview",
    "new": "plop",
    "svgo": "svgo -f src/icons/svg --config=src/icons/svgo.yml",
    "test:unit": "jest --clearCache && vue-cli-service test:unit",
    "test:ci": "npm run lint && npm run test:unit"
  },
}
除此之外,打包还有一个注意事项,如果上面方式直接打包的项目,dist 文件夹下的文件必须放到静态资源服务器www.xxx.com 访问的根目录下。
如果我们只有一个项目还好,但是实际上我们往往一个服务器部署好多项目,因此我们需要对路径增加一个上下文区分。
解决方法也很简单,修改vue-config.js 中的publicPath 为/prod-html5
// All configuration item explanations can be find in https://cli.vuejs.org/config/
module.exports = {

  /**
   * You will need to set publicPath if you plan to deploy your site under a sub path,
   * for example GitHub Pages. If you plan to deploy your site to https://foo.github.io/bar/,
   * then publicPath should be set to "/bar/".
   * In most cases please use '/' !!!
   * Detail: https://cli.vuejs.org/config/#publicpath
   */
  publicPath: '/prod-html5',
  outputDir: 'dist',
  assetsDir: 'static',
  lintOnSave: process.env.NODE_ENV === 'development',
  productionSourceMap: false,
  devServer: {

    port: port,
    open: true,
    overlay: {

      warnings: false,
      errors: true
    },
    //after: require('./mock/mock-server.js')
  },
然后nginx中配置如下所示即可:
server {

  listen 80;
  server_name api.xxx.com;

  # HTML5 前端系统
  # Test环境
  location /prod-html5 {

    alias /opt/app/my_app_sample/prod/html5/;
    index index.html index.htm;
  }

  # 配置500 错误页面
  # redirect server error pages to the static page /50x.html
  error_page 500 502 503 504 /50x.html;
  location = /50x.html {

    root html;
  }

  # 配置API
   location ^~ /prod-api/ {

    proxy_redirect off;
    proxy_set_header x-real-ip $remote_addr;
    proxy_set_header x-forwarded-for $proxy_add_x_forwarded_for;
    proxy_set_header host $http_host;
    proxy_pass http://0.0.0.0:8003/prod-api/;
  }
}
这样配置之后,我们的静态页面网站访问地址就是 http://www.xxx.com/prod-html5
实际访问API地址就是http://www.xxx.com/prod-api
由于访问的是同一个域名,且同一个80端口,也就不存在跨域问题了,况且我们引入了变量的方式来解决跨域问题。
你觉得以上就是最佳解决方案么?不。
当我们在实际开发的时候,可能会有这样的需求:
我们需要针对前端部署项目也对环境进行区分部署:
开发服: https://html5.xxx.com/dev-html5/index.html
测试服: https://html5.xxx.com/test-html5/index.html
UAT服: https://html5.xxx.com/test-html5/index.html
生产服: https://html5.xxx.com/prod-html5/indexhtml
如果按照上面的做法,
当发布到生产服需要修改为 publicPath: ‘/prod-html5’,
当发布到测试服需要修改为 publicPath: ‘/test-html5’,
每次修改都要去手动修改pubicPath 的值,一旦忘了修改可能就出问题了。
为了应对这种需求,我们其实同样使用一个变量来解决。
具体做法如下:
- 修改vue-config.js 如下:
/**
   * You will need to set publicPath if you plan to deploy your site under a sub path,
   * for example GitHub Pages. If you plan to deploy your site to https://foo.github.io/bar/,
   * then publicPath should be set to "/bar/".
   * In most cases please use '/' !!!
   * Detail: https://cli.vuejs.org/config/#publicpath
   */
  //publicPath: process.env.NODE_ENV === 'prod' ? '/leapfrog-video/admin/' : '/',
  publicPath: process.env.VUE_CONTEXT_PATH,
  outputDir: 'dist',
  assetsDir: 'static',
  lintOnSave: process.env.NODE_ENV === 'dev',
  productionSourceMap: false,
  devServer: {

    port: port,
    open: true,
    overlay: {

      warnings: false,
      errors: true
    },
    //本地反向代理解决跨域问题
    proxy: {

      // change xxx-api/login => mock/login
      // detail: https://cli.vuejs.org/config/#devserver-proxy
      [process.env.VUE_APP_BASE_API]: {

        target: process.env.VUE_APP_PROXY_API,
        changeOrigin: true,
        pathRewrite: {

          ['^' + process.env.VUE_APP_BASE_API]: ''
        }
      }
    },
    //before: require('./mock/mock-server.js')
  },
其实最主要的就是publicPath: process.env.VUE_CONTEXT_PATH,
然后在每种环境变量中配置下这个变量
.env.dev配置如下所示
# 激活哪个配置文件
NODE_ENV= dev

# base api
VUE_APP_BASE_API = '/dev-api'

# context-path
VUE_CONTEXT_PATH=/dev-html5/

# proxy api
VUE_APP_PROXY_API='https://api.xxx.com/dev-api'
这样的话,凡是匹配到/dev-api 开头的API请求都使用https://api.xxx.com/dev-api 进行处理。
.env.test 配置文件中修改如下:
# 激活哪个配置文件
NODE_ENV= test

# base api
VUE_APP_BASE_API = '/test-api'

# context-path
VUE_CONTEXT_PATH=/test-html5/

# proxy api
VUE_APP_PROXY_API='https://api.xxx.com/test-api'
这样还按照之前的方法,
当激活的是dev 的时候发布资源根路径就是dev-html5
当激活的是test 的时候发布资源根路径就是test-html5
…
本篇完,下篇我们详细讲解后端API 如何适配这个框架。
