原文链接:http://www.yaoblog.info/?p=5021
1. 这里以 Debian 为例子,安装 Asterisk
apt-get update
apt-get install asterisk
2. 预设置 Asterisk,修改 sip.conf 和 extensions.conf 文件,是为了创建两个可供测试的 SIP 账号
nano /etc/asterisk/sip.conf
在文件的开头部分添加如下信息:
[general]
context = default
bindport = 5060
bindaddr = 0.0.0.0
tcpbindaddr = 0.0.0.0
tcpenable = yes

[1001]
type = friend
callerid = User One
secret = 1001
host = dynamic
canreinvite = no
dtmfmode = rfc2833
mailbox = 1001
disallow = all
allow = ulaw
transport = udp

[1002]
type = friend
callerid = User Two
secret = 1002
host = dynamic
canreinvite = no
dtmfmode = rfc2833
mailbox = 1002
disallow = all
allow = ulaw
transport = udp
这里的意思是,Asterisk 会听取来自所有 IP 的请求,监听端口为 5060,并且启用 TCP 协议的支持。然后定义了两个分机号码,分别给了 User One 和 User Two 两个潜在用户。
nano /etc/asterisk/extensions.conf
在文件的开头部分添加如下信息:
[general]
static=yes
writeprotect=no

[default]
exten => 1001,1,Answer()
exten => 1001,n,Dial(SIP/1001,20,tr)
exten => 1001,n,Hangup

exten => 1002,1,Answer()
exten => 1002,n,Dial(SIP/1002,20,tr)
exten => 1002,n,Hangup
这里的意思是,确认这两个分机号码的存在。
3. 重启 Asterisk
/etc/init.d/asterisk restart
4. 配置客户端程序,这里分别用 X-Lite,Blink,CSipSimple 做演示,教你如何设置
所有的参数都来源于 sip.conf 文件:
- Account name / Display name = callerid
- User ID / Authorization name = 分机号码 (方括号里面的 e.g. 1001)
- Password = secret
- The Domain = Server IP Address
配置 X-Lite: 菜单 Softphone – Account Settings
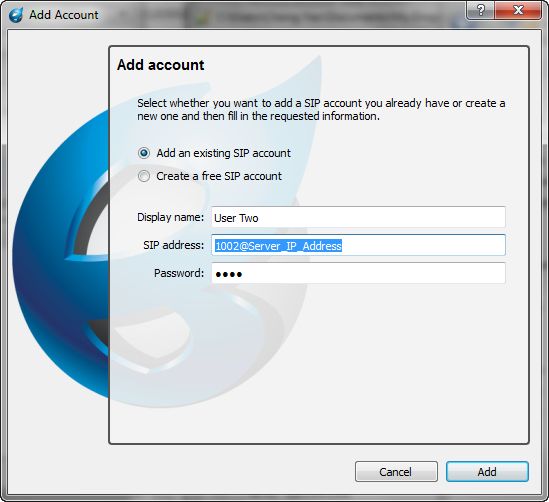
配置 Blink: 菜单 Blink – Accounts – Add account
配置 CSipSimple (Android): 菜单 Accounts – Add account – Generic wizards – Basic
5. 拨打 VoIP 的方式就是直接在客户端程序里输入对方的分机号码即可
6. 就这么多了,如果有连通问题,请注意防火墙的设置


