Unit13 yum命令;rpm命令;nginx
yum
yum clean all #清除原有的yum缓存
[root@localhost ~]# yum clean all
Loaded plugins: langpacks
Cleaning repos: rhel7
Cleaning up everything
yum repolist all #列出yum仓库信息
[root@localhost ~]# yum repolist all
Loaded plugins: langpacks
rhel7                                                    | 4.1 kB     00:00
(1/2): rhel7/group_gz                                      | 134 kB   00:00
(2/2): rhel7/primary_db                                    | 3.4 MB   00:00
repo id                           repo name                       status
rhel7                             rhel7                           enabled: 4,305
repolist: 4,305
yum install software -y #无需确认进行安装
yum update software #更新软件
[root@localhost ~]# yum update httpd
Loaded plugins: langpacks
No packages marked for update       ##没有需要更新的
yum list software #查看软件信息
[root@localhost ~]# yum list httpd
Loaded plugins: langpacks
Installed Packages
httpd.x86_64                         2.4.6-45.el7                         @rhel7
yum list all ##查看所有软件信息
yum list installed #已经安装的软件
yum list available #可安装的软件
yum reinstall software -y #重新安装软件
yum remove software #卸载软件
yum info software #查看软件的信息
yum search ‘software信息‘ #更具软件信息查找软件
yum whatprovides file #找出包含 此文件的软件
yum groups list ##列出软件组
yum groups info #查看软件组信息
yum groups install softwaregroup #安装软件组
yum groups remove softwaregroup #卸载软件组
rpm命令
yum是上层的安装智能管理工具,可以发现并解决依赖性问题
rpm是底层安装工具,只能发现依赖性,不能解决
rpm -i ##安装
-v ##显示安装进程
-h ##hash加密
[root@foundation38 Desktop]# rpm -ivh wps-office-10.1.0.5672-1.a21.x86_64.rpm
error: Failed dependencies:
	libpng12.so.0()(64bit) is needed by wps-office-10.1.0.5672-1.a21.x86_64
rpm -e ##卸载
-ql ##查看软件在系统中的文件路径
-p ##后面加的是.rpm结尾的软件包,查看软件包安装以后会产生什么文件
[root@foundation38 ~]# rpm -p wps-office-10.1.0.5672-1.a21.x86_64.rpm
RPM version 4.11.3
Copyright (C) 1998-2002 - Red Hat, Inc.
This program may be freely redistributed under the terms of the GNU GPL

Usage: rpm [-aKfgpqVcdLilsiv?] [-a|--all] [-f|--file] [-g|--group]
        [-p|--package] [--pkgid] [--hdrid] [--triggeredby] [--whatrequires]
        [--whatprovides] [--nomanifest] [-c|--configfiles] [-d|--docfiles]
        [-L|--licensefiles] [--dump] [-l|--list] [--queryformat=QUERYFORMAT]
        [-s|--state] [--nofiledigest] [--nofiles] [--nodeps] [--noscript]
        [--allfiles] [--allmatches] [--badreloc] [-e|--erase +]
        [--excludedocs] [--excludepath=] [--force]
        [-F|--freshen +] [-h|--hash] [--ignorearch] [--ignoreos]
        [--ignoresize] [-i|--install] [--justdb] [--nodeps] [--nofiledigest]
        [--nocontexts] [--noorder] [--noscripts] [--notriggers]
        [--nocollections] [--oldpackage] [--percent] [--prefix=]
        [--relocate==] [--replacefiles] [--replacepkgs] [--test]
        [-U|--upgrade +] [-D|--define 'MACRO EXPR']
        [--undefine=MACRO] [-E|--eval 'EXPR'] [--macros=]
        [--noplugins] [--nodigest] [--nosignature] [--rcfile=]
        [-r|--root ROOT] [--dbpath=DIRECTORY] [--querytags] [--showrc]
        [--quiet] [-v|--verbose] [--version] [-?|--help] [--usage]
        [--scripts] [--setperms] [--setugids] [--conflicts] [--obsoletes]
        [--provides] [--requires] [--info] [--changelog] [--xml]
        [--triggers] [--last] [--dupes] [--filesbypkg] [--fileclass]
        [--filecolor] [--fscontext] [--fileprovide] [--filerequire]
        [--filecaps]
rpm -qa ##查询系统中安装的所有软件名称
-qf filename (绝对路径) ##查看filename属于哪个安装包
-ivh nam.rpm --force ##忽略依赖性并强制安装
源码安装软件
1.获取安装包
可以从官网下载www.nginx.com (nginx-1.10.3.tar.gz)
我是从别的电脑用lftp下的
lftp 172.25.0.250:/pub/software> get nginx-1.10.3.tar.gz2.解压安装包
[root@foundation38 ~]# tar zxf nginx-1.10.3.tar.gz
[root@foundation38 ~]# ls
anaconda-ks.cfg             nginx-1.10.3         q
Desktop                     nginx-1.10.3.tar.gz  rht-ks-post.log
foundation-config-post.log  original-ks.cfg      rht-ks-pre.log
lnmp                        patches
3.安装配置
进行以下操作必需要在目录nginx-1.10.3/中
[root@foundation38 ~]# cd nginx-1.10.3/
[root@foundation38 nginx-1.10.3]# ls
auto     CHANGES.ru  configure  html     man     src
CHANGES  conf        contrib    LICENSE  README
[root@foundation38 nginx-1.10.3]# cd auto/cc    ##进入auto/cc中
[root@foundation38 cc]# ls
acc  bcc  ccc  clang  conf  gcc  icc  msvc  name  owc  sunc
[root@foundation38 cc]# vim gcc   ##在gcc文件内进行更改
去掉debug的部分,减少安装的大小
178 # debug
179 #CFLAGS="$CFLAGS -g" #注释掉
5.解决依赖性问题
在yum中下载所需要的依赖文件,主要有三个gcc,openssl-devel和pcre-devel
[root@foundation38 nginx-1.10.3]# yum install gcc openssl-devel pcre-devel -y

[root@foundation38 nginx-1.10.3]# ./configure --help

[root@foundation38 nginx-1.10.3]# ./configure --prefix=/usr/local/nginx --with-http_ssl_module --with-http_stub_status_module
--prefix指定安装目录
--with-http_ssl_module :支持https带安全认证(ssl)
--with-http_stub_status_module :查看nginx工作状态
[root@foundation38 nginx-1.10.3]# make

[root@foundation38 nginx-1.10.3]# make install

[root@foundation38 nginx-1.10.3]# /usr/local/nginx/sbin/nginx -t
nginx: the configuration file /usr/local/nginx/conf/nginx.conf syntax is ok
nginx: configuration file /usr/local/nginx/conf/nginx.conf test is successful

[root@foundation38 nginx-1.10.3]# systemctl stop httpd
[root@foundation38 nginx-1.10.3]# /usr/local/nginx/sbin/nginx
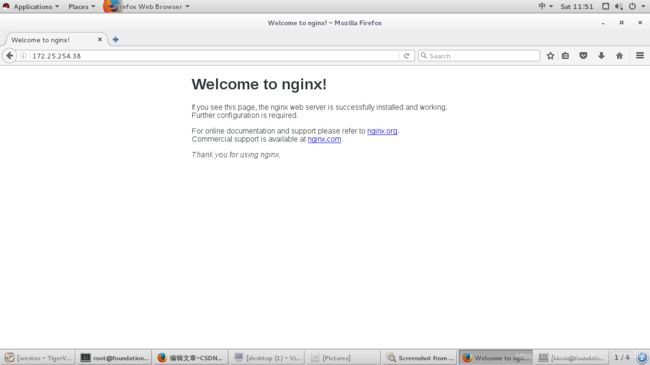
在浏览器中输入ip可以访问nginx的页面
netstat
用于列出系统上所有的网络套接字连接情况,包括tcp,udp
-a :列出所有当前连接
-t :TCP协议的连接
-u :UDP协议的连接
-n :不使用域名解析,只显示IP
-l :列出正在监听的套结字
-p :获取进程名,进程号及用户ID
[root@foundation38 ~]# netstat -atnp ##列出所有TCP协议、只显示IP,获取进程名,进程号及用户ID
Active Internet connections (servers and established)
Proto Recv-Q Send-Q Local Address Foreign Address State PID/Program name
tcp 0 0 127.0.0.1:5900 0.0.0.0:* LISTEN 3376/qemu-kvm
tcp 0 0 0.0.0.0:111 0.0.0.0:* LISTEN 1/systemd
tcp 0 0 172.25.250.250:53 0.0.0.0:* LISTEN 1560/dnsmasq
tcp 0 0 192.168.122.1:53 0.0.0.0:* LISTEN 1530/dnsmasq
tcp 0 0 0.0.0.0:22 0.0.0.0:* LISTEN 1313/sshd
tcp 0 0 127.0.0.1:25 0.0.0.0:* LISTEN 1469/master
tcp 0 0 172.25.254.38:36284 172.25.254.250:5908 ESTABLISHED 3331/vncviewer
tcp6 0 0 :::111 :::* LISTEN 1/systemd
tcp6 0 0 :::80 :::* LISTEN 1306/httpd
tcp6 0 0 :::22 :::* LISTEN 1313/sshd
tcp6 0 0 ::1:25 :::* LISTEN 1469/master
