springboot中swagger的小用
最近一直在找接口管理的东西便于开发,偶然间看到了swagger这个小技术。
介绍:接口管理,在页面上操作请求,不需要手动输入地址和对应字段,只需补全对应的value值即可,话不多说开搞。
1.导入maven依赖
   <!-- swagger-->
        <dependency>
            <groupId>io.springfox</groupId>
            <artifactId>springfox-swagger2</artifactId>
            <version>2.9.2</version>
        </dependency>
        <dependency>
            <groupId>io.springfox</groupId>
            <artifactId>springfox-swagger-ui</artifactId>
            <version>2.9.2</version>
        </dependency>
很多人只引入了两个依赖,报错如下

然后应该是缺了对应版本的文件,再引入
   <dependency>
            <groupId>com.google.guava</groupId>
            <artifactId>guava</artifactId>
            <version>19.0</version>
        </dependency>

        <dependency>
            <groupId>com.google.guava</groupId>
            <artifactId>guava</artifactId>
            <version>25.1-jre</version>
        </dependency>
发现ok了。
2.配置swagger的config
a.最简配置
package com.example.demo.config;

import org.springframework.context.annotation.Bean;
import org.springframework.context.annotation.Configuration;
import springfox.documentation.builders.PathSelectors;
import springfox.documentation.builders.RequestHandlerSelectors;
import springfox.documentation.service.ApiInfo;
import springfox.documentation.service.Contact;
import springfox.documentation.spi.DocumentationType;
import springfox.documentation.spring.web.plugins.Docket;
import springfox.documentation.swagger2.annotations.EnableSwagger2;

import java.util.ArrayList;

@Configuration
@EnableSwagger2
public class SwaggerConfig {


}
然后打开页面 http://localhost:8090/swagger-ui.html
ip+端口+ /swagger-ui.html 即可

然后在页面上可以发请求了

他会把你所有的Controller请求都加载进去,然后调用即可
b.可定制化配置
package com.example.demo.config;

import org.springframework.context.annotation.Bean;
import org.springframework.context.annotation.Configuration;
import springfox.documentation.builders.PathSelectors;
import springfox.documentation.builders.RequestHandlerSelectors;
import springfox.documentation.service.ApiInfo;
import springfox.documentation.service.Contact;
import springfox.documentation.spi.DocumentationType;
import springfox.documentation.spring.web.plugins.Docket;
import springfox.documentation.swagger2.annotations.EnableSwagger2;

import java.util.ArrayList;

@Configuration
@EnableSwagger2
public class SwaggerConfig {

    //构造docket的bean实例
    @Bean
    public Docket allDocket(){

        return new Docket(DocumentationType.SWAGGER_2).apiInfo(apiInfo()).groupName("all");
    }

    @Bean
    public Docket dictDocket(){

        return new Docket(DocumentationType.SWAGGER_2).
                //自定义页面配置
                apiInfo(apiInfo()).select().
                apis(RequestHandlerSelectors.any()).
                //对应的请求地址,可模糊查询的那种
                paths(PathSelectors.ant("/dict/**")).
                        build().groupName("字典人员");
    }

    @Bean
    public Docket loveDocket(){

        return new Docket(DocumentationType.SWAGGER_2).apiInfo(apiInfo()).select().
                apis(RequestHandlerSelectors.any()).paths(PathSelectors.ant("/love/**")).build().groupName("love");
    }

    private  ApiInfo apiInfo(){

        Contact contact = new Contact("涛涛", "https://blog.csdn.net/weixin_45214099", "[email protected]");
        return  new ApiInfo("滔滔的文档","加油","v1.0","https://blog.csdn.net/weixin_45214099",contact,"涛涛的微博","https://blog.csdn.net/weixin_45214099",new ArrayList<>());
    }
}
根据不同的请求分成不同的组,这样的话在开发中就可以 把自己想要的接口筛选出来便于开发了,自己用自己组里的接口不用到处去找了很方便。
对应love的

对应字典人员的

c.放入服务器上,写好配置文件,在服务器上运行即可,然后测试人员可以打开所有的接口或者模块测试的话,就打开对应组的接口即可,测试接口也很方便;需要注意的是在正式上线的时候需要把这个给注释了,避免暴露所有接口给别人不是很安全哈。
总结:这是个不错的管理接口的配置,而且很简单,稍加配置就可以自定义了,在开发测试阶段放入服务器上也可作为接口测试的依据,但在上线后需要注释保证安全即可。
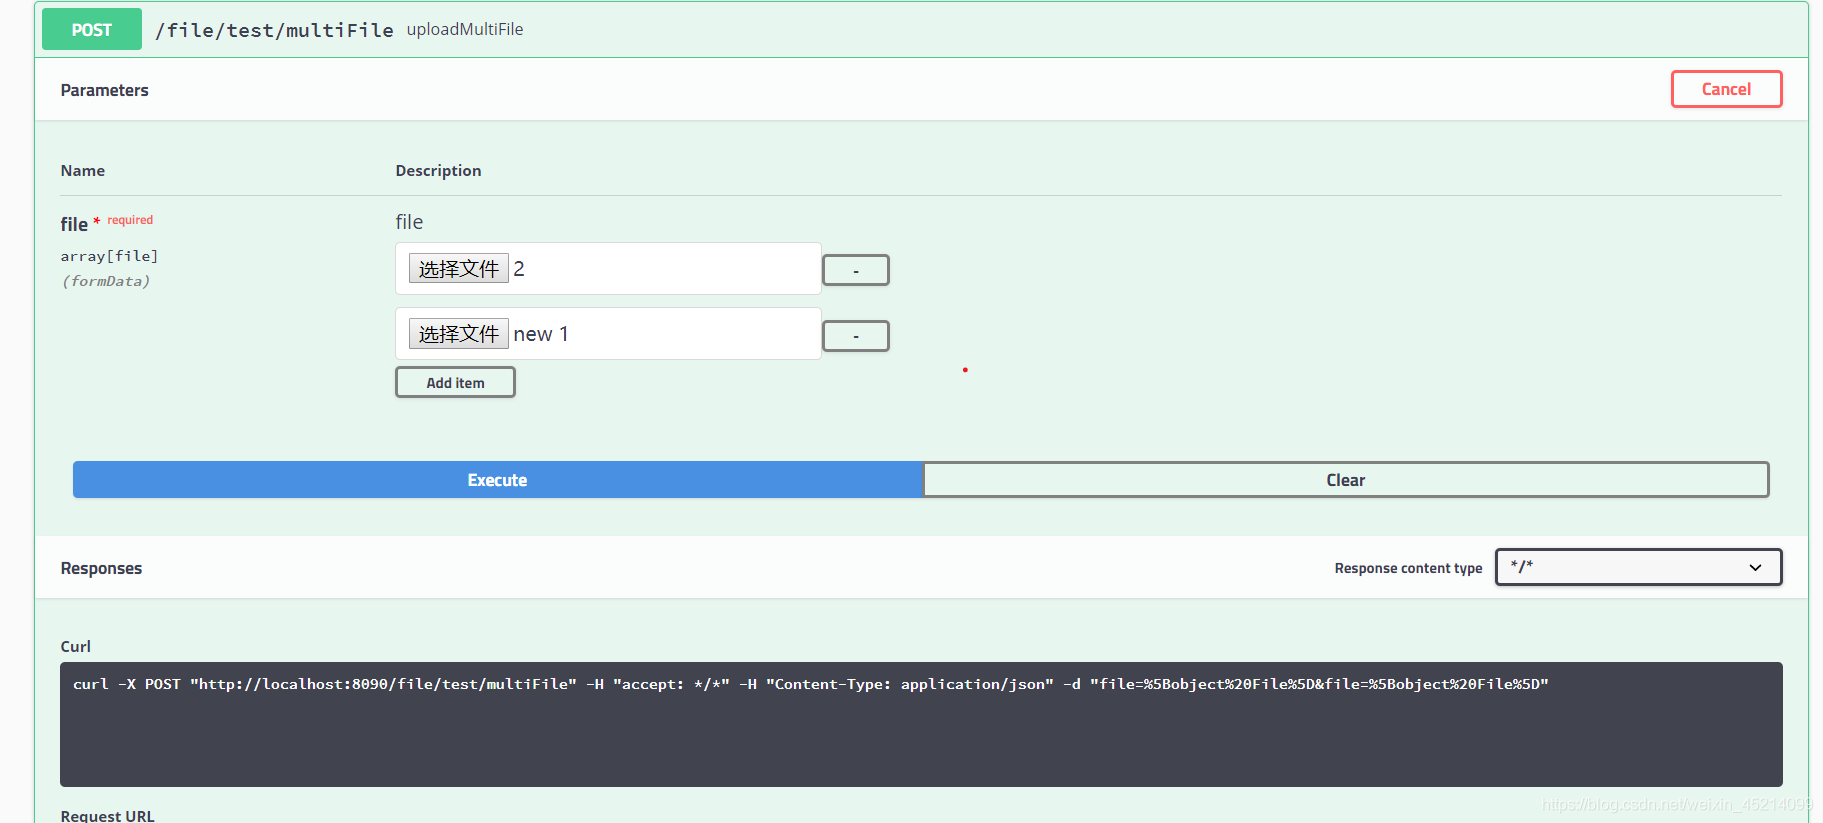
d.后续扩展: swagger 对于文件上传 这是个大坑呀,我用了许多种方法测试发现swagger就是不支持 多文件上传,所以就用postman替换 多文件上传的策略。
单文件上传
单个上传测试接口
    @PostMapping("/test/oneFile")
    public String uploadoneFile(@RequestParam("file") MultipartFile file) {

        System.out.println(file.getOriginalFilename());
        System.out.println(file.getSize());
        return file.getOriginalFilename();
    }
对应的请求操作swagger操作
 @PostMapping("/test/multiFile")
    public List uploadMultiFile(@RequestParam("file") MultipartFile[] file) {

        List list=new ArrayList<>();
        for (int i = 0; i <file.length ; i++) {

            System.out.println(file[i].getOriginalFilename());
            list.add(file[i].getOriginalFilename());
        }
        System.out.println(file.length);
        return list;
    }
对应的swagger操作

返回结果
哎,不太行
然后使用postman然后调用是可以的

总结 swagger支持单个文件上传但不支持批量,postman都支持,测单个上传优先用swagger,测批量的话选择postman效果更好。

