rabbitmq从零学起
1.安装erlang和rabbitmq
①windows下
参考:http://www.cnblogs.com/shanyou/p/4067250.html
遇到的问题:Error: unable to connect to node 'rabbit@Asus-PC': nodedown
解决:https://my.oschina.net/wenjinglian/blog/729699
②ubantu下
apt-get install rabbitmq-server
注意:默认页面管理没有开启,rabbitmq-plugins enable rabbitmq_management
rabbitmq-server就像是我们现在常用的“快递柜”或是寄信用的邮筒,实现“快递件”的异步收发。
教程:https://www.rabbitmq.com/tutorials/tutorial-one-python.html 本文中的代码用的python语言,pika包
2.本地安装rabbitmq-server,实现消息的发收
简单介绍几个概念:
producer:发送信息的物体;
queue:“邮筒”的名字,queue存在于rabbitmq中,信息必须由queue来存储;
consumer:接受信息的物体;
sending:
#!/usr/bin/env python
# coding=utf-8
import pika

# 与rabbitmq-server建立连接
connection = pika.BlockingConnection(pika.ConnectionParameters(
               'localhost'))
channel = connection.channel()
# 要确定queue存在,否则信息会直接被rabbitmq丢掉
# 创建一个名叫hello的queue
channel.queue_declare(queue='hello')
# 信息是不能直接发送到rabbitmq的queue,要经过exchange
# 此处使用的是默认的exchange,routing_key即为queue的名字
channel.basic_publish(exchange='',
                      routing_key='hello',
                      body='Hello World!')
print(" [x] Sent 'Hello World!'")
connection.close()
receiving:
#!/usr/bin/env python
# coding=utf-8
import pika

connection = pika.BlockingConnection(pika.ConnectionParameters(
        host='localhost'))
channel = connection.channel()
# 确保hello queue存在,运行了pika_server.py这句可以不加,加这句是个好习惯
# 也可以用rabbitmqctl list_queues查看是否存在hello queue
channel.queue_declare(queue='hello')

def callback(ch, method, properties, body):
    print(" [x] Received %r" % body)
# 进入了无限循环模式
channel.basic_consume(callback,
                      queue='hello',
                      no_ack=True)

print(' [*] Waiting for messages. To exit press CTRL+C')
channel.start_consuming()
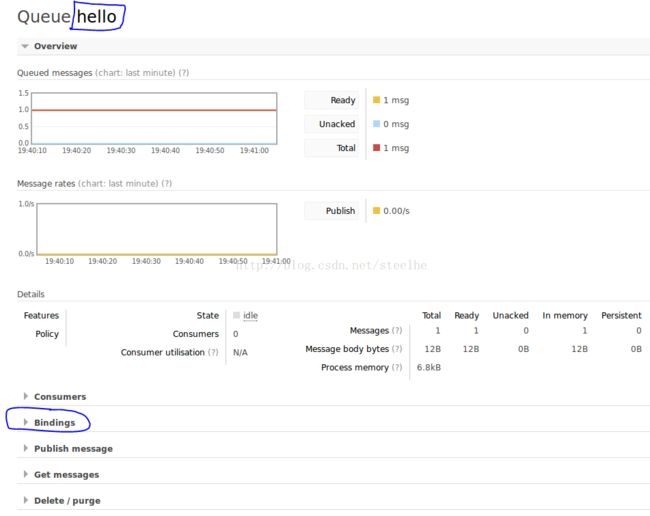
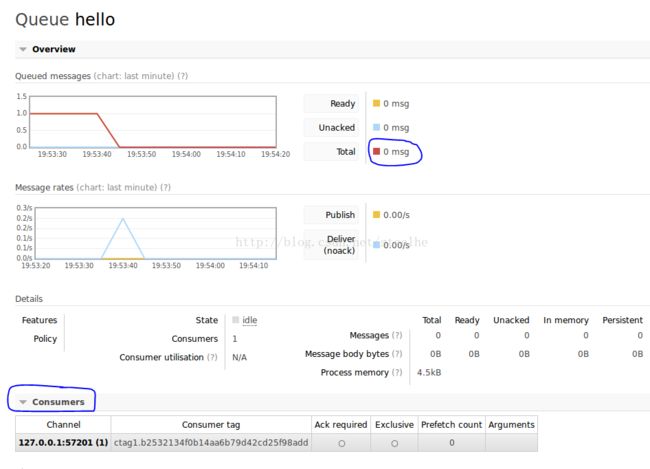
可以看到message已经被消费了,并且出现了consumer的信息。
3.work queues:给多个worker 分配耗时的任务
又名task queue,主要目的是,避免资源密集型的任务占用太多时间,而是等之后再运行。
server:
#!/usr/bin/env python
# coding=utf-8
import pika
import sys
# 默认情况下,rabbitmq按顺序给consumer发送信息,这种方式叫做 round-robin
connection = pika.BlockingConnection(pika.ConnectionParameters(
        host='localhost'))
channel = connection.channel()
# 当worker挂掉了,可以用ack来保证不丢失数据;
# 当rabbitmq挂掉了,需要设置queue和message为duable,
# 不能重新定义已经存在的queue;并且dutable模式需要在producer和consumer同时定义
channel.queue_declare(queue='task_queue', durable=True)

message = ' '.join(sys.argv[1:]) or "Hello World!"
# 注意:message为duable也不能完全保证数据不丢失,因为rabbitmq保存数据需要花一下时间,
# 对一些message也不会用fsync(2),使得信息尚未保存到硬盘中;需要使用其他方法。
channel.basic_publish(exchange='',
                      routing_key='task_queue',
                      body=message,
                      properties=pika.BasicProperties(
                         delivery_mode = 2, # make message persistent
                      ))
print(" [x] Sent %r" % message)
connection.close()
receive:
#!/usr/bin/env python
# coding=utf-8
import pika
import time

connection = pika.BlockingConnection(pika.ConnectionParameters(
        host='localhost'))
channel = connection.channel()

channel.queue_declare(queue='task_queue', durable=True)
print(' [*] Waiting for messages. To exit press CTRL+C')
# 使用这种模式,可以确保,即使在worker处理信息的时候被ctrl+C,
# 也不会丢失任何数据。所有的unack的信息会被重新发送。
def callback(ch, method, properties, body):
    print(" [x] Received %r" % body)
    time.sleep(body.count(b'.'))
    print(" [x] Done")
    ch.basic_ack(delivery_tag = method.delivery_tag)
# 告诉rabbitmq,在worker处理完信息之前,不再给他发送信息
channel.basic_qos(prefetch_count=1)
channel.basic_consume(callback,
                      queue='task_queue')

channel.start_consuming()
测试过程:开启两个worker,在server端发送好几个信息,. 的个数表示time.sleep的时间;
测试结果:①发送的信息按顺序发送给worker,worker处理完之后,rabbitmq才会发送下一个
②当worker没处理完消息,按ctrl+C中断,另一个worker马上收到重传的消息
③将worker都关闭,在rabbitmq页面上可以看到剩余的total message一直都在,页面上的consumer是实时存在的consumer
4.publish/subscribe:向多个consumer发送信息
rabbitmq的核心idea:producer不能直接发送信息给queue,而是发送给exchange。上面的代码中,我们使用的是rabbitmq中默认的exchange,他的名字为''。
exchange:接受producer的信息,再发送给queue。那是应该 发送给一个特殊的queue?还是所有的queue?这是由 exchange type决定的。包括
direct
,
topic
,
headers
and
fanout。这里我们只用到最后一个,也就是广播。
binding:exchange和queue的关系。
server:
!/usr/bin/env python
import pika

connection = pika.BlockingConnection(pika.ConnectionParameters(
        host='localhost'))
channel = connection.channel()

channel.exchange_declare(exchange='logs',
                         type='fanout')

result = channel.queue_declare(exclusive=True)
queue_name = result.method.queue

channel.queue_bind(exchange='logs',
                   queue=queue_name)

print(' [*] Waiting for logs. To exit press CTRL+C')

def callback(ch, method, properties, body):
    print(" [x] %r" % body)

channel.basic_consume(callback,
                      queue=queue_name,
                      no_ack=True)

channel.start_consuming()!/usr/bin/env python
import pika
connection = pika.BlockingConnection(pika.ConnectionParameters(
host='localhost'))
channel = connection.channel()
channel.exchange_declare(exchange='logs',
type='fanout')
result = channel.queue_declare(exclusive=True)
queue_name = result.method.queue
channel.queue_bind(exchange='logs',
                   queue=queue_name)
print(' [*] Waiting for logs. To exit press CTRL+C')
def callback(ch, method, properties, body):
print(" [x] %r" % body)
channel.basic_consume(callback,
queue=queue_name,
no_ack=True)
channel.start_consuming()
①没有binding的时候,发送的信息被丢掉
②![]() 开启两个receive,生成两个随机名字的queue
开启两个receive,生成两个随机名字的queue
③两个receive都收到信息
5.routing
前面一节中,binding的用法为:
channel.queue_bind(exchange='logs',
queue=queue_name)channel.queue_bind(exchange=exchange_name,
queue=queue_name,
routing_key='black')direct模式:routing_key要完全匹配;