【记录】Notifications和Toast的学习
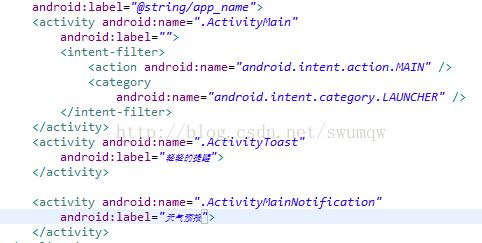
首先在AndroidManifest.xml声明三个页面:
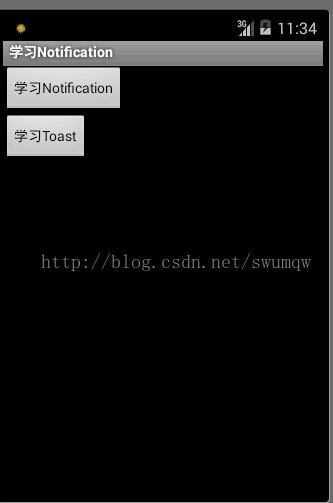
第一个是主页面,后面2个是Toast和Notifications的展示页面。
如图所示:
下面分别来看。
---------------------------------------------------------------------------------------------------------------------------------------------------------------------------------------------------------------------------------------
一、Notifications
1、点击按钮显示一个通知
代码如下:
public class ActivityMainNotification extends Activity {
	private static int NOTIFICATIONS_ID = R.layout.activity_notification;
	private NotificationManager mNotificationManager;

	@Override
	public void onCreate(Bundle savedInstanceState) {
		super.onCreate(savedInstanceState);
		setContentView(R.layout.activity_notification);

		Button button;

		mNotificationManager = (NotificationManager) getSystemService(NOTIFICATION_SERVICE);//-----(1)

		button = (Button) findViewById(R.id.sun_1);
		button.setOnClickListener(new Button.OnClickListener() {
			public void onClick(View v) {
				setWeather("晴空万里", "天气预报", "晴空万里", R.drawable.sun);
			}
		});


	private void setWeather(String tickerText, String title, String content,
			int drawable) {

		Notification notification = new Notification(drawable, tickerText,
				System.currentTimeMillis());//-----(2)

		PendingIntent contentIntent = PendingIntent.getActivity(this, 0,
				new Intent(this, ActivityMain.class), 0);//------(3)

		notification.setLatestEventInfo(this, title, content, contentIntent);//----(4)

		mNotificationManager.notify(NOTIFICATIONS_ID, notification);//-------(5)
	}
}
(2) Notification notification = new Notification(int drawable, String tickerText,System.currentTimeMillis());---构造一个Notification
第一个参数是通知的图片id;第二个参要显示的是通知要显示的文字;第三个参数是Notification显示的时间,一般为立即显示,就是,System.currentTimeMillis()。
(3)PendingIntent contentIntent = PendingIntent.getActivity(this, 0,new Intent(this, ActivityMain.class), 0);
创建一个PendingIntent,和Intent类似,当在下拉状态条中点击Notification时,跳转到这个Activity 。
(4)setLatestEventInfo(this,String ContentTitle,String ContentText,PendingIntent contentIntent);
----API 11中已经不使用setLatestEventInfo(),而使用Notification.Builder构造Notification:
Notification notification = new Notification.Builder(this)
.setSmallIcon(R.drawable.message) // 设置状态栏中的小图片,如需要更换更大的图片,使用setLargeIcon(Bitmap icon)。
.setTicker("。。。")// 设置通知要显示的文字。
.setContentTitle("下拉后标题")// 设置在下拉状态栏,通知条显示的标题
.setContentText("下拉后详细内容")// 设置在下拉状态栏,通知条显示的详细内容
.setContentIntent(pendingIntent) // 关联PendingIntent ,点击通知跳转的页面
.setNumber(1) // 在下拉后通知条的右方显示的数字。这个数字同时也起到一个序列号的作用,如果多个触发多个通知(同一ID),可以指定显示哪一个。
.getNotification(); //------API 16之后 build();
(5)通过NotificationManager将通知显示出来,必须要为每一个Notifications指定一个唯一的ID(见代码一开始)。
private static int NOTIFICATIONS_ID = R.layout.activity_notification;
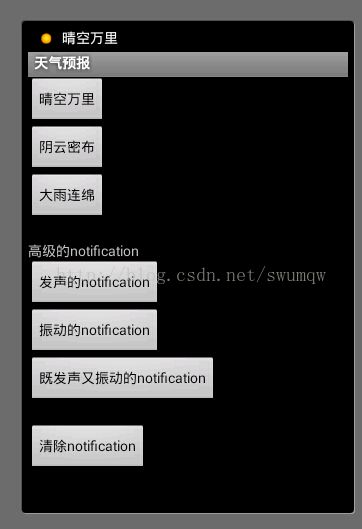
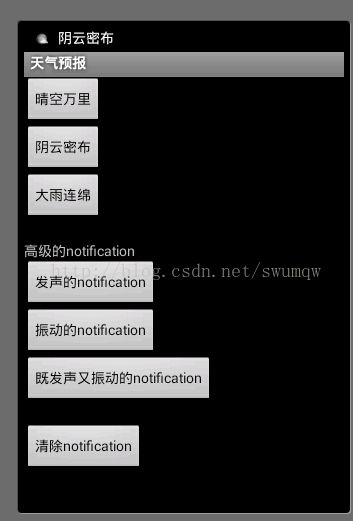
效果如图:
2、高级的通知
代码如下:
public class ActivityMainNotification extends Activity {
	private static int NOTIFICATIONS_ID = R.layout.activity_notification;
	private NotificationManager mNotificationManager;

	@Override
	public void onCreate(Bundle savedInstanceState) {
		super.onCreate(savedInstanceState);
		setContentView(R.layout.activity_notification);

		Button button;

		mNotificationManager = (NotificationManager) getSystemService(NOTIFICATION_SERVICE);

		button = (Button) findViewById(R.id.defaultSound);
		button.setOnClickListener(new Button.OnClickListener() {
			public void onClick(View v) {
				setDefault(Notification.DEFAULT_SOUND);//带声音
			}
		});

		button = (Button) findViewById(R.id.defaultVibrate);
		button.setOnClickListener(new Button.OnClickListener() {
			public void onClick(View v) {
				setDefault(Notification.DEFAULT_VIBRATE);带震动
			}
		});

		button = (Button) findViewById(R.id.defaultAll);
		button.setOnClickListener(new Button.OnClickListener() {
			public void onClick(View v) {
				setDefault(Notification.DEFAULT_ALL);//既发声又震动
			}
		});

		button = (Button) findViewById(R.id.clear);
		button.setOnClickListener(new Button.OnClickListener() {
			public void onClick(View v) {
				mNotificationManager.cancel(NOTIFICATIONS_ID);//清除通知
			}
		});

	}

	private void  setDefault(int defaults){


		PendingIntent contentIntent = PendingIntent.getActivity(this, 0,
				new Intent(this, ActivityMain.class), 0);

		String title = "天气预报";
		String content = "晴空万里";//默认是晴天天气预报

		final Notification notification = new Notification(R.drawable.sun,
				content, System.currentTimeMillis());

		notification.setLatestEventInfo(this, title, content, contentIntent);

		notification.defaults = defaults;

		mNotificationManager.notify(NOTIFICATIONS_ID, notification);
	}
}
(2)清除通知:mNotificationManager.cancel(NOTIFICATIONS_ID)。
---------------------------------------------------------------------------------------------------------------------------------------------------------------------------------------------------------------------------------------
二、Toast
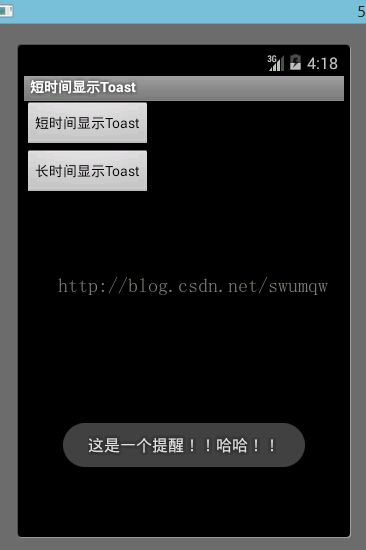
1、简单的提醒
代码很简单:
protected void showToast() {
		Toast.makeText(getApplicationContext(), "这是一个提醒!!哈哈!",
			     Toast.LENGTH_SHORT).show();
	}
解释:(1)第一个参数是Context;第二个参数是提醒的文字;第三个参数是提醒显示的时间,可以是Toast.LENGTH_SHORT或者Toast.LENGTH_LONG。
(2)show()-----显示此提醒。
效果如图:
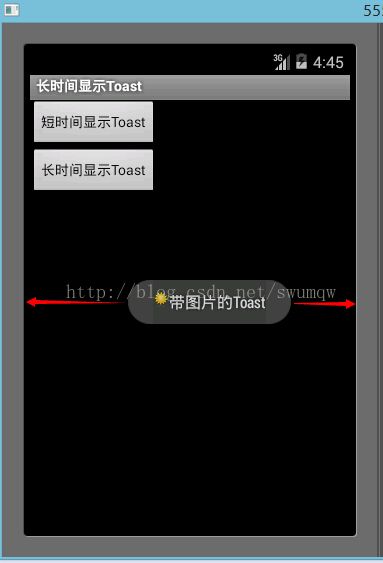
2、带小图标的提醒
代码如下:
		protected void showToast1( ) {

			Toast toast;
			toast = Toast.makeText(getApplicationContext(),
				     "带图片的Toast", Toast.LENGTH_LONG);
			toast.setGravity(Gravity.CENTER, 20, 0);
		        LinearLayout toastView = (LinearLayout) toast.getView();//创建LinearLayout布局
			toastView.setOrientation(LinearLayout.HORIZONTAL);//设置LinearLayout的布局方向
			ImageView imageCodeProject = new ImageView(getApplicationContext());//创建ImageView
			imageCodeProject.setImageResource(R.drawable.default_icon);
			toastView.addView(imageCodeProject, 0);//给toastView添加ImageView
			toast.show();//显示Toast
		}
解释:(1)setGravity(int Gravity,int Xoffset,, int Yoffset)-----设置Toast的位置,第一个参数是相对位置
(Gravity.RIGHT/Gravity.CENTER),第二、三个参数是X、 Y方向的偏移值。
(2)除了这种方法,还可以定义一个XML布局文件,然后用LayoutInflater inflater将其转换为View。
	protected void showToast( ) {

		View view;
		LayoutInflater vi = (LayoutInflater) getSystemService(Context.LAYOUT_INFLATER_SERVICE);
		view = vi.inflate(R.layout.toast , null);

		TextView tv = (TextView) view.findViewById(R.id.content);
		tv.setText("自定义Toast");
		Toast toast = new Toast(this);
		toast.setView(view);
		toast.setDuration(Toast.LENGTH_LONG);
		toast.show();
	}
效果如图:
