ps -ef|grep pmon
你就知道你当前登陆机器的运行中的ORACLE_SID了
客户端连接RAC
三台主机的IP映射必须写在hosts
连接scan的机器,必须用主机名连接,后跟global database name
rac的hosts文件,一定要写
127.0.0.1 localhost localhost
清除RAC环境
rm -rf /u01/11.2.0/grid/*
rm -rf /u01/app/oracle/*
rm -rf /u01/app/grid/*
rm -rf /u01/app/oraInventory/*
rm -rf /etc/ora*
chown -R oracle:oinstall /u01/app
修改裸设备权限
chown oracle:asmadmin /dev/sdb1
chmod 777 /dev/sdb1
增加VIP
srvctl add nodeapps -n rac2 -A 192.168.0.102/255.255.255.0/eth1
修改VIP地址
srvctl modify nodeapps -n rac1 -A 192.168.0.101/255.255.255.0/eth1
重新配置SCAN-IP的步骤:
查看SCAN-IP配置:
[root@rac1 bin]# ./srvctl config scan
SCAN name: scan-ip, Network: 1/10.0.4.0/255.255.255.0/eth0
SCAN VIP name: scan1, IP: /scan-ip/192.168.175.233
关闭SCAN-IP和SCAN_LISTENER服务:
[root@rac1 bin]# ./srvctl stop scan_listener
[root@rac1 bin]# ./srvctl stop scan
[root@rac1 bin]# ./srvctl status scan
SCAN VIP scan1 is enabled
SCAN VIP scan1 is not running
[root@rac1 bin]# ./srvctl status scan_listener
SCAN Listener LISTENER_SCAN1 is enabled
SCAN listener LISTENER_SCAN1 is not running
修改SCAN-IP配置:
[root@rac1 bin]# ./srvctl modify scan -n scan-ip#/etc/hosts里的SCAN-IP名字
[root@rac1 bin]# ./srvctl config scan
SCAN name: scan-ip, Network: 1/10.0.4.0/255.255.255.0/eth0
SCAN VIP name: scan1, IP: /scan-ip/10.0.4.49
启动SCAN-IP和SCAN_LISTENER服务:
[root@rac1 bin]# ./srvctl start scan
[root@rac1 bin]# ./srvctl start scan_listener
[root@rac1 bin]# ./srvctl status scan
SCAN VIP scan1 is enabled
SCAN VIP scan1 is running on node rac2
[root@rac1 bin]# ./srvctl status scan_listener
SCAN Listener LISTENER_SCAN1 is enabled
SCAN listener LISTENER_SCAN1 is running on node rac2
oracle11g数据库在执行dbca或者调整sga后重启oracle的时候可能会出现ORA-00845 MEMORY_TARGET not supported on this system 错误。
究其原因就是Linux系统的shm的大小比SGA设置的小,造成的,距离来说,SGA设置4G,而shm可能只有1G
网上提供两种解决办法:
01、调整sga的大小,这个明显不是我们所希望的
02、调整shm的大小,这样相对简单,具体操作如下
vi /etc/fstab
修改如下行的设置
tmpfs /dev/shm tmpfs defaults 0 0
改成
tmpfs /dev/shm tmpfs defaults,size=6G 0 0
保存退出
重新mount下shm使其生效
mount -o remount /dev/shm
通过df可以查看下,没有问题就可以继续安装数据库或者启动数据库了!
参考http://www.oracle-base.com/articles/11g/oracle-db-11gr2-rac-installation-on-ol5-using-vmware-server-2.php
当需要用root在各节点执行脚本时,发生了错误cannot restore segment prot after reloc: Permission denied
启动直接关系 echo "/usr/sbin/setenforce 0" >> /etc/rc.local
可以执行如下命令,然后重试:
/usr/sbin/setenforce 0
/u01/app/11.2.0/grid/crs/install/rootcrs.pl -verbose -deconfig -force
/u01/app/11.2.0/grid/root.sh
在11gr2 修改归档模式要简单一些:
1、将数据库启动到mount模式,
srvctl stop database -d cmsnm1
srvctl start database -d cmsnm1 -o mount
2、进入各个实例:
alter database archivelog
alter database open
3、连接数据库cmsnm1
SQL> archive log list;
Database log mode Archive Mode
Automatic archival Enabled
Archive destination USE_DB_RECOVERY_FILE_DEST
Oldest online log sequence 27
Next log sequence to archive 28
Current log sequence 28
Oracle Database 11g Release 2 RAC On Linux Using VMware Server 2
This article describes the installation of Oracle Database 11g release 2 (11.2 64-bit) RAC on Linux (Oracle Enterprise Linux 5 64-bit) using VMware Server 2 with no additional shared disk devices.
- Introduction
- Download Software
- VMware Server Installation
- Virtual Machine Setup
- Guest Operating System Installation
- Oracle Installation Prerequisites
- Automatic Setup
- Manual Setup
- Additional Setup
- Install VMware Client Tools
- Create Shared Disks
- Clone the Virtual Machine
- Install the Grid Infrastructure
- Install the Database
- Check the Status of the RAC
Note. I no longer use VMware Server. Since this article was written I've switched to VirtualBox as my main virtualization solution for testing installations.
- Oracle Database 11g Release 2 RAC On Linux Using VirtualBox
Introduction
One of the biggest obstacles preventing people from setting up test RAC environments is the requirement for shared storage. In a production environment, shared storage is often provided by a SAN or high-end NAS device, but both of these options are very expensive when all you want to do is get some experience installing and using RAC. A cheaper alternative is to use a FireWire disk enclosure to allow two machines to access the same disk(s), but that still costs money and requires two servers. A third option is to use VMware Server to fake the shared storage.
Using VMware Server you can run multiple Virtual Machines (VMs) on a single server, allowing you to run both RAC nodes on a single machine. In addition, it allows you to set up shared virtual disks, overcoming the obstacle of expensive shared storage.
![]()
Before you launch into this installation, here are a few things to consider.
- The finished system includes the host operating system, two guest operating systems, two sets of Oracle Grid Infrastructure (Clusterware + ASM) and two Database instances all on a single server. As you can imagine, this requires a significant amount of disk space, CPU and memory. I completed this installation on a Quad-Core processor with 8G of memory, so don't expect to work on a low spec machine.
- Following on from the last point, the VMs will each need 2G of RAM, preferably 3-4G if you don't want the VM to swap like crazy. As you can see, 11gR2 RAC requires much more memory than 11gR1 RAC. Don't assume you will be able to run this on a small PC or laptop. You won't.
- This procedure provides a bare bones installation to get the RAC working. There is no redundancy in the Grid Infrastructure installation or the ASM installation. To add this, simply create double the amount of shared disks and select the "Normal" redundancy option when it is offered. Of course, this will take more disk space.
- During the virtual disk creation, I always choose not to preallocate the disk space. This makes virtual disk access slower during the installation, but saves on wasted disk space.
- This is not, and should not be considered, a production-ready system. It's simply to allow you to get used to installing and using RAC.
- The Single Client Access Name (SCAN) should really be defined in the DNS or GNS and round-robin between one of 3 addresses, which are on the same subnet as the public and virtual IPs. In this article I've defined it as a single IP address in the "/etc/hosts" file, which is wrong and will cause the cluster verification to fail, but it allows me to complete the install without the presence of a DNS. This approach will not work for 11.2.0.2 onward, where you must use the DNS.
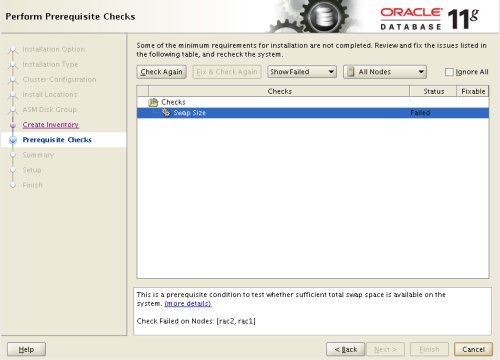
- The virtual machines used are only given 2Gig of swap, which causes a prerequisite check failure, but doesn't prevent the installation working. If you want to avoid this, define 3+Gig of swap.
- This article uses the 64-bit versions of Oracle Enterprise Linux and Oracle 11g Release 2.
Download Software
Download the following software.
- Oracle Enterprise Linux 5
- VMware Server
- Oracle 11g Release 2 (11.2) Software (64 bit)
VMware Server Installation
Regardless of the host OS, the setup of the virtual machines should be similar.
First, install the VMware Server software. On Linux you do this with the following command as the root user.
# rpm -Uvh VMware-server*.rpm
Preparing...                ########################################### [100%]
   1:VMware-server          ########################################### [100%]

The installation of VMware Server 2.0.0 for Linux completed successfully.
You can decide to remove this software from your system at any time by
invoking the following command: "rpm -e VMware-server".

Before running VMware Server for the first time, you need to
configure it for your running kernel by invoking the
following command: "/usr/bin/vmware-config.pl".

Enjoy,

    --the VMware team

#
Then finish the configuration by running the vmware-config.pl script as the root user. Most of the questions can be answered with the default response by pressing the return key. An example of the output can be seen here.
The web-based VMware Intrastructure Web Access Console is started by issuing the command "vmware" at the command prompt, or by pointing your browser to one of the two following URLs depending on whether you need Secure HTTP or not.
- http://machine-name:8222
- https://machine-name:8333
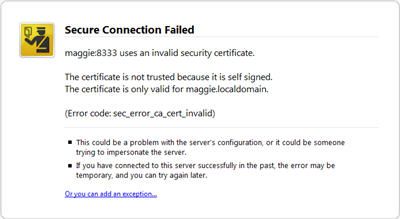
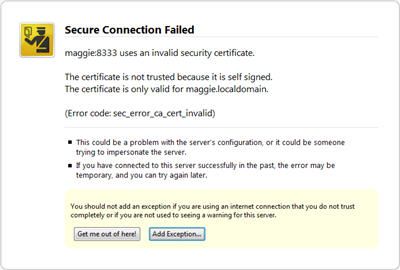
If you are using Secure HTTP, your browser may fail due to the self-signed certificate. In Firefox you can solve this by clicking the "Or you can add an exception..." link on the failure page.
On the resulting page, click the "Add Exception..." button..
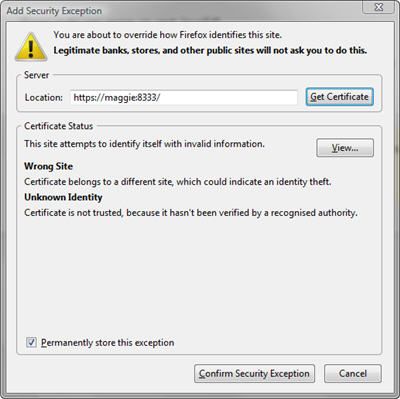
On the "Add Security Exception" page, click the "Get Certificate" button, then click the "Confirm Security Exception" button.
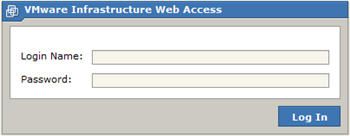
You are then presented with the web-based login screen.
Log in with the user specified during the config stage and you are presented with the VMware Intrastructure Web Access Console.
The VMware Server is now installed and ready to use.
Virtual Machine Setup
Now we must define the two virtual RAC nodes. We can save time by defining one VM, then cloning it when it is installed.
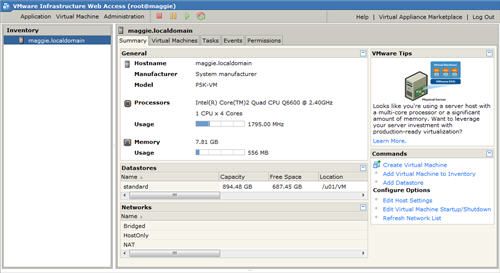
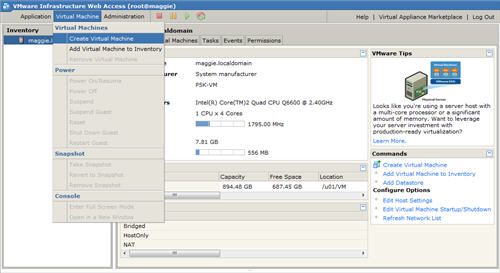
Click the "Virtual Machine > Create Virtual Machine" menu option, or click the "Create Virtual Machine" link on the bottom right of the console.
Enter the name "RAC1" and accept the standard datastore by clicking the "Next" button.
![]()
Select the "Linux operating system" option, and set the version to "Red Hat Enterprise Linux 5 (64-bit)", then click the "Next" button.
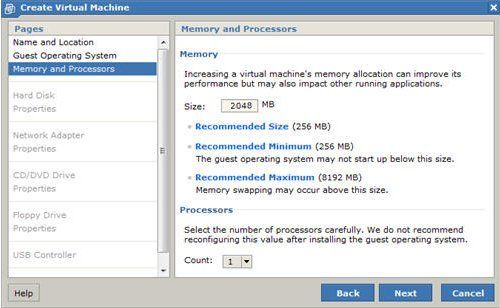
Enter the required amount of memory and number of CPUs for the virtual machine, then click the "Next" button. You should enter a minimum of 2048MB of memory.
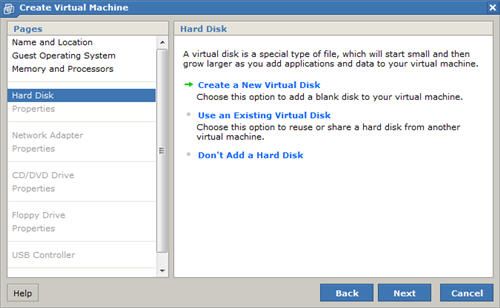
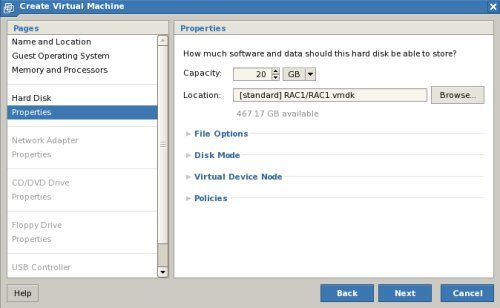
Click on the "Create a New Virtual Disk" link or click the "Next" button.
Set the disk size to "20 GB" and click the "Next" button.
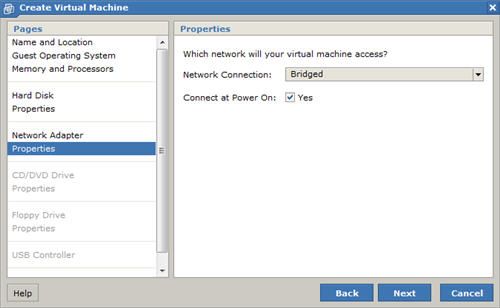
Click the "Add a Network Adapter" link or click the "Next" button.
![]()
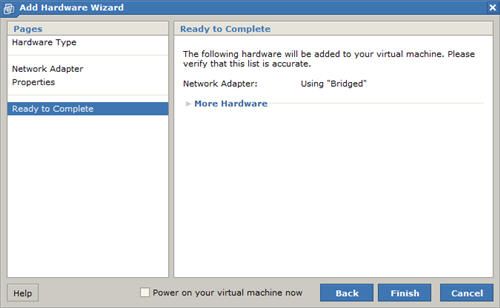
Select the "Bridged" option and click the "Next" button.
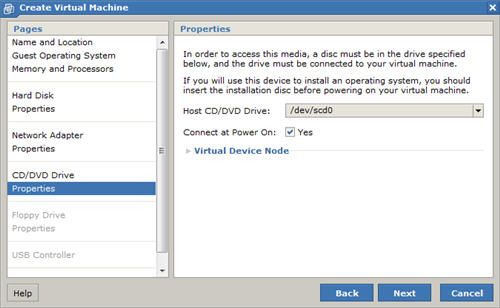
Click the "Use a Physical Drive" link, or click the "Next" button.
Accept the DVD properties by clicking the "Next" button.
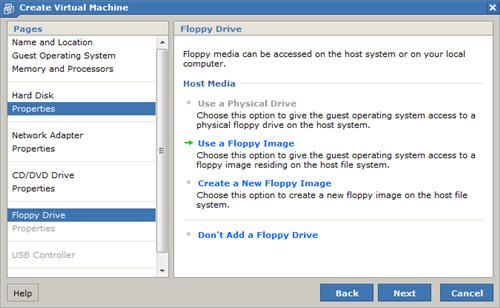
Click the "Don't Add a Floppy Drive" link.
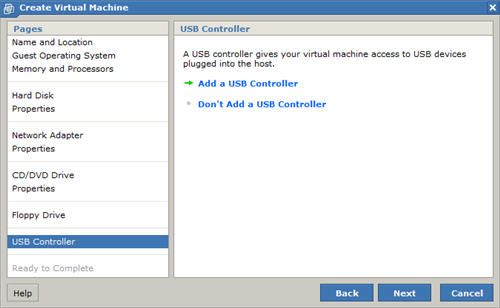
Click the "Add a USB Controller" link, or click the "Next" button.
Click the "Finish" button to create the virtual machine.
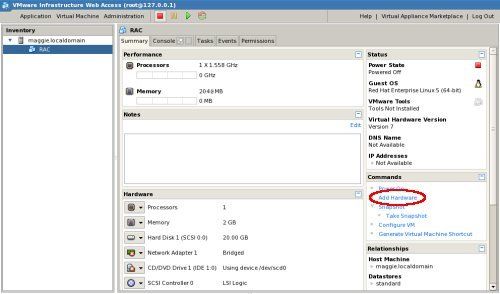
Highlight the "RAC1" VM in the "Inventory" pane, then click the "Add Hardware" link in the "Commands" section to the right.
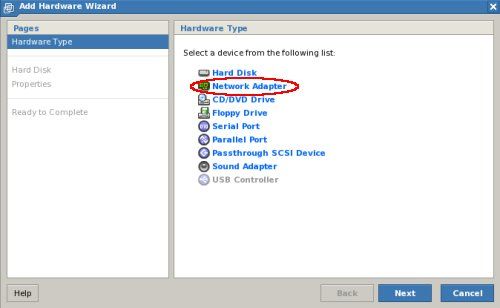
Click the "Network Adapter" link.
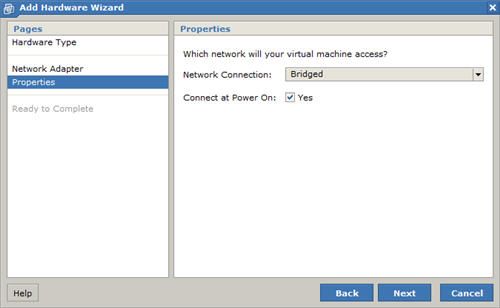
Select the "Bridged" option and click the "Next" button.
Click the "Finish" button.
The virtual machine is now configured so we can start the guest operating system installation.
Guest Operating System Installation
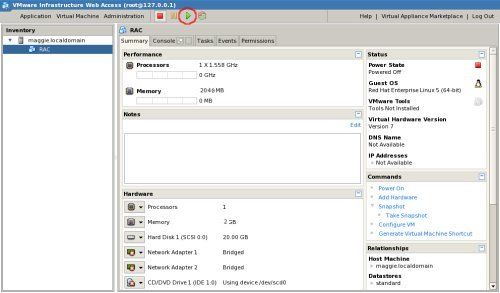
Place the first OEL 5 disk in the DVD drive and start the virtual machine by clicking the play button on the toolbar.
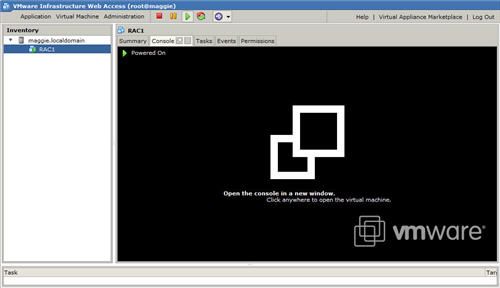
Click on the "Console" tab. If you have not previously installed the VMware browser plugin you will be prompted to do so. If it is already present, simply click on the black pane to the right to open a new console window.
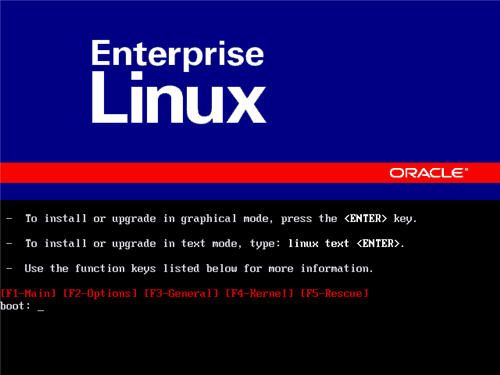
The resulting console window will contain the OEL boot screen.
Continue through the OEL 5 installation as you would for a normal server. A general pictorial guide to the installation can be found here. More specifically, it should be a server installation with a minimum of 2G swap (3-4G if you want to avoid warnings), firewall and SELinux disabled and the following package groups installed:
- GNOME Desktop Environment
- Editors
- Graphical Internet
- Text-based Internet
- Development Libraries
- Development Tools
- Server Configuration Tools
- Administration Tools
- Base
- System Tools
- X Window System
To be consistent with the rest of the article, the following information should be set during the installation.
- hostname: rac1.localdomain
- IP Address eth0: 192.168.2.101 (public address)
- Default Gateway eth0: 192.168.2.1 (public address)
- IP Address eth1: 192.168.0.101 (private address)
- Default Gateway eth1: none
You are free to change the IP addresses to suit your network, but remember to stay consistent with those adjustments throughout the rest of the article.
Oracle Installation Prerequisites
Perform either the Automatic Setup or the Manual Setup to complete the basic prerequisites. The Additional Setup is required for all installations.
Automatic Setup
If you plan to use the "oracle-validated" package to perform all your prerequisite setup, follow the instructions at http://public-yum.oracle.com to setup the yum repository for OL, then perform the following command.
# yum install oracle-validated
All necessary prerequisites will be performed automatically.
It is probably worth doing a full update as well, but this is not strictly speaking necessary.
# yum update
Manual Setup
If you have not used the "oracle-validated" package to perform all prerequisites, you will need to manually perform the following setup tasks.
In addition to the basic OS installation, the following packages must be installed whilst logged in as the root user. This includes the 64-bit and 32-bit versions of some packages.
# From Oracle Linux 5 DVD
cd /media/cdrom/Server
rpm -Uvh binutils-2.*
rpm -Uvh compat-libstdc++-33*
rpm -Uvh elfutils-libelf-0.*
rpm -Uvh elfutils-libelf-devel-*
rpm -Uvh gcc-4.*
rpm -Uvh gcc-c++-4.*
rpm -Uvh glibc-2.*
rpm -Uvh glibc-common-2.*
rpm -Uvh glibc-devel-2.*
rpm -Uvh glibc-headers-2.*
rpm -Uvh ksh-2*
rpm -Uvh libaio-0.*
rpm -Uvh libaio-devel-0.*
rpm -Uvh libgcc-4.*
rpm -Uvh libstdc++-4.*
rpm -Uvh libstdc++-devel-4.*
rpm -Uvh make-3.*
rpm -Uvh sysstat-7.*
rpm -Uvh unixODBC-2.*
rpm -Uvh unixODBC-devel-2.*

cd /
eject
Add or amend the following lines to the "/etc/sysctl.conf" file.
fs.aio-max-nr = 1048576
fs.file-max = 6815744
kernel.shmall = 2097152
kernel.shmmax = 1054504960
kernel.shmmni = 4096
# semaphores: semmsl, semmns, semopm, semmni
kernel.sem = 250 32000 100 128
net.ipv4.ip_local_port_range = 9000 65500
net.core.rmem_default=262144
net.core.rmem_max=4194304
net.core.wmem_default=262144
net.core.wmem_max=1048586
Run the following command to change the current kernel parameters.
/sbin/sysctl -p
Add the following lines to the "/etc/security/limits.conf" file.
oracle               soft    nproc   2047
oracle               hard    nproc   16384
oracle               soft    nofile  1024
oracle               hard    nofile  65536
Add the following lines to the "/etc/pam.d/login" file, if it does not already exist.
session required pam_limits.so
Create the new groups and users.
groupadd -g 1000 oinstall
groupadd -g 1200 dba
useradd -u 1100 -g oinstall -G dba oracle
passwd oracle
Create the directories in which the Oracle software will be installed.
mkdir -p  /u01/app/11.2.0/grid
mkdir -p /u01/app/oracle/product/11.2.0/db_1
chown -R oracle:oinstall /u01
chmod -R 775 /u01/
Additional Setup
Perform the following steps whilst logged into the "ol5-112-rac1" virtual machine as the root user.
Set the password for the "oracle" user.
passwd oracle
Install the following package from the Oracle grid media after you've defined groups.
cd /your/path/to/grid/rpm
rpm -Uvh cvuqdisk*
If you are not using DNS, the "/etc/hosts" file must contain the following information.
127.0.0.1       localhost.localdomain   localhost
# Public
192.168.0.101   ol5-112-rac1.localdomain        ol5-112-rac1
192.168.0.102   ol5-112-rac2.localdomain        ol5-112-rac2
# Private
192.168.1.101   ol5-112-rac1-priv.localdomain   ol5-112-rac1-priv
192.168.1.102   ol5-112-rac2-priv.localdomain   ol5-112-rac2-priv
# Virtual
192.168.0.103   ol5-112-rac1-vip.localdomain    ol5-112-rac1-vip
192.168.0.104   ol5-112-rac2-vip.localdomain    ol5-112-rac2-vip
# SCAN
192.168.0.105   ol5-112-scan.localdomain        ol5-112-scan
192.168.0.106   ol5-112-scan.localdomain        ol5-112-scan
192.168.0.107   ol5-112-scan.localdomain        ol5-112-scan
Note. The SCAN address should not really be defined in the hosts file. Instead is should be defined on the DNS to round-robin between 3 addresses on the same subnet as the public IPs. For this installation, we will compromise and use the hosts file. This is not possible if you are using 11.2.0.2 onward.
If you are using DNS, then only the first line needs to be present in the "/etc/hosts" file. The other entries are defined in the DNS, as described here. Having said that, I typically include all but the SCAN addresses.
Change the setting of SELinux to permissive by editing the "/etc/selinux/config" file, making sure the SELINUX flag is set as follows.
SELINUX=permissive
Alternatively, this alteration can be done using the GUI tool (System > Administration > Security Level and Firewall). Click on the SELinux tab and disable the feature.
If you have the Linux firewall enabled, you will need to disable or configure it, as shown here or here. The following is an example of disabling the firewall.
# service iptables stop
# chkconfig iptables off
Either configure NTP, or make sure it is not configured so the Oracle Cluster Time Synchronization Service (ctssd) can synchronize the times of the RAC nodes. If you want to deconfigure NTP do the following.
# service ntpd stop
Shutting down ntpd:                                        [  OK  ]
# chkconfig ntpd off
# mv /etc/ntp.conf /etc/ntp.conf.orig
# rm /var/run/ntpd.pid
If you want to use NTP, you must add the "-x" option into the following line in the "/etc/sysconfig/ntpd" file.
OPTIONS="-x -u ntp:ntp -p /var/run/ntpd.pid"
Then restart NTP.
# service ntpd restart
Create the directories in which the Oracle software will be installed.
mkdir -p  /u01/app/11.2.0/grid
mkdir -p /u01/app/oracle/product/11.2.0/db_1
chown -R oracle:oinstall /u01
chmod -R 775 /u01/
Login as the "oracle" user and add the following lines at the end of the "/home/oracle/.bash_profile" file.
# Oracle Settings
TMP=/tmp; export TMP
TMPDIR=$TMP; export TMPDIR

ORACLE_HOSTNAME=ol5-112-rac1.localdomain; export ORACLE_HOSTNAME
ORACLE_UNQNAME=RAC; export ORACLE_UNQNAME
ORACLE_BASE=/u01/app/oracle; export ORACLE_BASE
GRID_HOME=/u01/app/11.2.0/grid; export GRID_HOME
DB_HOME=$ORACLE_BASE/product/11.2.0/db_1; export DB_HOME
ORACLE_HOME=$DB_HOME; export ORACLE_HOME
ORACLE_SID=RAC1; export ORACLE_SID
ORACLE_TERM=xterm; export ORACLE_TERM
BASE_PATH=/usr/sbin:$PATH; export BASE_PATH
PATH=$ORACLE_HOME/bin:$BASE_PATH; export PATH

LD_LIBRARY_PATH=$ORACLE_HOME/lib:/lib:/usr/lib; export LD_LIBRARY_PATH
CLASSPATH=$ORACLE_HOME/JRE:$ORACLE_HOME/jlib:$ORACLE_HOME/rdbms/jlib; export CLASSPATH

if [ $USER = "oracle" ]; then
  if [ $SHELL = "/bin/ksh" ]; then
    ulimit -p 16384
    ulimit -n 65536
  else
    ulimit -u 16384 -n 65536
  fi
fi

alias grid_env='. /home/oracle/grid_env'
alias db_env='. /home/oracle/db_env'
Create a file called "/home/oracle/grid_env" with the following contents.
ORACLE_SID=+ASM1; export ORACLE_SID
ORACLE_HOME=$GRID_HOME; export ORACLE_HOME
PATH=$ORACLE_HOME/bin:$BASE_PATH; export PATH

LD_LIBRARY_PATH=$ORACLE_HOME/lib:/lib:/usr/lib; export LD_LIBRARY_PATH
CLASSPATH=$ORACLE_HOME/JRE:$ORACLE_HOME/jlib:$ORACLE_HOME/rdbms/jlib; export CLASSPATH
Create a file called "/home/oracle/db_env" with the following contents.
ORACLE_SID=RAC1; export ORACLE_SID
ORACLE_HOME=$DB_HOME; export ORACLE_HOME
PATH=$ORACLE_HOME/bin:$BASE_PATH; export PATH

LD_LIBRARY_PATH=$ORACLE_HOME/lib:/lib:/usr/lib; export LD_LIBRARY_PATH
CLASSPATH=$ORACLE_HOME/JRE:$ORACLE_HOME/jlib:$ORACLE_HOME/rdbms/jlib; export CLASSPATH
Once the "/home/oracle/grid_env" has been run, you will be able to switch between environments as follows.
$ grid_env
$ echo $ORACLE_HOME
/u01/app/11.2.0/grid
$ db_env
$ echo $ORACLE_HOME
/u01/app/oracle/product/11.2.0/db_1
$
We've made a lot of changes, so it's worth doing a reboot of the VM at this point to make sure all the changes have taken effect.
# shutdown -r now
Install VMware Client Tools
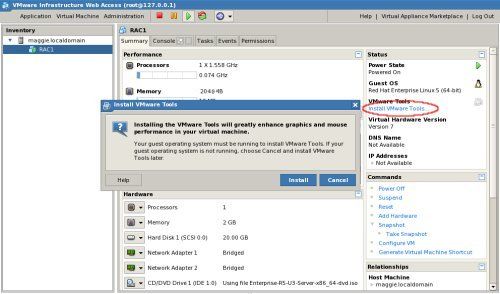
On the web console, highlight the "RAC1" VM and click the "Install VMware Tools" link and click the subsequent "Install" button.
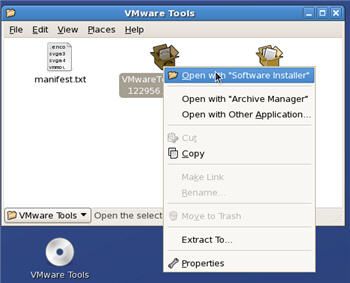
In the RAC1 console, right-click on the "VMwareTools*.rpm" file and select the "Open with "Software Installer"" option.
Click the "Apply" button and accept the warning by clicking the subsequent "Install Anyway" button.
Next, run the "vmware-config-tools.pl" script as the root user.
# vmware-config-tools.pl
Accept all the default settings and pick the screen resolution of your choice. Ignore any warnings or errors. The VMware client tools are now installed.
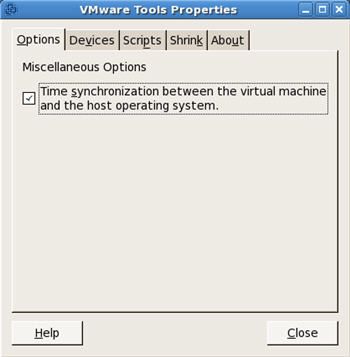
Issue the "vmware-toolbox" command as the root user. On the subsequent dialog, check the "Time synchronization..." option and click the "Close" button.
Reboot the server before proceeding. After the reboot, it is possible the monitor will not be recognised. If this is the case don't panic. Follow the instructions provided on the screen and reconfigure the monitor setting, which will allow the XServer to function correctly.
Create Shared Disks
Shut down the RAC1 virtual machine using the following command.
# shutdown -h now
Create a directory on the host system to hold the shared virtual disks.
# mkdir -p /u01/VM/shared
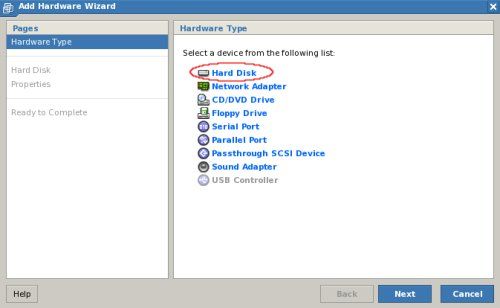
On the VMware Intrastructure Web Access Console, click the "Add Hardware" link.
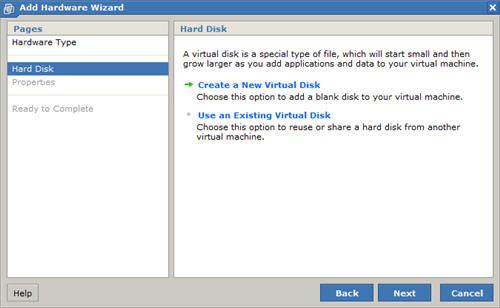
Click the "Hard Disk" link, or click the "Next" button.
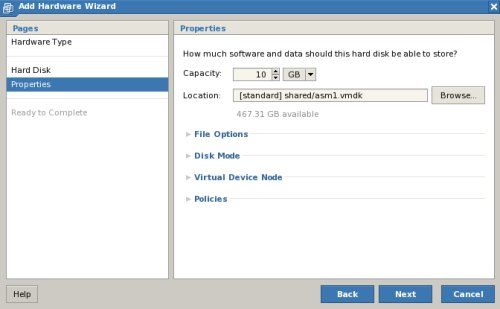
Click the "Create New Virtual Disk" link, or click the "Next" button.
Set the size to "10 GB" and the location to "[standard] shared/asm1.vmdk".
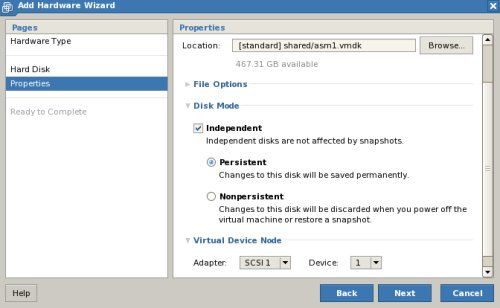
Expand the "Disk Mode" section and check the "Independent" and "Persistent" options. Expand the "Virtual Device Node" section and set the adapter to "SCSI 1" and the device to "1", then click the "Next" button.
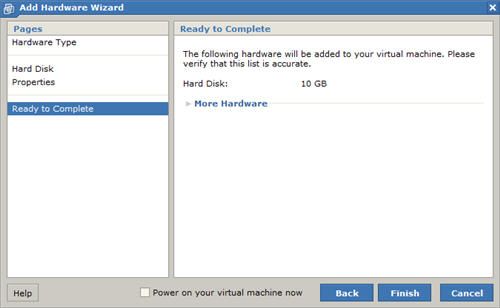
Click the "Finish" button to add the new virtual disk.
Repeat the previous hard disk creation steps 4 more times, using the following values.
- File Name: [standard] shared/asm2.vmdk
Virtual Device Node: SCSI 1:2
Mode: Independent and Persistent - File Name: [standard] shared/asm3.vmdk
Virtual Device Node: SCSI 1:3
Mode: Independent and Persistent - File Name: [standard] shared/asm4.vmdk
Virtual Device Node: SCSI 1:4
Mode: Independent and Persistent - File Name: [standard] shared/asm5.vmdk
Virtual Device Node: SCSI 1:5
Mode: Independent and Persistent
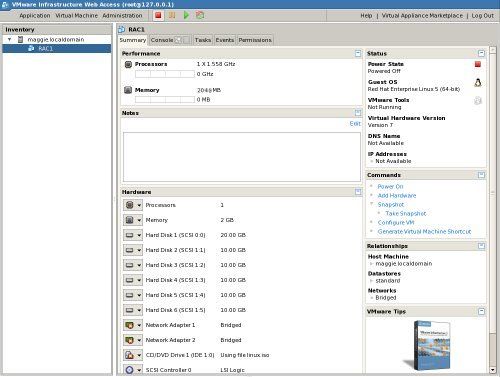
At the end of this process, the virtual machine should look something like the picture below.
Edit the contents of the "/u01/VM/RAC1/RAC1.vmx" file using a text editor, making sure the following entries are present. Some of the tries will already be present, some will not.
disk.locking = "FALSE"
diskLib.dataCacheMaxSize = "0"
diskLib.dataCacheMaxReadAheadSize = "0"
diskLib.dataCacheMinReadAheadSize = "0"
diskLib.dataCachePageSize = "4096"
diskLib.maxUnsyncedWrites = "0"

scsi1.present = "TRUE"
scsi1.sharedBus = "VIRTUAL"
scsi1.virtualDev = "lsilogic"

scsi1:1.present = "TRUE"
scsi1:1.fileName = "/u01/VM/shared/asm1.vmdk"
scsi1:1.writeThrough = "TRUE"
scsi1:1.mode = "independent-persistent"
scsi1:1.deviceType = "plainDisk"
scsi1:1.redo = ""

scsi1:2.present = "TRUE"
scsi1:2.fileName = "/u01/VM/shared/asm2.vmdk"
scsi1:2.writeThrough = "TRUE"
scsi1:2.mode = "independent-persistent"
scsi1:2.deviceType = "plainDisk"
scsi1:2.redo = ""

scsi1:3.present = "TRUE"
scsi1:3.fileName = "/u01/VM/shared/asm3.vmdk"
scsi1:3.writeThrough = "TRUE"
scsi1:3.mode = "independent-persistent"
scsi1:3.deviceType = "plainDisk"
scsi1:3.redo = ""

scsi1:4.present = "TRUE"
scsi1:4.fileName = "/u01/VM/shared/asm4.vmdk"
scsi1:4.writeThrough = "TRUE"
scsi1:4.mode = "independent-persistent"
scsi1:4.deviceType = "plainDisk"
scsi1:4.redo = ""

scsi1:5.present = "TRUE"
scsi1:5.fileName = "/u01/VM/shared/asm5.vmdk"
scsi1:5.writeThrough = "TRUE"
scsi1:5.mode = "independent-persistent"
scsi1:5.deviceType = "plainDisk"
scsi1:5.redo = ""
Start the RAC1 virtual machine by clicking the "Play" button on the toolbar, then start the console as before. When the server has started, log in as the root user so you can partition the disks. The current disks can be seen by issuing the following commands.
# cd /dev
# ls sd*
sda  sda1  sda2  sdb  sdc  sdd  sde  sdf
#
Use the "fdisk" command to partition the disks sdb to sdf. The following output shows the expected fdisk output for the sdb disk.
# fdisk /dev/sdb
Device contains neither a valid DOS partition table, nor Sun, SGI or OSF disklabel
Building a new DOS disklabel. Changes will remain in memory only,
until you decide to write them. After that, of course, the previous
content won't be recoverable.


The number of cylinders for this disk is set to 1305.
There is nothing wrong with that, but this is larger than 1024,
and could in certain setups cause problems with:
1) software that runs at boot time (e.g., old versions of LILO)
2) booting and partitioning software from other OSs
   (e.g., DOS FDISK, OS/2 FDISK)
Warning: invalid flag 0x0000 of partition table 4 will be corrected by w(rite)

Command (m for help): n
Command action
   e   extended
   p   primary partition (1-4)
p
Partition number (1-4): 1
First cylinder (1-1305, default 1):
Using default value 1
Last cylinder or +size or +sizeM or +sizeK (1-1305, default 1305):
Using default value 1305

Command (m for help): p

Disk /dev/sdb: 10.7 GB, 10737418240 bytes
255 heads, 63 sectors/track, 1305 cylinders
Units = cylinders of 16065 * 512 = 8225280 bytes

   Device Boot      Start         End      Blocks   Id  System
/dev/sdb1               1        1305    10482381   83  Linux

Command (m for help): w
The partition table has been altered!

Calling ioctl() to re-read partition table.
Syncing disks.
#
In each case, the sequence of answers is "n", "p", "1", "Return", "Return", "p" and "w".
Once all the disks are partitioned, the results can be seen by repeating the previous "ls" command.
# cd /dev
# ls sd*
sda  sda1  sda2  sdb  sdb1  sdc  sdc1  sdd  sdd1  sde  sde1  sdf  sdf1
#
Determine your current kernel.
uname -rm
2.6.18-164.el5 x86_64
#
Download the appropriate ASMLib RPMs from OTN. In this case we installed the last two from the media, so we just need the first package. For RHEL we would need all three of the following.
- oracleasm-support-2.1.3-1.el5.x86_64.rpm
- oracleasmlib-2.0.4-1.el5.x86_64.rpm
- oracleasm-2.6.18-164.el5-2.0.5-1.el5.x86_64.rpm
Install the packages using the following command.
rpm -Uvh oracleasm*.rpm
Configure ASMLib using the following command.
# oracleasm configure -i
Configuring the Oracle ASM library driver.

This will configure the on-boot properties of the Oracle ASM library
driver.  The following questions will determine whether the driver is
loaded on boot and what permissions it will have.  The current values
will be shown in brackets ('[]').  Hitting  without typing an
answer will keep that current value.  Ctrl-C will abort.

Default user to own the driver interface []: oracle
Default group to own the driver interface []: dba
Start Oracle ASM library driver on boot (y/n) [n]: y
Scan for Oracle ASM disks on boot (y/n) [y]:
Writing Oracle ASM library driver configuration: done
#
Load the kernel module using the following command.
# /usr/sbin/oracleasm init
Loading module "oracleasm": oracleasm
Mounting ASMlib driver filesystem: /dev/oracleasm
#
If you have any problems, run the following command to make sure you have the correct version of the driver.
# /usr/sbin/oracleasm update-driver
Mark the five shared disks as follows.
# /usr/sbin/oracleasm createdisk DISK1 /dev/sdb1
Writing disk header: done
Instantiating disk: done
# /usr/sbin/oracleasm createdisk DISK2 /dev/sdc1
Writing disk header: done
Instantiating disk: done
# /usr/sbin/oracleasm createdisk DISK3 /dev/sdd1
Writing disk header: done
Instantiating disk: done
# /usr/sbin/oracleasm createdisk DISK4 /dev/sde1
Writing disk header: done
Instantiating disk: done
# /usr/sbin/oracleasm createdisk DISK5 /dev/sdf1
Writing disk header: done
Instantiating disk: done
#
It is unnecessary, but we can run the "scandisks" command to refresh the ASM disk configuration.
# /usr/sbin/oracleasm scandisks
Reloading disk partitions: done
Cleaning any stale ASM disks...
Scanning system for ASM disks...
#
We can see the disk are now visible to ASM using the "listdisks" command.
# /usr/sbin/oracleasm listdisks
DISK1
DISK2
DISK3
DISK4
DISK5
#
The shared disks are now configured for the grid infrastructure.
Clone the Virtual Machine
The current version of VMware Server does not include an option to clone a virtual machine, but the following steps illustrate how this can be achieved manually.
Shut down the RAC1 virtual machine using the following command.
# shutdown -h now
Copy the RAC1 virtual machine using the following command.
# cp -R /u01/VM/RAC1 /u01/VM/RAC2
Edit the contents of the "/u01/VM/RAC2/RAC1.vmx" file, making the following change.
displayName = "RAC2"
Ignore discrepancies with the file names in the "/u01/VM/RAC2" directory. This does not affect the action of the virtual machine.
In the VMware Infrastructure Web Access Console, select the "Virtual Machine > Add Virtual Machien to Inventory" menu options and browse for the "/u01/VM/RAC2/RAC1.vmx" file. Once opened, the RAC2 virtual machine is visible on the console.
![]()
Start the RAC2 virtual machine by clicking the "Play" button on the toolbar. Select the "I _copied it" option click the "OK" button when prompted.
Ignore any errors during the server startup. We are expecting the networking components to fail at this point.
Log in to the RAC2 virtual machine as the root user and start the "Network Configuration" tool (System > Administration > Network).
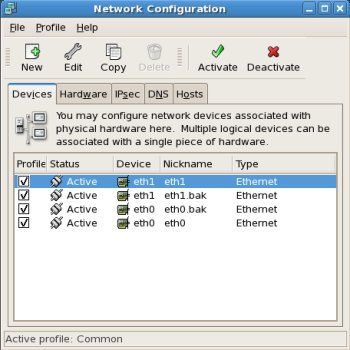
Remove the devices with the "%.bak" nicknames. To do this, highlight a device, deactivate, then delete it. This will leave just the regular "eth0" and "eth1" devices. Highlight the "eth0" interface and click the "Edit" button on the toolbar and alter the IP address to "192.168.2.102" in the resulting screen.
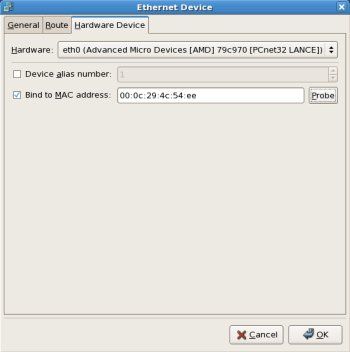
Click on the "Hardware Device" tab and click the "Probe" button. Then accept the changes by clicking the "OK" button.
Repeat the process for the "eth1" interface, this time setting the IP Address to "192.168.0.102", and making sure the default gateway is not set for the "eth1" interface.
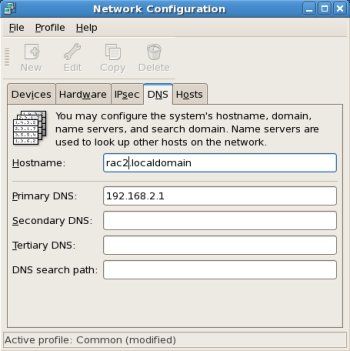
Click on the "DNS" tab and change the host name to "rac2.localdomain", then click on the "Devices" tab.
Once you are finished, save the changes (File > Save) and activate the network interfaces by highlighting them and clicking the "Activate" button. Once activated, the screen should look like the following image.
Edit the "/home/oracle/.bash_profile" file on the RAC2 node to correct the ORACLE_SID and ORACLE_HOSTNAME values.
ORACLE_SID=RAC2; export ORACLE_SID
ORACLE_HOSTNAME=rac2.localdomain; export ORACLE_HOSTNAME
Also, amend the ORACLE_SID setting in the "/home/oracle/db_env" and "/home/oracle/grid_env" files.
Start the RAC1 virtual machine and restart the RAC2 virtual machine. When both nodes have started, check they can both ping all the public and private IP addresses using the following commands.
ping -c 3 rac1
ping -c 3 rac1-priv
ping -c 3 rac2
ping -c 3 rac2-priv
At this point the virtual IP addresses defined in the "/etc/hosts" file will not work, so don't bother testing them.
Prior to 11gR2 we would probably use the "runcluvfy.sh" utility in the clusterware root directory to check the prerequisites have been met. If you are intending to configure SSH connectivity using the installer this check should be omitted as it will always fail. If you want to setup SSH connectivity manually, then once it is done you can run the "runcluvfy.sh" with the following command.
/mountpoint/clusterware/runcluvfy.sh stage -pre crsinst -n rac1,rac2 -verbose
If you get any failures be sure to correct them before proceeding.
It's a good idea to take a snapshot of the virtual machines, so you can repeat the following stages if you run into any problems. To do this, shutdown both virtual machines and issue the following commands.
# cd /u01/VM
# tar -cvf 11gR2-RAC-PreGrid.tar RAC1 RAC2 shared
# gzip 11gR2-RAC-PreGrid.tar
The virtual machine setup is now complete.
Install the Grid Infrastructure
Start the RAC1 and RAC2 virtual machines, login to RAC1 as the oracle user and start the Oracle installer.
./runInstaller
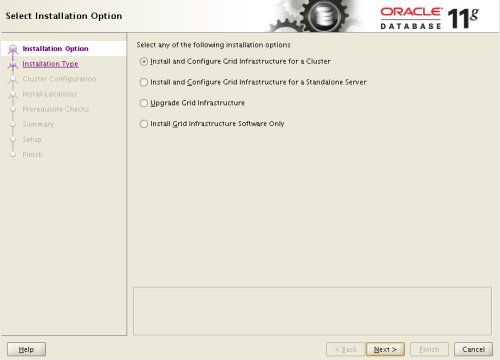
Select the "Install and Configure Grid Infrastructure for a Cluster" option, then click the "Next" button.
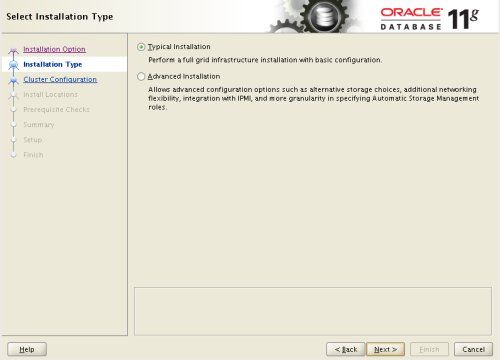
Select the "Typical Installation" option, then click the "Next" button.
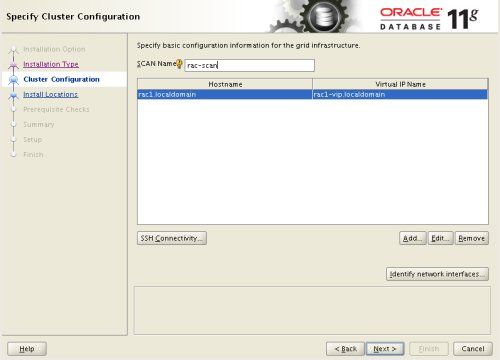
On the "Specify Cluster Configuration" screen, click the "Add" button.
Enter the details of the second node in the cluster, then click the "OK" button.
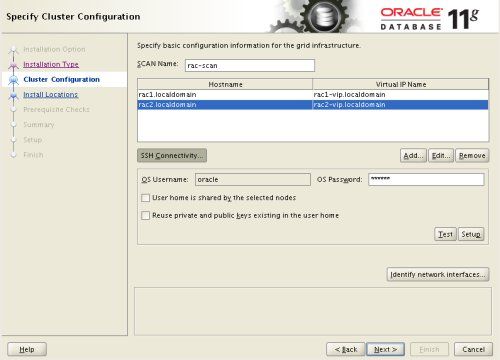
Click the "SSH Connectivity..." button and enter the password for the "oracle" user. Click the "Setup" button to to configure SSH connectivity, and the "Test" button to test it once it is complete.
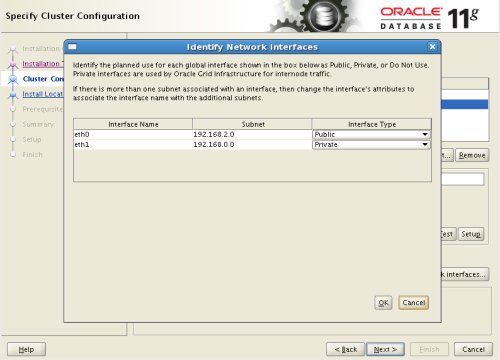
Click the "Identify network interfaces..." button and check the public and private networks are specified correctly. Once you are happy with them, click the "OK" button and the "Next" button on the previous screen.
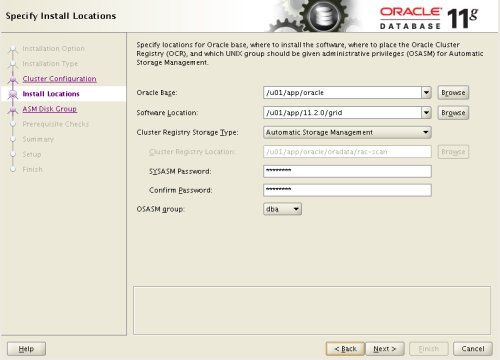
Enter "/u01/app/11.2.0/grid" as the software location and "Automatic Storage Manager" as the cluster registry storage type. Enter the ASM password and click the "Next" button.
Set the redundancy to "External", select all 5 disks and click the "Next" button.
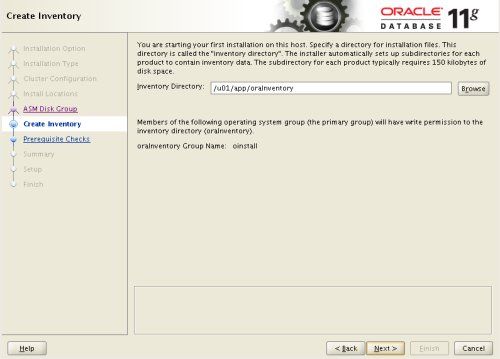
Accept the default inventory directory by clicking the "Next" button.
Wait while the prerequisite checks complete. If you have any issues, either fix them or check the "Ignore All" checkbox and click the "Next" button.
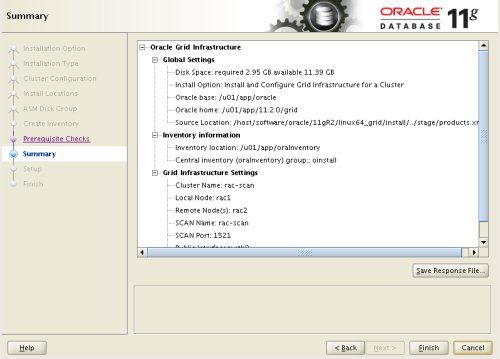
If you are happy with the summary information, click the "Finish" button.
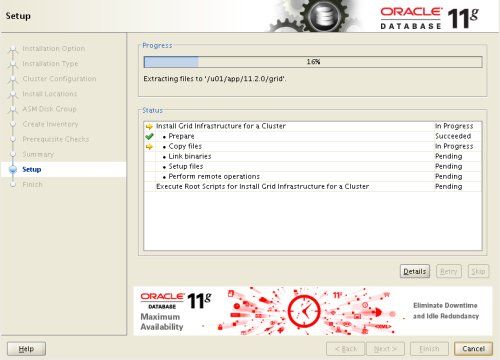
Wait while the setup takes place.
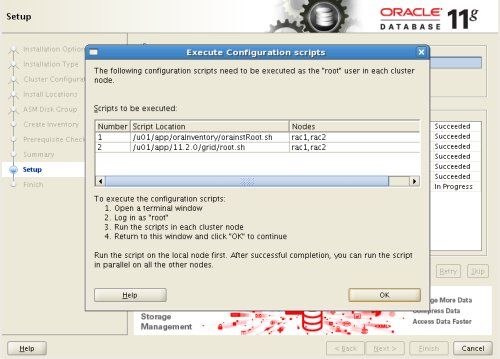
When prompted, run the configuration scripts on each node.
The output from the "orainstRoot.sh" file should look something like that listed below.
# cd /u01/app/oraInventory
# ./orainstRoot.sh
Changing permissions of /u01/app/oraInventory.
Adding read,write permissions for group.
Removing read,write,execute permissions for world.

Changing groupname of /u01/app/oraInventory to oinstall.
The execution of the script is complete.
#
The output of the root.sh will vary a little depending on the node it is run on. Example output can be seen here (Node1, Node2).
Once the scripts have completed, return to the "Execute Configuration Scripts" screen on RAC1 and click the "OK" button.
Wait for the configuration assistants to complete.
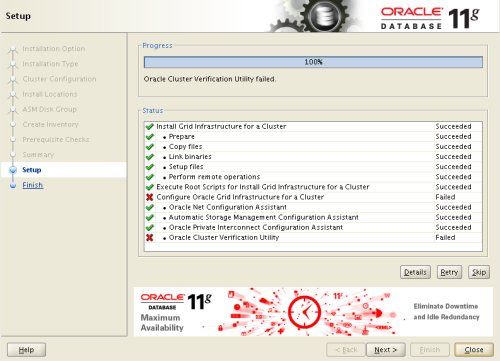
We expect the verification phase to fail with an error relating to the SCAN, assuming you are not using DNS.
INFO: Checking Single Client Access Name (SCAN)...
INFO: Checking name resolution setup for "rac-scan.localdomain"...
INFO: ERROR:
INFO: PRVF-4664 : Found inconsistent name resolution entries for SCAN name "rac-scan.localdomain"
INFO: ERROR:
INFO: PRVF-4657 : Name resolution setup check for "rac-scan.localdomain" (IP address: 192.168.2.201) failed
INFO: ERROR:
INFO: PRVF-4664 : Found inconsistent name resolution entries for SCAN name "rac-scan.localdomain"
INFO: Verification of SCAN VIP and Listener setup failed
Provided this is the only error, it is safe to ignore this and continue by clicking the "Next" button.
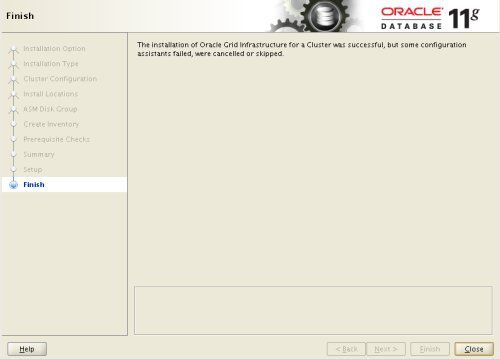
Click the "Close" button to exit the installer.
It's a good idea to take a snapshot of the virtual machines, so you can repeat the following stages if you run into any problems. To do this, shutdown both virtual machines and issue the following commands.
# cd /u01/VM
# tar -cvf 11gR2-RAC-PostGrid.tar RAC1 RAC2 shared
# gzip 11gR2-RAC-PostGrid.tar
The grid infrastructure installation is now complete.
Install the Database
Start the RAC1 and RAC2 virtual machines, login to RAC1 as the oracle user and start the Oracle installer.
./runInstaller
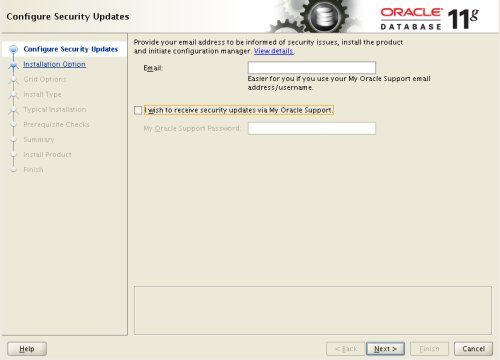
Uncheck the security updates checkbox and click the "Next" button.
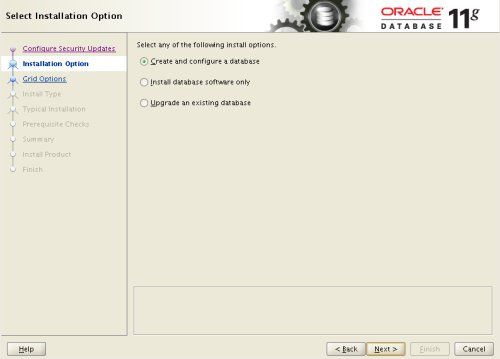
Accept the "Create and configure a database" option by clicking the "Next" button.
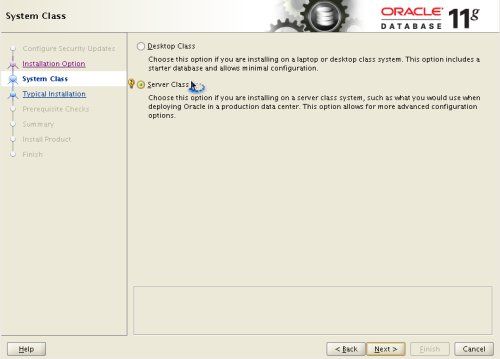
Accept the "Server Class" option by clicking the "Next" button.
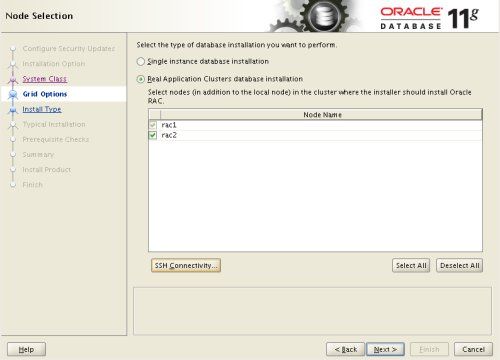
Make sure both nodes are selected, then click the "Next" button.
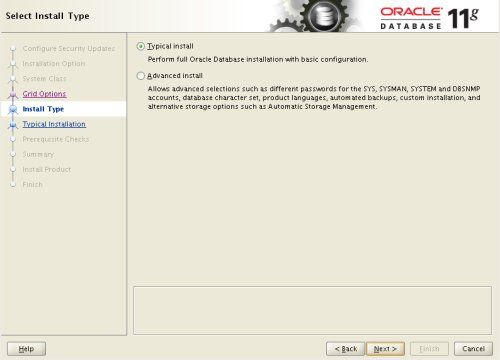
Accept the "Typical install" option by clicking the "Next" button.
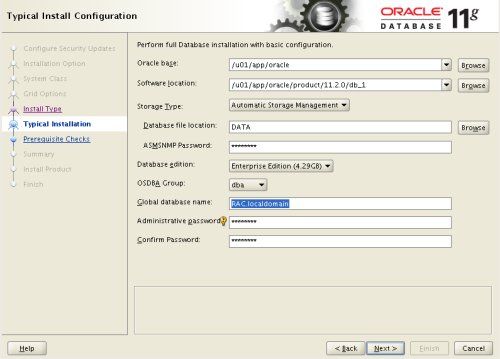
Enter "/u01/app/oracle/product/11.2.0/db_1" for the software location. The storage type should be set to "Automatic Storage Manager". Enter the appropriate passwords and database name, in this case "RAC.localdomain".
Wait for the prerequisite check to complete. If there are any problems either fix them, or check the "Ignore All" checkbox and click the "Next" button.
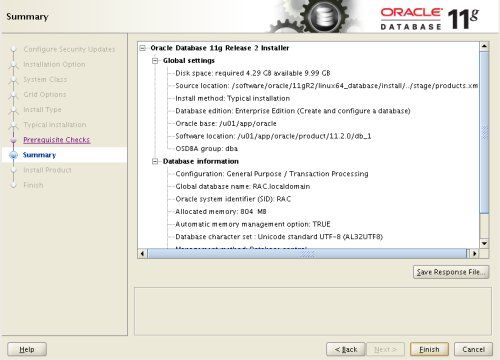
If you are happy with the summary information, click the "Finish" button.
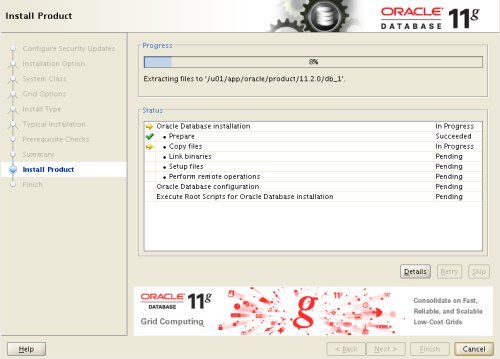
Wait while the installation takes place.
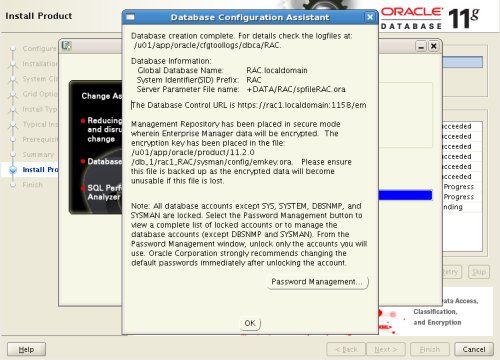
Once the software installation is complete the Database Configuration Assistant (DBCA) will start automatically.
![]()
Once the Database Configuration Assistant (DBCA) has finished, click the "OK" button.
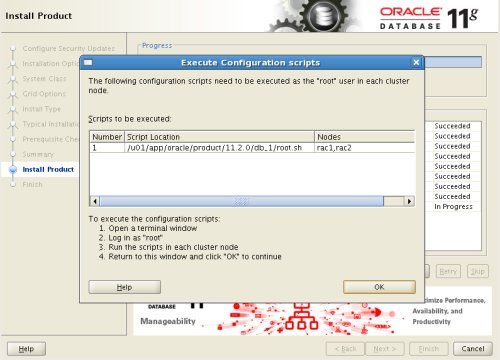
When prompted, run the configuration scripts on each node. When the scripts have been run on each node, click the "OK" button.
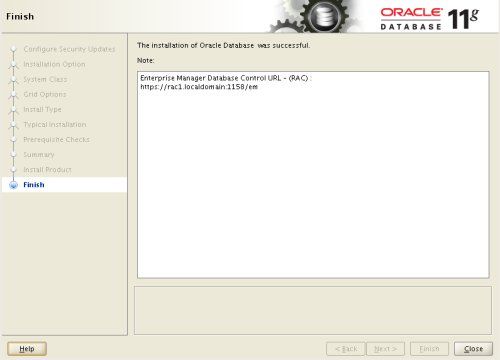
Click the "Close" button to exit the installer.
The RAC database creation is now complete.
Check the Status of the RAC
There are several ways to check the status of the RAC. The srvctl utility shows the current configuration and status of the RAC database.
$ srvctl config database -d RAC
Database unique name: RAC
Database name: RAC
Oracle home: /u01/app/oracle/product/11.2.0/db_1
Oracle user: oracle
Spfile: +DATA/RAC/spfileRAC.ora
Domain: localdomain
Start options: open
Stop options: immediate
Database role: PRIMARY
Management policy: AUTOMATIC
Server pools: RAC
Database instances: RAC1,RAC2
Disk Groups: DATA
Services:
Database is administrator managed
$

$ srvctl status database -d RAC
Instance RAC1 is running on node rac1
Instance RAC2 is running on node rac2
$
The V$ACTIVE_INSTANCES view can also display the current status of the instances.
$ sqlplus / as sysdba

SQL*Plus: Release 11.2.0.1.0 Production on Sat Sep 26 19:04:19 2009

Copyright (c) 1982, 2009, Oracle.  All rights reserved.


Connected to:
Oracle Database 11g Enterprise Edition Release 11.2.0.1.0 - 64bit Production
With the Partitioning, Real Application Clusters, Automatic Storage Management, OLAP,
Data Mining and Real Application Testing options

SQL> SELECT inst_name FROM v$active_instances;

INST_NAME
--------------------------------------------------------------------------------
rac1.localdomain:RAC1
rac2.localdomain:RAC2

SQL>
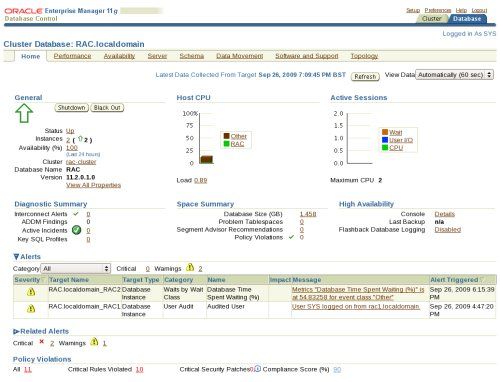
If you have configured Enterprise Manager, it can be used to view the configuration and current status of the database using a URL like "https://rac1.localdomain:1158/em".
For more information see:
- Grid Infrastructure Installation Guide for Linux
- Real Application Clusters Installation Guide for Linux and UNIX
Hope this helps. Regards Tim...
Back to the Top.
