Android自定义View--从Canvas、Paint、Bitmap谈起
Android中提供的常用控件非常丰富,即便如此,也很难满足在实际开发中的各种需求。
自定义视图的核心实现需要我们重写View.onDraw(Canvas canvas)方法,接下来就从该函数的唯一参数类型Canvas入手分析。
首先,简要介绍以下基本图形接口相关的类:
1. Bitmap ------ 可以来自资源/文件,也可以在程序中创建,实际的功能相当于图片的存储空间。
2. Canvas ------ 如果把Bitmap比作内容的话,Canvas就是提供了众多方法操作Bitmap的一个工具。
3. Paint ------ "画板"上的笔刷工具,也用于设置View控件上的样式。
那么,三者是什么关系呢?
从功能上来看,一个Canvas就像一个神奇的“画家”,一个Paint就像一支“画笔”,而Bitmap就像一张“画纸”。画家利用各式各样的画笔在画纸上画出一张张美丽的图片。
在接下来的Demo中,每个自定义视图都是利用Bitmap来构造一个Canvas对象,之后Canvas利用Paint在Bitmap上绘制(text, rect, bitmap etc.),Canvas绘制完成后再将Bitmap添加到一个ImageView控件中去。
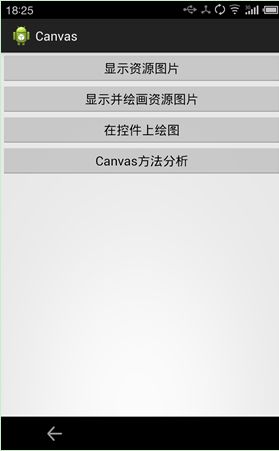
Demo的效果图:


****** 完整Demo工程下载 ******
1. 主Activity布局文件 ------ main.xml
public class MainActivity extends Activity implements OnClickListener {
private Button btn1, btn2, btn3, btn4;
private ImageView iv;
@Override
protected void onCreate(Bundle savedInstanceState) {
super.onCreate(savedInstanceState);
setContentView(R.layout.main);
btn1 = (Button) findViewById(R.id.btn_1);
btn2 = (Button) findViewById(R.id.btn_2);
btn3 = (Button) findViewById(R.id.btn_3);
btn4 = (Button) findViewById(R.id.btn_4);
btn1.setOnClickListener(this);
btn2.setOnClickListener(this);
btn3.setOnClickListener(this);
btn4.setOnClickListener(this);
iv = (ImageView) findViewById(R.id.iv_1);
}
@Override
public void onClick(View v) {
Resources res = getResources();
//BitmapFactory creates Bitmap objects from various sources, including files, streams, and byte-arrays.
Bitmap bmp = BitmapFactory.decodeResource(res, R.drawable.ic_launcher);
Bitmap tbmp;
// The Canvas class holds the "draw" calls.
// To draw something, you need 4 basic components:
// 1. A Bitmap to hold the pixels.
// 2. A Canvas to host the draw calls(writing into the bitmap).
// 3. A drawing primitive(e.g. Rect, Path, text, Bitmap).
// 4. A Paint to describe the colors, and styles for the drawing.
Canvas canvas;
String familyName = "宋体";
Typeface font = Typeface.create(familyName, Typeface.BOLD);
// The Paint class holds the style and color information about how to draw geometries,
// text, and bitmps.
Paint paint = new Paint();
paint.setColor(Color.RED);
paint.setTypeface(font);
paint.setTextSize(22);
switch (v.getId()) {
case R.id.btn_1:
// set a Bitmap as the content of ImageView.
iv.setImageBitmap(bmp);
break;
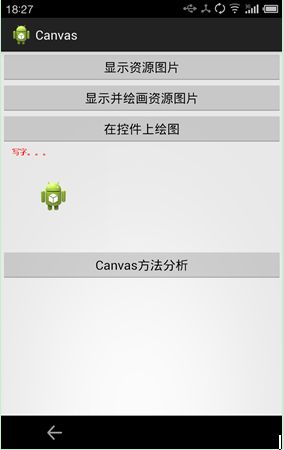
case R.id.btn_2:
// Create a mutable bitmap with the specified width and height.
// Its initial desity is as per getDensity.
tbmp = Bitmap.createBitmap(300, 300, Config.ARGB_8888);
// Construct a canvas with the specified bitmap to draw into.
// The bitmap must be mutable.
// The initial target density of the canvas is the same as the given bitmap's density.
canvas = new Canvas(tbmp);
// Fill the entire canvas's bitmap (restricted to the current clip) with the specified color.
canvas.drawColor(color.transparent);
// Draw the text, with origin at (x, y), using the specified paint.
// The origin is interpreted based on the Align setting int the paint.
canvas.drawText("写字。。。", 30, 30, paint);
// Draw the specified bitmap, with its top/left corner at (x, y),
// using the specified paint, transformed by the current matrix.
canvas.drawBitmap(bmp, 100, 100, paint);
iv.setImageBitmap(tbmp);
break;
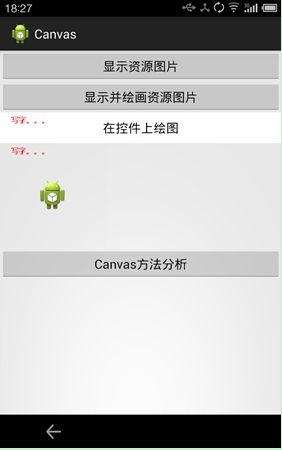
case R.id.btn_3:
tbmp = Bitmap.createBitmap(btn3.getWidth(), btn3.getHeight(), Config.ARGB_8888);
canvas = new Canvas(tbmp);
canvas.drawColor(Color.WHITE);
canvas.drawText("写字。。。", 30, 30, paint);
Drawable drawable = new BitmapDrawable(tbmp);
btn3.setBackgroundDrawable(drawable);
break;
case R.id.btn_4:
Intent intent = new Intent(MainActivity.this, CanvasMethodActivity.class);
startActivity(intent);
break;
default:
break;
}
}
}
3. 自定义View ------ MyView.java
/**
 * 自定义视图
 */
public class MyView extends View {

	public MyView(Context context) {
		super(context);
	}

	public MyView(Context context, AttributeSet attrs) {
		super(context, attrs);
	}

	public MyView(Context context, AttributeSet attrs, int defStyle) {
		super(context, attrs, defStyle);
	}

	/**
	 * 存在canvas对象,即存在默认的显示区域
	 */
	@Override
	protected void onDraw(Canvas canvas) {
		 Paint paint = new Paint();
		 paint.setTypeface(Typeface.defaultFromStyle(Typeface.BOLD));
		 paint.setColor(Color.BLUE);
		 canvas.drawText("自定义View,Canvas对象已经存在。", 65, 65, paint);
		 // Draw the specified Rect using the specified paint.
		 // The rectangle will be filled or framed based on the style in the paint.
		 canvas.drawRect(10, 10, 60, 60, paint);
		 canvas.drawBitmap(BitmapFactory.decodeResource(getResources(), R.drawable.ic_launcher),
				 80, 80, paint);
	}
}
4. 布局文件 ------ method.xml
5. Canvas常用方法测试Activity ------ CanvasMethodActivity.java
/**
 * 测试与学习Canvas的一些常用基本方法的功能。
 *
 */
public class CanvasMethodActivity extends Activity {

	private Paint paint = new Paint();
	// 用来测试Canvas的clip...方法的ImageView
	private ImageView ivClip;
	// 用来测试Canvas的rotate,translate,save, restore等方法的ImageView
	private ImageView ivSave;

	@Override
	protected void onCreate(Bundle savedInstanceState) {
		super.onCreate(savedInstanceState);
		setContentView(R.layout.method);

		ivClip = (ImageView) findViewById(R.id.iv_clip);
		ivSave = (ImageView) findViewById(R.id.iv_save_restore);

		testClipMethod();
		testSaveResoreMethod();
	}

	/**
	 * 测试Canvas的clipe...方法
	 */
	private void testClipMethod() {
		Bitmap bmp = BitmapFactory.decodeResource(getResources(), R.drawable.ic_launcher);
		Bitmap tbmp = Bitmap.createBitmap(300, 300, Config.ARGB_8888);

		Canvas canvas = new Canvas(tbmp);
		canvas.drawColor(Color.RED);

		paint.setColor(Color.BLACK);
		paint.setTextSize(18);
		canvas.drawText("原先的画图区域--红色部分", 50, 50, paint);

		canvas.drawBitmap(bmp, 80, 70, paint);

		Rect rect = new Rect(10, 180, 290, 240);
		canvas.clipRect(rect);
		canvas.drawColor(Color.YELLOW);
		paint.setColor(Color.BLACK);
		canvas.drawText("裁剪clip后画图区域-黄色部分", 30, 215, paint);
		canvas.drawText("这部分文字是无法显示的,因为在Rect之外。", 10, 160, paint);

		ivClip.setImageBitmap(tbmp);
	}

	/**
	 * 测试Canvas的save(),restore(), rotate(), translate()等方法
	 */
	private void testSaveResoreMethod() {
		Bitmap bmp = BitmapFactory.decodeResource(getResources(), R.drawable.ic_launcher);
		Bitmap tbmp = Bitmap.createBitmap(300, 300, Config.ARGB_8888);

		Canvas canvas = new Canvas(tbmp);

		canvas.drawColor(Color.RED);

		paint.setColor(Color.GREEN);
		paint.setTextSize(18);
		canvas.drawRect(10, 10, 90, 90, paint);
		canvas.drawText("没有旋转的矩形视图", 100, 50, paint);

		canvas.save();
		canvas.rotate(10);

		canvas.drawRect(90, 110, 170, 190, paint);
		canvas.drawText("旋转的矩形视图", 180, 150, paint);
		canvas.restore();

		canvas.translate(0, 200);
		paint.setColor(Color.BLUE);
		canvas.drawRect(0, 10, 80, 90, paint);
		canvas.drawText("恢复旋转操作后绘制的视图", 85, 50, paint);

		ivSave.setImageBitmap(tbmp);
	}
}
1. Android入门第14篇之画图
2. Andriod中绘(画)图----Canvas的使用详解