Nginx 详解(包含各个 Nginx 模块)
Nginx 详解
- Nginx 相关概念
- 1、Nginx 概念
- 2、Nginx 功能
- 3、Nginx 程序架构
- 3.1 master/worker
- 3.2 特性
- 3.3 Nginx 模块
- 3.4 Nginx 功用
- Nginx 安装及配置
- 1、Nginx 安装
- 2、Nginx 编译安装
- 3、Nginx 程序环境
- 3.1 配置文件的组成部分
- 3.2 Nginx 主配置文件说明
- 3.3 Nginx 主配置文件结构
- 3.4 Nginx http 协议相关的配置结构
- Nginx 官方文档说明
- main 配置段常见的配置指令
- 1、正常运行必备的配置
- 2、性能优化的相关配置
- 3、调试、定位问题
- 4、示例
- 事件驱动相关的配置
- http协议及http模块相关配置
- 1、与套接字相关的配置
- 2、定义路径相关的配置
- 3、定义客户端请求的相关配置
- 4、对客户端进行限制的相关配置
- 5、文件操作优化的配置
- 6、ngx_http_access_module模块
- 7、ngx_http_auth_basic_module模块
- 7.1 示例
- 8、ngx_http_stub_status_module
- 8.1 示例
- 9、ngx_http_log_module模块
- 9.1 示例
- 10、ngx_http_gzip_module 模块
- 10.1 示例-1
- 11、ngx_http_ssl_module 模块
- 11.1 示例
- 12、ngx_http_rewrite_module 模块
- 12.1 示例
- 12.2 redirect 示例
- 12.3 permanent 示例
- 12.4 示例
- 12.5 last 示例(注意和默认的进行区分)
- 12.6 last 示例(注意和默认的进行区分)
- 13、ngx_http_referer_module 模块
Nginx 相关概念
1、Nginx 概念
Nginx(engine X) — NGINX is a free, open-source, high-performance HTTP server and reverse proxy, as well as an IMAP/POP3 proxy server.
2、Nginx 功能
http协议:web服务器(类似于httpd)、http reverse proxy(类似于httpd)、imap/pop3 reverse proxy
3、Nginx 程序架构
3.1 master/worker
-
一个master进程:负载加载和分析配置文件、管理worker进程、平滑升级
-
一个或多个worker进程:处理并响应用户请求
-
缓存相关的进程:
cache loader    # 载入缓存对象
cache manager   # 管理缓存对象
3.2 特性
异步、事件驱动和非阻塞。
并发请求处理     # 通过epoll/select
文件IO          # 高级IO sendfile,异步,mmap
3.3 Nginx 模块
高度模块化,但其模块早期不支持DSO机制;近期版本支持动态装载和卸载。
模块分类:
1、核心模块:core module
2、标准模块:
	HTTP modules:
		Standard HTTP modules
		Optional HTTP modules
	Mail modules
	Stream modules:
		传输层代理
3、3rd party modules:
3.4 Nginx 功用
- 静态的web资源服务器;(图片服务器,或js/css/html/txt等静态资源服务器)
- 结合FastCGI/uwSGI/SCGI等协议反代动态资源请求
- http/https协议的反向代理
- imap4/pop3协议的反向代理
- tcp/udp协议的请求转发
Nginx 安装及配置
1、Nginx 安装
-
自定义YUM官方仓库安装Nginx、常用命令及启动、进程查
https://blog.csdn.net/weixin_44983653/article/details/100808806 -
自建epel yum仓库并安装Nginx
https://blog.csdn.net/weixin_44983653/article/details/100840513 -
使用yum安装epel yum源,并安装nginx(与nginx官方源安装有微小区别)
https://blog.csdn.net/weixin_44983653/article/details/100840818
2、Nginx 编译安装
# yum groupinstall "Development Tools" "Server Platform Development"
# yum install pcre-devel openssl-devel zlib-devel
# useradd -r nginx
#  ./configure --prefix=/usr/local/nginx --conf-path=/etc/nginx/nginx.conf --error-log-path=/var/log/nginx/error.log --http-log-path=/var/log/nginx/access.log --pid-path=/var/run/nginx.pid --lock-path=/var/run/nginx.lock --user=nginx --group=nginx --with-http_ssl_module --with-http_v2_module --with-http_dav_module --with-http_stub_status_module --with-threads --with-file-aio
# make && make install
3、Nginx 程序环境
3.1 配置文件的组成部分
-
配置文件的组成部分:
主配置文件:nginx.conf include conf.d/*.conf fastcgi, uwsgi,scgi等协议相关的配置文件 mime.types:支持的mime类型 -
主程序文件:/usr/sbin/nginx
-
Unit File:nginx.service
3.2 Nginx 主配置文件说明
- 主配置文件的配置指令:
directive value [value2 ...]; - 注意事项:
(1) 指令必须以分号结尾
(2) 支持使用配置变量
	内建变量:由Nginx模块引入,可直接引用
	自定义变量:由用户使用set命令定义
		set variable_name value;
	引用变量:$variable_name
3.3 Nginx 主配置文件结构
main block         # 主配置段,也即全局配置段;
	event {        # 事件驱动相关的配置,单进程响应N个请求
		...
	}
http {             # http/https 协议相关的配置段
...
}
mail {
...
}
stream {
	...
}
3.4 Nginx http 协议相关的配置结构
http {
	...
	...                            # 各server的公共配置
	server {
		...
	}                              # 每个server用于定义一个虚拟主机
	server {
		...
		listen                     # 监听地址和端口
		server_name                # 主机名
		root                       # 站点根目录(document_root)
		alias                      # 路径别名
		location [OPERATOR] URL {  # 针对于一些URL的条件
			...
			if CONDITION {
				...
			}
		}
	}
}
Nginx 官方文档说明
- 官方配置文档地址:
http://nginx.org/en/docs/
main 配置段常见的配置指令
-
官方配置指令说明:
http://nginx.org/en/docs/ngx_core_module.html -
分类:
正常运行必备的配置
优化性能相关的配置
用于调试及定位问题相关的配置
事件驱动相关的配置
1、正常运行必备的配置
-
user
Defines user and group credentials used by worker processes. If group is omitted, a group whose name equals that of user is used.Syntax: user user [group]; Default: user nobody nobody; Context: main -
pid /PATH/TO/PID_FILE
指定存储nginx主进程进程号码的文件路径。 -
include file | mask
指明包含进来的其它配置文件片断。 -
load_module file;
指明要装载的动态模块。
2、性能优化的相关配置
-
worker_processes number | auto;
worker进程的数量;通常应该等于小于当前主机的cpu的物理核心数 auto:当前主机物理CPU核心数 -
worker_cpu_affinity cpumask …;
worker_cpu_affinity auto [cpumask];  # worker与CPU进行绑定
worker_cpu_affinity auto;            # 如果此服务器主要是做nginx服务器的话,可是使用此配置
                                     # 如果还有其它重要程序运行,不建议使用
CPU MASK: 00000000 # 8个CPU的表示 00000001 # 0号CPU 00000010 # 1号CPU ... ...服务器有8个CPU,nginx服务要启用4个worker进程,可以使用auto进行自动分配,也可以使用手动绑定 比如绑定后四个CPU,就是4、5、6、7号CPU(00010000、00100000、01000000、10000000) -
worker_priority number;
指定worker进程的nice值,设定worker进程优先级;[-20,20] [root@Tang-Neo ~]# ps axo comm,pid,psr,ni | grep nginx # 默认nice值是0 nginx 7209 0 0 nginx 8812 3 0 nginx 8813 2 0 nginx 8814 1 0 -
worker_rlimit_nofile number;
所有worker进程所能够打开的文件数量上限
一个进程至少需要打一个套接字文件,1024个进程就需要至少打开1024个套接字文件
3个worker进程至少需要打开3*1024=3072个文件
3、调试、定位问题
1、daemon on|off;
	# 是否以守护进程方式运行Nignx;(CentOS 7不需要)

2、master_process on|off;
	# 是否以master/worker模型运行nginx;默认为on

3、error_log file [level];
4、示例
[root@Tang-Neo nginx]# vim nginx.conf
worker_processes  1;
[root@Tang-Neo nginx]# pwd
/etc/nginx
[root@Tang-Neo nginx]# ps -aux | grep nginx    # 只有一个 worker 子进程
root       7209  0.0  0.0  46340   980 ?        Ss   07:53   0:00 nginx: master process /usr/sbin/nginx -c /etc/nginx/nginx.conf
nginx      7210  0.0  0.2  46752  2176 ?        S    07:53   0:00 nginx: worker process
root       7242  0.0  0.0 112708   976 pts/2    S+   08:06   0:00 grep --color=auto nginx
[root@Tang-Neo nginx]# vim nginx.conf
worker_processes  auto;
[root@Tang-Neo nginx]# nginx -t                # 检查语法格式
nginx: the configuration file /etc/nginx/nginx.conf syntax is ok
nginx: configuration file /etc/nginx/nginx.conf test is successful
[root@Tang-Neo nginx]# nginx -s reload  # 重载 nginx 程序,不需重启
[root@Tang-Neo nginx]# ps -aux | grep nginx    # 根据物理CPU进行worker子进程分配,4个CPU就会产生4个worker子进程
root       7209  0.0  0.1  46468  1960 ?        Ss   07:53   0:00 nginx: master process /usr/sbin/nginx -c /etc/nginx/nginx.conf
nginx      7248  0.0  0.2  46880  2064 ?        S    08:07   0:00 nginx: worker process
nginx      7249  0.0  0.2  46880  2064 ?        S    08:07   0:00 nginx: worker process
nginx      7250  0.0  0.2  46880  2064 ?        S    08:07   0:00 nginx: worker process
nginx      7251  0.0  0.2  46880  2064 ?        S    08:07   0:00 nginx: worker process
root       7253  0.0  0.0 112708   976 pts/2    S+   08:08   0:00 grep --color=auto nginx
[root@Tang-Neo ~]# lscpu | grep "CPU(s)"       # 本机四个CPU
CPU(s):                4
On-line CPU(s) list:   0-3
NUMA node0 CPU(s):     0-3
[root@Tang-Neo nginx]# vim nginx.conf
events {                # 单个 worker 进程响应N个请求,一共响应 4(worker的进程数量)*1024
    worker_connections  1024;
}
[root@Tang-Neo ~]# ps axo comm,pid,psr | grep nginx   # 显示程序的进程和运行在哪个CPU上
nginx             7209   3
nginx             7389   2
nginx             7390   0
nginx             7391   3
nginx             7392   1
[root@Tang-Neo ~]# watch -n.5 'ps axo comm,pid,psr | grep nginx'  # 每0.5s运行一次命令
[root@Tang-Neo ~]# ps axo comm,pid,psr | grep nginx  # 如果绑定(worker_cpu_affinity cpumask ...;)以后,就不会变化了
nginx             7209   3
nginx             7389   3
nginx             7390   1
nginx             7391   1
nginx             7392   0
[root@Tang-Neo ~]# vim /etc/nginx/nginx.conf   # 编辑主配置文件,绑定CPU
user  nginx;
worker_processes  auto;
worker_cpu_affinity 1000 0100 0010 0001;
[root@Tang-Neo ~]# nginx -t
nginx: the configuration file /etc/nginx/nginx.conf syntax is ok
nginx: configuration file /etc/nginx/nginx.conf test is successful
[root@Tang-Neo ~]# nginx -s reload
[root@Tang-Neo ~]# ps axo comm,pid,psr | grep nginx
nginx             7209   2
nginx             8795   3
nginx             8796   2
nginx             8797   1
nginx             8798   0
[root@Tang-Neo ~]# ab -n 10000 -c 100 http://192.168.1.9/index.html   # 进行压力测试
[root@Tang-Neo ~]# ps axo comm,pid,psr | grep nginx  # 进行压力测试后,运行的CPU也不会进行改变
nginx             7209   2
nginx             8795   3
nginx             8796   2
nginx             8797   1
nginx             8798   0
[root@Tang-Neo ~]# vim /etc/nginx/nginx.conf
user  nginx;
worker_processes  3;
worker_cpu_affinity 1000 0100 0010;
[root@Tang-Neo ~]# nginx -t
nginx: the configuration file /etc/nginx/nginx.conf syntax is ok
nginx: configuration file /etc/nginx/nginx.conf test is successful
[root@Tang-Neo ~]# nginx -s reload
[root@Tang-Neo ~]# ps axo comm,pid,psr | grep nginx
nginx             7209   0
nginx             8812   3
nginx             8813   2
nginx             8814   1
[root@Tang-Neo ~]# vim /etc/nginx/nginx.conf    # 修改nice值
user  nginx;
worker_processes  3;
worker_cpu_affinity 1000 0100 0010;
worker_priority -5;
[root@Tang-Neo ~]# nginx -t
nginx: the configuration file /etc/nginx/nginx.conf syntax is ok
nginx: configuration file /etc/nginx/nginx.conf test is successful
[root@Tang-Neo ~]# nginx -s reload
[root@Tang-Neo ~]# ps axo comm,pid,psr,ni | grep nginx
nginx             7209   0   0
nginx             8812   3   0
nginx             8813   2   0
nginx             8814   1   0
[root@Tang-Neo ~]# ps axo comm,pid,psr,ni | grep nginx
nginx             7209   0   0
nginx             8846   3  -5
nginx             8847   2  -5
nginx             8848   1  -5
事件驱动相关的配置
events {
	...
}
1、worker_connections number;
	每个worker进程所能够打开的最大并发连接数数量
	总共的并发连接数数量:
		worker_processes * worker_connections

2、use method;
	指明并发连接请求的处理方法
		use epoll;  (epoll没限制)
		use select; (只能处理1024个请求,一般不使用)

3、accept_mutex on | off;
	处理新的连接请求的方法;on意味着由各worker轮流处理新请求,Off意味着每个新请求的到达都会通知所有的worker进程
http协议及http模块相关配置
官方文档地址:
http://nginx.org/en/docs/http/ngx_http_core_module.html
http {
	... ...
	server {
		...
			server_name
		root
		location [OPERATOR] /uri/ {
			...
		}
	}
	server {
		...
	}
}
1、与套接字相关的配置
1、server { ... }            # 配置一个虚拟主机


server {
	listen address[:PORT]|PORT;      # http://nginx.org/en/docs/http/ngx_http_core_module.html#listen
	server_name SERVER_NAME;
	root /PATH/TO/DOCUMENT_ROOT;     # web服务器设置
	proxy_pass http://192.168.1.10;  # nginx反代设置,后续会详解
}
2、listen PORT|address[:port]|unix:/PATH/TO/SOCKET_FILE
	listen address[:port] [default_server] [ssl] [http2 | spdy]  [backlog=number] [rcvbuf=size] [sndbuf=size]

	default_server  # 设定为默认虚拟主机
	ssl             # 限制仅能够通过ssl连接提供服务
	backlog=number  # 后援队列长度
	rcvbuf=size     # 接收缓冲区大小
	sndbuf=size     # 发送缓冲区大小
3、server_name name ...;
	指明虚拟主机的主机名称;后可跟多个由空白字符分隔的字符串
		支持*通配任意长度的任意字符;server_name *.magedu.com  www.magedu.*
		支持~起始的字符做正则表达式模式匹配;server_name ~^www\d+\.magedu\.com$
			\d 代表 [0-9],\d+ 代表至少一个数字

	匹配机制(顺序):
		(1) 首先是字符串精确匹配
		(2) 左侧 * 通配符
		(3) 右侧 * 通配符
		(4) 正则表达式
4、tcp_nodelay on | off;
	在keepalived模式下的连接是否启用TCP_NODELAY选项
		(小包是否启用延迟发送,非保持连接的情况下,此设置无用)
tcp_nopush on|off;
	在sendfile模式下,是否启用TCP_CORK选项
5、sendfile on | off;
	是否启用sendfile功能
2、定义路径相关的配置
6、root path;
	设置web资源路径映射;用于指明用户请求的url所对应的本地文件系统上的文档所在目录路径
	可用的配置位置:http, server, location, if in location

root /vhosts/www/htdocs/
	网址 -->  文件目录
	http://www.magedu.com/index.html -->  /vhosts/www/htdocs/index.html
7、location [ = | ~ | ~* | ^~ ] uri { ... }
	Sets configuration depending on a request URI
	location 指定各种URL的访问属性,如果对于条件匹配成功后,就会引用后续的命令参数配置,会覆盖掉之前的相关配置

	在一个server中location配置段可存在多个,用于实现从uri到文件系统的路径映射
	ngnix会根据用户请求的URI来检查定义的所有location,并找出一个最佳匹配,而后应用其配置

	=  # 对URI做精确匹配;例如, http://www.magedu.com/, http://www.magedu.com/index.html
	~   # 对URI做正则表达式模式匹配,区分字符大小写
	~*  # 对URI做正则表达式模式匹配,不区分字符大小写
	^~  # 对URI的左半部分做匹配检查,不区分字符大小写
	不带符号   # 匹配起始于此uri的所有的url

	匹配优先级:
		=
		^~
		~/~*
		不带符号

	定义格式:
	location  =  / {
		...
	}

注意:
location /     # 表示以根起始的所有文件
location = /   # 必须是根,例如 http://www.magedu.com/ 能够匹配,http://www.magedu.com/index.html 不能够匹配
				(意义不大,只能访问主页)
8、alias path;
	定义路径别名,文档映射的另一种机制;仅能用于location上下文

	注意:location中使用root指令和alias指令的意义不同
		(a) root,给定的路径对应于location中的/uri/左侧的/
		(b) alias,给定的路径对应于location中的/uri/右侧的/

	location /i/ {
    	alias /data/w3/images/;
	}
	on request of “/i/top.gif”, the file /data/w3/images/top.gif will be sent.

	location /i/ {
  	  root /data/w3;
	}
	The /data/w3/i/top.gif file will be sent in response to the “/i/top.gif” request.

root定义 、 location定义 和 alias定义 结合使用:
server {
	root  /vhosts/www/htdocs/

	location /admin/ {
		root /webapps/app1/data/     # 如果条件匹配的话,/admin/ 左边的 / 就会被替换为 /webapps/app1/data/
	}
}

server {
	root  /vhosts/www/htdocs/

	location /admin/ {
		alias /webapps/app1/data/    # 如果条件匹配的话,/admin/ 右边的 / 就会被替换为 /webapps/app1/data/
									 # 如果访问的是 /admin/1.txt , /webapps/app1/data/1.txt 会被发送出去
	}
}
9、index file ...;
	默认资源;适用于:http, server, location
10、error_page code ... [=[response]] uri;
	Defines the URI that will be shown for the specified errors.
11、try_files file ... uri;
	Checks the existence of files in the specified order and uses the first found file for request processing; the processing is performed in the current context.
	The path to a file is constructed from the file parameter according to the root and alias directives.
示例:
Nginx 服务器配置:

[root@Tang-Neo conf.d]# cat vhost1.conf
server {
	listen 192.168.1.9;
	server_name www.neotang.com;
	root /data/nginx/vhost1;
	index index.html;

	location / {
		allow all;
	}
	location /newroot/ {
		root /data/newnginx/vhost1;
	}
	location /alias1/ {
		alias /alias2/;
	}
}

[root@Tang-Neo conf.d]# cat /data/nginx/vhost1/index.html
<h1>Nginx Vhost 1</h1>

[root@Tang-Neo conf.d]# cat /data/newnginx/vhost1/newroot/index.html
<h1>Location && Root Example!</h1>

[root@Tang-Neo conf.d]# cat /alias2/index.html
<h1>Location && Alias Example!</h1>
Nginx 客户端访问:
[root@neo ~]# cat /etc/hosts | grep neotang
192.168.1.9 www.neotang.com

[root@neo ~]# curl http://192.168.1.9/
<h1>Nginx Vhost 1</h1>

[root@neo ~]# curl http://www.neotang.com/
<h1>Nginx Vhost 1</h1>

[root@neo ~]# curl http://www.neotang.com/newroot/index.html
<h1>Location && Root Example!</h1>

[root@neo ~]# curl http://www.neotang.com/newroot/
<h1>Location && Root Example!</h1>

[root@neo ~]# curl http://www.neotang.com/alias1/index.html
<h1>Location && Alias Example!</h1>

[root@neo ~]# curl http://www.neotang.com/alias1/
<h1>Location && Alias Example!</h1>
3、定义客户端请求的相关配置
12、keepalive_timeout timeout [header_timeout];
	设定保持连接的超时时长,0表示禁止长连接;默认为75s

13、keepalive_requests number;
	在一次长连接上所允许请求的资源的最大数量,默认为100

14、keepalive_disable none | browser ...;
	对哪种浏览器禁用长连接

15、send_timeout time;
	向客户端发送响应报文的超时时长,此处,是指两次写操作之间的间隔时长

16、client_body_buffer_size size;
	用于接收客户端请求报文的body部分的缓冲区大小;默认为16k
		超出此大小时,其将被暂存到磁盘上的由client_body_temp_path指令所定义的位置
	适用于用户通过web页面进行上传的场景

17、client_body_temp_path path [level1 [level2 [level3]]];
	设定用于存储客户端请求报文的body部分的临时存储路径及子目录结构和数量

	16进制的数字;
		client_body_temp_path   /var/tmp/client_body  2 1 1
		表示有16*16=256个一级子目录,有256*16个二级子目录,有256*16*16个三级子目录
			1:表示用一位16进制数字表示一级子目录:0-f
			2:表示用2位16进程数字表示二级子目录:00-ff
			2:表示用2位16进程数字表示三级子目录:00-ff
4、对客户端进行限制的相关配置
18、limit_rate rate;
	限制响应给客户端的传输速率,单位是bytes/second,0表示无限制

19、limit_except method ... { ... }
	限制对指定的请求方法之外的其它方法的使用客户端

示例:
只允许主机192.168.1.0段的地址进行HTTP GET请求:
	limit_except GET {
		allow 192.168.1.0/24;
		deny  all;
	}
5、文件操作优化的配置
20、aio on | off | threads[=pool];
	# 是否启用aio功能
21、directio size | off;
	# 在Linux主机启用O_DIRECT标记,此处意味文件大于等于给定的大小时使用,例如directio 4m
22、open_file_cache off;
	open_file_cache max=N [inactive=time];

	nginx可以缓存以下三种信息:
		(1) 文件的描述符、文件大小和最近一次的修改时间
		(2) 打开的目录结构
		(3) 没有找到的或者没有权限访问的文件的相关信息

	max=N:可缓存的缓存项上限;达到上限后会使用LRU算法(最近最少使用)实现缓存管理;

	inactive=time:缓存项的非活动时长,在此处指定的时长内未被命中的或命中的次数少于open_file_cache_min_uses指令所指定的次数的缓存项即为非活动项
23、open_file_cache_valid time;
	# 缓存项有效性的检查频率;默认为60s;
24、open_file_cache_min_uses number;
	# 在open_file_cache指令的inactive参数指定的时长内,至少应该被命中多少次方可被归类为活动项
25、open_file_cache_errors on | off;
	# 是否缓存查找时发生错误的文件一类的信息
6、ngx_http_access_module模块
实现基于ip的访问控制功能。
allow address | CIDR | unix: | all;
deny address | CIDR | unix: | all;

使用位置:http, server, location, limit_except
示例:
Nginx 服务器配置:
[root@Tang-Neo conf.d]# cat vhost1.conf
server {
	listen 192.168.1.9;
	server_name www.neotang.com;
	root /data/nginx/vhost1;
	index index.html;

	location / {
		allow 192.168.1.10/32;
		deny all;
	}
	location /newroot/ {
		root /data/newnginx/vhost1;
	}
	location /alias1/ {
		alias /alias2/;
	}
}
[root@Tang-Neo conf.d]# nginx -t
nginx: the configuration file /etc/nginx/nginx.conf syntax is ok
nginx: configuration file /etc/nginx/nginx.conf test is successful
[root@Tang-Neo conf.d]# nginx -s reload
192.168.1.10 访问:
[root@neo ~]# curl http://www.neotang.com/
<h1>Nginx Vhost 1</h1>

192.168.1.11 访问:
[root@Neo_Tang ~]# curl http://www.neotang.com/
<html>
<head><title>403 Forbidden</title></head>
<body>
<center><h1>403 Forbidden</h1></center>
<hr><center>nginx/1.16.1</center>
</body>
</html>
7、ngx_http_auth_basic_module模块
实现基于用户的访问控制,使用basic机制进行用户认证(nginx本身无生成密码的工具,需要使用 httpd-tools 来实现)。
auth_basic string | off;
auth_basic_user_file file;

location /admin/ {
	alias /webapps/app1/data/;
	auth_basic "Admin Area";
	auth_basic_user_file /etc/nginx/.ngxpasswd;
}

注意:htpasswd命令由httpd-tools所提供
安装 httpd-tools :
[root@neo ~]# yum info httpd-tools
Loaded plugins: fastestmirror
Loading mirror speeds from cached hostfile
 * base: mirrors.aliyun.com
 * extras: mirrors.cn99.com
 * updates: mirrors.huaweicloud.com
Installed Packages
Name        : httpd-tools
Arch        : x86_64
Version     : 2.4.6
Release     : 89.el7.centos.1
Size        : 169 k
Repo        : installed
From repo   : updates
Summary     : Tools for use with the Apache HTTP Server
URL         : http://httpd.apache.org/
License     : ASL 2.0
Description : The httpd-tools package contains tools which can be used with
            : the Apache HTTP Server.
利用 httpd-tools 生成用户名和密码:
[root@neo ~]# htpasswd -c -m /data/neo/.ngxpasswd tom
New password:
Re-type new password:
Adding password for user tom
[root@neo ~]# htpasswd -m /data/neo/.ngxpasswd neo
New password:
Re-type new password:
Adding password for user neo

[root@neo ~]# cat /data/neo/.ngxpasswd
tom:$apr1$Nck7LycT$ptff1DsqWOmJKc8qSVJUE/
neo:$apr1$kWMV2k3Q$HwVDOXWzoBRwH/fGtARLu0
7.1 示例
Nginx 服务器:
1、生成用户名和密码文件:
[root@Tang-Neo ~]# mkdir /data/nginx/password
[root@Tang-Neo ~]# htpasswd -c -m /data/nginx/password/.nginxpasswd neo
New password: neo
Re-type new password:neo
Adding password for user neo
[root@Tang-Neo ~]# htpasswd -m /data/nginx/password/.nginxpasswd tang
New password: tang
Re-type new password:tang
Adding password for user tang
[root@Tang-Neo ~]# cat /data/nginx/password/.nginxpasswd
neo:$apr1$xlqx4Obs$/z3.M5uTZyEzrBi3p2rTv/
tang:$apr1$jUWWgFit$EqRF04z2xhv.Rr/egI67R/

2、修改配置文件
[root@Tang-Neo conf.d]# vim vhost1.conf
[root@Tang-Neo conf.d]# nginx -t
nginx: the configuration file /etc/nginx/nginx.conf syntax is ok
nginx: configuration file /etc/nginx/nginx.conf test is successful
[root@Tang-Neo conf.d]# nginx -s reload
[root@Tang-Neo conf.d]# cat vhost1.conf
server {
	listen 192.168.1.9;
	server_name www.neotang.com;
	root /data/nginx/vhost1;
	index index.html;

	location / {
		allow all;
		auth_basic "Cat Area";
		auth_basic_user_file /data/nginx/password/.nginxpasswd;
	}
	location /newroot/ {
		root /data/newnginx/vhost1;
	}
	location /alias1/ {
		alias /alias2/;
	}
}
客户端访问:
[root@neo ~]# curl http://www.neotang.com/
<html>
<head><title>401 Authorization Required</title></head>
<body>
<center><h1>401 Authorization Required</h1></center>
<hr><center>nginx/1.16.1</center>
</body>
</html>
[root@neo ~]# curl http://neo:[email protected]/
<h1>Nginx Vhost 1</h1>
[root@neo ~]# curl http://tang:[email protected]/
<h1>Nginx Vhost 1</h1>
8、ngx_http_stub_status_module
ngx_http_stub_status_module模块
	# 用于输出nginx的基本状态信息

配置示例:
	location  /basic_status {
		stub_status;
	}

状态信息含义:
	Active connections: 291
	server accepts handled requests
		16630948 16630948 31070465
	Reading: 6 Writing: 179 Waiting: 106

	Active connections   # 活动状态的连接数
	accepts              # 已经接受的客户端请求的总数
	handled              # 已经处理完成的客户端请求的总数
	requests             # 客户端发来的总的请求数
	Reading              # 处于读取客户端请求报文首部的连接的连接数
	Writing              # 处于向客户端发送响应报文过程中的连接数
	Waiting              # 处于等待客户端发出请求的空闲连接数
8.1 示例
Nginx 服务器配置:
[root@Tang-Neo conf.d]# vim vhost1.conf
[root@Tang-Neo conf.d]# nginx -t
nginx: the configuration file /etc/nginx/nginx.conf syntax is ok
nginx: configuration file /etc/nginx/nginx.conf test is successful
[root@Tang-Neo conf.d]# nginx -s reload
[root@Tang-Neo conf.d]# cat vhost1.conf
server {
	listen 192.168.1.9;
	server_name www.neotang.com;
	root /data/nginx/vhost1;
	index index.html;

	location / {
		allow all;
		auth_basic "Cat Area";
		auth_basic_user_file /data/nginx/password/.nginxpasswd;
	}
	location /newroot/ {
		root /data/newnginx/vhost1;
	}
	location /alias1/ {
		alias /alias2/;
	}
	location /basic_status {
		stub_status;
	}
}
客户端进行服务器状态信息查看:
[root@neo ~]# curl http://www.neotang.com/basic_status
Active connections: 1
server accepts handled requests
 45 45 49
Reading: 0 Writing: 1 Waiting: 0
9、ngx_http_log_module模块
The ngx_http_log_module module writes request logs in the specified format.
1、log_format name string ...;
	# tring可以使用nginx核心模块及其它模块内嵌的变量;

2、access_log path [format [buffer=size] [gzip[=level]] [flush=time] [if=condition]];
	access_log off;

	# 访问日志文件路径,格式及相关的缓冲的配置
		buffer=size
		flush=time

3、open_log_file_cache max=N [inactive=time] [min_uses=N] [valid=time];
	open_log_file_cache off;
		# 缓存各日志文件相关的元数据信息

		max:缓存的最大文件描述符数量
		min_uses:在inactive指定的时长内访问大于等于此值方可被当作活动项
		inactive:非活动时长
		valid:验正缓存中各缓存项是否为活动项的时间间隔
9.1 示例
Nginx 主配置文件配置:
[root@Tang-Neo conf.d]# vim ../nginx.conf
http {
    include       /etc/nginx/mime.types;
    default_type  application/octet-stream;

    log_format  main  '$remote_addr - $remote_user [$time_local] "$request" '
                      '$status $body_bytes_sent "$http_referer" '
                      '"$http_user_agent" "$http_x_forwarded_for"';

    access_log  /var/log/nginx/access.log  main;

    sendfile        on;
    #tcp_nopush     on;

    keepalive_timeout  65;

    #gzip  on;

    include /etc/nginx/conf.d/*.conf;
}
查看Nginx访问log日志:
[root@Tang-Neo ~]# tail -10 /var/log/nginx/access.log
192.168.1.10 - - [21/Sep/2019:11:05:24 -0400] "GET / HTTP/1.1" 200 23 "-" "curl/7.29.0" "-"
192.168.1.11 - - [21/Sep/2019:11:06:03 -0400] "GET / HTTP/1.1" 403 153 "-" "curl/7.29.0" "-"
192.168.1.10 - - [21/Sep/2019:11:19:58 -0400] "GET / HTTP/1.1" 401 179 "-" "curl/7.29.0" "-"
192.168.1.10 - neo [21/Sep/2019:11:22:22 -0400] "GET / HTTP/1.1" 200 23 "-" "curl/7.29.0" "-"
192.168.1.10 - tang [21/Sep/2019:11:22:34 -0400] "GET / HTTP/1.1" 200 23 "-" "curl/7.29.0" "-"
192.168.1.5 - - [21/Sep/2019:11:27:50 -0400] "GET / HTTP/1.1" 401 581 "-" "Mozilla/5.0 (Windows NT 6.1; Win64; x64) AppleWebKit/537.36 (KHTML, like Gecko) Chrome/74.0.3729.169 Safari/537.36" "-"
192.168.1.5 - - [21/Sep/2019:11:27:52 -0400] "GET / HTTP/1.1" 401 581 "-" "Mozilla/5.0 (Windows NT 6.1; Win64; x64) AppleWebKit/537.36 (KHTML, like Gecko) Chrome/74.0.3729.169 Safari/537.36" "-"
192.168.1.5 - neo [21/Sep/2019:11:27:59 -0400] "GET / HTTP/1.1" 200 23 "-" "Mozilla/5.0 (Windows NT 6.1; Win64; x64) AppleWebKit/537.36 (KHTML, like Gecko) Chrome/74.0.3729.169 Safari/537.36" "-"
192.168.1.5 - neo [21/Sep/2019:11:27:59 -0400] "GET /favicon.ico HTTP/1.1" 404 555 "http://192.168.1.9/" "Mozilla/5.0 (Windows NT 6.1; Win64; x64) AppleWebKit/537.36 (KHTML, like Gecko) Chrome/74.0.3729.169 Safari/537.36" "-"
192.168.1.10 - - [21/Sep/2019:11:35:32 -0400] "GET /basic_status HTTP/1.1" 200 100 "-" "curl/7.29.0" "-"
[root@Tang-Neo ~]#
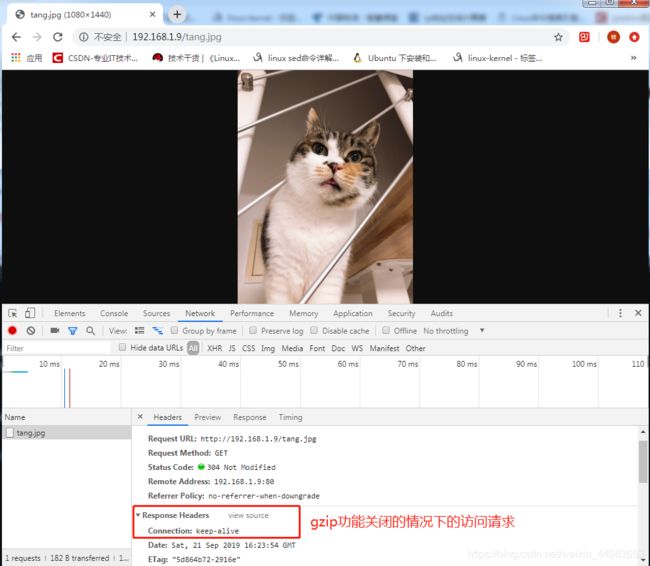
10、ngx_http_gzip_module 模块
The ngx_http_gzip_module module is a filter that compresses responses using the “gzip” method. This often helps to reduce the size of transmitted data by half or even more.(浪费CPU时钟来节省带宽)
1、gzip on | off;
	Enables or disables gzipping of responses.

2、gzip_comp_level level;
	# Sets a gzip compression level of a response. Acceptable values are in the range from 1 to 9.

3、	gzip_disable regex ...;
	# Disables gzipping of responses for requests with “User-Agent” header fields matching any of the specified regular expressions.

4、	gzip_min_length length;
	# 启用压缩功能的响应报文大小阈值

5、gzip_buffers number size;
	# 支持实现压缩功能时为其配置的缓冲区数量及每个缓存区的大小

6、gzip_proxied off | expired | no-cache | no-store | private | no_last_modified | no_etag | auth | any ...;
	# nginx作为代理服务器接收到从被代理服务器发送的响应报文后,在何种条件下启用压缩功能的
	off:对代理的请求不启用
	no-cache, no-store,private:表示从被代理服务器收到的响应报文首部的Cache-Control的值为此三者中任何一个,则启用压缩功能

7、gzip_types mime-type ...;
	# 缩过滤器,仅对此处设定的MIME类型的内容启用压缩功能
配置示例:
	gzip  on;
	gzip_comp_level 6;
	gzip_min_length 64;
	gzip_proxied any;
	gzip_types text/xml text/css  application/javascript;
[root@Tang-Neo nginx]# ll
total 36
drwxr-xr-x. 2 root root   70 Sep 13 21:02 conf.d
-rw-r--r--. 1 root root 1007 Aug 13 11:04 fastcgi_params
-rw-r--r--. 1 root root 2837 Aug 13 11:04 koi-utf
-rw-r--r--. 1 root root 2223 Aug 13 11:04 koi-win
-rw-r--r--. 1 root root 5231 Aug 13 11:04 mime.types
lrwxrwxrwx. 1 root root   29 Sep 13 07:08 modules -> ../../usr/lib64/nginx/modules
-rw-r--r--. 1 root root  699 Sep 13 11:54 nginx.conf
-rw-r--r--. 1 root root  636 Aug 13 11:04 scgi_params
-rw-r--r--. 1 root root  664 Aug 13 11:04 uwsgi_params
-rw-r--r--. 1 root root 3610 Aug 13 11:04 win-utf
[root@Tang-Neo nginx]# cat mime.types     # mime的文件格式,用于在 httpd或者nginx conf文件中定义
10.1 示例-1
Nginx 服务器配置:
[root@Tang-Neo conf.d]# vim vhost1.conf
[root@Tang-Neo conf.d]# nginx -t
nginx: the configuration file /etc/nginx/nginx.conf syntax is ok
nginx: configuration file /etc/nginx/nginx.conf test is successful
[root@Tang-Neo conf.d]# nginx -s reload
[root@Tang-Neo conf.d]# cat vhost1.conf
server {
	listen 192.168.1.9;
	server_name www.neotang.com;
	root /data/nginx/vhost1;
	index index.html;

	location / {
		allow all;
		auth_basic "Cat Area";
		auth_basic_user_file /data/nginx/password/.nginxpasswd;
		gzip  on;
		gzip_comp_level 6;
		gzip_min_length 2;
		gzip_types image/jpeg;
}
	location /newroot/ {
		root /data/newnginx/vhost1;
	}
	location /alias1/ {
		alias /alias2/;
	}
	location /basic_status {
		stub_status;
	}
}

11、ngx_http_ssl_module 模块
ssl只能基于IP地址进行设置,如果一个服务器有多个IP地址,只能有一个IP地址设置为https。
1、ssl on | off;
	# Enables the HTTPS protocol for the given virtual server.

2、ssl_certificate file;
	# 当前虚拟主机使用PEM格式的证书文件

3、ssl_certificate_key file;
	# 当前虚拟主机上与其证书匹配的私钥文件

4、ssl_protocols [SSLv2] [SSLv3] [TLSv1] [TLSv1.1] [TLSv1.2];
	# 支持ssl协议版本,默认为后三个

5、ssl_session_cache off | none | [builtin[:size]] [shared:name:size];
	builtin[:size]      # 使用OpenSSL内建的缓存,此缓存为每worker进程私有

	[shared:name:size]  # 在各worker之间使用一个共享的缓存;可以提高性能

6、ssl_session_timeout time;
	# 客户端一侧的连接可以复用ssl session cache中缓存 的ssl参数的有效时长
配置示例:
	server {
		listen 443 ssl;
		server_name www.magedu.com;
		root /vhosts/ssl/htdocs;
		ssl on;
		ssl_certificate /etc/nginx/ssl/nginx.crt;
		ssl_certificate_key /etc/nginx/ssl/nginx.key;
		ssl_session_cache shared:sslcache:20m;
	}
11.1 示例
可查看一下链接:
https://blog.csdn.net/weixin_44983653/article/details/100868125
12、ngx_http_rewrite_module 模块
The ngx_http_rewrite_module module is used to change request URI using PCRE regular expressions, return redirects, and conditionally select configurations.
将用户请求的URI基于regex所描述的模式进行检查,而后完成替换。
官方文档:
http://nginx.org/en/docs/http/ngx_http_rewrite_module.html#rewrite
一些 rewrite 的示例:
http://bbs.magedu.com/ --> http://www.magedu.com/bbs/
http://www.magedu.com/ --> https://www.magedu.com/  (把80端口重定向443)
	# rewrite /(.*)$ https://www.neotang.com/$1;
	# 所有 http 的请求全部重定向为 https
1、rewrite regex replacement [flag];
	# 将用户请求的URI基于regex所描述的模式进行检查,匹配到时将其替换为replacement指定的新的URI

	# 注意:如果在同一级配置块中存在多个rewrite规则,那么会自下而下逐个检查
	# 被某条件规则替换完成后,会重新一轮的替换检查,还需要重新进行 location 检查
	# 因此,隐含有循环机制;[flag]所表示的标志位用于控制此循环机制

	# 如果replacement是以http://或https://开头,则替换结果会直接以重向返回给客户端

	[flag]:
	# last:重写完成后停止对当前URI在当前location中后续的其它重写操作,而后对新的URI启动新一轮重写检查;提前重启新一轮循环
	# break:重写完成后停止对当前URI在当前location中后续的其它重写操作,而后直接跳转至重写规则配置块之后的其它配置;结束循环
	# redirect:重写完成后以临时重定向方式直接返回重写后生成的新URI给客户端,由客户端重新发起请求;不能以http://或https://开头
	# permanent:重写完成后以永久重定向方式直接返回重写后生成的新URI给客户端,由客户端重新发起请求(301:永久重定向)

	# 注意:last 和 break 由nginx自己完成,客户端浏览器对此一无所知(URI 都不会改变)
	# 注意:redirect 和 permanent 是需要客户端浏览器根据第一次的返回结果重新进行请求(URI 都不会改变)
2、return
	return code [text];
	return code URL;
	return URL;

	Stops processing and returns the specified code to a client.
3、	rewrite_log on | off;
	# 是否开启重写日志
4、	if (condition) { ... }
	引入一个新的配置上下文 ;条件满足时,执行配置块中的配置指令;适用于 server, location

	变量是字符串时,空串为真,非空为假。变量是数值型时,0为假,非0为真。
	condition:
		比较操作符:
			==   # 等于
			!=   # 不等于
			~    # 模式匹配,区分字符大小写
			~*   # 模式匹配,不区分字符大小写
			!~   # 模式不匹配,区分字符大小写
			!~*  # 模式不匹配,不区分字符大小写
		文件及目录存在性判断:
			-e, !-e
			-f, !-f
			-d, !-d
			-x, !-x
5、set $variable value;
	# 用户自定义变量
12.1 示例
访问 .png 时,uri 重定向为 .jpg 。
[root@Tang-Neo conf.d]# vim vhost1.conf
[root@Tang-Neo conf.d]# nginx -t
nginx: the configuration file /etc/nginx/nginx.conf syntax is ok
nginx: configuration file /etc/nginx/nginx.conf test is successful
[root@Tang-Neo conf.d]# nginx -s reload
[root@Tang-Neo conf.d]# cat vhost1.conf
server {
	listen 192.168.1.9;
	server_name www.neotang.com;
	root /data/nginx/vhost1;
	index index.html;
	rewrite /(.*)\.png$ /$1.jpg;    # 第二个 \ 是 . 的转义符,$1 是前面 () 内内容的引用
								    # 第一个和第三个 / 是 Nginx 服务器的根

	location / {
		allow all;
		auth_basic "Cat Area";
		auth_basic_user_file /data/nginx/password/.nginxpasswd;
}
	location /newroot/ {
		root /data/newnginx/vhost1;
	}
	location /alias1/ {
		alias /alias2/;
	}
	location /basic_status {
		stub_status;
	}
}
[root@Tang-Neo conf.d]# ls /data/nginx/vhost1/
index.html  neo.jpg  passwd  passwd.text  tang.jpg


12.2 redirect 示例
URI 重定向过程:
- 客户端浏览器向服务器进行访问。
- 符合 rewrite 条件的,进行URI 重写,并发送至客户端浏览器。
- 客户端浏览器重新以新的 URI 进行网页请求。
- 服务器端按照新的 URI 进行返回。
- 在 redirect 下,用户请求的 URI 都会发生变化。
[root@Tang-Neo conf.d]# vim vhost1.conf
[root@Tang-Neo conf.d]# nginx -t
nginx: the configuration file /etc/nginx/nginx.conf syntax is ok
nginx: configuration file /etc/nginx/nginx.conf test is successful
[root@Tang-Neo conf.d]# nginx -s reload
[root@Tang-Neo conf.d]# cat vhost1.conf
server {
	listen 192.168.1.9;
	server_name www.neotang.com;
	root /data/nginx/vhost1;
	index index.html;
	rewrite /(.*)\.png$ /$1.jpg redirect;

	location / {
		allow all;
		auth_basic "Cat Area";
		auth_basic_user_file /data/nginx/password/.nginxpasswd;
}
	location /newroot/ {
		root /data/newnginx/vhost1;
	}
	location /alias1/ {
		alias /alias2/;
	}
	location /basic_status {
		stub_status;
	}
}
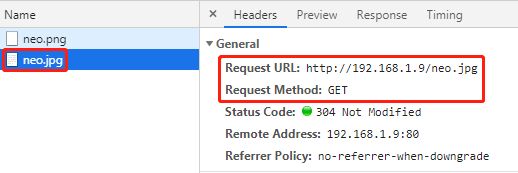
客户端进行访问:http://192.168.1.9/neo.png


12.3 permanent 示例
[root@Tang-Neo conf.d]# vim vhost1.conf
[root@Tang-Neo conf.d]# nginx -t
nginx: the configuration file /etc/nginx/nginx.conf syntax is ok
nginx: configuration file /etc/nginx/nginx.conf test is successful
[root@Tang-Neo conf.d]# nginx -s reload
[root@Tang-Neo conf.d]# cat vhost1.conf
server {
	listen 192.168.1.9;
	server_name www.neotang.com;
	root /data/nginx/vhost1;
	index index.html;
	rewrite /(.*)\.png$ /$1.jpg permanent;

	location / {
		allow all;
		auth_basic "Cat Area";
		auth_basic_user_file /data/nginx/password/.nginxpasswd;
}
	location /newroot/ {
		root /data/newnginx/vhost1;
	}
	location /alias1/ {
		alias /alias2/;
	}
	location /basic_status {
		stub_status;
	}
}


12.4 示例
[root@Tang-Neo conf.d]# vim vhost1.conf
[root@Tang-Neo conf.d]# nginx -t
nginx: the configuration file /etc/nginx/nginx.conf syntax is ok
nginx: configuration file /etc/nginx/nginx.conf test is successful
[root@Tang-Neo conf.d]# nginx -s reload
[root@Tang-Neo conf.d]# cat vhost1.conf
server {
	listen 192.168.1.9;
	server_name www.neotang.com;
	root /data/nginx/vhost1;
	index index.html;
	rewrite /(.*)\.txt$ /$1.png;
	rewrite /(.*)\.png$ /$1.jpg;

	location / {
		allow all;
		auth_basic "Cat Area";
		auth_basic_user_file /data/nginx/password/.nginxpasswd;
}
	location /newroot/ {
		root /data/newnginx/vhost1;
	}
	location /alias1/ {
		alias /alias2/;
	}
	location /basic_status {
		stub_status;
	}
}

12.5 last 示例(注意和默认的进行区分)
[root@Tang-Neo conf.d]# vim vhost1.conf
[root@Tang-Neo conf.d]# nginx -t
nginx: the configuration file /etc/nginx/nginx.conf syntax is ok
nginx: configuration file /etc/nginx/nginx.conf test is successful
[root@Tang-Neo conf.d]# nginx -s reload
[root@Tang-Neo conf.d]# cat vhost1.conf
server {
	listen 192.168.1.9;
	server_name www.neotang.com;
	root /data/nginx/vhost1;
	index index.html;
	rewrite /(.*)\.txt$ /$1.jpg last;
	rewrite /(.*)\.png$ /$1.jpg last;

	location / {
		allow all;
		auth_basic "Cat Area";
		auth_basic_user_file /data/nginx/password/.nginxpasswd;
}
	location /newroot/ {
		root /data/newnginx/vhost1;
	}
	location /alias1/ {
		alias /alias2/;
	}
	location /basic_status {
		stub_status;
	}
}


12.6 last 示例(注意和默认的进行区分)
[root@Tang-Neo conf.d]# vim vhost1.conf
[root@Tang-Neo conf.d]# nginx -t
nginx: the configuration file /etc/nginx/nginx.conf syntax is ok
nginx: configuration file /etc/nginx/nginx.conf test is successful
[root@Tang-Neo conf.d]# nginx -s reload
[root@Tang-Neo conf.d]# cat vhost1.conf
server {
	listen 192.168.1.9;
	server_name www.neotang.com;
	root /data/nginx/vhost1;
	index index.html;
	rewrite /(.*)\.txt$ /$1.png last;
	rewrite /(.*)\.png$ /$1.jpg last;

	location / {
		allow all;
		auth_basic "Cat Area";
		auth_basic_user_file /data/nginx/password/.nginxpasswd;
}
	location /newroot/ {
		root /data/newnginx/vhost1;
	}
	location /alias1/ {
		alias /alias2/;
	}
	location /basic_status {
		stub_status;
	}
}


13、ngx_http_referer_module 模块
The ngx_http_referer_module module is used to block access to a site for requests with invalid values in the “Referer” header field. (常用于禁止非法引用)
1、valid_referers none | blocked | server_names | string ...;
	# 定义referer首部的合法可用值;

	none:请求报文首部没有referer首部;
	blocked:请求报文的referer首部没有值;
	server_names:参数,其可以有值作为主机名或主机名模式;
		arbitrary_string:直接字符串,但可使用*作通配符;
		regular expression:被指定的正则表达式模式匹配到的字符串;要使用~打头,例如 ~.*\.magedu\.com;

配置示例:
	valid_referers none block server_names *.magedu.com *.mageedu.com magedu.* mageedu.* ~\.magedu\.;

if($invalid_referer) {
		return http://www.magedu.com/invalid.jpg;
}