Android实现自定义的电池充电View
最近简单学习了一下Android自定义View的实现,感觉趁热打铁动手实践最重要,写了一个电池充电的简单带动画自定义View。
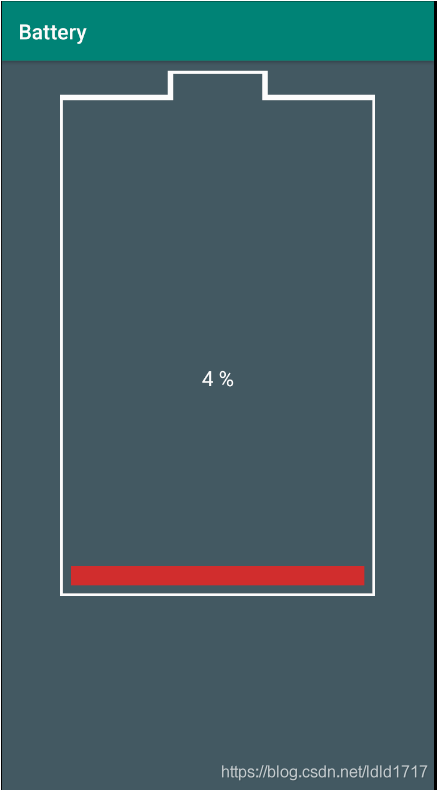
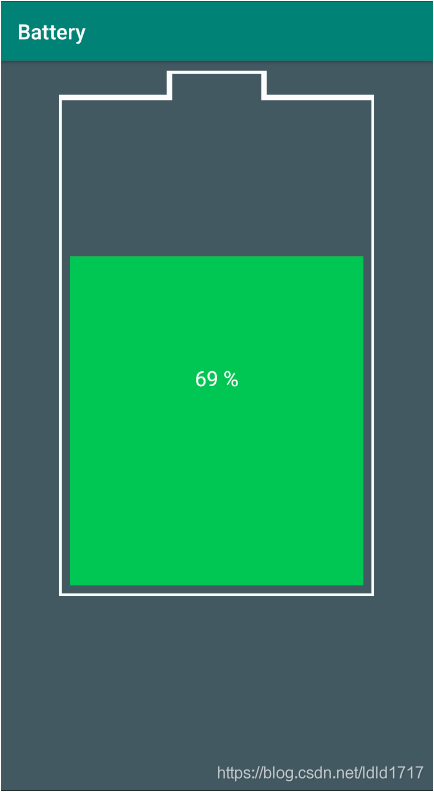
效果如下所示:

实现方法其实很简单,总结来看就3步:
1.新建attrs.xml来自定义相关的属性
2.自定义Battery继承View。在构造器中获取参数,在onMeasure()方法中进行尺寸测量,在onDraw()方法中进行绘制
3.在MainActivity中进行属性动画的设置与触发
第一步:新建attrs.xml在定义相关的属性
strokeColor:图形边线颜色
strokeWidth:图形边线宽度
lowPowerColor:低电量时的填充颜色
middlePowerColor:中等电量时的填充颜色
enoughPowerColor:电量充足时的填充颜色
text:显示的文本内容
textColor:文字颜色
textSize:文字大小
第二步:自定义Battery继承View。在构造器中获取参数,在onMeasure()方法中进行尺寸测量,在onDraw()方法中进行绘制
package com.example.leidong.battery.view;

import android.content.Context;
import android.content.res.TypedArray;
import android.graphics.Canvas;
import android.graphics.Color;
import android.graphics.Paint;
import android.graphics.Path;
import android.support.annotation.Nullable;
import android.util.AttributeSet;
import android.view.View;

import com.example.leidong.battery.R;

/**
 * Created by Lei Dong on 2019/4/7.
 */
public class Battery extends View {
    private Paint mPaint = new Paint();

    // 自定义View宽度
    private float width;
    // 自定义View高度
    private float height;
    // 自定义View中心x坐标
    private float centerX;
    // 自定义View中心y坐标
    private float centerY;

    // 宽度的1/100
    private float perUnitWidth;
    // 高度的1/100
    private float perUnitHeight;

    // 电量百分比
    private int power = 0;

    // 低电量颜色
    private int lowPowerColor;
    // 中电量颜色
    private int middlePowerColor;
    // 高电量颜色
    private int enoughPowerColor;
    // 边框宽度
    private int strokeWidth;
    // 边框颜色
    private int strokeColor;
    // 字体大小
    private int textSize;
    // 字体颜色
    private int textColor;

    public void setPower(int power) {
        this.power = power;
        invalidate();
    }

    public Battery(Context context, @Nullable AttributeSet attrs) {
        super(context, attrs);

        // 获取参数
        TypedArray typedArray = context.obtainStyledAttributes(attrs, R.styleable.Battery);
        lowPowerColor = typedArray.getColor(R.styleable.Battery_lowPowerColor, Color.parseColor("#000000"));
        middlePowerColor = typedArray.getColor(R.styleable.Battery_middlePowerColor, Color.parseColor("#000000"));
        enoughPowerColor = typedArray.getColor(R.styleable.Battery_enoughPowerColor, Color.parseColor("#000000"));
        strokeWidth = typedArray.getDimensionPixelSize(R.styleable.Battery_strokeWidth, 20);
        strokeColor = typedArray.getColor(R.styleable.Battery_strokeColor, Color.parseColor("#000000"));
        textSize = typedArray.getDimensionPixelSize(R.styleable.Battery_textSize, 50);
        textColor = typedArray.getColor(R.styleable.Battery_textColor, Color.parseColor("#000000"));

        // 回收对象
        typedArray.recycle();
    }

    /**
     * 测量
     *
     * @param widthMeasureSpec
     * @param heightMeasureSpec
     */
    @Override
    protected void onMeasure(int widthMeasureSpec, int heightMeasureSpec) {
        super.onMeasure(widthMeasureSpec, heightMeasureSpec);

        int measuredWidth = getMeasuredWidth();
        int measureHeight = getMeasuredHeight();

        measuredWidth = resolveSize(measuredWidth, widthMeasureSpec);
        measureHeight = resolveSize(measureHeight, heightMeasureSpec);

        this.width = measuredWidth;
        this.height = measureHeight;
        this.centerX = width / 2;
        this.centerY = height / 2;
        this.perUnitHeight = height / 100;
        this.perUnitWidth = width / 100;

        setMeasuredDimension(measuredWidth, measureHeight);
    }

    /**
     * 绘制
     *
     * @param canvas
     */
    @Override
    protected void onDraw(Canvas canvas) {
        super.onDraw(canvas);

        mPaint.setAntiAlias(true);

        // 绘制电池边框
        Path path = new Path();
        path.moveTo(centerX - 50 * perUnitWidth, centerY - 45 * perUnitHeight);
        path.lineTo(centerX - 15 * perUnitWidth, centerY - 45 * perUnitHeight);
        path.lineTo(centerX - 15 * perUnitWidth, centerY - 50 * perUnitHeight);
        path.lineTo(centerX + 15 * perUnitWidth, centerY - 50 * perUnitHeight);
        path.lineTo(centerX + 15 * perUnitWidth, centerY - 45 * perUnitHeight);
        path.lineTo(centerX + 50 * perUnitWidth, centerY - 45 * perUnitHeight);
        path.lineTo(centerX + 50 * perUnitWidth, centerY + 50 * perUnitHeight);
        path.lineTo(centerX - 50 * perUnitWidth, centerY + 50 * perUnitHeight);
        path.close();

        mPaint.setStyle(Paint.Style.STROKE);
        mPaint.setStrokeWidth(strokeWidth);
        mPaint.setColor(strokeColor);

        canvas.drawPath(path, mPaint);

        // 绘制中间填充的颜色
        if (power < 10) {
            mPaint.setColor(lowPowerColor);
        } else if (power < 30) {
            mPaint.setColor(middlePowerColor);
        } else {
            mPaint.setColor(enoughPowerColor);
        }
        mPaint.setStyle(Paint.Style.FILL);
        canvas.drawRect(centerX + 2 * strokeWidth - 50 * perUnitWidth,
                (centerY + 50 * perUnitHeight - 2 * strokeWidth - power * (height - 5 * perUnitHeight - 4 * strokeWidth) / 100),
                centerX - 2 * strokeWidth + 50 * perUnitWidth,
                centerY + 50 * perUnitHeight - 2 * strokeWidth,
                mPaint);

        // 绘制文字
        mPaint.setColor(textColor);
        mPaint.setTextSize(textSize);
        mPaint.setStyle(Paint.Style.FILL);
        String text = power + " %";
        float textWidth = mPaint.measureText(text);
        canvas.drawText(text, centerX - (textWidth / 2), centerY + 10 * perUnitHeight, mPaint);
    }
}
在构造器中通过TypedArray获取到xml布局中传递的各个自定义属性值,最后记得释放它。
重写onMeasure()方法,根据xml布局中传递的尺寸进行组件尺寸的测量与匹配。
在onDraw()中,绘制通过三步完成。首先利用drawPath()绘制组件的外形。其次利用drawRect()绘制内部的填充矩形,这里的power是一个变量,待会由MainActivity中的属性动画传递值来不断刷新举行高度已实现电量增加的动画效果。drawText()方法中绘制电量的文本显示。
第三步:在MainActivity中进行属性动画的设置与触发
MainActivity的代码如下:
package com.example.leidong.battery;

import android.animation.ObjectAnimator;
import android.os.Bundle;
import android.support.v7.app.AppCompatActivity;
import android.view.View;
import android.view.animation.AccelerateDecelerateInterpolator;

import com.example.leidong.battery.view.Battery;

public class MainActivity extends AppCompatActivity {
    private Battery mBattery;

    @Override
    protected void onCreate(Bundle savedInstanceState) {
        super.onCreate(savedInstanceState);
        setContentView(R.layout.activity_main);

        mBattery = findViewById(R.id.battery);
    }

    /**
     * Click battery
     *
     * @param view
     */
    public void onClickBattery(View view) {
        // 设置属性动画并播放
        ObjectAnimator animator = ObjectAnimator.ofInt(mBattery, "power", 0, 100);
        animator.setDuration(10000);
        animator.setInterpolator(new AccelerateDecelerateInterpolator());
        animator.start();
    }
}
属性动画这里设置的power从0到100渐变,渐变规则遵循先加速后减速的策略,动画持续实践10s。当点击组件时触发动画进行播放。
布局文件activity_main,xml如下:
欢迎在我的github下载完整工程:
github链接