【项目中期-Cloud分布式组件整合-1】Nacos-Hystrix-Gateway
项目中期,暂时整合部分分布式组件,使得微服务模块能够协同开发,并结合前端测试做出修改。这里主要整合了三个基本组件:Nacos,Hystrix,Gateway。暂时只做了最基本的整合,更多配置和使用后续进行。
0x01.Nacos 注册中心 - 整合
1.Nacos概述
- 官方概述:Nacos 是阿里巴巴推出来的一个新开源项目,是一个更易于构建云原生应用的动态服务发现、配置管理和服务管理平台。Nacos 致力于帮助您发现、配置和管理微服务。Nacos 提供了一组简单易用的特性集,帮助您快速实现动态服务发现、服务配置、服务元数据及流量管理。Nacos 帮助您更敏捷和容易地构建、交付和管理微服务平台。 Nacos 是构建以“服务”为中心的现代应用架构 (例如微服务范式、云原生范式) 的服务基础设施。
- 简而言之:Nacos就是一个微服务管理的组件,也叫注册中心,能够为我们提供很多微服务管理相关的功能。
2.Nacos的本地安装
-
首先,需要下载nacos的windows版本(dev环境使用)
-
下载地址:https://github.com/alibaba/nacos/releases
- 免安装,解压即可。
3.Nacos进行服务注册 【服务发现】
- 首先导入相关依赖。
        <dependency>
            <groupId>org.springframework.cloudgroupId>
            <artifactId>spring-cloud-starter-alibaba-nacos-discoveryartifactId>
        dependency>
- application.properties中进行配置。
# nacos的相关配置
# nacos服务地址
spring.cloud.nacos.discovery.server-addr=127.0.0.1:8848
- 启动类上加上注解。代表引入了注册中心。
@EnableDiscoveryClient
- 启动微服务。可以发现服务已经注册成功了。
4.搭配Feign进行服务调用【服务调用】
-
Feign是Netflix开发的声明式、模板化的HTTP客户端, Feign可以帮助我们更快捷、优雅地调用HTTP API。
-
Spring Cloud对Feign进行了增强,使Feign支持了Spring MVC注解,并整合了Ribbon和Eureka,从而让Feign的使用更加方便。
-
使用Feign的前提是已经进行了服务注册。
-
1.导入相关依赖:
        <dependency>
            <groupId>org.springframework.cloudgroupId>
            <artifactId>spring-cloud-starter-openfeignartifactId>
        dependency>
- 2.在调用端的启动类添加注解
@EnableFeignClients
-
3.在调用端的client包下创建用于调用的接口。
- 类上加注解
@Component,交给Spring进行管理。 - 类上加注解
@FeignClient,参数是被调用端的服务名。 - 接口里的内容是要调用的方法名,上面需要指定请求方法和具体路径。
- 注意: @PathVariable注解要指定参数名称,否则会出错。
- 类上加注解
-
例如:
@FeignClient("service-oss")
@Component
public interface OssClient {

    @PostMapping("/gfbbsoss/fileoss/uploadOssFile")
    public R uploadOssFile(MultipartFile file);
}
-
4.实际调用。
- 在调用端的controller中注入写好的Client。
- 注入之后,就可以直接调用里面的方法。
-
例如:
-
被调用端的测试方法:
	//TEST -- 测试服务调用
    @GetMapping("test/{id}")
    public R test(@PathVariable Integer id){

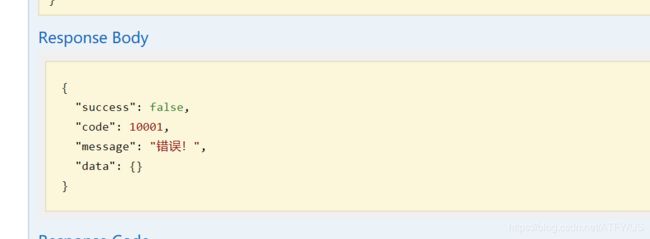
        return id>=10?R.ok().data("id",id):R.error().message("错误!");
    }
- Client接口:
@FeignClient("service-oss")
@Component
public interface OssClient {


    //注意 @PathVariable 要指定参数名称
    @GetMapping("/gfbbsoss/fileoss/test/{id}")
    public R test(@PathVariable("id") Integer id);
}
- 调用端controller的注入:
@Autowired
private OssClient ossClient;
- 调用端的controller的测试:
	//测试服务调用
    @ApiOperation(value ="测试服务调用")
    @GetMapping("test")
    public R test(){

        Integer id=9;
        return ossClient.test(id);
    }
- 测试效果:微服务之间的调用成功!
0x02.Hystrix 熔断器 – 整合
1.Hystrix概述
- Hystrix:熔断处理机制 Feign的调用关系,会被Hystrix代理拦截,对每一个Feign调用请求,Hystrix都会将其包装成HystrixCommand,参与Hystrix的流控和熔断规则。如果请求判断需要熔断,则Hystrix直接熔断,抛出异常或者使用FallbackFactory返回熔断Fallback结果;如果通过,则将调用请求传递给Ribbon组件。
- Hystrix 是一个供分布式系统使用,提供延迟和容错功能,保证复杂的分布系统在面临不可避免的失败时,仍能有其弹性。
- 简而言之,Hystrix主要就是个熔断器。
2.具体整合
- 1.添加相关依赖。
		 <dependency>
            <groupId>org.springframework.cloud</groupId>
            <artifactId>spring-cloud-starter-netflix-ribbon</artifactId>
        </dependency>
        <!--hystrix依赖,主要是用  @HystrixCommand -->
        <dependency>
            <groupId>org.springframework.cloud</groupId>
            <artifactId>spring-cloud-starter-netflix-hystrix</artifactId>
        </dependency>
- 2.配置文件中开启熔断器。
# Hystrix 熔断器的相关配置
# 开启熔断器
feign.hystrix.enabled=true
# 设置hystrix超时时间,默认1000ms
hystrix.command.default.execution.isolation.thread.timeoutInMilliseconds=6000
- 3.创建Client的实现类。里面实现方法的内容是出错后的响应内容。
@Component
public class OssDegradeFeignClient implements OssClient {
    @Override
    public R test(Integer id) {
        return R.error().message("服务器异常!");
    }
}
- 4.修改Client接口的注解。添加fallback属性为熔断之后执行的方法。
@FeignClient(name = "service-oss",fallback = OssDegradeFeignClient.class)
- 完成如上配置,如果某个服务器宕机,就可以进行相关的熔断处理。测试略。
0x03.Gateway 网关 – 整合
1.Spring Cloud Gateway 概述
网关提供API全托管服务,丰富的API管理功能,辅助企业管理大规模的API,以降低管理成本和安全风险,包括协议适配、协议转发、安全策略、防刷、流量、监控日志等贡呢。一般来说网关对外暴露的URL或者接口信息,我们统称为路由信息。如果研发过网关中间件或者使用过Zuul的人,会知道网关的核心是Filter以及Filter Chain(Filter责任链)。Sprig Cloud Gateway也具有路由和Filter的概念。Spring Cloud Gateway中几个重要的概念。
(1)路由。路由是网关最基础的部分,路由信息有一个ID、一个目的URL、一组断言和一组Filter组成。如果断言路由为真,则说明请求的URL和配置匹配
(2)断言。Java8中的断言函数。Spring Cloud Gateway中的断言函数输入类型是Spring5.0框架中的ServerWebExchange。Spring Cloud Gateway中的断言函数允许开发者去定义匹配来自于http request中的任何信息,比如请求头和参数等。
(3)过滤器。一个标准的Spring webFilter。Spring cloud gateway中的filter分为两种类型的Filter,分别是Gateway Filter和Global Filter。过滤器Filter将会对请求和响应进行修改处理
2.整合Gateway
- 创建模块infrastructure,创建子模块api_gateway。
- 添加依赖。
		<dependency>
            <groupId>org.gfbbsgroupId>
            <artifactId>common-utilsartifactId>
            <version>1.0-SNAPSHOTversion>
        dependency>
        <dependency>
            <groupId>org.springframework.cloudgroupId>
            <artifactId>spring-cloud-starter-alibaba-nacos-discoveryartifactId>
        dependency>
        <dependency>
            <groupId>org.springframework.cloudgroupId>
            <artifactId>spring-cloud-starter-gatewayartifactId>
        dependency>

        <dependency>
            <groupId>com.google.code.gsongroupId>
            <artifactId>gsonartifactId>
        dependency>

        <dependency>
            <groupId>org.springframework.cloudgroupId>
            <artifactId>spring-cloud-starter-openfeignartifactId>
        dependency>
    dependencies>
- 启动类。(引入注册中心)
@SpringBootApplication
@EnableDiscoveryClient
public class ApiGatewayApplication {

    public static void main(String[] args) {

        SpringApplication.run(ApiGatewayApplication.class,args);
    }
}
- 配置文件。配置其它服务的路由规则。
# 服务端口
server.port=8868
# 服务名
spring.application.name=service-gateway

# nacos服务地址
spring.cloud.nacos.discovery.server-addr=127.0.0.1:8848

#使用服务发现路由
spring.cloud.gateway.discovery.locator.enabled=true
#服务路由名小写
#spring.cloud.gateway.discovery.locator.lower-case-service-id=true

# user服务
#设置路由id
spring.cloud.gateway.routes[0].id=service-user
#设置路由的uri
spring.cloud.gateway.routes[0].uri=lb://service-user
#设置路由断言,代理servicerId为auth-service的/auth/路径
spring.cloud.gateway.routes[0].predicates= Path=/userService/**

# post服务
spring.cloud.gateway.routes[1].id=service-post-comment
spring.cloud.gateway.routes[1].uri=lb://service-post-comment
spring.cloud.gateway.routes[1].predicates= Path=/post_comment/**

# msm服务
spring.cloud.gateway.routes[2].id=service-msm
spring.cloud.gateway.routes[2].uri=lb://service-msm
spring.cloud.gateway.routes[2].predicates= Path=/msm/**

# oss服务
spring.cloud.gateway.routes[3].id=service-oss
spring.cloud.gateway.routes[3].uri=lb://service-oss
spring.cloud.gateway.routes[3].predicates= Path=/service-oss/**
3.Gateway的相关配置
- 配置全局的跨域。若配置,其它controller上不能再加
@CrossOrigin注解,不然会多次跨域导致跨域失败。
@Configuration
public class CorsConfig {


    @Bean
    public CorsWebFilter corsFilter() {

        CorsConfiguration config = new CorsConfiguration();
        config.addAllowedMethod("*");
        config.addAllowedOrigin("*");
        config.addAllowedHeader("*");
        UrlBasedCorsConfigurationSource source = new UrlBasedCorsConfigurationSource(new PathPatternParser());
        source.registerCorsConfiguration("/**", config);
        return new CorsWebFilter(source);
    }
}
- 其它全局权限处理,异常处理等后续再进行相关的配置。


