yilia主题安装需要的命令
从你的博客根目录转到thmes文件夹内,在此处bash here并在小黑窗中输入命令:
$ git clone https://github.com/litten/hexo-theme-yilia.git themes/yilia
后在博客根目录的_config.yml文件中修改theme:后面的内容为yilia(这里是更改该调用的主题,默认的是landscape)
有些同学改为yilia之后并没有调用并出现一大堆报错,下载到thmes中的yilia主题的名称可能是hexo-theme-yilia,将两个地方名字更改一致就好了。
中间可能会有人安装配置过程中出错,
初始化出错,补充以下参数:
hexo sever出错,补充以下参数:
npm install hexo-renderer-ejs--save

npm install hexo-renderer-stylus--save

npm install hexo-renderer-marked--save
执行hexo g命令后,报错:incomplete explicit mapping pair; a key node is missed
主题目录下所有yml文件中所有有空格的字段都用双引号括起来,尤其注意languages下面的yml文件。
hexo根目录文件解释
node_modules:是依赖包
public:存放的是生成的页面
scaffolds:命令生成文章等的模板
source:用命令创建的各种文章
themes:主题
_config.yml:整个博客的配置
db.json:source解析所得到的
package.json:项目所需模块项目的配置信息
Site
title: 大何生のBLOG //站点标题
subtitle: 积跬步,至千里。 //站点副标题
description: ‘’ //站点描述
keywords: //博客关键字
author: 大何生 //作者
language: en //语言
timezone: ‘’ //时间
查看所有配置文件:
npm i hexo-generator-json-content --save
###拿我的博客举例,配置好后hexo s预览的样子:
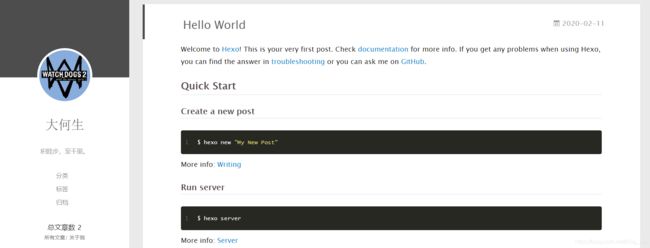 yilia主题本身的色调就很让像我这种不爱花里胡哨的人喜欢,但还是要学会修改一些东西才能更熟练的应用本主题,下面开始:
№1 显示摘要(而不是全文显示)
在编辑你的博文的时候在你需要在摘要出显示出来的内容后面插入一行
css
№2 优先级配置
修改根目录配置文件/_config.yml,top值-1标示根据top值倒序(正序设置为1即可),同样date也是根据创建日期倒序。
index_generator:
  path: ''
  per_page: 10
  order_by:
    top: -1
    date: -1
№3 在左侧显示总文章数
将**themes\yilia\layout_partial**left-col.ejs文件的
<nav class="header-menu">
    <ul>
    <% for (var i in theme.menu){
      %>
        <li><a href="<%- url_for(theme.menu[i]) %>"><%= i %></a></li>
    <%}%>
    </ul>
</nav>
后面加上
<nav>
    总文章数 <%=site.posts.length%>
</nav>
插入网易云音乐播放器
打开网易云音乐首页,复制你喜欢的的背景音乐分享外链复制源码

<% if (theme.music && theme.music.enable){
%>
<% } %>
这里的宽度和高度是可以为量调整的,在其中的width=?? height=??。
在themes/yilia/layout/_partial/left-col.ejs文件nav标签中添加代码:
注:放在
这里添加了一些判断和表达式。
在yilia主题配置文件_config.yml中添加属性:
# 网易云音乐插件
music:
  enable: true
  #id: 1332647902  # 网易云分享的ID
  autoplay: true  # 是否开启自动播放
№4 个人外部宣传
打开themes/yilia/_config.yml

# SubNav
subnav:
  #github: "#"
  weibo: "https://weibo.com/p/1005055125083612"
  #rss: "#"
  zhihu: "https://www.zhihu.com/people/he-sheng-51-24"
  #qq: "202299834"
  weixin: "/assets/wei.jpg"
  #jianshu: "#"
  #douban: "#"
  #segmentfault: "#"
  bilibili: "https://space.bilibili.com/39971838"
  #acfun: "#"
  mail: "mailto:[email protected]"
  #facebook: "#"
  #google: "#"
  #twitter: "#"
  #linkedin: "#"
不想显示的在前面加#如果需要显示,前面不要加#
№5配置显示
修改该文件:themes/yilia/_config.yml
在里面加入:
declare_type: 1
licensee_url: https:
licensee_name: '知识共享署名-非商业性使用-相同方式共享 4.0 国际许可协议'
licensee_img: https:
然后在需要进行版权声明的文章的md文件头部,设置属性:
bash declare:true
№6 字数、阅读时长添加
安装hexo-wordcount 安装完就报错了 pass
在博客目录下打开terminal,输入命令
npm i --save hexo-wordcount
№7 鼠标点击小红心的设置
在 hexo/themes/yilia/source
文件目录下添加love.js文件。
love.js文件内这样编辑:
!function(e,t,a){
     function r(){
     for(var e=0;e<s.length;e++)s[e].alpha<=0?(t.body.removeChild(s[e].el),s.splice(e,1)):(s[e].y-
-,s[e].scale+=.004,s[e].alpha-
=.013,s[e].el.style.cssText="left:"+s[e].x+"px;top:"+s[e].y+"px;opacity:"+s[e].alpha+";transform:scale("+s[e].scale+","+s[e].scale+")
rotate(45deg);background:"+s[e].color+";z-index:99999");requestAnimationFrame(r)}function n(){var t="function"==typeof e.onclick&&e.onclick;e.onclick=function(e){
     t&&t(),o(e)}}function o(e){
     var
a=t.createElement("div");a.className="heart",s.push({
     el:a,x:e.clientX-
5,y:e.clientY-5,scale:1,alpha:1,color:c()}),t.body.appendChild(a)}function i(e){
     var
a=t.createElement("style");a.type="text/css";try{
     a.appendChild(t.createTextNode(e))}
catch(t){
     a.styleSheet.cssText=e}t.getElementsByTagName("head")[0].appendChild(a)}function c(){
     return"rgb("+~~(255*Math.random())+","+~~(255*Math.random())+","+~~(255*Math.random())+")"}var
s=[];e.requestAnimationFrame=e.requestAnimationFrame||e.webkitRequestAnimationFrame||e.mozRequestAnimationFrame||e.oRequestAnimationFrame||e.msRequestAnimationFrame||function(e){
     setTimeout(e,1e3/60)},i(".heart{
     width: 10px;height: 10px;position:
fixed;background: #f00;transform: rotate(45deg);-webkit-transform: rotate(45deg);-moz-transform:
rotate(45deg);}.heart:after,.heart:before{
     content: '';width: inherit;height: inherit;background: inherit;border-radius: 50%;-webkit-border-radius: 50%;-moz-
border-radius: 50%;position: fixed;}.heart:after{
     top: -5px;}.heart:before{
     left: -5px;}"),n(),r()}
(window,document);
在文件hexo/themes/yilia/layout/_partial/footer.ejs
文件的最后, 添加以下代码:
<!--页面点击小红心-->
<script type="text/javascript" src="/love.js"></script>

№8 文本结束并且与more无冲突
打开yourblog\themes\yilia\layout_partial文件夹,
样图:
并编辑article.ejs文件
并在这段代码:
<% if (!post.noDate){
%>
<%- partial('post/date', {
class_name: 'archive-article-date', date_format: null}) %>
<% } %>
<% } %>
<% if (post.excerpt && index)
{
%>
<%- post.excerpt %>
<% if (theme.excerpt_link) {
%>
"article-more-a" href="<%- url_for(post.path) %>#more"><%= theme.excerpt_link %> >>
<%
} %>
<%
} else {
%>
<%- post.content %>
<%
} %>
的下面添加:
<% if ((theme.essayending_type === 2 || (theme.essayending_type === 1 && post.essayending)) && !index){
%>
<% if (!index){
%>
"essayending">
"text-align:center;color: #ccc;font-size:22px;">
-------------本文结束"fa fa-paw">感谢您的阅读-------------
"essayending" hidden="hidden">
<% } %>
<% } %>
然后在**\theme\yilia_config.yml**
文件中找到合适位置添加:
#文章结束
essayending_type: 1 #0关闭文章结束提示 2全开 1需要在文章开头加上
essayending: true
№9 修复手机浏览出现以下问题
所有文章无法查看
将此中出现的内从全部复制,打开根目录的全局配置文件_config.yml在文件的最下面把这些内容然贴进去就好了:
jsonContent:
meta: false
pages: false
posts:
title: true
date: true
path: true
text: false
raw: false
content: false
slug: false
updated: false
comments: false
link: false
permalink: false
excerpt: false
categories: false
tags: true
№10 404 界面
直接在hexo/source文件夹里面加一个个性的404.html,内容自定可以到网上下载推荐个链接个性404界面模板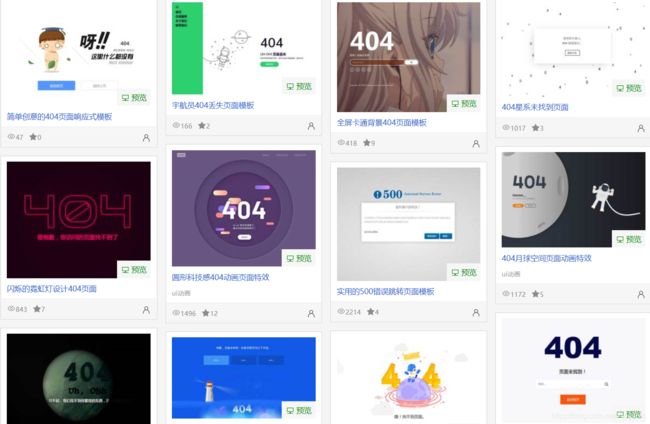
№ 11单篇文章点击量

在themes/yilia/layout/_partial/article.ejs中 在
<%- partial('post/title', {
class_name: 'article-title'}) %>
后面插入如下代码:
<!--显示阅读次数-->
<% if (!index && post.comments){
%>
<br/>
<a class="cloud-tie-join-count" href="javascript:void(0);" style="color:gray;font-size:14px;">
<span class="icon-sort"></span>
<span id="busuanzi_container_page_pv" style="color:#ef7522;font-size:14px;">
阅读数: <span id="busuanzi_value_page_pv"></span>次
</span>
</a>
<% } %>
<!--显示阅读次数完毕-->
先做人,再做事,近期对hexo-yilia的探索就是这些,步子小,但不能停下来。
积跬步,至千里,加油!