使用 style-loader,css-loader 打包 css 文件
首先在src目录下创建一个 index.css 文件,内容如下:
.this_style {
    color: red;
}
修改 index.js 文件内容如下:
import './index.css';

var root = document.getElementById('root');
var wp = document.createElement('div');
wp.innerText = 'Hello, Webpack';
wp.classList.add('this_style');

root.append(wp);
代码的内容是创建一个div,并把this_style的样式赋给它,使它的字体变为红色。然后直接运行 npm run bundle 来打包会报错吗?当然会了,因为之前说过 webpack 只能处理 js 文件,遇到 css 文件时,它就不知道该怎么办了。所以我们就配置一下 webpack.config.js 来告诉它怎么做,配置内容如下:
const path = require('path'); // 得到的path为webpack.config.js所在的目录

module.exports = {
    entry: {
        main: './src/index.js'
    },
    output: {
        filename: 'bundle.js',
        path: path.resolve(__dirname, 'dist')
    },
    module: {
        rules: [{
            test: /\.css$/,
            use: ['style-loader', 'css-loader']
        }]
    },
    mode: 'development'
}
然后安装 style-loader 和 css-loader:
npm install style-loader css-loader -D
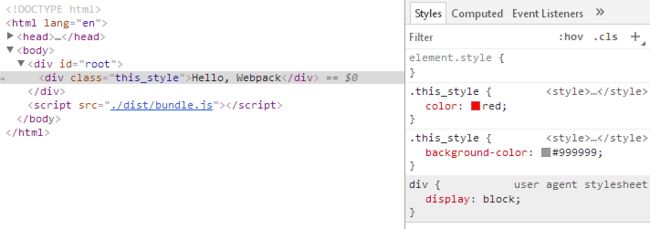
安装完之后,执行打包命令,没有报错,就说明 webpack 已经正确打包好了 css 文件。打开 index.html 可以看到,字体的颜色已经变成了红色:
下面大概来说一下 style-loader 和 css-loader 做了哪些工作,详细的说明可以去看官方文档。
在src目录下再新建一个 test.css 文件,给 this_style 样式加一个背景色:
.this_style {
    background-color: #999999; /* 灰色 */
}
然后在 index.css 文件中引入 test.css:
@import './test.css';

.this_style {
    color: red;
}
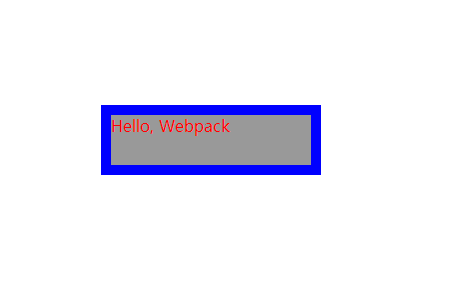
执行打包命令,打开 index.html 查看结果:
打包成功, 背景色显示了出来。
在这段打包的过程中,css-loader 会根据 css 的语法,比如 @import.. 分析出几个 css 文件的关系,然后把它们合并成一段 css,style-loader 在得到 css-loader 生成的内容之后,会把这段内容添加到指定的内页元素上,最后呈现出上图的结果。
使用 stylus-loader 打包 stylus 样式文件
接下来我们试一下打包 stylus 样式文件,在 src 目录下新建一个 test.styl 文件,内容为:
.this_style
  height 50px
  width 200px
  border 10px solid blue
  transform translate(100px, 100px)
然后在 index.css 文件中使用 @import './test.styl'; 引入这个文件,配置 webpack.config.js 文件:
const path = require('path'); // 得到的path为webpack.config.js所在的目录

module.exports = {
    entry: {
        main: './src/index.js'
    },
    output: {
        filename: 'bundle.js',
        path: path.resolve(__dirname, 'dist')
    },
    module: {
        rules: [{
            test: /\.(css|styl)$/,
            use: ['style-loader', 'css-loader', 'stylus-loader']
        }]
    },
    mode: 'development'
}
别忘了安装 stylus 和 stylus-loader :
npm install stylus stylus-loader -D
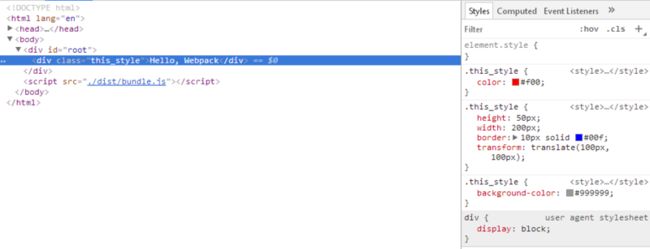
最后执行打包,查看页面显示的内容:
一切正常,新的样式已经加了上去,说明打包 stylus 样式文件成功。
请注意,使用 loader 打包时,是有执行顺序的,依次为 从右到左执行 和 从下到上执行:
![]()
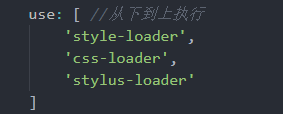
这里的执行顺序为:先用 stylus-loader 将 styl 文件翻译为 css,然后 css-loader 处理好这些 css,最后给到 style-loader 做最后的处理。
使用 postcss-loader 处理一些 css 需求
注意看这个地方:
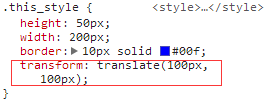
像 transform 这种样式,目前都有各大浏览器的厂商前缀,比如 -webkit-transform,但我们只写了 transform, 能不能借助一些工具自动添加上这些前缀呢,当然是可以的,这里我们就使用 postcss-loader。
查看 postcss-loader 的文档,需要创建一个 postcss.config.js 文件, 在根目录下创建这个文件,内容如下:
module.exports = {
    plugins: [
        require('autoprefixer')
    ]
}
在配置里,我们使用 require('autoprefixer') 来引入 autoprefixer 插件自动给样式添加浏览器厂商前缀。
在 webpack.config.js 里添加 postcss-loader:
use: ['style-loader', 'css-loader', 'postcss-loader', 'stylus-loader'] // 从右到左执行
最后,安装 postcss-loader 和 autoprefixer:
npm install postcss-loader autoprefixer -D
执行打包命令,查看结果:
可以看到,浏览器厂商前缀已经自动加上了,不需要我们再手动敲了,非常方便。

