Android通过URL跟web服务器通信那点破事
代码片段(7)[全屏查看所有代码]
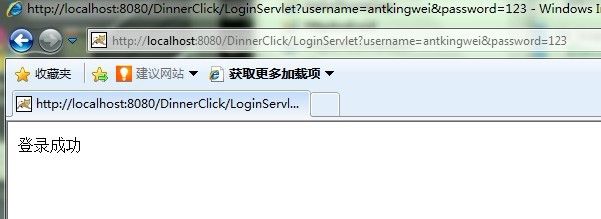
4. [代码]tomCat服务器端
|
1
2
3
4
5
6
7
8
9
10
11
12
13
14
15
16
17
18
19
20
21
22
23
24
25
26
27
28
29
30
31
32
33
34
35
|
package
com.edu.qufu.dinner.servlet;
import
java.io.IOException;
import
java.io.PrintWriter;
import
javax.servlet.ServletException;
import
javax.servlet.http.HttpServlet;
import
javax.servlet.http.HttpServletRequest;
import
javax.servlet.http.HttpServletResponse;
public
class
LoginServlet
extends
HttpServlet{
protected
void
doGet(HttpServletRequest request,HttpServletResponse response)
throws
ServletException,
IOException{
String username = request.getParameter(
"username"
);
String password = request.getParameter(
"password"
);
System.out.println(username+
":"
+password);
response.setContentType(
"text/html"
);
response.setCharacterEncoding(
"utf-8"
);
PrintWriter out = response.getWriter();
String msg =
null
;
if
(username !=
null
&& username.equals(
"antkingwei"
) && password !=
null
&& password.equals(
"123"
)){
msg=
"登录成功"
;
}
else
{
msg =
"登录失败"
;
}
out.print(msg);
out.flush();
out.close();
}
protected
void
doPost(HttpServletRequest request,HttpServletResponse response)
throws
ServletException,IOException{
doGet(request,response);
}
}
|
5. [代码]在web.xml里配置一下loginServlet
|
1
2
3
4
5
6
7
8
9
10
11
12
13
14
15
16
17
18
19
20
21
22
23
24
25
26
27
|
<
web-app
version
=
"2.5"
xmlns
=
"http://java.sun.com/xml/ns/javaee"
xmlns:xsi
=
"http://www.w3.org/2001/XMLSchema-instance"
xsi:schemaLocation="http://java.sun.com/xml/ns/javaee
http://java.sun.com/xml/ns/javaee/web-app_2_5.xsd">
<
display-name
>
<
             welcome-file-list
             >
<
welcome-file
>index.jsp
<
             servlet
             >
<
servlet-name
>FoodServlet
<
servlet-class
>com.edu.qufu.dinner.servlet.FoodServlet
<
             servlet-mapping
             >
<
servlet-name
>FoodServlet
<
url-pattern
>/FoodServlet
<
             servlet
             >
<
servlet-name
>LoginServlet
<
servlet-class
>com.edu.qufu.dinner.servlet.LoginServlet
<
             servlet-mapping
             >
<
servlet-name
>LoginServlet
<
url-pattern
>/LoginServlet
|
6. [代码]android 客户端 跳至 [4] [5] [6] [7] [全屏预览]
|
1
2
3
4
5
6
7
8
9
10
11
12
13
14
15
16
17
18
19
20
21
22
23
24
25
26
27
28
29
30
31
32
33
34
35
36
37
38
39
40
41
42
43
44
45
46
47
48
49
50
51
52
53
54
55
56
57
58
59
60
61
62
63
64
65
66
67
68
69
70
71
72
73
74
75
76
77
78
79
80
81
82
83
84
85
86
87
88
89
90
91
92
93
94
95
96
97
98
99
100
101
|
package
com.android.antking.http.url.connection;
import
java.io.InputStream;
import
java.net.HttpURLConnection;
import
java.net.URL;
import
android.app.Activity;
import
android.app.AlertDialog;
import
android.content.DialogInterface;
import
android.os.Bundle;
import
android.view.View;
import
android.widget.Button;
import
android.widget.EditText;
public
class
LoginActivity
extends
Activity {
//声明用到的组件
private
Button login,cancel;
private
EditText userName,userPassword;
/** Called when the activity is first created. */
@Override
public
void
onCreate(Bundle savedInstanceState) {
super
.onCreate(savedInstanceState);
setContentView(R.layout.main);
//事例画所有控件
login = (Button)
this
.findViewById(R.id.yes);
cancel = (Button)
this
.findViewById(R.id.no);
userName = (EditText)
this
.findViewById(R.id.username);
userPassword = (EditText)
this
.findViewById(R.id.userpassword);
//给按钮添加监听事件
login.setOnClickListener(onClickListenr);
cancel.setOnClickListener(onClickListenr);
}
/**
* 按钮监听类,处理按钮事件
*/
private
View.OnClickListener onClickListenr =
new
View.OnClickListener() {
@Override
public
void
onClick(View v) {
// TODO Auto-generated method stub
if
(v.getId()==R.id.yes){
String nameString = userName.getText().toString();
String password = userPassword.getText().toString();
login(nameString,password);
}
if
(v.getId()==R.id.no){
LoginActivity.
this
.finish();
}
}
};
/**
* 自定义一个消息提示窗口
* @param msg
*/
private
void
showDialog(String msg){
AlertDialog.Builder builder =
new
AlertDialog.Builder(
this
);
builder.setMessage(msg).setCancelable(
false
).setPositiveButton(
"确定"
,
new
DialogInterface.OnClickListener() {
@Override
public
void
onClick(DialogInterface dialog,
int
id) {
// TODO Auto-generated method stub
}
});
AlertDialog alert = builder.create();
alert.show();
}
private
void
login(String username,String password){
//要访问的HttpServlet
String urlStr=
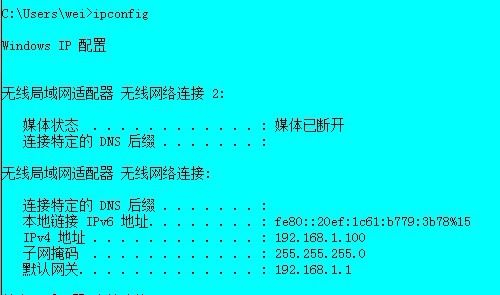
"http://192.168.1.100:8080/DinnerClick/LoginServlet?"
;
//要传递的数据
String query =
"username="
+username+
"&password="
+password;
urlStr+=query;
try
{
URL url =
new
URL(urlStr);
//获得连接
HttpURLConnection conn = (HttpURLConnection)url.openConnection();
if
(
true
){
//获得输入流
InputStream in = conn.getInputStream();
//创建一个缓冲字节数
byte
[] buffer =
new
byte
[in.available()];
//在输入流中读取数据并存放到缓冲字节数组中
in.read(buffer);
//将字节转换成字符串
String msg =
new
String(buffer);
showDialog(msg);
in.close();
//关闭数据流
}
else
{
//否则就关闭连接
conn.disconnect();
showDialog(
"连接失败"
);
}
}
catch
(Exception e){
showDialog(e.getMessage());
}
}
}
|
7. [代码]别忘了在AndroieManifest.xml里加上网络权限
|
1
|
<
uses-permission
android:name
=
"android.permission.INTERNET"
>
|


