【Arduino+C#串口上位机】10min教你编写C#上位机控制arduino板载LED
现在人工智能非常火爆,一般的教程都是为博硕生准备的,太难看懂了,分享一个非常适合小白入门的教程,不仅通俗易懂而且还很风趣幽默,点☞这里☜进入传送门~
= = = = 我是华丽的分割线 = = = =
昨天有一个学弟找我帮忙写个程序,任务是编写一个串口上位机控制Arduino板载LED,已经焦头烂额了好久,无从下手,本来想几句话就能说清楚如何做,但是麻雀虽小,五脏俱全,包含了Arduino、串口、C#编程,写篇文章详细的讲述一下该如何做~
1.任务需求
编写一个电脑上位机控制Arduino板载LED。
2.明确任务需求
拿到这个任务,首先要确定一些不确定的因素(非常重要,不然,产品经理和攻城狮的故事,你懂得~)。比如在这个任务中只是说编写一个电脑上位机,具体的问题没有说明:
- 没有说明上位机使用什么原因编写;
- 没有说明上位机与Arduino开发板使用什么方式进行通信;
那么,接下来就是根据自己的水平和实际情况来确定这两个问题:
- 关于编程语言:我会C#,Qt,Matlab,都可以编写,但是此处不需要跨平台,没有大量数据分析,所以选择使用C#,可以最快完成;
- 关于通信方式:电脑和Arduino之间可以使用串口、USB、网络通信,此处没有硬性要求,当然选择串口是最简单的;
- 关于通信协议:这个是为了练手,肯定是越简单越好,上位机发送’o’,Arduino收到后打开LED,上位机发送’f’,Arduino收到后关闭LED。
3.实现思路
确定了任务需求后,在做嵌入式产品的时候讲究的是慢,稳,一步一步的来实现:
- ① 编写Arduino程序让LED以1s的间隔闪烁;
- ② 加入串口发送数据功能,使用Arduino自带串口监视器测试;
- ③ 加入串口接收功能,使用Arduino自带串口监视器测试;
- ④ 硬件程序搞定,编写上位机利用串口发送数据;
4.硬件程序
4.1.LED闪烁
int led = 13;

void setup() {
  // initialize the digital pin as an output.
  pinMode(led, OUTPUT);
}

void loop() {
  digitalWrite(led, HIGH);   // turn the LED on (HIGH is the voltage level)
  delay(1000);               // wait for a second
  digitalWrite(led, LOW);    // turn the LED off by making the voltage LOW
  delay(1000);               // wait for a second
}
4.2.加入串口发送功能
首先初始化串口,设置波特率为115200:
Serial.begin(115200);
然后打印输出提示信息:
Serial.println("please select 'o' or 'f' to control led:");
程序更改为如下:
int led = 13;

void setup() {
  // initialize the digital pin as an output.
  pinMode(led, OUTPUT);
  digitalWrite(led, LOW);
  Serial.begin(115200);
  Serial.println("please select 'o' or 'f' to control led:");
}

void loop() {
  digitalWrite(led, HIGH);   // turn the LED on (HIGH is the voltage level)
  delay(1000);               // wait for a second
  digitalWrite(led, LOW);    // turn the LED off by making the voltage LOW
  delay(1000);               // wait for a second
}
4.3.加入串口接收功能
之前明确任务需求的时候,确定的协议是:
- 当接收到字符
'o'的时候打开led; - 当接收到字符
'f'的时候关闭led;
所以应该先定义一个字符变量:
char led_recv_status = 0;
当串口接收到一个数据的时候就进入判断:
 if(Serial.available()>0)
 {

 }
判断之前先要从缓存区读取刚刚接收的一个字节数据:
led_recv_status = Serial.read();
然后开始判断:
	if(led_recv_status  == 'o')
     {
      	digitalWrite(led, HIGH); //led on
      	Serial.println("led on");
     }
     else if(led_recv_status  == 'f')
     {
       	digitalWrite(led, LOW); //led off
        Serial.println("led off");
     }
整体代码如下:
/**
 * @ brief  serial control led
 * @ author mculover666
 * @ date   2019/3/16
*/
int led = 13;
char led_recv_status  = 0;
void setup()
{
   pinMode(led,OUTPUT);
   digitalWrite(led, LOW);
   Serial.begin(115200);
   Serial.println("please select 'o' or 'f' to control led:");
}
void loop()
{
  if(Serial.available()>0)
  {
    led_recv_status  = Serial.read();
    if(led_recv_status  == 'o')
     {
      	digitalWrite(led, HIGH); //led on
      	Serial.println("led on");
     }
     else if(led_recv_status  == 'f')
     {
       	digitalWrite(led, LOW); //led off
        Serial.println("led off");
     }
  }
}
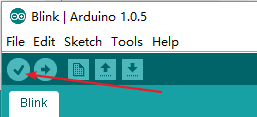
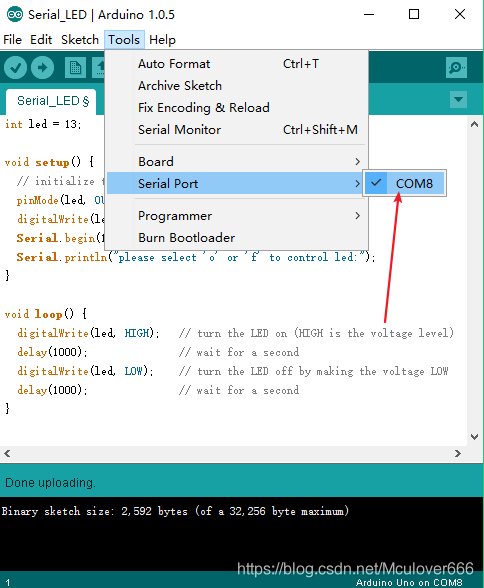
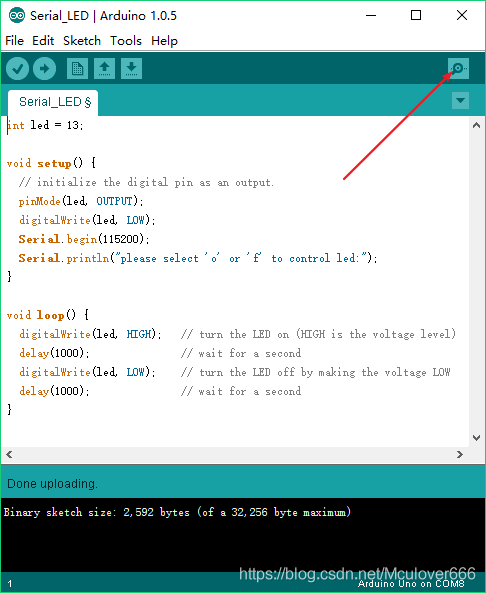
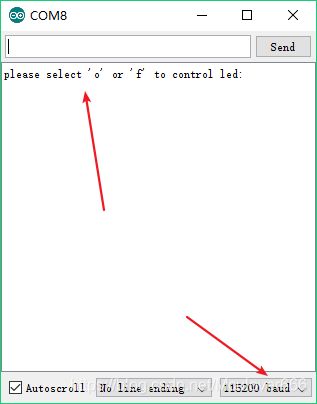
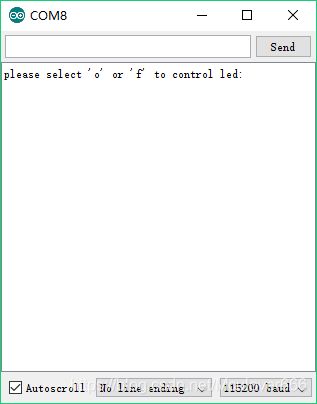
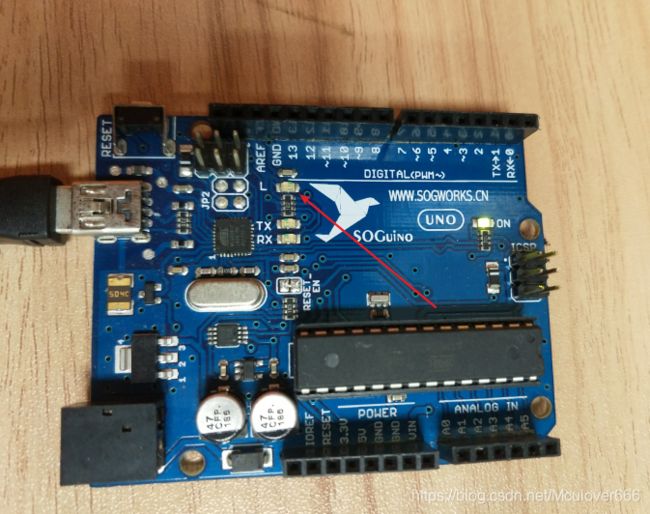
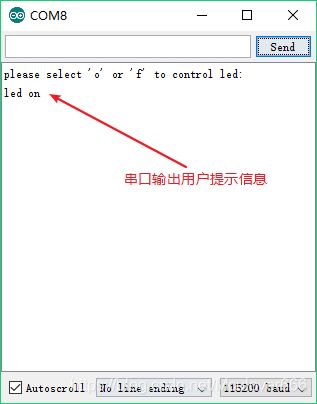
编译、烧写、打开串口监视器,此时可以看到板载LED是熄灭状态,串口提示信息也已输出:
首先测试发送字符'o':
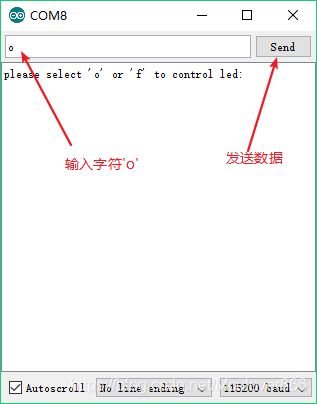
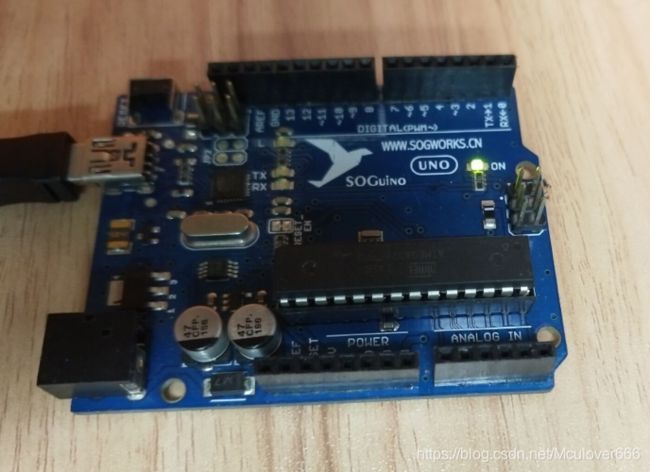
Arduino开发板收到后先打开LED,然后输出提示信息:

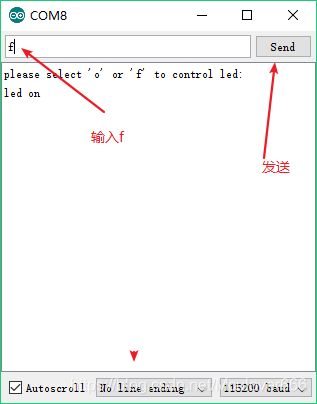
然后再测试发送字符'f':
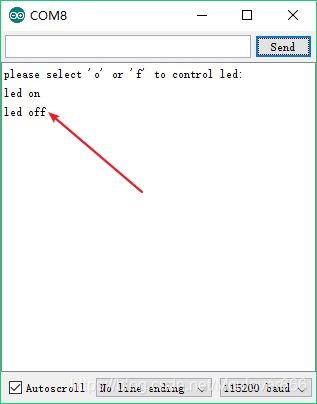
可以看到LED熄灭,串口输出用户提示信息:
5.编写上位机
注:我使用的是VS2017。
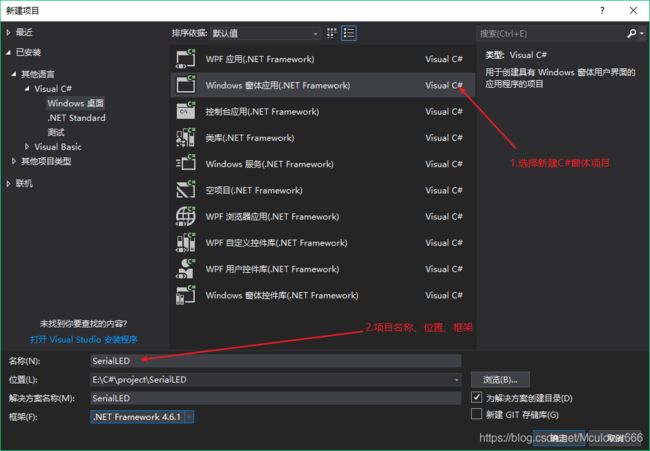
5.1.新建工程
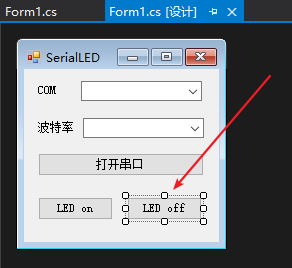
5.2.绘制界面
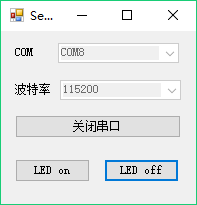
这里为了简单,只提供用户选择串口和波特率。
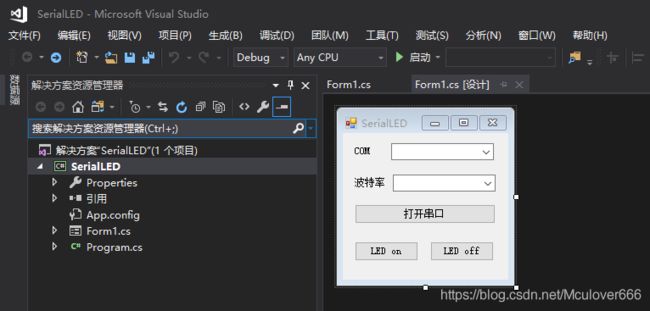
注意要将串口组件添加进去:

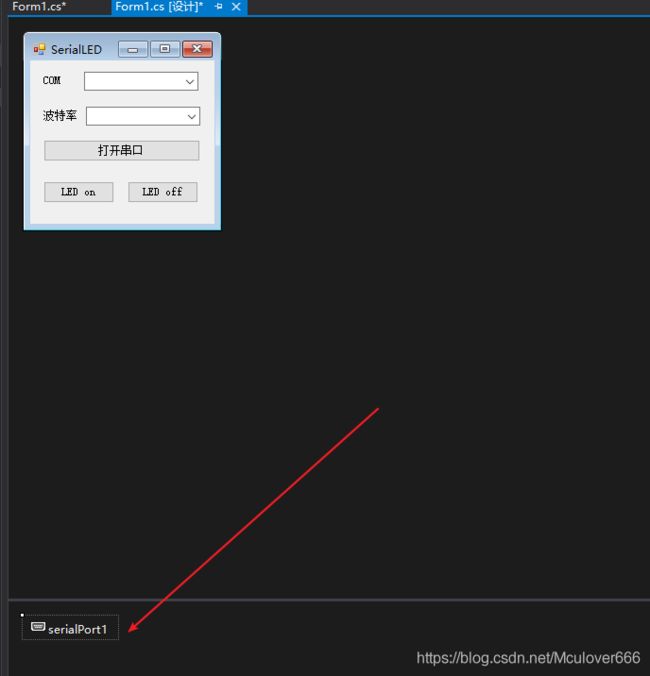
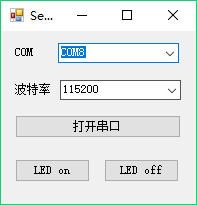
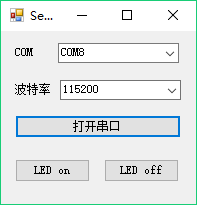
按Ctrl+F5运行一下看看效果:

5.3.编写后台程序
5.3.1.添加串口及串口设置
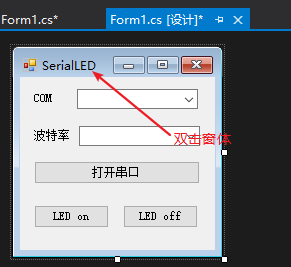
IDE会自动跳转到窗体的加载函数:
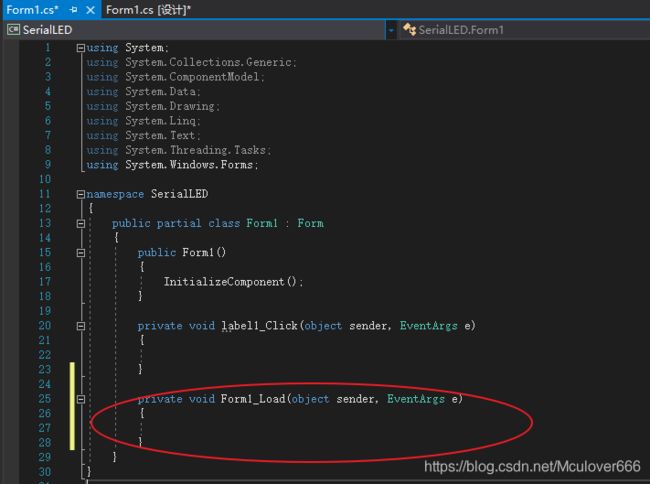
在这个函数中我们编写一些初始化界面的代码,比如添加波特率选项,自动搜索可用串口:
        private void Form1_Load(object sender, EventArgs e)
        {
            //添加波特率列表
            string[] baud = { "9600", "115200"};
            comboBox2.Items.AddRange(baud);

            //设置选项默认值
            comboBox2.Text = "115200";

            //获取电脑当前可用串口并添加到选项列表中
            comboBox1.Items.AddRange(System.IO.Ports.SerialPort.GetPortNames());

        }
5.3.2.打开/关闭串口
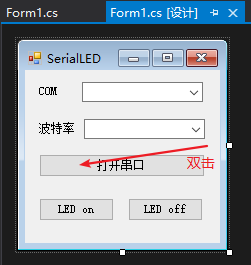
双击按钮会自动跳转到回调函数:

在这个函数中我们设置串口的一些属性,然后选择打开或者关闭串口:
        private void button1_Click(object sender, EventArgs e)
        {
            try
            {
                //将可能产生异常的代码放置在try块中
                //根据当前串口属性来判断是否打开
                if (serialPort1.IsOpen)
                {
                    //串口已经处于打开状态
                    serialPort1.Close();    //关闭串口
                    button1.Text = "打开串口";
                    comboBox1.Enabled = true;
                    comboBox2.Enabled = true;
                }
                else
                {
                    //串口已经处于关闭状态,则设置好串口属性后打开
                    comboBox1.Enabled = false;
                    comboBox2.Enabled = false;
                    serialPort1.PortName = comboBox1.Text;
                    serialPort1.BaudRate = Convert.ToInt32(comboBox2.Text);
                    serialPort1.DataBits = 8;
                    serialPort1.Parity = System.IO.Ports.Parity.None;
                    serialPort1.StopBits = System.IO.Ports.StopBits.One;
                    serialPort1.Open();     //打开串口
                    button1.Text = "关闭串口";
                }
            }
            catch (Exception ex)
            {
                //捕获可能发生的异常并进行处理

                //捕获到异常,创建一个新的对象,之前的不可以再用
                serialPort1 = new System.IO.Ports.SerialPort();
                //刷新COM口选项
                comboBox1.Items.Clear();
                comboBox1.Items.AddRange(System.IO.Ports.SerialPort.GetPortNames());
                //响铃并显示异常给用户
                System.Media.SystemSounds.Beep.Play();
                button1.Text = "打开串口";
                button1.BackColor = Color.ForestGreen;
                MessageBox.Show(ex.Message);
                comboBox1.Enabled = true;
                comboBox2.Enabled = true;
            }
        }
5.3.3.打开LED
        private void button2_Click(object sender, EventArgs e)
        {
            try
            {
                //首先判断串口是否开启
                if (serialPort1.IsOpen)
                {
                    //串口处于开启状态,将发送区文本发送
                   //以ASCII模式发送
                   serialPort1.Write("o");
                }
            }
            catch (Exception ex)
            {
                serialPort1.Close();
                //捕获到异常,创建一个新的对象,之前的不可以再用
                serialPort1 = new System.IO.Ports.SerialPort();
                //刷新COM口选项
                comboBox1.Items.Clear();
                comboBox1.Items.AddRange(System.IO.Ports.SerialPort.GetPortNames());
                //响铃并显示异常给用户
                System.Media.SystemSounds.Beep.Play();
                button1.Text = "打开串口";
                button1.BackColor = Color.ForestGreen;
                MessageBox.Show(ex.Message);
                comboBox1.Enabled = true;
                comboBox2.Enabled = true;
            }
        }
5.3.4.关闭LED
        private void button3_Click(object sender, EventArgs e)
        {
            try
            {
                //首先判断串口是否开启
                if (serialPort1.IsOpen)
                {
                    //串口处于开启状态,将发送区文本发送
                    //以ASCII模式发送
                    serialPort1.Write("f");
                }
            }
            catch (Exception ex)
            {
                serialPort1.Close();
                //捕获到异常,创建一个新的对象,之前的不可以再用
                serialPort1 = new System.IO.Ports.SerialPort();
                //刷新COM口选项
                comboBox1.Items.Clear();
                comboBox1.Items.AddRange(System.IO.Ports.SerialPort.GetPortNames());
                //响铃并显示异常给用户
                System.Media.SystemSounds.Beep.Play();
                button1.Text = "打开串口";
                button1.BackColor = Color.ForestGreen;
                MessageBox.Show(ex.Message);
                comboBox1.Enabled = true;
                comboBox2.Enabled = true;
            }
        }
