Ionic集成ionic-datepicker插件
Ionic项目中用到了时间选择器,为了快速快速开发选择了集成ionic-datepicker插件,GitHub上的文档有详细的步骤,但在实际开发中还是遇到了很多坎坷,记录下自己的代码,方便以后使用。GitHub地址。
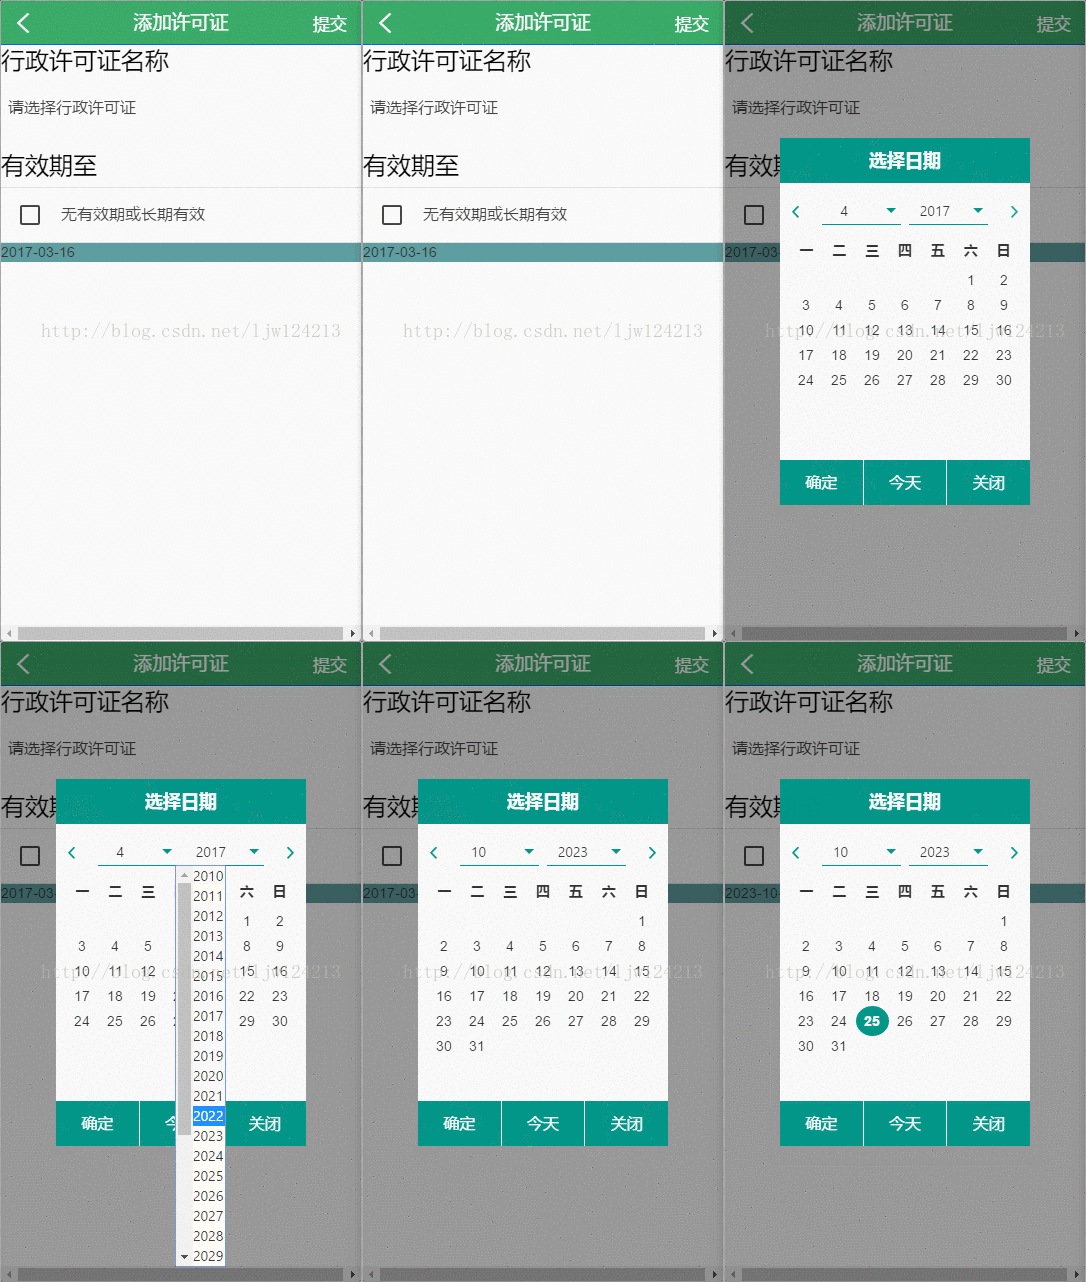
效果图如下:
1.文档中介绍使用bower install ionic-datepicker --save命令安装插件,自己也研究了半天bower,感觉这一步没用什么必要,完全可以省略。想学习bower的朋友,可以参考 https://segmentfault.com/a/1190000002971135。
2.在项目的index.html中引入ionic-datepicker.bundle.min.js文件的存放目录。先在GitHub上下载,然后把dist拷贝到项目的lib目录下。
<scriptsrc="lib/ionic-datepicker/dist/ionic-datepicker.bundle.min.js">script>
3.在项目的app.js中注入依赖ionic-datepicker,如下:
angular.module('mainModuleName', ['ionic','ionic-datepicker']){
.......
}
4.在项目的app.js中添加默认配置:
angular.module('starter', ['ionic', 'ion-floating-menu', 'ionic-datepicker'])

.run(function($ionicPlatform) {
  $ionicPlatform.ready(function() {
    if(cordova.platformId === 'ios' && window.cordova && window.cordova.plugins.Keyboard) {
      // Hide the accessory bar by default (remove this to show the accessory bar above the keyboard
      // for form inputs)
      cordova.plugins.Keyboard.hideKeyboardAccessoryBar(true);

      // Don't remove this line unless you know what you are doing. It stops the viewport
      // from snapping when text inputs are focused. Ionic handles this internally for
      // a much nicer keyboard experience.
      cordova.plugins.Keyboard.disableScroll(true);
    }
    if(window.StatusBar) {
        //StatusBar.styleDefault 状态栏默认样式,也就是电池信号黑色;
        //StatusBar.styleLightContent 状态栏内容浅色,貌似就是白色,适合深色背景;
        //StatusBar.styleBlackTranslucent 状态栏黑色半透明,电池时间都是白色的,适合深色背景;
        //StatusBar.styleBlackOpaque 状态栏黑色不透明,还是白色的,适合深色背景;
        //StatusBar.hide 状态栏隐藏;
        //StatusBar.show 状态栏显示;
        StatusBar.styleLightContent();
    }
  });
})

  .config(['$stateProvider', '$urlRouterProvider', '$locationProvider', '$ionicConfigProvider', 'ionicDatePickerProvider', function ($stateProvider, $urlRouterProvider, $locationProvider, $ionicConfigProvider, ionicDatePickerProvider) {
      //$locationProvider.html5Mode({
      //    enabled: true,
      //    requireBase: false
      //});
      //日期选择
      var datePickerObj = {
          inputDate: new Date(),
          titleLabel: '选择日期',
          setLabel: '确定',
          todayLabel: '今天',
          closeLabel: '关闭',
          mondayFirst: false,
          weeksList: ["日", "一", "二", "三", "四", "五", "六"],
          monthsList: ["1", "2", "3", "4", "5", "6", "7", "8", "9", "10", "11", "12"],
          templateType: 'popup',
          from: new Date(2012, 8, 1),
          to: new Date(2028, 8, 1),
          showTodayButton: true,
          dateFormat: 'yyyy-MM-dd',
          closeOnSelect: false,
          disableWeekdays: []
      };
      ionicDatePickerProvider.configDatePicker(datePickerObj);

      .......
}]);5.把ionic-datepicker注入到要使用此插件的页面对应的controller.js:
(function () {
    "use strict"

    angular.module('starter')
    .controller('licenseAdd', ['$scope', 'ionicDatePicker', 'nav', '$filter', function ($scope, ionicDatePicker, nav, $filter) {
        $scope.validedTime = new Date();

        var datePickerObj = {
            //选择日期后的回掉
            callback: function (val) {
                if (typeof (val) === 'undefined') {
                } else {
                    $scope.validedTime = $filter('date')(new Date(val), 'yyyy-MM-dd');
                    datePickerObj.inputDate = new Date(val); //更新日期弹框上的日期
                }
            },
            disabledDates: [
              new Date(2016, 2, 16),
              new Date(2015, 3, 16),
              new Date(2015, 4, 16),
              new Date(2015, 5, 16),
              new Date('Wednesday, August 12, 2015'),
              new Date("2016-08-16"),
              new Date(1439676000000)
            ],
            from: new Date(2010, 1, 1),
            to: new Date(2038, 10, 30),
            inputDate: new Date(),
            mondayFirst: true,
            disableWeekdays: [], //设置不能选中
            closeOnSelect: false,
            dateFormat: 'yyyy-MM-dd',
            templateType: 'popup',
        };

        //打开日期选择框
        $scope.openDatePicker = function () {
            ionicDatePicker.openDatePicker(datePickerObj);
        };

        $scope.navigate = function (state) {
            nav.navigate(state);
        };
    }]);
})();
6.在使用此插件的html页面中简单的一行代码:
这个插件的使用到此要告一段落了,虽然花费了很多时间,但摸索出来了很多知识,有不懂的伙伴可以联系我,共同讨论。
