java,ssm框架实战
毕业以后来到公司还不到一年,因为本身是C,C++出身,进公司后进入了Java部门,所以为了加强对java的了解。博主决定从最基本的j2ee开始做起,也就是俗称的造轮子。
这次我要做一个《网上图书售卖系统》可以理解为类似《当当网》的初级模型。
j2ee
web服务器:tomcat
浏览器:chrome
数据库:MySQL
开发工具:eclipse JDK1.6
这里采用的是b\s模型,也就是俗称的browser\server模型。
好了,到这里准备工作差不多做完了,有了上面工具就可以进行开发,接下来我会一边开发一边记录。将本次搭建遇到的问题及解决方案记录下来。加油吧!^_^
第一部分 mysql跟java的连接:
首先,下载安装mysql。
其次,下载mysql的驱动jdbc.jar.
导入你所建的动态web工程。
遇到的问题是mysql数据库安装时,user角色加不进去,只能用root登录,报的错误是:
Access denied for user 'root'@localhost'(using password:YES),
百度很久,答案是更改 root密码。
使用mysql连接server
更改密码: update mysql.user set authentication_string=password('123qwe') where user='root' and Host = 'localhost';
改了密码以后,需要自行增加用户。
登录root账户后执行下面操作:

1、创建用户,名字为userone,密码为123456
  create user userone identified by '123456';
2、创建名字为dbone的数据库
  create database dbone;
3、授予dbone数据库的所有权限给userone用户:
  grant all on dbone.* to userone
PS:如果第3步授权失败,可以退出root账户,并重新登录;
看似简单,找问题也是用了我半天时间。
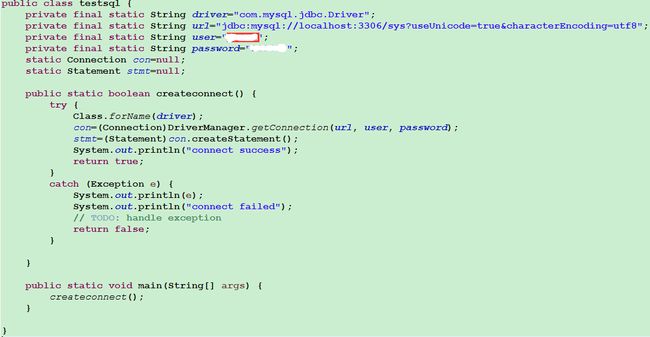
最后附上链接数据库的java源码:
到这里,mysql和java的连接就建立了。
第二部分 通过URL访问你的页面
昨天我们完成了数据库的连接,今天开始做页面的链接。
首先给大家看我的工程目录:
这里采用了springMVC框架,不懂得同学要自行百度了。
运用框架的好处就是方便,这里给出springMVC-servlet.xml和web.xml配置详情:
- xml version="1.0" encoding="UTF-8"?>
- <beans xmlns="http://www.springframework.org/schema/beans"
- xmlns:xsi="http://www.w3.org/2001/XMLSchema-instance" xmlns:context="http://www.springframework.org/schema/context"
- xmlns:mvc="http://www.springframework.org/schema/mvc" xmlns:aop="http://www.springframework.org/schema/aop"
- xmlns:tx="http://www.springframework.org/schema/tx"
- xsi:schemaLocation="http://www.springframework.org/schema/beans http://www.springframework.org/schema/beans/spring-beans.xsd
- http://www.springframework.org/schema/context http://www.springframework.org/schema/context/spring-context-4.1.xsd
- http://www.springframework.org/schema/mvc http://www.springframework.org/schema/mvc/spring-mvc-4.1.xsd
- http://www.springframework.org/schema/tx
- http://www.springframework.org/schema/tx/spring-tx-3.0.xsd
- http://www.springframework.org/schema/context
- http://www.springframework.org/schema/context/spring-context-3.0.xsd
- http://www.springframework.org/schema/aop
- http://www.springframework.org/schema/aop/spring-aop-3.0.xsd">
- <context:component-scan base-package="test"/>
- <mvc:default-servlet-handler />
- <mvc:annotation-driven />
- <bean
- class="org.springframework.web.servlet.view.InternalResourceViewResolver"
- id="internalResourceViewResolver">
- <property name="prefix" value="/WEB-INF/jsp/" />
- <property name="suffix" value=".jsp" />
- bean>
- <bean id="multipartResolver" class="org.springframework.web.multipart.commons.CommonsMultipartResolver"/>
- beans>
这是最简单的配置了。然后是web.xml:
- xml version="1.0" encoding="UTF-8"?>
- <web-app xmlns:xsi="http://www.w3.org/2001/XMLSchema-instance" xmlns="http://java.sun.com/xml/ns/javaee" xsi:schemaLocation="http://java.sun.com/xml/ns/javaee http://java.sun.com/xml/ns/javaee/web-app_3_0.xsd" id="WebApp_ID" version="3.0">
- <display-name>BooksStoredisplay-name>
- <context-param>
- <param-name>log4jConfigLocationparam-name>
- <param-value>/WEB-INF/log4j.propertiesparam-value>
- context-param>
- <listener>
- <listener-class>org.springframework.web.util.Log4jConfigListenerlistener-class>
- listener>
- <filter>
- <filter-name>Character Encodingfilter-name>
- <filter-class>org.springframework.web.filter.CharacterEncodingFilterfilter-class>
- <init-param>
- <param-name>encodingparam-name>
- <param-value>UTF-8param-value>
- init-param>
- filter>
- <filter-mapping>
- <filter-name>Character Encodingfilter-name>
- <url-pattern>/*url-pattern>
- filter-mapping>
- <servlet>
- <servlet-name>springMVCservlet-name>
- <servlet-class>org.springframework.web.servlet.DispatcherServletservlet-class>
- <init-param>
- <param-name>contextConfigLocationparam-name>
- <param-value>WEB-INF/springMVC-servlet.xmlparam-value>
- init-param>
- <load-on-startup>1load-on-startup>
- servlet>
- <servlet-mapping>
- <servlet-name>springMVCservlet-name>
- <url-pattern>/url-pattern>
- servlet-mapping>
- <welcome-file-list>
- <welcome-file>index.htmlwelcome-file>
- <welcome-file>index.htmwelcome-file>
- <welcome-file>index.jspwelcome-file>
- <welcome-file>default.htmlwelcome-file>
- <welcome-file>default.htmwelcome-file>
- <welcome-file>default.jspwelcome-file>
- welcome-file-list>
- web-app>
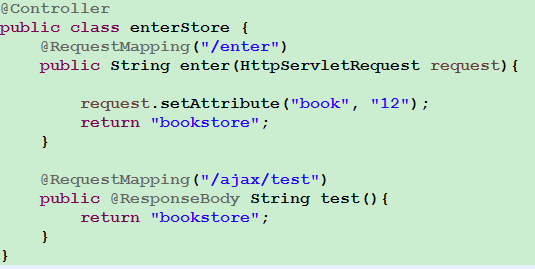
这两个文件配置好后,就可以写控制层了。然后是控制层代码:
控制层代码很简单,就是通过URL访问,返回一个bookstore.jsp的文件。bookstore.jsp属于视图层的,大家可以随意编辑。类似html.
好啦,这里所有的配置工作已经完毕。用tomcat7.0启动这个BooksStore工程,然后在网页上敲下localhost:8080/BooksStore/enter就可以访问你写的bookstore.jsp页面了。
效果如图:
localhost:8080是你的本地服务器端口;
BooksStore是你的工程名字;
enter是你要执行的控制层方法名;
bookstore.jsp是你返回的页面(就是给大家看的页面啦)
到这里,就可以通过URL访问你的页面。
接下来,通过编写方法的具体实现,实现前后端联通。还有页面的优化。
第三部分 用户登录注册功能及信息存储
前面已经把前后端到数据库连通了,现在就要做具体的业务了。我先做的是用户的登录与注册的功能。
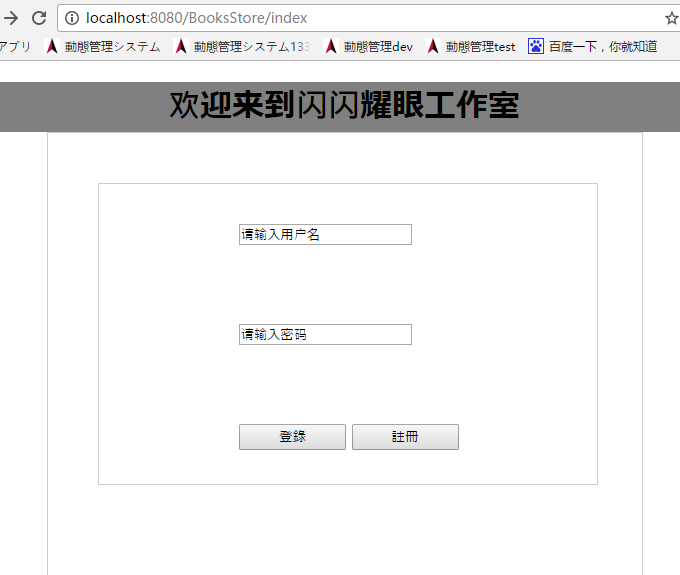
首先,门户界面是这样的:
接下来我主要介绍用户登录功能,先给代码:
- private User userdata = new User();
- @RequestMapping("/ajax/selectuser")
- @ResponseBody
- public Result enter(User user) {
- Statement stmt = testsql.createconnect();
- String query = sqlcommend.selectC;
- ResultSet result = null;
- boolean userExit = false;
- Result dataresult = new Result();
- ArrayList
- try {
- result = stmt.executeQuery(query);
- while (result.next()) {
- userdata.setId(result.getInt("id"));
- userdata.setName(result.getString("name"));
- userdata.setPassword(result.getString("password"));
- if (user.getName() != null) {
- if (user.getName().equals(result.getString("name"))
- && user.getPassword().equals(result.getString("password"))) {
- userExit = true;
- }
- }
- userdatalist.add(userdata);
- }
- }
- catch (SQLException e) {
- e.printStackTrace();
- }
- dataresult.setDataExit(userExit);
- dataresult.setDatalist(userdatalist);
- return dataresult;
- }
这里主要逻辑就是,把你页面拿到的用户名密码和数据库匹配,如果一致则用户存在,进入书店。
下面是我数据库的用户表:
现在有两个用户,我用liming登录,接下来是书店页面,因为还没有做,就用了之前做的一个游戏页面暂时顶替:
到这里,用户登录注册功能就完成了。
期间页面采用ajax技术接取数据,所以需要引入json格式jar包,将结果转为json的数据。
其次,数据库的查询和插入等功能用的是不一样的函数,这个要注意一下。
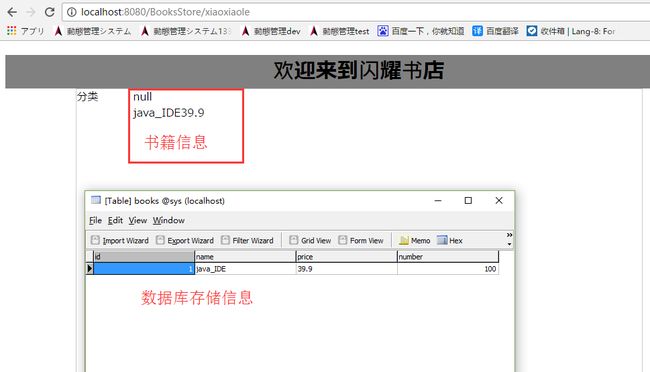
书店的页面如下:
数据库存储的书籍名称,价格和库存量等信息就可以通过ajax技术实时的显示在网页上,这样书籍的展示功能就做完了。
接下来一些购买和书店的界面属于UI的部分,这里就不介绍了。
其实,用户应该分为几个角色的,比如卖书的店主,买书的顾客,还有系统管理员等,
他们分别对应店主开店,把书列出来,顾客浏览书籍,买入等功能。这就跟当当网很像了,(其实也像淘宝),就是提供一个平台供大家交易。
当然了,涉及交易时系统安全性的问题,服务器效率的问题都很重要,
由于博主是个新手,很多地方不是很严谨,有错的地方也请大家指正。︿( ̄︶ ̄)︿拜了个拜!
第四部分 卖家登录书籍
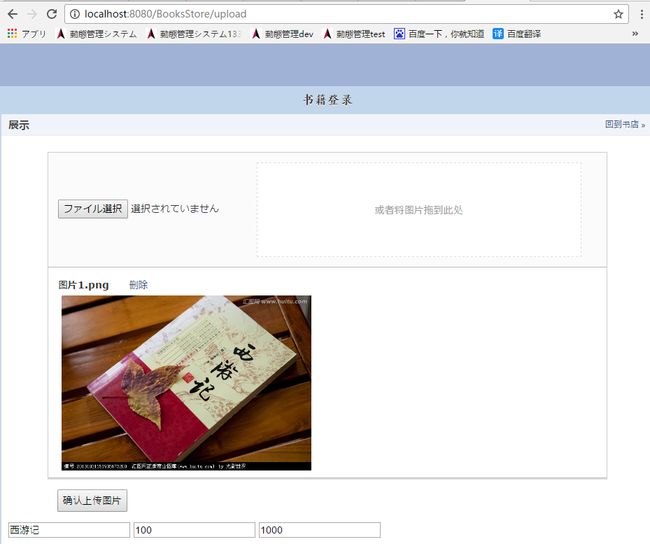
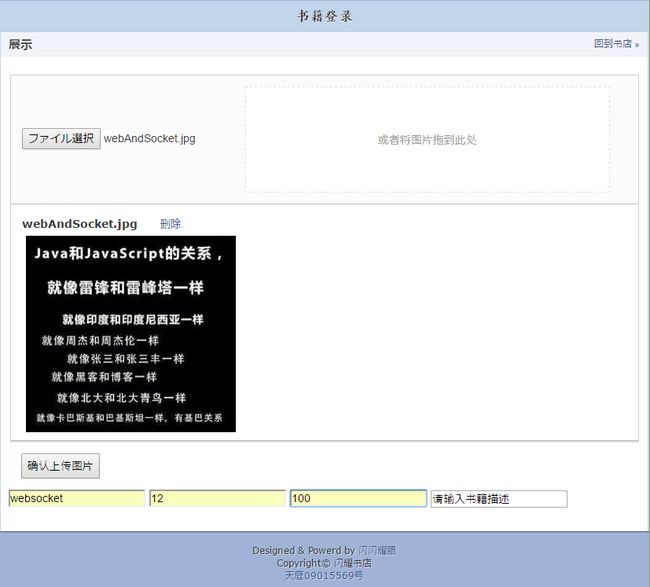
卖家进入书店之后,需要把出售的书籍的图片,简介,价格和数量登录到系统中。这里做了个图片上传的功能和页面:
下面的三个输入框分别是:书籍名称,书籍价格,书籍数量。
文件上传之后,要把文件存到服务器,这里存文件时还要存书名价钱等信息,
遇到了一些小麻烦,表单同时提交文本和图片信息时,后台怎样接的问题,还好解决了。
下面给出后台接取文件代码:
- // 文件上传
- @RequestMapping(value = "/upload", method = RequestMethod.POST)
- public String upload(@RequestParam(value = "file", required = false) MultipartFile file,
- @RequestParam(value = "name", required = false)String name,
- @RequestParam(value = "price", required = false)String price,
- @RequestParam(value = "number", required = false)Integer number,
- @RequestParam(value = "describe", required = false)String describe,
- MultipartHttpServletRequest request, ModelMap model) {
- System.out.println("开始");
- String path = request.getSession().getServletContext().getRealPath("upload");
- String fileName = file.getOriginalFilename();
- // String fileName = new Date().getTime()+".jpg";
- File targetFile = new File(path, fileName);
- if (!targetFile.exists()) {
- targetFile.mkdirs();
- }
- // 保存
- try {
- file.transferTo(targetFile);
- }
- catch (Exception e) {
- e.printStackTrace();
- }
- model.addAttribute("fileUrl", request.getContextPath() + "/upload/" + fileName);
- //储存书籍信息
- sqlbookscommend sqlbookscommend = new sqlbookscommend();
- sqlbookscommend.setName(name);
- sqlbookscommend.setPrice(price);
- sqlbookscommend.setNumber(number);
- String imgpath=(path+"\\"+fileName).replace("\\","*");
- sqlbookscommend.setPicpath(imgpath);
- sqlbookscommend.setDescribe(describe);
- Statement stmt = testsql.createconnect();
- String query = sqlbookscommend.insertB();
- try {
- stmt.execute(query);
- System.out.println("上传成功,图片路径:"+imgpath);
- }
- catch (SQLException e) {
- // TODO Auto-generated catch block
- e.printStackTrace();
- }
- return "upload";
- }
这是存储的是本地的F盘,涉及到的问题主要是路径中的\,/要进行转码存储。我做的操作是
先转成* ,然后前台去数据时,再把*转换回去。
接下来就是前台取数据库中数据。这里保存在本地是不行的,要保存在服务器上,也就是tomcat。明天研究tomcat目录映射。
----------------------------
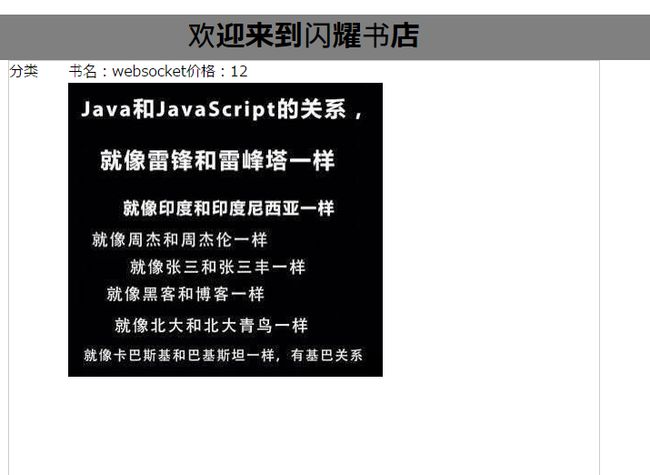
今天做完了Tomcat的目录映射功能,总体来说很成功了,卖家上传书籍图片和价格等信息后,买家会在前台看见书的详细信息。
效果如图:
前台效果如图:
当然UI还要大家自己做了,接下来研究下购物车买书等功能吧。
今天稍稍做了UI的美化,购物车还没做完全,接下来再做吧。
第五部分 买家浏览书籍
客人填入要买的书的数量,点击加入购物车时,我们把数量和对应的书的ID暂存到购物车中。
如果客人最后点击购买,就去数据库把对应ID的图书数量减1。
前端如果查询的图书数量为0,就显示缺货状态。
第六部分 购物车
今天做了购物车的功能,其实也没什么,主要是用户把要买的东西加入购物车,
然后在购买的时候可以输入购买数量,最后在一起算出总价钱。
第七部分 支付宝接口
调用支付宝的接口需要实际的业务,所以博主也就到这里了。
调用支付宝接口文档如下:
https://doc.open.alipay.com/docs/doc.htm?spm=a219a.7629140.0.0.NkJTDn&treeId=193&articleId=103419&docType=1
差不多j2ee的工程到这里基本搭完了,由于本人的能力有限,其中肯定也有很多不足的地方,但是总体功能差不多实现了。
接下来要投身别的革命了,继续加油把,拜了个拜^_^
