kaptcha生成自定义图片验证码
因为项目需要,在发短信验证码 之前加上图片验证码。根据网上提供的资料很快的就实现了。因为kaptcha相当于是别人封装的,效果比较单一,所以在简单实现后自己试着改了改。虽然还是挺不好看的,还是想自己记录下来,下次就可以看自己的笔记而不用再在网上找了。
先写最简单的配置实现的吧,效果图:
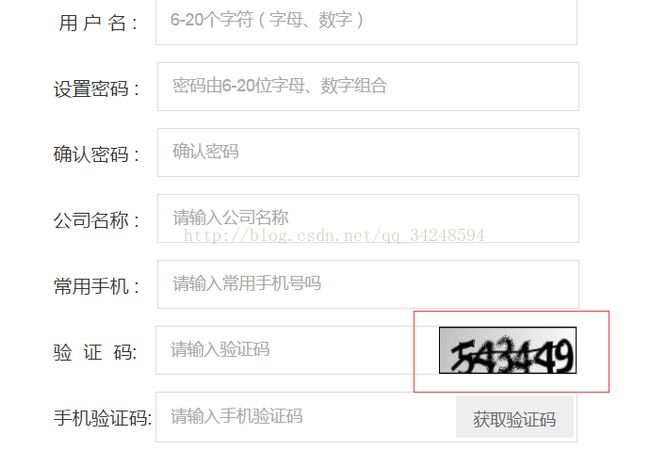
1.maven项目首先配置pom文件导入jar包;
		    com.google.code.kaptcha
		    kaptcha
		    2.3
2..spring 配置文件配置
100
50
0123456789
6
@RequestMapping("/kaptcha")
    public SingtonResult handleRequest(HttpServletRequest request, HttpServletResponse response) throws Exception{
        response.setDateHeader("Expires", 0);
        response.setHeader("Cache-Control", "no-store, no-cache, must-revalidate");
        response.addHeader("Cache-Control", "post-check=0, pre-check=0");
        response.setHeader("Pragma", "no-cache");
        response.setContentType("image/jpeg");
        String token = (String) request.getAttribute("token");
        String capText = captchaProducer.createText();
        //redis存值
        String  redisKey= "PC-kaptcha:"+token;
		rc.SetObjectByKey(redisKey, capText);
        BufferedImage bi = captchaProducer.createImage(capText);
        ServletOutputStream out = response.getOutputStream();
        ImageIO.write(bi, "jpg", out);

        try {
        	out.flush();
        } finally {
        	out.close();
        }
        return null;//SingtonResult.getSingtonSuccessInstance(b,"成功");
    }
4.前端页面:

哦了,简单的很丑的图片验证码就好了。有没有发现在页面可能会格格不入,现在就需要自己去优化了。我没事的时候写了一下。
1.修改spring 配置如下:
	                    117

	                    40

	                     com.qfy.common.utils.Noise

	                    0123456789

	                    6

	                    27

	                    微软雅黑

	                    white

	                    no
com.qfy.common.utils.Noisepackage com.qfy.common.utils;
import java.awt.Color;
import java.awt.Graphics2D;
import java.awt.RenderingHints;
import java.awt.geom.CubicCurve2D;
import java.awt.geom.PathIterator;
import java.awt.geom.Point2D;
import java.awt.image.BufferedImage;
import java.util.Random;
import com.google.code.kaptcha.NoiseProducer;
import com.google.code.kaptcha.util.Configurable;
/**
* 图片验证码干扰线实现类
* @author ptt
*
*/
public class Noise extends Configurable implements NoiseProducer
{
/**
* Draws a noise on the image. The noise curve depends on the factor values.
* Noise won't be visible if all factors have the value > 1.0f
*
* @param image
* the image to add the noise to
* @param factorOne
* @param factorTwo
* @param factorThree
* @param factorFour
*/
public void makeNoise(BufferedImage image, float factorOne,
float factorTwo, float factorThree, float factorFour)
{
// image size
int width = image.getWidth();
int height = image.getHeight();
// the points where the line changes the stroke and direction
Point2D[] pts = null;
Random rand = new Random();
// 使用 float 坐标指定的三次参数曲线段。
CubicCurve2D cc = new CubicCurve2D.Float(width * factorOne, height
* rand.nextFloat(), width * factorTwo, height
* rand.nextFloat(), width * factorThree, height
* rand.nextFloat(), width * factorFour, height
* rand.nextFloat());
// 返回定义变平形状边界的迭代对象。
PathIterator pi = cc.getPathIterator(null,2);
Point2D tmp[] = new Point2D[200];
int i = 0;
// while pi is iterating the curve, adds points to tmp array
while (!pi.isDone())
{
float[] coords = new float[6];
switch (pi.currentSegment(coords))//使用迭代返回当前路径段的坐标和类型,必须传入长度为 6 的 float 数组
{
case PathIterator.SEG_MOVETO: //SEG_MOVETO 和 SEG_LINETO 类型返回一个点
case PathIterator.SEG_LINETO:
case PathIterator.SEG_CUBICTO: //SEG_CUBICTO 返回 3 个点
case PathIterator.SEG_QUADTO: //SEG_QUADTO 返回两个点
tmp[i] = new Point2D.Float(coords[0], coords[1]);
}
i++;
pi.next();
}
pts = new Point2D[i];
System.arraycopy(tmp, 0, pts, 0, i);
Graphics2D graph = (Graphics2D) image.getGraphics();
graph.setRenderingHints(new RenderingHints(
RenderingHints.KEY_ANTIALIASING,
RenderingHints.VALUE_ANTIALIAS_ON));
// 设置干扰线10条;可以自行设置,每条干扰线的颜色位置都随机产生
for (i = 0; i < 10; i++)
{
int xs = rand.nextInt(width);
int ys = rand.nextInt(height);
int xe = xs+rand.nextInt(width/8);
int ye = ys+rand.nextInt(height/8);
graph.setColor(getColor());
graph.drawLine(xs, ys, xe, ye);
}
graph.dispose();
}
/**
* 干扰线 的颜色随机生成
* @Title: getColor
*@author :彭婷婷
* @Description: TODO
* @param @return
* @return Color
* @throws
* @data 2017年3月31日下午1:32:32
*/
private Color getColor(){
Random random = new Random();
int red = random.nextInt(255);
int green = random.nextInt(255);
int blue = random.nextInt(255);
return new Color(red, green, blue);
}
}
试试现在的验证码就是这个样了。
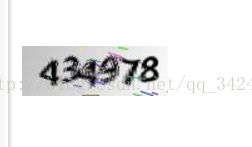
还是有点 丑,将就吧,继续,干扰线五颜六色了,接下来就是字符串的色彩,字体改变了。当然,还是得在原有基础改写。
先修改spring配置文件
自己重写DefaultKaptcha类,实现Producer。贴代码
package com.qfy.common.utils;

import java.awt.BasicStroke;
import java.awt.Color;
import java.awt.Font;
import java.awt.Graphics2D;
import java.awt.RenderingHints;
import java.awt.font.FontRenderContext;
import java.awt.font.GlyphVector;
import java.awt.geom.Line2D;
import java.awt.image.BufferedImage;
import java.util.Random;

import com.google.code.kaptcha.BackgroundProducer;
import com.google.code.kaptcha.GimpyEngine;
import com.google.code.kaptcha.Producer;
import com.google.code.kaptcha.text.TextProducer;
import com.google.code.kaptcha.text.WordRenderer;
import com.google.code.kaptcha.util.Configurable;

/**
 * Default {@link Producer} implementation which draws a captcha image using
 * {@link WordRenderer}, {@link GimpyEngine}, {@link BackgroundProducer}.
 * Text creation uses {@link TextProducer}.
 */
public class Kaptcha extends Configurable implements Producer
{
	private int width = 200;

	private int height = 50;

	/**
	 * Create an image which will have written a distorted text.
	 *
	 * @param text
	 *            the distorted characters
	 * @return image with the text
	 */
	public BufferedImage createImage(String text)
	{
		GimpyEngine gimpyEngine = getConfig().getObscurificatorImpl();
		BackgroundProducer backgroundProducer = getConfig().getBackgroundImpl();
		boolean isBorderDrawn = getConfig().isBorderDrawn();
		this.width = getConfig().getWidth();
		this.height = getConfig().getHeight();

		BufferedImage bi = renderWord(text, width, height);
		bi = gimpyEngine.getDistortedImage(bi);
		bi = backgroundProducer.addBackground(bi);
		Graphics2D graphics = bi.createGraphics();
		if (isBorderDrawn)
		{
			drawBox(graphics);
		}
		return bi;
	}

	private void drawBox(Graphics2D graphics)
	{
		Color borderColor = getConfig().getBorderColor();
		int borderThickness = getConfig().getBorderThickness();

		graphics.setColor(borderColor);

		if (borderThickness != 1)
		{
			BasicStroke stroke = new BasicStroke((float) borderThickness);
			graphics.setStroke(stroke);
		}

		Line2D line1 = new Line2D.Double(0, 0, 0, width);
		graphics.draw(line1);
		Line2D line2 = new Line2D.Double(0, 0, width, 0);
		graphics.draw(line2);
		line2 = new Line2D.Double(0, height - 1, width, height - 1);
		graphics.draw(line2);
		line2 = new Line2D.Double(width - 1, height - 1, width - 1, 0);
		graphics.draw(line2);
	}

	/**
	 * @return the text to be drawn
	 */
	public String createText()
	{
		return getConfig().getTextProducerImpl().getText();
	}

	public BufferedImage renderWord(String word, int width, int height)
	{
		int fontSize = getConfig().getTextProducerFontSize();
		Font[] fonts = getConfig().getTextProducerFonts(fontSize);
		BufferedImage image = new BufferedImage(width, height,
				BufferedImage.TYPE_INT_ARGB);
		Graphics2D g2D = image.createGraphics();

		RenderingHints hints = new RenderingHints(
				RenderingHints.KEY_ANTIALIASING,
				RenderingHints.VALUE_ANTIALIAS_ON);
		hints.add(new RenderingHints(RenderingHints.KEY_RENDERING,
				RenderingHints.VALUE_RENDER_QUALITY));
		g2D.setRenderingHints(hints);

		FontRenderContext frc = g2D.getFontRenderContext();
		Random random = new Random();

		int startPosY = (height - fontSize) / 5 + fontSize;

		char[] wordChars = word.toCharArray();
		Font[] chosenFonts = new Font[wordChars.length];
		int [] charWidths = new int[wordChars.length];
		int widthNeeded = 0;
		for (int i = 0; i < wordChars.length; i++)
		{
			chosenFonts[i] = fonts[random.nextInt(fonts.length)];
			char[] charToDraw = new char[]{
				wordChars[i]
			};
			GlyphVector gv = chosenFonts[i].createGlyphVector(frc, charToDraw);
			charWidths[i] = (int)gv.getVisualBounds().getWidth();
			if (i > 0)
			{
				widthNeeded = widthNeeded + 2;
			}
			widthNeeded = widthNeeded + charWidths[i];
		}

		int startPosX = (width - widthNeeded) / 2;
		for (int i = 0; i < wordChars.length; i++)
		{
			g2D.setColor(getColor());
			g2D.setFont(chosenFonts[i]);
			char[] charToDraw = new char[] {
				wordChars[i]
			};
			g2D.drawChars(charToDraw, 0, charToDraw.length, startPosX, startPosY);
			startPosX = startPosX + (int) charWidths[i] ;
		}

		return image;
	}

	private Color getColor(){
		Random random = new Random();
		int red = random.nextInt(255);
		int green = random.nextInt(255);
		int blue = random.nextInt(255);
		return new Color(red, green, blue);
	}
}
看看效果,贴图;
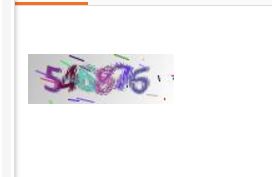
就这样就可以实现自己想要的效果了,不再是默认的黑白色了。效果就自己调节到满意为止就行了。