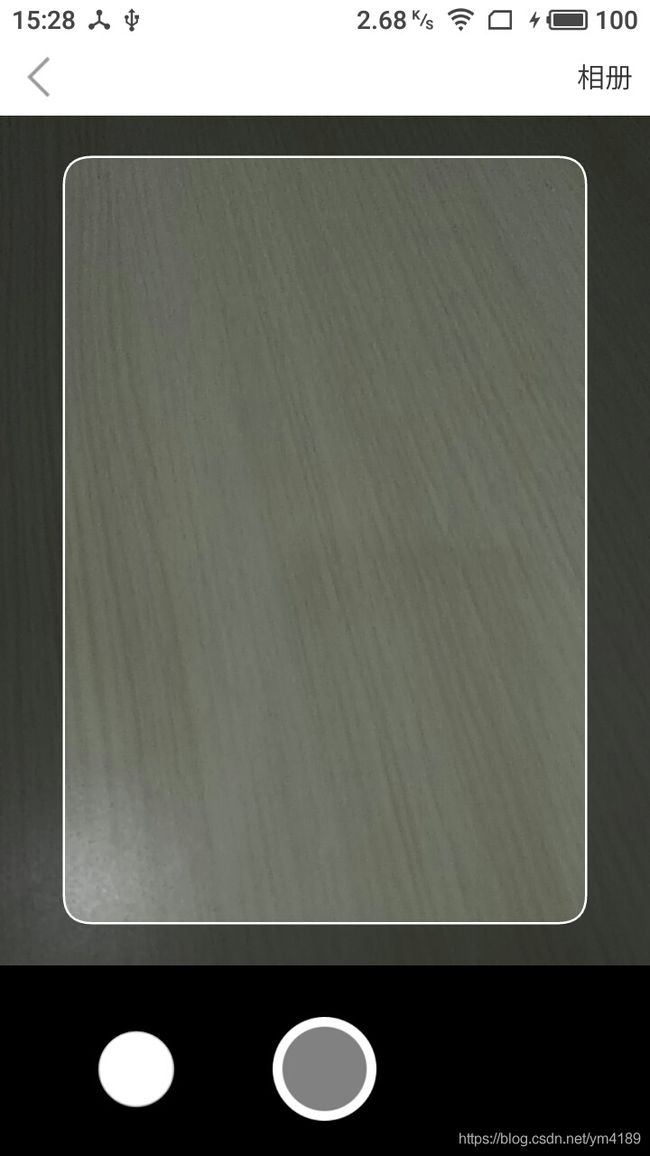
Android自定义相机镂空遮罩
前言
最近在做项目时需要自定义相机拍照,并在预览页面显示一个取景框,效果如图:

本文只讲镂空遮罩的实现,照相部分不做解释。
思路
考虑到需要获取取景框的坐标信息进行裁剪,所以用自定义View实现。
实现步骤:
- 画出半透明黑色遮罩
- 画圆角矩形取景框
- 将框中遮罩清除
实现
1.画半透明黑色遮罩
	/**
     * 遮罩颜色
     */
    private int maskColor = Color.argb(120, 0, 0, 0);


    @Override
    protected void onDraw(Canvas canvas) {
   	    canvas.drawColor(maskColor);
    }
2.画圆角矩形取景框
这里有2种方法画圆角矩形
第一种比较简单
	RectF roundRect = new RectF(left, top, right, bottom);
	path.addRoundRect(roundRect, rx, ry, Path.Direction.CW);
第二种就是利用Path.rLineTo()画直线,Path.rQuadTo()正余弦曲线画圆角,可以加深对Path的理解
	float width = right - left;
    float height = bottom - top;

    float lineWidth = (width - (2 * rx));
    float lineHeight = (height - (2 * ry));

    path.moveTo(left, top + ry);
    path.rQuadTo(0, -ry, rx, -ry);
    path.rLineTo(lineWidth, 0);
    path.rQuadTo(rx, 0, rx, ry);
    path.rLineTo(0, lineHeight);
    path.rQuadTo(0, ry, -rx, ry);
    path.rLineTo(-lineWidth, 0);
    path.rQuadTo(-rx, 0, -rx, -ry);
    path.rLineTo(0, -lineHeight);

    path.close();
关于Path的详细用法,可以查看这篇文章Android Canvas之Path操作
3.将框中遮罩清除
实现这种效果需要用到图像混合模式,由于是清除,所以用到
	private Paint eraser = new Paint(Paint.ANTI_ALIAS_FLAG);
	eraser.setXfermode(new PorterDuffXfermode(PorterDuff.Mode.CLEAR));
关于图像混合的讲解,可以查看详解Paint的setXfermode(Xfermode xfermode)
完整代码
public class MaskView extends View {

    /**
     * 遮罩颜色
     */
    private int maskColor = Color.argb(100, 0, 0, 0);

    /**
     * 镂空矩形
     */
    private Rect frame = new Rect();

    /**
     * 镂空边框
     */
    private Paint border = new Paint(Paint.ANTI_ALIAS_FLAG);

    /**
     * 镂空区域
     */
    private Paint eraser = new Paint(Paint.ANTI_ALIAS_FLAG);
    private Path path = new Path();

    public MaskView(Context context) {
        super(context);
        init();
    }

    public MaskView(Context context, @Nullable AttributeSet attrs) {
        super(context, attrs);
        init();
    }

    public MaskView(Context context, @Nullable AttributeSet attrs, int defStyleAttr) {
        super(context, attrs, defStyleAttr);
        init();
    }

    private void init() {
        // 硬件加速不支持,图层混合。
        setLayerType(View.LAYER_TYPE_SOFTWARE, null);
		// 取景框颜色、线宽
        border.setColor(Color.WHITE);
        border.setStyle(Paint.Style.STROKE);
        border.setStrokeWidth(5);

        eraser.setXfermode(new PorterDuffXfermode(PorterDuff.Mode.CLEAR));
    }

    @Override
    protected void onSizeChanged(int w, int h, int oldw, int oldh) {
        super.onSizeChanged(w, h, oldw, oldh);

        int width = (int) (w * 0.8f);
        int height = (int) (h * 0.9f);

        int left = (w - width) / 2;
        int top = (h - height) / 2;
        int right = width + left;
        int bottom = height + top;

        frame.left = left;
        frame.top = top;
        frame.right = right;
        frame.bottom = bottom;

    }


    @Override
    protected void onDraw(Canvas canvas) {
        super.onDraw(canvas);

        int left = frame.left;
        int top = frame.top;
        int right = frame.right;
        int bottom = frame.bottom;

        fillRectRound(left, top, right, bottom, 30, 30);


        canvas.drawColor(maskColor);
        canvas.drawPath(path, border);
        canvas.drawPath(path, eraser);

    }

    private void fillRectRound(float left, float top, float right, float bottom, float rx, float ry) {
        path.reset();

        float width = right - left;
        float height = bottom - top;

        float lineWidth = (width - (2 * rx));
        float lineHeight = (height - (2 * ry));

        path.moveTo(left, top + ry);
        path.rQuadTo(0, -ry, rx, -ry);
        path.rLineTo(lineWidth, 0);
        path.rQuadTo(rx, 0, rx, ry);
        path.rLineTo(0, lineHeight);
        path.rQuadTo(0, ry, -rx, ry);
        path.rLineTo(-lineWidth, 0);
        path.rQuadTo(-rx, 0, -rx, -ry);
        path.rLineTo(0, -lineHeight);

        path.close();

//        RectF roundRect = new RectF(left, top, right, bottom);
//        path.addRoundRect(roundRect, rx, ry, Path.Direction.CW);

    }

    public Rect getFrameRect() {
        return new Rect(frame);
    }

}
注意事项:
1.控件大小没有对wrap_content做处理,所以在使用时请使用match_parent或绝对值。
2.取景框大小是根据控件的宽高取其8/10,9/10比例获得,可自行修改。