QT学习笔记16(网络通信)
一、获取本机网络信息
获取本机的主机名、IP地址和硬件地址等网络信息。
(1)编写界面
#ifndef NETWORKINFORMATION_H
#define NETWORKINFORMATION_H

#include
#include
#include
#include
#include
#include
#include
#include
class NetworkInformation : public QWidget
{
    Q_OBJECT

public:
    NetworkInformation(QWidget *parent = 0);
    ~NetworkInformation();
    void getHostInformation();
public slots:
    void slotDetail();
private:
    QLabel *hostLabel;
    QLineEdit *LineEditLocalHostName;
    QLabel *ipLabel;
    QLineEdit *LineEditAddress;
    QPushButton *detailBtn;
    QGridLayout *mainLayout;
};

#endif // NETWORKINFORMATION_H
(2)编写.cpp文件,获取并显示网络接口信息
#include "networkinformation.h"

NetworkInformation::NetworkInformation(QWidget *parent)
    : QWidget(parent)
{
    hostLabel = new QLabel(tr("主机名:"));
    LineEditLocalHostName = new QLineEdit;
    ipLabel = new QLabel(tr("IP 地址:"));
    LineEditAddress = new QLineEdit;
    detailBtn = new QPushButton(tr("详细"));
    mainLayout = new QGridLayout(this);
    mainLayout->addWidget(hostLabel,0,0);
    mainLayout->addWidget(LineEditLocalHostName,0,1);
    mainLayout->addWidget(ipLabel,1,0);
    mainLayout->addWidget(LineEditAddress,1,1);
    mainLayout->addWidget(detailBtn,2,0,1,2);
    getHostInformation();
    connect(detailBtn,SIGNAL(clicked()),this,SLOT(slotDetail()));
}

void NetworkInformation::getHostInformation()
{
    QString localHostName = QHostInfo::localHostName();//获得本机主机名
    LineEditLocalHostName->setText(localHostName);//显示主机名
    QHostInfo hostInfo = QHostInfo::fromName(localHostName);//根据主机名获得相关主机信息,包括IP地址等
    //获得主机的IP地址列表
    QList listAddress = hostInfo.addresses();
    if(!listAddress.isEmpty())	//获得主机的ip地址列表可能为空
    {
        LineEditAddress->setText(listAddress.at(2).toString());//主机IP地址不为空显示第一个IP地址
    }
}
//显示主机网卡的详细信息
void NetworkInformation::slotDetail()
{
    QString detail="";
    QList list=QNetworkInterface::allInterfaces();
    //提供了主机IP地址和网络接口列表
    for(int i=0;i entryList=interface.addressEntries();
           //(d)显示子网掩码和广播地址等信息
        for(int j=1;j
二、Qt UDP通信
1、Qt实现UDP广播通信
服务器端:
(1).h文件设计
#ifndef UDPSERVER_H
#define UDPSERVER_H

#include
#include
#include
#include
#include
#include
#include
class UdpServer : public QDialog
{
    Q_OBJECT

public:
    UdpServer(QWidget *parent = 0,Qt::WindowFlags f=0);
    ~UdpServer();
public slots:
    void StartBtnClicked();
    void timeout();
private:
    QLabel *TimerLabel;
    QLineEdit *TextLineEdit;
    QPushButton *StartBtn;
    QVBoxLayout *mainLayout;
    int port;
    bool isStarted;
    QUdpSocket *udpSocket;
    QTimer *timer;
};

#endif // UDPSERVER_H
(2)编写.cpp文件
#include "udpserver.h"
#include
UdpServer::UdpServer(QWidget *parent,Qt::WindowFlags f)
    : QDialog(parent,f)
{
    setWindowTitle(tr("UDP Server"));			//设置窗体的标题
    /* 初始化各个控件 */
    TimerLabel = new QLabel(tr("计时器:"),this);
    TextLineEdit = new QLineEdit(this);
    StartBtn = new QPushButton(tr("开始"),this);
    /* 设置布局 */
    mainLayout = new QVBoxLayout(this);
    mainLayout->addWidget(TimerLabel);
    mainLayout->addWidget(TextLineEdit);
    mainLayout->addWidget(StartBtn);
    connect(StartBtn,SIGNAL(clicked()),this,SLOT(StartBtnClicked()));
    port = 5555;		//设置UDP的端口号参数,服务器定时向此端口发送广播信息
    isStarted = false;
    udpSocket = new QUdpSocket(this);
    timer = new QTimer(this);		//创建一个QUdpSocket
    //定时发送广播信息
    connect(timer,SIGNAL(timeout()),this,SLOT(timeout()));
}
//开始发送数据槽函数
void UdpServer::StartBtnClicked()
{
    if(!isStarted)
    {
        StartBtn->setText(tr("停止"));
        timer->start(1000);//定时1s
        isStarted =true;
    }
    else
    {
        StartBtn->setText(tr("开始"));
        isStarted = false;
        timer->stop();
    }
}
//定时器相应槽函数
void UdpServer::timeout()
{
    QString msg = TextLineEdit->text();//获取待发送数据
    int length=0;
    if(msg=="")
    {
       return;
    }
    if((length=udpSocket->writeDatagram(msg.toLatin1(),
    msg.length(),QHostAddress::Broadcast,port))!=msg.length())//发送待发送数据
    {
        return;
    }
}

UdpServer::~UdpServer()
{

}
客户端编写:
(1)编写.h文件
#ifndef UDPCLIENT_H
#define UDPCLIENT_H

#include
#include
#include
#include
#include
class UdpClient : public QDialog
{
    Q_OBJECT

public:
    UdpClient(QWidget *parent = 0,Qt::WindowFlags f=0);
    ~UdpClient();
public slots:
    void CloseBtnClicked();
    void dataReceived();
private:
    QTextEdit *ReceiveTextEdit;
    QPushButton *CloseBtn;
    QVBoxLayout *mainLayout;
    int port;
    QUdpSocket *udpSocket;
};

#endif // UDPCLIENT_H
(2)编写.CPP文件,接收显示数据
#include "udpclient.h"
#include
#include
UdpClient::UdpClient(QWidget *parent,Qt::WindowFlags f)
    : QDialog(parent,f)
{
    setWindowTitle(tr("UDP Client"));		//设置窗体的标题
    /* 初始化各个控件 */
    ReceiveTextEdit = new QTextEdit(this);
    CloseBtn = new QPushButton(tr("Close"),this);
    /* 设置布局 */
    mainLayout=new QVBoxLayout(this);
    mainLayout->addWidget(ReceiveTextEdit);
    mainLayout->addWidget(CloseBtn);
    connect(CloseBtn,SIGNAL(clicked()),this,SLOT(CloseBtnClicked()));
    port =5555;                             //设置UDP的端口号参数,指定在此端口上监听数据
    udpSocket = new QUdpSocket(this);		//创建一个QUdpSocket
    connect(udpSocket,SIGNAL(readyRead()),this,SLOT(dataReceived()));
         //QUdpSocket是一个IO设备,当有数据到达I/O设备时,发送readyRead()信号
    bool result=udpSocket->bind(port);		//绑定到指定的端口上
    if(!result)
    {
        QMessageBox::information(this,tr("error"),tr("udp socket create error!"));
        return;
    }
}

void UdpClient::CloseBtnClicked()
{
    close();
}

void UdpClient::dataReceived()
{
    while(udpSocket->hasPendingDatagrams())//判断是否有数据可读
    {
        QByteArray datagram;
        datagram.resize(udpSocket->pendingDatagramSize());
        udpSocket->readDatagram(datagram.data(),datagram.size());
         //实现读取第一个数据报,datagram.size()是数据报的长度
        QString msg=datagram.data();
        ReceiveTextEdit->insertPlainText(msg);			//显示数据内容
    }
}

UdpClient::~UdpClient()
{

}
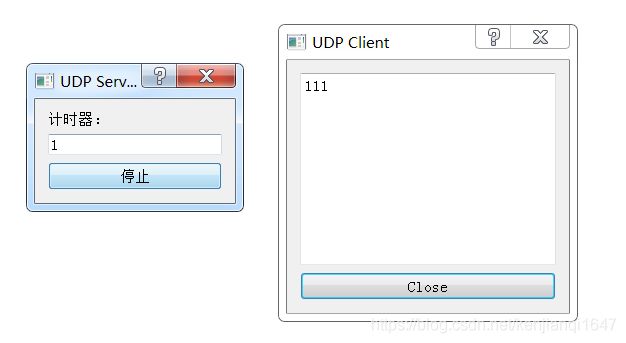
测试效果:
三、Qt TCP通信
TCP通信流程,首先启动服务器,然后启动客户端,客户端与服务器经过三次握手之后建立连接。Qt中通过QTcpSocket类和QTcpServer类实现TCP协议的编程。
服务端:
连接流程:
- 创建QTcpServer对象
- 启动服务器(监听)调用成员方法listen(QHostAddress::Any,端口号)
- 当有客户端链接时候会发送newConnection信号,触发槽函数接受链接(得到一个与客户端通信的套接字QTcpSocket)
- QTcpsocket发送数据用成员方法write
- 读数据当客户端有数据来,QTcpSocket对象就会发送readyRead信号,关联槽函数读取数据
1、新建工程,Qt应用程序默认没有加QtNetwork库,手动添加QtNetwork库
在工程的pro文件中添加:QT += network
2、 tcpclientsoket.h中声明需要的控件
tcpserver.cpp构造函数设计界面
客户端:
连接流程:
- 创建QTcpSocket对象
- 链接服务器connectToHost(QHostAddress("ip"),端口号)
- QTcpsocket发送数据用成员方法write
- 读数据当对方有数据来,QTcpSocket对象就会发送readyRead信号,关联槽函数读取数据
1、.pro文件添加network
2、创建QTcpSocket对象
tcpSocket=new QTcpSocket();//创建QTcpSocket套接字对象3、链接服务器connectToHost(QHostAddress("ip"),端口号)
 QString localHostName = QHostInfo::localHostName();//获得本机主机名
    QHostInfo hostInfo = QHostInfo::fromName(localHostName);//根据主机名获得相关主机信息,包括IP地址等
    QList listAddress = hostInfo.addresses();  //获得主机的IP地址列表
    tcpSocket->connectToHost(listAddress.at(2).toString(),port);//连接服务器  端口号与要连接的服务端一致
4、发送数据
tcpSocket->write("1");5、接收数据
connect(tcpSocket, &QTcpSocket::readyRead,this,&UdpClient::ReadTcpData);//连接tcp数据接收
//接收主机发来的数据
void UdpClient::ReadTcpData()
{
   QByteArray buffer;
   //读取缓冲区数据
   buffer = tcpSocket->readAll();
   if(!buffer.isEmpty())
   {
        ReceiveTextEdit->insertPlainText(buffer);
   }
}
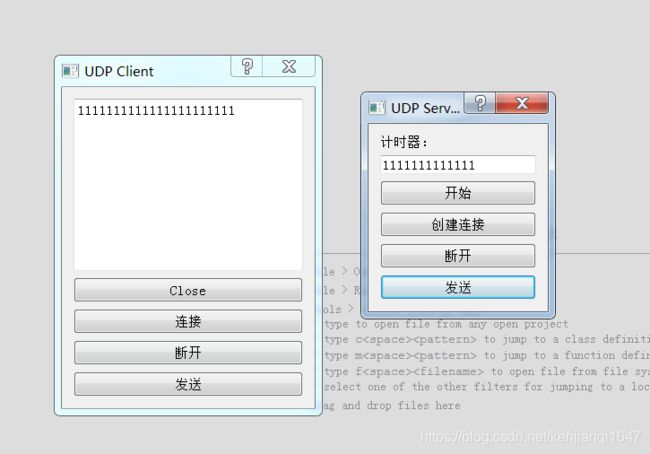
测试效果:


