Elasticsearch 6.8源码构建
Elasticsearch源码下载
从elasticsearch github下载源码
从github上下载clone下来或zip包
https://github.com/elastic/elasticsearch.git
git checkout 6.8
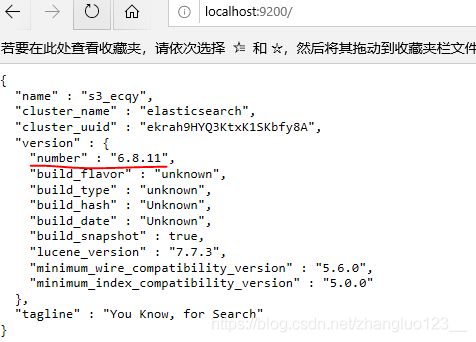
选择自己需要的分支,这里用了6.8的分支[因为集成了plugin x-pack很多特性], 对应编译后的版本其实为6.8.11
Gradle 环境准备及构建
本地构建需要用gradle,在下载来的代码里可以看到具体需要的gradle、java compile和runtime的版本要求
src/main/resources下:
minimumGradleVersion:5.4.1
minimumCompilerVersion:1.11
minimumRuntimeVersion:1.8
本地装的gradle 版本4.8,jdk版本12,环境里需要配置JAVA9_HOME。ProjectSDK中配置了1.8,11,12三个版本的jdk版本 
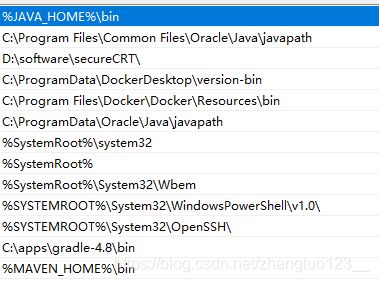
因为本地装了多个jdk版本,需要将java home放在最前面覆盖掉默认添加的C:\Program Files\Common Files\Oracle\Java\javapath,也可以把该目录从path中移除

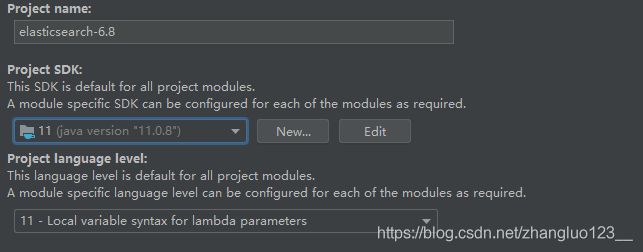
Project SDK中选择用jdk 11compile,

Gradle settings:

因为编译需要下载gradle的包,为了加快速度,可以从将代码里的gradle\wrapper\gradle-wrapper.properties中
distributionUrl=https\://services.gradle.org/distributions/gradle-5.4.1-all.zip
需要的gradle安装包提前下好,在对应的${user.home}下的**.gradle\wrapper\dists\gradle-5.4.1-all\3221gyojl5jsh0helicew7rwx**中,删除其他文件后把压缩包靠到这里并解压

在./gradle目录下创建init.gradle文件,配置需要的镜像,可查询阿里云仓库服务
allprojects{
	repositories {
	maven { url 'https://maven.aliyun.com/nexus/content/repositories/google' }
        maven { url 'https://maven.aliyun.com/nexus/content/groups/public' }
        maven { url 'https://maven.aliyun.com/nexus/content/repositories/jcenter'}
    }
}
项目中gradle plugin的repo配置https://plugins.gradle.org/m2/有需要也可一起换成对应的镜像地址.
buildscript {
  repositories {
    maven {
      name "gradle-plugins"
//      url "https://plugins.gradle.org/m2/"
      url "https://maven.aliyun.com/repository/gradle-plugin"
    }
    maven { url 'https://maven.aliyun.com/nexus/content/repositories/google' }
    maven { url 'https://maven.aliyun.com/nexus/content/groups/public' }
    maven { url 'https://maven.aliyun.com/nexus/content/repositories/jcenter'}
  }
  dependencies {
    classpath 'com.netflix.nebula:gradle-ospackage-plugin:4.7.1'
  }
}
BuildPlugin.groovy中,如果没有配置license,下面license的部分需要注释掉,否则会加载出错
 project.afterEvaluate {
//                if (project.licenseFile == null || project.noticeFile == null) {
//                    throw new GradleException("Must specify license and notice file for project ${project.path}")
//                }
//                jarTask.metaInf {
//                    from(project.licenseFile.parent) {
//                        include project.licenseFile.name
//                        rename { 'LICENSE.txt' }
//                    }
//                    from(project.noticeFile.parent) {
//                        include project.noticeFile.name
//                        rename { 'NOTICE.txt' }
//                    }
//                }
            }
Elastic项目配置
elasticsearch下载
官网
镜像网站
在项目中新建home目录,下载6.8.0【与项目版本对应】的zip包下载后,config和module目录拷贝到home文件夹中,在config中加入java.policy文件
grant {
    permission java.lang.RuntimePermission "createClassLoader";
};
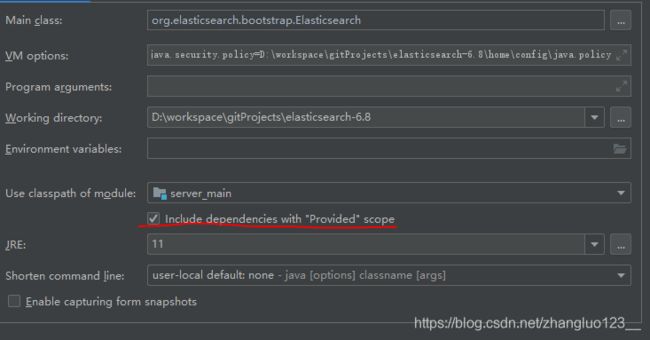
ELasticsearch的启动参数配置如下
-Des.path.conf=D:\workspace\gitProjects\elasticsearch-6.8\home\config
-Des.path.home=D:\workspace\gitProjects\elasticsearch-6.8\home
-Dlog4j2.disable.jmx=true
-Djava.security.policy=D:\workspace\gitProjects\elasticsearch-6.8\home\config\java.policyElasticsearch启动
PluginService.java
org.elasticsearch.plugins.PluginsService#verifyCompatibility, 如果构建后的版本6.8.11与下载的6.8.0配置的config与module不一致,将下面检查版本的部分注释掉
static void verifyCompatibility(PluginInfo info) {

        if (info.getElasticsearchVersion().equals(Version.CURRENT) == false) {

//            throw new IllegalArgumentException("Plugin [" + info.getName() + "] was built for Elasticsearch version "
//                + info.getElasticsearchVersion() + " but version " + Version.CURRENT + " is running");
        }
        JarHell.checkJavaVersion(info.getName(), info.getJavaVersion());
}在项目中建的home目录下会默认生成存放data和log的文件夹

从本地控制台可查看对应默认端口、集群名信息

至此,es源码构建就完成了!

