Spring(1)—maven依赖、IOC、Spring配置说明、依赖注入、bean的作用域
1、maven spring依赖
<dependency>
    <groupId>org.springframeworkgroupId>
    <artifactId>spring-webmvcartifactId>
    <version>5.2.0.RELEASEversion>
dependency>


<dependency>
    <groupId>org.springframeworkgroupId>
    <artifactId>spring-jdbcartifactId>
    <version>5.2.0.RELEASEversion>
dependency>
2、控制反转IOC
- 控制反转是一种通过描述(xml或注解)并通过第三方去生产或获取特定对象的方式
- Spring中实现控制反转的是IOC容器,其实现方法是依赖注入(DI)
以往dao层和service层的结构
public class UserServiceImpl implements UserService{

    //private UserDao userDao=new UserDaoImpl();
    private UserDao userDao=new UserDaoMysqlImpl();

    public void getUser() {

        userDao.getUser();
    }
}
public class MyTest {

    public static void main(String[] args) {

        //用户调用的是业务层,dao层他们不需要接触
        UserService userService = new UserServiceImpl();

        userService.getUser();
    }
}
- 用户调用的是业务层,不需要接触Dao层,因为service实体类中实例化了一个Dao层实体类,用户通过调用service实体类中的方法来获得Dao中数据
- 因此Dao层中的不同实现类,用户想要获得的类改变了,就必须去service实体类中改变Dao实体类的类型,这就需要ioc来解决这个问题
使用set进行动态实现值的注入
public class UserServiceImpl implements UserService{

    private UserDao userDao;

    //利用set实现动态实现值的注入
    public void setUserDao(UserDao userDao) {

        this.userDao = userDao;
    }

    public void getUser() {

        userDao.getUser();
    }
}
- 在service实体类中添加一个set方法,使得用户能够调用该方法实现Dao不同类的注入
public class MyTest {

    public static void main(String[] args) {

        //用户调用的是业务层,dao层他们不需要接触
        UserServiceImpl userService = new UserServiceImpl();
        userService.setUserDao(new UserDaoMysqlImpl());

        userService.getUser();
    }
}
- 使用不同的Dao,就设定不同的类
- 使用set注入后,程序不再是主动创建对象,而是被动的接收对象,这种思想就是IOC的原型
Spring中IOC的使用
- 创建一个实例化类
@Data
public class Hello {

    private String str;
}
- 配置Spring中该类的相关
<beans xmlns="http://www.springframework.org/schema/beans"
       xmlns:xsi="http://www.w3.org/2001/XMLSchema-instance"
       xsi:schemaLocation="http://www.springframework.org/schema/beans
        https://www.springframework.org/schema/beans/spring-beans.xsd">


    <bean id="hello" class="com.hdu.pojo.Hello">
        <property name="str" value="Spring"/>
    bean>
beans>
- 配置文件就相当于将Hello类创建了一个对象放在context容器中,并设置好相关属性,然后就可以调用方法来从容器中获得该对象:
public class MyTest {

    public static void main(String[] args) {

        //获取Spring的上下文对象
        ApplicationContext context = new ClassPathXmlApplicationContext("ApplicationContext.xml");
        //对象都在Spring中管理,使用时直接取出
        Object hello = context.getBean("hello");
        System.out.println(hello.toString());
    }
}
- 其中配置文件中配置属性值,要求该类中必须有set方法,通过set来实现值的注入
Spring实现Dao和Service的IOC方式
- xml配置文件中对Dao和Service的实现类进行配置
<beans xmlns="http://www.springframework.org/schema/beans"
       xmlns:xsi="http://www.w3.org/2001/XMLSchema-instance"
       xsi:schemaLocation="http://www.springframework.org/schema/beans
        https://www.springframework.org/schema/beans/spring-beans.xsd">

    <bean id="mysqlImpl" class="com.hdu.dao.UserDaoMysqlImpl"/>
    <bean id="oracleImpl" class="com.hdu.dao.UserDaoOracleImpl"/>

    <bean id="userServiceImpl" class="com.hdu.service.UserServiceImpl">
        <property name="userDao" ref="mysqlImpl"/>

    bean>
beans>
- 通过配置,就可以为Service中的UserDao赋值,通过Spring得到对象
public class MyTest {

    public static void main(String[] args) {

        //new CPX
        ApplicationContext context = new ClassPathXmlApplicationContext("applicationContext.xml");
        UserServiceImpl userServiceImpl = (UserServiceImpl) context.getBean("userServiceImpl");
        userServiceImpl.getUser();
    }
}
- 因此,用户需要不同的Dao类,不需要去程序里面改动,只需要在xml配置文件中修改
IOC创建对象的方式
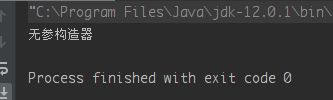
(1)默认使用无参构造器
- 当容器中类中存在无参构造方法时,默认使用无参构造器
public class User {

    private String name;

    public User(){

        System.out.println("无参构造器");
    }

    public void setName(String name){

        this.name=name;
    }

    public void show(){

        System.out.println("name="+name);
    }
}
    <bean id="user" class="com.hdu.pojo.User">
        <property name="name" value="String"/>
    bean>
public class MyTest {

    public static void main(String[] args) {

        ApplicationContext context = new ClassPathXmlApplicationContext("applicationContext.xml");
        User user = (User) context.getBean("user");
    }
}
- 如果在User类中创建一个有参构造器,此时类中没有无参构造器,此时就需要在配置文件中设置有参构造器创建对象
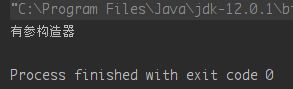
(2)有参构造器创建对象
public class User {

    private String name;

    public User(String name){

        this.name=name;
        System.out.println("有参构造器");
    }

    public void setName(String name){

        this.name=name;
    }

    public void show(){

        System.out.println("name="+name);
    }
}
    <bean id="user" class="com.hdu.pojo.User">
        <constructor-arg name="name" value="String"/>
    bean>
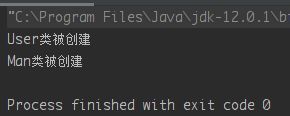
(3)在获得Spring容器时,容器会自动将里面的beans全部创建,由用户挑选获得哪个bean的对象
- 将两个类User和Man作为bean放在Spring容器中,两个类均使用无参构造器
    public Man(){

        System.out.println("Man类被创建");
    }

    public User(){

        System.out.println("User类被创建");
    }
    <bean id="user" class="com.hdu.pojo.User">

    bean>
    <bean id="man" class="com.hdu.pojo.Man">

    bean>
- 获得Spring容器,但是不从中得到类对象
public class MyTest {

    public static void main(String[] args) {

        ApplicationContext context = new ClassPathXmlApplicationContext("applicationContext.xml");
    }
}
3、Spring配置说明
(1)alias:给bean取一个别名,可以通过别名调用
public class User {

    private String name;

    public User(){

    }

    public void setName(String name){

        this.name=name;
    }

    public void show(){

        System.out.println("name="+name);
    }
}
    <bean id="user" class="com.hdu.pojo.User">
        <property name="name" value="Spring"/>
    bean>

    <alias name="user" alias="user2"/>
public class MyTest {

    public static void main(String[] args) {

        ApplicationContext context = new ClassPathXmlApplicationContext("applicationContext.xml");
        User user2 = (User) context.getBean("user2");
        user2.show();
    }
}
但是,alias没有直接通过name设定方便,而且name可以设定多个别名
    <bean id="user" class="com.hdu.pojo.User" name="user2,us,uuu">
        <property name="name" value="Spring"/>
    bean>
public class MyTest {

    public static void main(String[] args) {

        ApplicationContext context = new ClassPathXmlApplicationContext("applicationContext.xml");
        User user2 = (User) context.getBean("uuu");
        user2.show();
    }
}
(2)bean的配置
    <bean id="user" class="com.hdu.pojo.User" name="user2,us,uuu">
        <property name="name" value="Spring"/>
    bean>
(3)import:一般用于团队开发使用,可以将多个配置文件导入为一个
- 除了主配置文件,有其他多个配置文件:
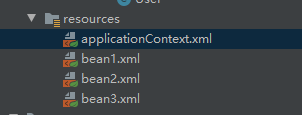
- 可以将其他配置文件import进主配置文件中,使用时只调用主配置文件就行
    <import resource="bean1.xml"/>
    <import resource="bean2.xml"/>
    <import resource="bean3.xml"/>
4、依赖注入DI
- 依赖:bean对象的创建依赖于容器
- 注入:bean对象中的所有属性,由容器来注入
(1)构造器注入
- 有参构造器创建对象
   <bean id="user" class="com.hdu.pojo.User">
       <constructor-arg name="name" value="String"/>
   bean>
(2)Set方式注入(重点)
- set注入的方法主要是根据实体类中的属性类型而定,根据不同的属性类型而具有不同的方法
- 根据官方文档中的描述,对于属性的注入包括:基本值、引用对象(容器中的bean)、数组、集合(list\set\map\props)、Null、空值等
- 实例:
public class Student {

    //真值
    private String name;
    //引用对象
    private Address address;
    //数组
    private String[] books;
    //集合
    private List<Hobby> hobbies;
    private Map<String,String> card;
    private Set<String> games;
    private Properties info;
    //null
    private String wife;
}
- Address和Hobby为自定义类
- 对应的配置文件:
    <bean id="address" class="com.hdu.pojo.Address">
        <constructor-arg name="address" value="上海"/>
    bean>

    <bean id="hobby" class="com.hdu.pojo.Hobby">
        <constructor-arg name="hobby" value="打篮球"/>
    bean>

    <bean id="student" class="com.hdu.pojo.Student">
        <property name="name" value="小明"/>

        <property name="address" ref="address"/>

        <property name="books">
            <array>
                <value>红楼梦value>
                <value>水浒传value>
                <value>三国演义value>
                <value>西游记value>
            array>
        property>

        <property name="hobbies">
            <list>
                <value>游泳value>
                <value>下棋value>
                <value>打篮球value>
                <ref bean="hobby"/>
            list>
        property>

        <property name="card">
            <map>
                <entry key="身份证" value="123546"/>
                <entry key="银行卡" value="54645649848"/>
            map>
        property>

        <property name="games">
            <set>
                <value>LOLvalue>
                <value>AOAvalue>
                <value>BOBvalue>
            set>
        property>

        <property name="info">
            <props>
                <prop key="driver">123465prop>
                <prop key="url">456486prop>
                <prop key="username">rootprop>
                <prop key="password">65465798789prop>
            props>
        property>

        <property name="wife">
            <null>null>
        property>
    bean>
- 测试类:
public class MyTest {

    public static void main(String[] args) {

        ApplicationContext context = new ClassPathXmlApplicationContext("applicationContext.xml");
        Student student = (Student) context.getBean("student");

        System.out.println(student.toString());
        List<Hobby> hobbies = student.getHobbies();
        for (Hobby hobby : hobbies) {

            System.out.println(hobby.getClass());
        }
    }
}
- 测试结果
Student{
     name='小明', address=Address(address=上海), books=[红楼梦, 水浒传, 三国演义, 西游记], hobbies=[Hobby(hobby=游泳,1, id=0), Hobby(hobby=下棋, id=0), Hobby(hobby=打篮球, id=0), Hobby(hobby=打篮球, id=0)], card={
     身份证=123546, 银行卡=54645649848}, games=[LOL, AOA, BOB], info={
     password=65465798789, driver=123465, url=456486, username=root}, wife='null'}
(3)拓展方式注入
p-命名空间
- p-命名空间对应着properties,即为对象的属性命名
- 需要在配置文件中添加resource
- xmlns:p=“http://www.springframework.org/schema/p”
- 下面两种set注入和p-空间注入的方法是等价的
    <bean name="classic" class="com.example.ExampleBean">
        <property name="email" value="[email protected]"/>
    bean>

    <bean name="p-namespace" class="com.example.ExampleBean"
        p:email="[email protected]"/>
c-命名空间
- c-命名空间对应constructor-arg 注入方式,即通过有参构造器的属性注入方式
- 需要在配置文件中添加resource
- xmlns:c=“http://www.springframework.org/schema/c”
- 需要在类中创建有参构造器
- 下面两种方式是等价的
    <bean id="beanOne" class="x.y.ThingOne">
        <constructor-arg name="thingTwo" ref="beanTwo"/>
        <constructor-arg name="thingThree" ref="beanThree"/>
        <constructor-arg name="email" value="[email protected]"/>
    bean>


    <bean id="beanOne" class="x.y.ThingOne" c:thingTwo-ref="beanTwo"
        c:thingThree-ref="beanThree" c:email="[email protected]"/>
5、bean的作用域
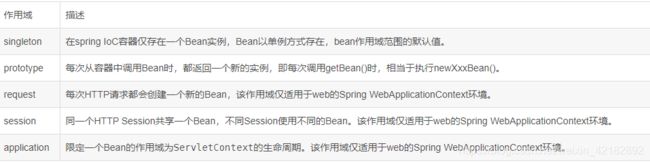
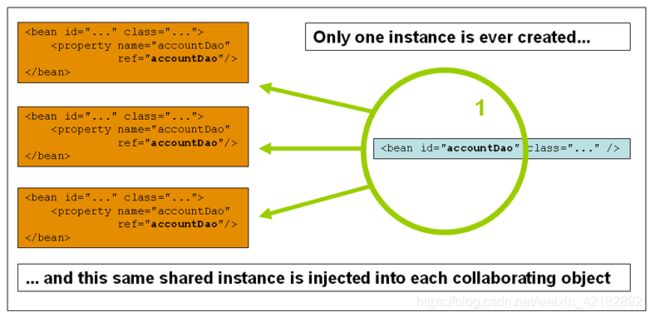
singleton单例模式
- bean的默认模式,该模式下使用同一个bean创建的对象是一个对象
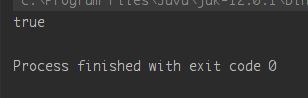
- 测试:
public class MyTest {

    public static void main(String[] args) {

        ApplicationContext context = new ClassPathXmlApplicationContext("applicationContext.xml");
        Student student1 = context.getBean("student", Student.class);
        Student student2 = context.getBean("student", Student.class);
        System.out.println(student1==student2);
    }
}
- 可以显式的在bean配置中设置为单例模式:
<bean id="student" class="com.hdu.pojo.Student" scope="singleton">
proptotype
- 这种模式下通过bean获得的每一个对象均是不同的对象
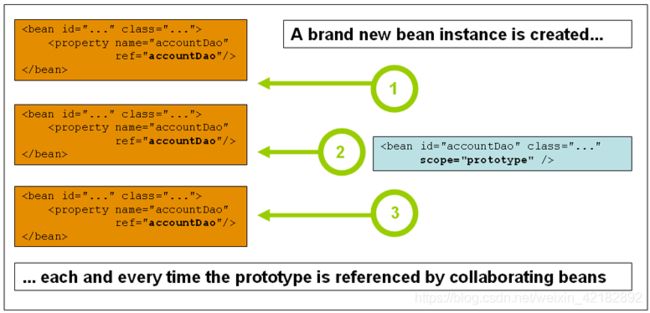
- 可以显式的在bean配置中说明
<bean id="student" class="com.hdu.pojo.Student" scope="prototype">
- 测试
public class MyTest {

    public static void main(String[] args) {

        ApplicationContext context = new ClassPathXmlApplicationContext("applicationContext.xml");
        Student student1 = context.getBean("student", Student.class);
        Student student2 = context.getBean("student", Student.class);
        System.out.println(student1==student2);
    }
}

`#### 其余三种是web中应用到的,可以参考:bean的作用域