AT91SAM9261EK 开发环境的搭建--Bootstrap
闲来无事,想继续研究一下Linux的内核。光看代码,显然兴趣不足,还是实战出真知。
翻出来一块Atmel at91sam9261ek 的开发板,这个开发板,是可以跑linux的,之前的开发环境,有些找不到了。正好,可以让它跑起来,熟悉下开发环境。
atmel ARM9的开发,已经比较老了,现在都被ST系列的单片机代替了。at91sam9261 200MHz的频率,已经不算高了,如今,一些Linux都要跑AI,跑算法,跑GUI。。。
不管怎样,能跑Linux,熟悉基本的开发,我想,已经够了。还有一块nxp imx6q的板子,也在等待去开发。
下面是搭建开发环境,并编译下载bootstrap的过程。bootstrap是uboot前的atmel官方提供的启动bootloader,更底层。
一、搭建环境:
虚拟机:使用 VMware Workstation 14 Pro
主机:Windows 10 64位
ubuntu18.04bk,为之前自己已经安装好的ubuntu 18.04。否则每次安装,都会浪费较多的时间。
进入:ubuntu
1、 安装配置arm gcc交叉编译环境
- sudo apt-get install gcc-arm-linux-gnueabi
- arm-linux-gnueabi-gcc -v 可以查看gcc 是否正常工作
- export CROSS_COMPILE=arm-linux-gnueabi-
2、at91 bootstrap 下载
运行uboot之前,第二级的启动引导程序,atmel官方的开发板,可以直接编译使用。
源码下载:这里使用git clone方式
若ubuntu没有安装git,安装一下git
$ sudo apt install git
git clone git://github.com/linux4sam/at91bootstrap.git
$ make mrproper //清理工程
我的这块开发板使用nandflash启动,
配置文件在:
at91bootstrap/board/at91sam9261ek/at91sam9261eknf_uboot_defconfig
执行:
$ make at91sam9261eknf_uboot_defconfig
#

# configuration written to .config

#

#

# make dependencies written to .auto.deps

# See top of this file before playing with this auto-preprequisites!

#
表示配置成功
若失败,需要ubuntn 安装一些工具包
安装make
$ sudo apt install make
新安装的ubuntu,可能shell 不是sh,sh脚本不能工作。
$ sudo dpkg-reconfigure dash
然后出现的界面中选择 NO
/bin/sh: gcc: command not found
安装gcc
$ sudo apt-get install gcc
3、make menuconfig 配置,其实没有什么需要配置的,看一下,了解一下硬件
缺少的ubuntu lib需要安装
sudo apt-get install libncurses5-dev
4、make ARCH=arm CROSS_COMPILE=arm-linux-gnueabi- 开始编译
提示:
ld FLAGS

========

-nostartfiles -Map=binaries/at91sam9261ek-nandflashboot-uboot-3.10.0.map --cref -static -T elf32-littlearm.lds --gc-sections -Ttext 0x300000


Size of at91sam9261ek-nandflashboot-uboot-3.10.0.bin is 8248 bytes

[Succeeded] It's OK to fit into SRAM area

[Attention] The space left for stack is 14752 bytes
说明bootstrap已经编译成功,可以烧写了
binaries/at91sam9261ek-nandflashboot-uboot-3.10.0.bin
二、烧写与启动
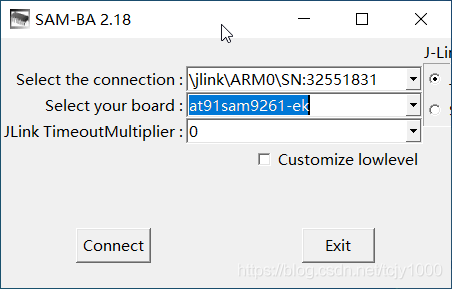
1、这里烧写,使用atmel 提供的 SAM-BA 2.18
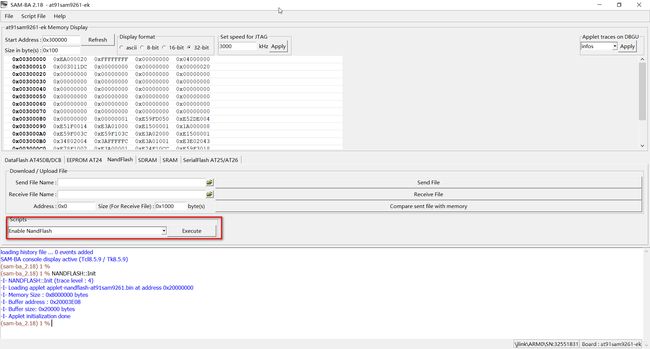
2、使能一下:Nandflash,因为使用NandFlash启动
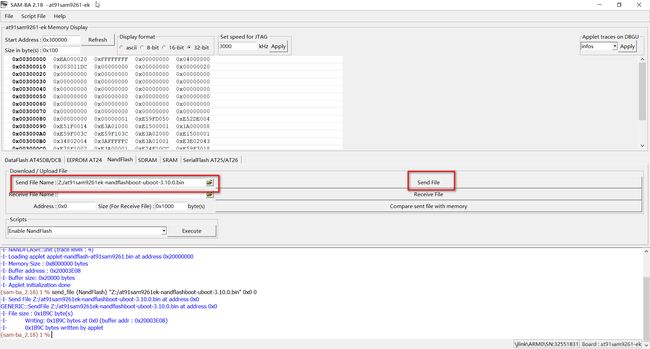
3、发送刚编译好的 bootstrap bin文件到开发板,进入烧写
4、启动信息如下:
RomBOOT


AT91Bootstrap 3.10.0 (2020-10-05 10:49:00)


NAND: ONFI not supported

NAND: Not found Manufacturer ID: 0xec,Chip ID: 0xf1

NAND: Not find support device!

NAND: Failed to load image
5、烧写完,接好串口线,发现找不到NandFlash的型号,原来,这个开发板,NandFlash的型号更改了,需要添加一下新型号,128M
打开并修改:driver/nandflash.c,添加自己开发板NandFlash的型号
#ifdef CONFIG_NANDFLASH_SMALL_BLOCKS

static struct nand_chip nand_ids[] = {

/* Samsung 32MB 8Bit */

{0xec75, 0x800, 0x4000, 0x200, 0x10, 0x0},

{0,}

};

#else

static struct nand_chip nand_ids[] = {

/* Samsung K9F2G08U0M 256MB */

{0xecda, 0x800, 0x20000, 0x800, 0x40, 0x0},

/* Samsung K9F2G08U0A 256MB */

{0xecaa, 0x800, 0x20000, 0x800, 0x40, 0x0},

/* Micron MT29F2G16AAB 256MB */

{0x2cca, 0x800, 0x20000, 0x800, 0x40, 0x1},

/* Micron MT29F2G08AAC 256MB */

{0x2cda, 0x800, 0x20000, 0x800, 0x40, 0x0},

/* Micron MT29F2G08ABD 256MB */

{0x2caa, 0x800, 0x20000, 0x800, 0x40, 0x0},

/* Mircon MT29H8G08ACAH1 1GB */

{0x2c38, 0x800, 0x80000, 0x1000, 0xe0, 0x0},

#ifndef CONFIG_AT91SAM9260EK

/* Hynix HY27UF082G2A 256MB */

{0xadda, 0x800, 0x20000, 0x800, 0x40, 0x0},

/* Hynix HY27UF162G2A 256MB */

{0xadca, 0x800, 0x20000, 0x800, 0x40, 0x1},

/* Hynix HY27UF162G2B 512MB */

{0xaddc, 0x1000, 0x20000, 0x800, 0x40, 0x0},

/* EON EN27LN1G08 128MB */

{0x92f1, 0x400, 0x20000, 0x800, 0x40, 0x0},

#endif

/* Samsung K9F1G08U0A 128MB */

{0xecf1, 0x400, 0x20000, 0x800, 0x40, 0x0},

{0,}

};
这里添加的为:
/* Samsung K9F1G08U0A 128MB */

{0xecf1, 0x400, 0x20000, 0x800, 0x40, 0x0},
6、Flash匹配成功串口打印信息:
RomBOOT


AT91Bootstrap 3.10.0 (2020-10-05 10:49:00)


NAND: ONFI not supported

NAND: Manufacturer ID: 0xec Chip ID: 0xf1

NAND: Disable On-Die ECC

NAND: Press the recovery button (BP4) to recovery

NAND: Using Software ECC

NAND: Image: Copy 0xa0000 bytes from 0x40000 to 0x21f00000

NAND: Done to load image
说明:bootstrap已经成功跑起来。接下来,需要uboot。
总结:
每次努力,都有不同的收获,每份努力,都会助你成长。
万里长征,走好第一步,走好每一步。


