【OpenCV 图像基础】4.图像特征与目标检测(笔记)
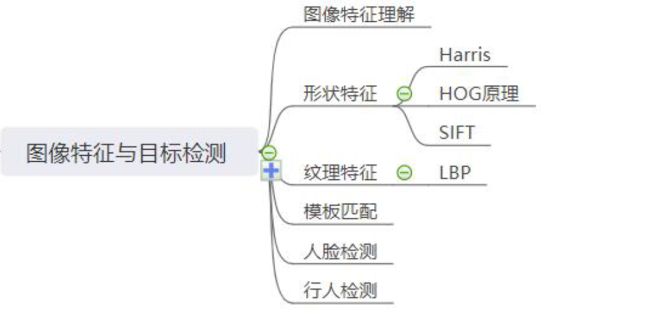
目录
1.学习目标
2.图像特征理解
2.1图像特征
2.2颜色特征
2.3纹理特征
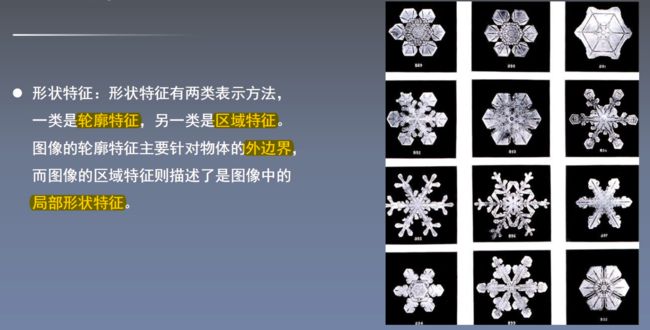
2.4形状特征
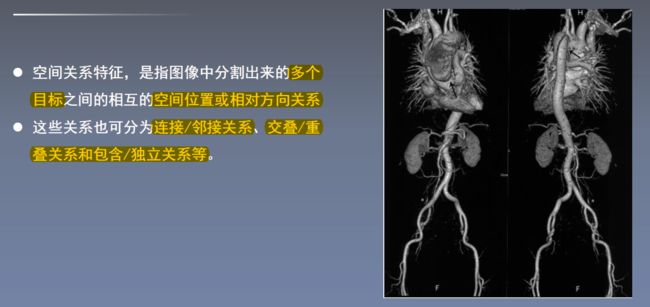
2.5空间关系特征
3.形状特征描述
3.1HOG特征提取
3.2HOG实现过程
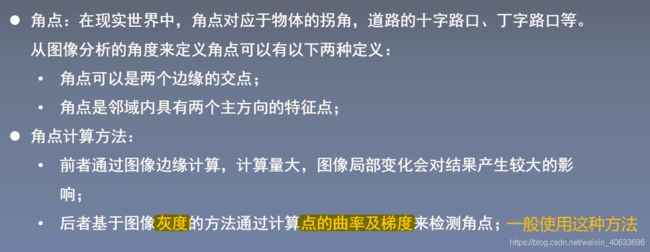
3.3角点概念
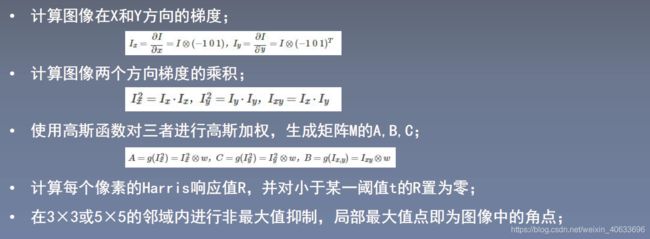
3.4Harris角点检测
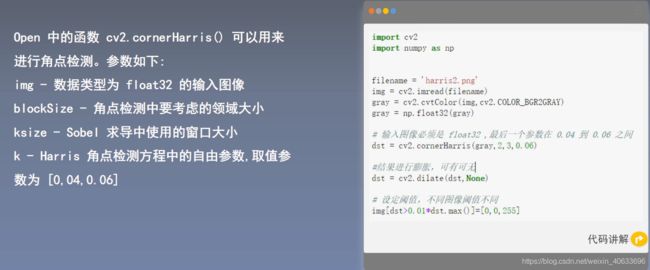
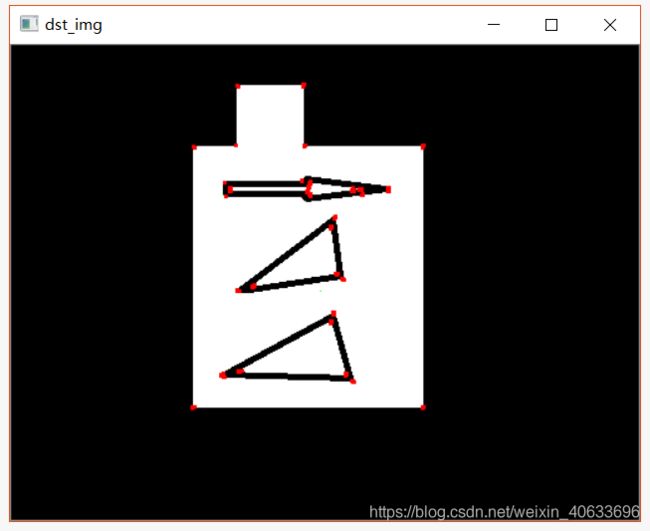
3.5Harris实现过程
3.6SIFT算法
3.7SIFT实现过程
4.LBP纹理特征
4.1LBP介绍
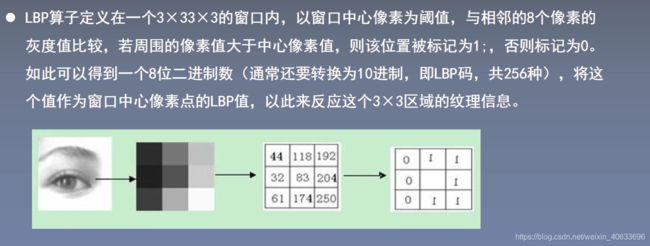
4.2LBP原理
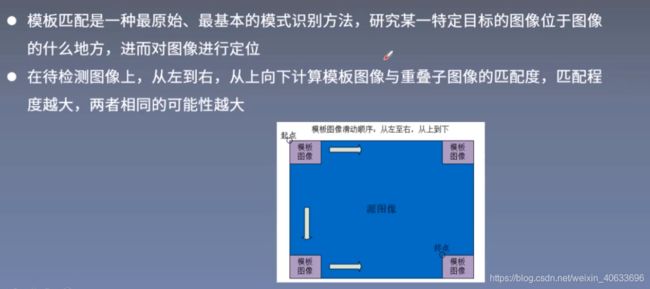
5.模板匹配算法
6.人脸检测算法
6.1人脸检测
6.2人脸对齐
6.3人脸特征提取
6.4人脸识别
1.学习目标
2.图像特征理解
2.1图像特征
 2.2颜色特征
 2.3纹理特征
 2.4形状特征
2.5空间关系特征
3.形状特征描述
3.1HOG特征提取
3.2HOG实现过程
 第五点补充说明:将0-360度分布的梯度方向映射到bin个小的区间内。
代码:
import cv2
import numpy as np
# 判断矩形i是否完全包含在矩形o中
def is_inside(o, i):
    ox, oy, ow, oh = o
    ix, iy, iw, ih = i
    return ox > ix and oy > iy and ox + ow < ix + iw and oy + oh < iy + ih
# 对人体绘制颜色框
def draw_person(image, person):
    x, y, w, h = person
    cv2.rectangle(image, (x, y), (x + w, y + h), (0, 255, 255), 2)
img = cv2.imread("people.jpg")
hog = cv2.HOGDescriptor()  # 启动检测器对象
hog.setSVMDetector(cv2.HOGDescriptor_getDefaultPeopleDetector())  # 指定检测器类型为人体
found, w = hog.detectMultiScale(img,0.1,(1,1)) # 加载并检测图像
print(found)
print(w)

# 丢弃某些完全被其它矩形包含在内的矩形
found_filtered = []
for ri, r in enumerate(found):
    for qi, q in enumerate(found):
        if ri != qi and is_inside(r, q):
            break
    else:
        found_filtered.append(r)
        print(found_filtered)
# 对不包含在内的有效矩形进行颜色框定
for person in found_filtered:
    draw_person(img, person)
cv2.imshow("people detection", img)
cv2.waitKey(0)
cv2.destroyAllWindows()
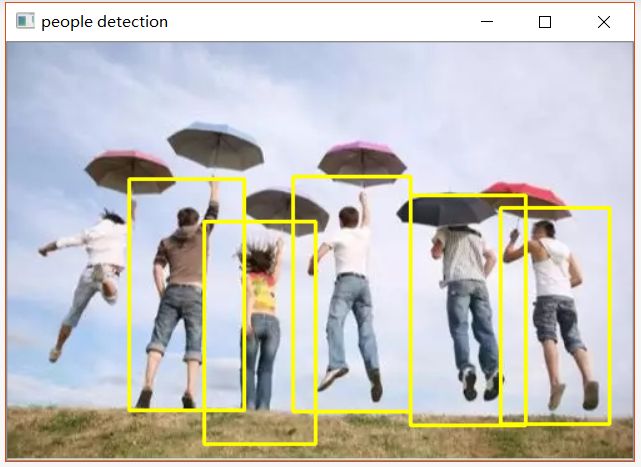
输出:
[[322 122  92 184]
 [228 107  94 188]
 [ 97 109  92 185]
 [394 132  87 173]
 [157 143  89 178]]
[[1.69752147]
 [1.50364332]
 [2.26940114]
 [0.15458478]
 [1.37897637]]
[array([322, 122,  92, 184], dtype=int32)]
[array([322, 122,  92, 184], dtype=int32), array([228, 107,  94, 188], dtype=int32)]
[array([322, 122,  92, 184], dtype=int32), array([228, 107,  94, 188], dtype=int32), array([ 97, 109,  92, 185], dtype=int32)]
[array([322, 122,  92, 184], dtype=int32), array([228, 107,  94, 188], dtype=int32), array([ 97, 109,  92, 185], dtype=int32), array([394, 132,  87, 173], dtype=int32)]
[array([322, 122,  92, 184], dtype=int32), array([228, 107,  94, 188], dtype=int32), array([ 97, 109,  92, 185], dtype=int32), array([394, 132,  87, 173], dtype=int32), array([157, 143,  89, 178], dtype=int32)]
3.3角点概念
3.4Harris角点检测
 3.5Harris实现过程
import cv2
import numpy as np


filename = 'harris2.png'
img = cv2.imread(filename)
gray = cv2.cvtColor(img,cv2.COLOR_BGR2GRAY)
gray = np.float32(gray)

# 输入图像必须是 float32 ,最后一个参数在 0.04 到 0.06 之间
dst = cv2.cornerHarris(gray,2,3,0.06)

#结果进行膨胀,可有可无
dst = cv2.dilate(dst,None)
print(dst)
# 设定阈值,不同图像阈值不同
img[dst>0.01*dst.max()]=[0,0,255]
print(dst.max())
cv2.imshow('dst_img',img)
#cv2.imshow('dst',dst)
cv2.waitKey(0)
cv2.destroyAllWindows()
输出:
[[0. 0. 0. ... 0. 0. 0.]
 [0. 0. 0. ... 0. 0. 0.]
 [0. 0. 0. ... 0. 0. 0.]
 ...
 [0. 0. 0. ... 0. 0. 0.]
 [0. 0. 0. ... 0. 0. 0.]
 [0. 0. 0. ... 0. 0. 0.]]
533091900.0
3.6SIFT算法
 3.7SIFT实现过程
import cv2
import numpy as np

img = cv2.imread('harris2.png')
gray= cv2.cvtColor(img,cv2.COLOR_BGR2GRAY)
sift = cv2.xfeatures2d.SIFT_create()
kp = sift.detect(gray,None)#找到关键点
img=cv2.drawKeypoints(gray,kp,img)#绘制关键点
cv2.imshow('sp',img)
cv2.waitKey(0)
cv2.destroyAllWindows()
输出:
4.LBP纹理特征
4.1LBP介绍
4.2LBP原理
def LBP(src):
    '''
    :param src:灰度图像
    :return:
    '''
    height = src.shape[0]
    width = src.shape[1]
    dst = src.copy()
    lbp_value = np.zeros((1,8), dtype=np.uint8)
    #print(lbp_value)
    neighbours = np.zeros((1,8), dtype=np.uint8)
    #print(neighbours)
    for x in range(1, width-1):
        for y in range(1, height-1):
            neighbours[0, 0] = src[y - 1, x - 1]
            neighbours[0, 1] = src[y - 1, x]
            neighbours[0, 2] = src[y - 1, x + 1]
            neighbours[0, 3] = src[y, x - 1]
            neighbours[0, 4] = src[y, x + 1]
            neighbours[0, 5] = src[y + 1, x - 1]
            neighbours[0, 6] = src[y + 1, x]
            neighbours[0, 7] = src[y + 1, x + 1]
            center = src[y, x]
            for i in range(8):
                if neighbours[0, i] > center:
                    lbp_value[0, i] = 1
                else:
                    lbp_value[0, i] = 0

            lbp = lbp_value[0, 0] * 1 + lbp_value[0, 1] * 2 + lbp_value[0, 2] * 4 + lbp_value[0, 3] * 8 \
                + lbp_value[0, 4] * 16 + lbp_value[0, 5] * 32 + lbp_value[0, 6] * 64 + lbp_value[0, 7] * 128

            #print(lbp)
            dst[y, x] = lbp

    return dst
import cv2
import numpy as np
img = cv2.imread('people.jpg',0)
print(img.shape)
cv2.imshow('src',img)
cv2.waitKey(0)
cv2.destroyAllWindows()
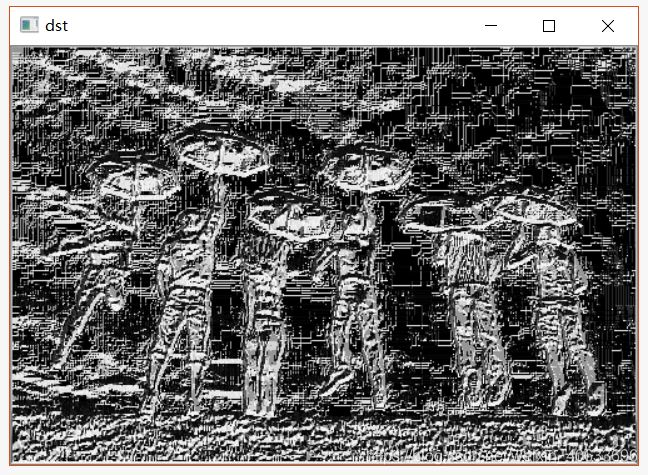
new_img = LBP(img)
cv2.imshow('dst',new_img)
cv2.waitKey(0)
cv2.destroyAllWindows()输出:
(334, 500)5.模板匹配算法
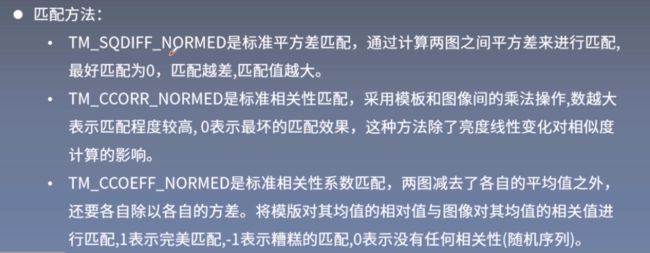
平方差匹配的方法速度最快,效果无法保证;相关性匹配的方法速度比平方差匹配慢,但效果要好一些;相关性系数匹配速度最慢,效果最好。
代码:
#模板匹配
import cv2
import numpy as np
def template_demo(tpl,target):

    methods = [cv2.TM_SQDIFF_NORMED, cv2.TM_CCORR_NORMED, cv2.TM_CCOEFF_NORMED]   #3种模板匹配方法
    th, tw = tpl.shape[:2]
    for md in methods:
        #print(md)
        result = cv2.matchTemplate(target, tpl, md)
        #print(result.shape)
        min_val, max_val, min_loc, max_loc = cv2.minMaxLoc(result)
        print(min_val, max_val, min_loc, max_loc)
        if md == cv2.TM_SQDIFF_NORMED:
            tl = min_loc
        else:
            tl = max_loc
        br = (tl[0]+tw, tl[1]+th)   #br是矩形右下角的点的坐标
        cv2.rectangle(target, tl, br, (0, 0, 255), 2)
        cv2.namedWindow("match-" + np.str(md), cv2.WINDOW_NORMAL)
        cv2.imshow("match-" + np.str(md), target)

tpl =cv2.imread("sample2.jpg")
print(tpl.shape)
target = cv2.imread("target1.jpg")
print(target.shape)
cv2.waitKey(0)
cv2.destroyAllWindows()

cv2.namedWindow('template image', cv2.WINDOW_NORMAL)
cv2.imshow("template image", tpl)
cv2.namedWindow('target image', cv2.WINDOW_NORMAL)
cv2.imshow("target image", target)
template_demo(tpl,target)
cv2.waitKey(0)
cv2.destroyAllWindows()
输出:
6.人脸检测算法
6.1人脸检测
6.2人脸对齐
6.3人脸特征提取
6.4人脸识别
import cv2

# 读入图像
img = cv2.imread("12.jpg")
img = cv2.resize(img,None,fx=0.4,fy=0.4,interpolation=cv2.INTER_LINEAR)

# 加载人脸特征,该文件在 python安装目录\Lib\site-packages\cv2\data 下
face_cascade = cv2.CascadeClassifier(r'haarcascade_frontalface_default.xml')
# 将读取的图像转为COLOR_BGR2GRAY,减少计算强度
gray = cv2.cvtColor(img, cv2.COLOR_BGR2GRAY)

# 检测出的人脸个数
faces = face_cascade.detectMultiScale(gray, scaleFactor = 1.15, minNeighbors = 4, minSize = (5, 5))

print("Face : {0}".format(len(faces)))
print(faces)
# 用矩形圈出人脸的位置
for(x, y, w, h) in faces:
    cv2.rectangle(img, (x, y), (x + w, y + h), (0, 255, 0), 2)

cv2.namedWindow("Faces")
cv2.imshow("Faces", img)
cv2.waitKey(0)
cv2.destroyAllWindows()
输出:
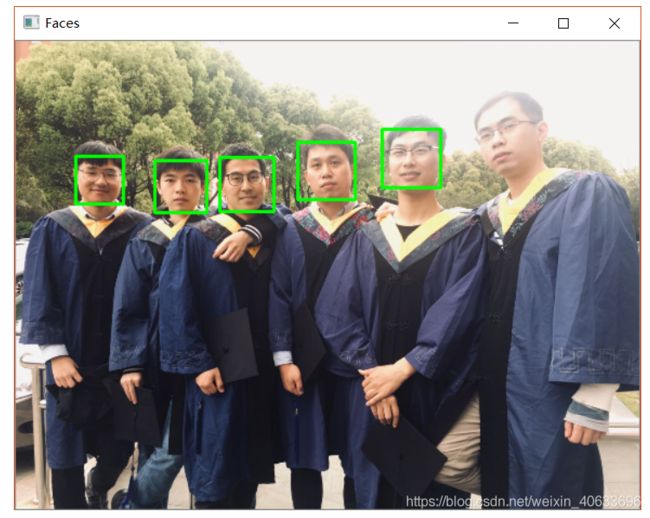
Face : 5
[[128 110  48  48]
 [188 107  50  50]
 [338  81  54  54]
 [260  93  53  53]
[ 55 106 44 44]]代码2:
# -*- coding:utf-8 -*-
import cv2
import dlib
import numpy as np

predictor_model = 'shape_predictor_68_face_landmarks/shape_predictor_68_face_landmarks.dat'
detector = dlib.get_frontal_face_detector()
predictor = dlib.shape_predictor(predictor_model)

# cv2读取图像
test_film_path = "3.png"
img = cv2.imread(test_film_path)
# 取灰度
img_gray = cv2.cvtColor(img, cv2.COLOR_RGB2GRAY)

# 人脸数rects
rects = detector(img_gray, 0)
print(rects[0])
for i in range(len(rects)):
    landmarks = np.matrix([[p.x, p.y] for p in predictor(img,rects[i]).parts()])
    print(landmarks, type(landmarks))
    for idx, point in enumerate(landmarks):
        # 68点的坐标
        pos = (point[0, 0], point[0, 1])
        #print(idx+1, pos)

        # 利用cv2.circle给每个特征点画一个圈,共68个
        cv2.circle(img, pos, 3, color=(0, 255, 0))
        # 利用cv2.putText输出1-68
        font = cv2.FONT_HERSHEY_SIMPLEX
        cv2.putText(img, str(idx+1), pos, font, 0.5, (0, 0, 255), 1, cv2.LINE_AA)

#cv2.imwrite("result.png", img)
cv2.imshow("img", img)
cv2.waitKey(0)
cv2.destroyAllWindows()
输出:
