SpringBoot+Mybatis多模块(module)项目搭建
SpringBoot+Mybatis多模块(module)项目搭建
开发工具及环境搭建
- IDE: IntelliJ IDEA 2020.1
- JDK: jdk1.8
项目目录结构
- biz层:业务逻辑层
- dao层:数据持久层
- web层:请求处理层
搭建步骤
创建父工程
① IDEA 工具栏选择菜单File ->New ->Project

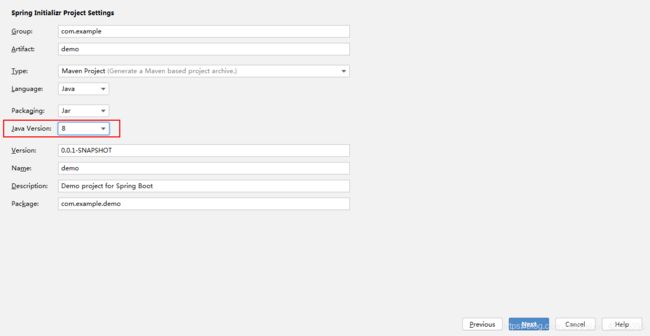
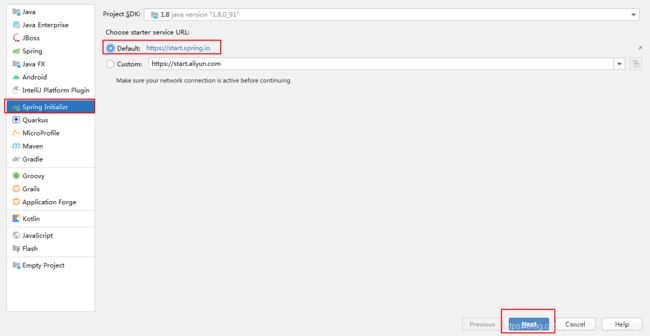
②选择Spring Initializr,start service URL默认选择Default,点击Next
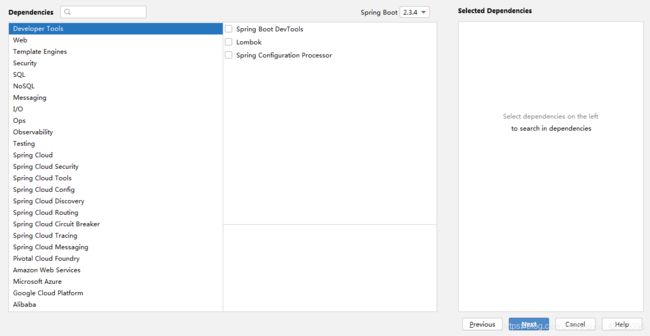
④这步不需要选择直接点Next
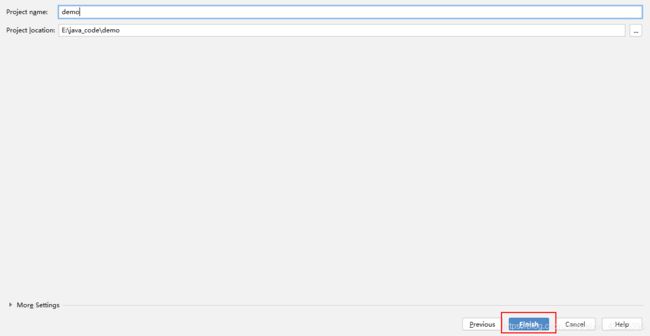
⑤点击Finish创建项目
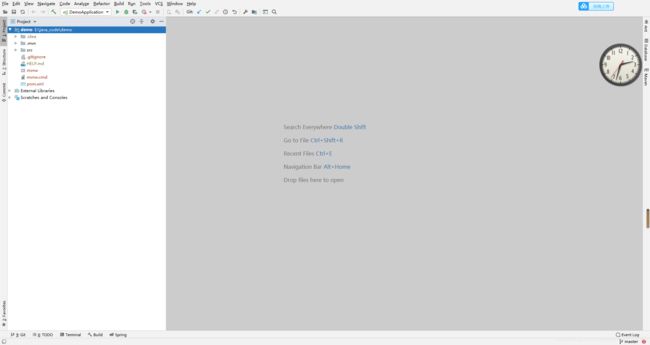
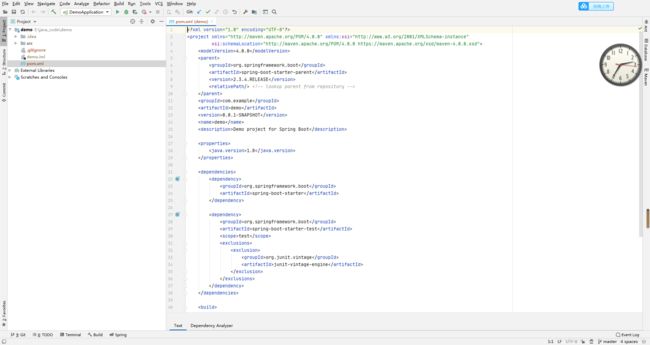
⑥最终得到的项目目录结构如下
⑦删除无用的.mvn目录、src目录、mvnw、mvnw.cmd文件,最终只留.gitignore和pom.xml文件(图中src目录删掉,我截图的时候忘了…)
创建子模块
①选择项目根目录demo右键呼出菜单,选择New -> Module
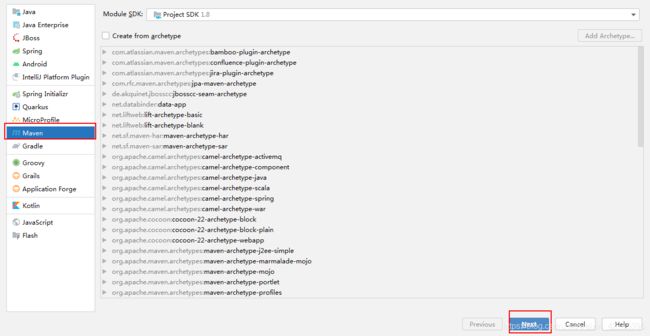
②选择Maven,点击Next
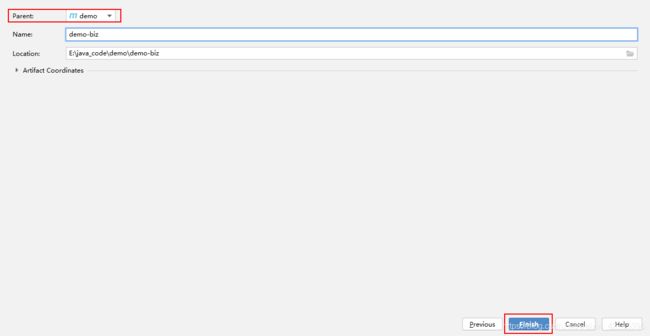
③填写ArifactId,点击Finish
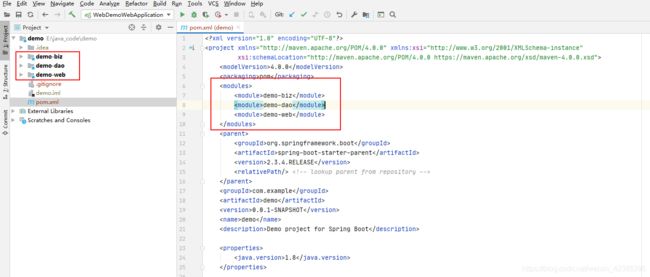
④同理添加【demo-dao】、【demo-web】子模块,最终得到项目目录结构如下图
运行项目
①在【demo-web】模块创建com.example.demo.web包,并添加入口类 DemoWebApplication.java
package com.example.demo.web;

import org.springframework.boot.SpringApplication;
import org.springframework.boot.autoconfigure.SpringBootApplication;

@SpringBootApplication
public class DemoWebApplication {

    public static void main(String[] args) {

        SpringApplication.run(DemoWebApplication.class,args);
    }
}
②在父工程【demo】的pom.xml文件中的dependency依赖
<dependency>
    <groupId>org.springframework.bootgroupId>
    <artifactId>spring-boot-starter-webartifactId>
dependency>
③在com.example.demo.web包中添加controller目录,并创建一个Controller,添加test方法测试接口是否可以正常访问
package com.example.demo.web.controller;

import org.springframework.web.bind.annotation.GetMapping;
import org.springframework.web.bind.annotation.RequestMapping;
import org.springframework.web.bind.annotation.RestController;

@RestController
@RequestMapping("demo")
public class DemoController {


    @GetMapping("test")
    public String test(){

        return "Hello Spring Boot";
    }
}
④在【demo-web】子模块的resource目录下创建SpringBoot配置文件application.yml文件,在配置文件中可以修改服务器端口号(默认端口为8080)
server:
  port: 9999
⑤运行WebDemoWebApplication类中的main方法启动项目,访问http://localhost:9999/demo/test得到如下效果(如果配置文件没有设置端口号,则访问http://localhost:8080/demo/test)
配置模块间的依赖关系
各个子模块的依赖关系,biz层依赖dao层,web层依赖biz层
①父工程pom.xml文件中声明所有子模块依赖
<dependencyManagement>
    <dependencies>
        <dependency>
            <groupId>com.examplegroupId>
            <artifactId>demo-bizartifactId>
            <version>${project.version}version>
        dependency>
        <dependency>
            <groupId>com.examplegroupId>
            <artifactId>demo-daoartifactId>
            <version>${project.version}version>
        dependency>
        <dependency>
            <groupId>com.examplegroupId>
            <artifactId>demo-webartifactId>
            <version>${project.version}version>
        dependency>
    dependencies>
dependencyManagement>
②在【demo-web】模块中的pom.xml文件中添加demo-biz依赖
<dependencies>
    <dependency>
        <groupId>com.examplegroupId>
        <artifactId>demo-bizartifactId>
    dependency>
dependencies>
③在【demo-biz】模块中的pom.xml文件中添加demo-dao依赖
<dependencies>
    <dependency>
        <groupId>com.examplegroupId>
        <artifactId>demo-daoartifactId>
    dependency>
dependencies>
web层调用biz层的接口测试
①在【demo-biz】层创建com.example.demo包,添加service目录并创建DemoService接口及其实现类
package com.example.demo.service;

public interface DemoService {

    String test();
}
package com.example.demo.service.impl;

import com.example.demo.service.DemoService;
import org.springframework.stereotype.Service;

@Service
public class DemoServiceImpl implements DemoService {

    @Override
    public String test() {

        return "Service Test";
    }
}
②DemoController通过@Autowired注解注入DemoService,修改DemoController的test方法使之调用DemoService的test方法,最终如下图所示
package com.example.demo.web.controller;

import com.example.demo.service.DemoService;
import org.springframework.beans.factory.annotation.Autowired;
import org.springframework.web.bind.annotation.GetMapping;
import org.springframework.web.bind.annotation.RequestMapping;
import org.springframework.web.bind.annotation.RestController;

@RestController
@RequestMapping("demo")
public class DemoController {


    @Autowired
    private DemoService demoService;

    @GetMapping("test")
    public String test(){

        return demoService.test();
    }
}
③在DemoWebApplication启动类中增加包扫描,设置@SpringBootApplication注解中的scanBasePackages 的值为 com.example.demo,如下图所示
package com.example.demo.web;

import org.springframework.boot.SpringApplication;
import org.springframework.boot.autoconfigure.SpringBootApplication;

@SpringBootApplication(scanBasePackages = "com.example.demo")
public class DemoWebApplication {

    public static void main(String[] args) {

        SpringApplication.run(DemoWebApplication.class,args);
    }
}
④重新运行DemoWebApplication启动类中的main方法,发现如下报错信息,
将父工程pom.xml文件中的如下代码删除或注释
⑤重新运行main方法,项目正常启动,访问http://localhost:9999/demo/test得到如下效果
集成Mybatis
①父工程pom.xml文件中声明mybatis-spring-boot-starter及lombok依赖
<dependencyManagement>
    <dependencies>
        <dependency>
            <groupId>org.mybatis.spring.bootgroupId>
            <artifactId>mybatis-spring-boot-starterartifactId>
            <version>2.1.2version>
        dependency>
        <dependency>
            <groupId>org.projectlombokgroupId>
            <artifactId>lombokartifactId>
            <version>1.18.0version>
        dependency>
    dependencies>
dependencyManagement>
②在【demo-dao】层中的pom.xml文件中添加如下依赖
<dependencies>
    <dependency>
        <groupId>org.mybatis.spring.bootgroupId>
        <artifactId>mybatis-spring-boot-starterartifactId>
    dependency>
    <dependency>
        <groupId>mysqlgroupId>
        <artifactId>mysql-connector-javaartifactId>
        <version>5.1.21version>
    dependency>
    <dependency>
        <groupId>org.projectlombokgroupId>
        <artifactId>lombokartifactId>
    dependency>
dependencies>
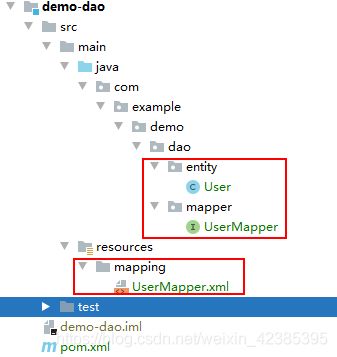
③在【demo-dao】层创建com.example.demo.dao包,通过mybatis-genertaor工具生成dao层相关文件(entity,mapper、xml)
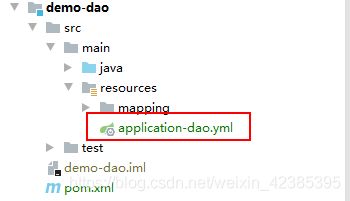
④在【demo-dao】层的resource目录下创建SpringBoot配置文件application-dao.yml,并添加jdbc及mybatis相应配置项
spring:
  datasource:
    username: root
    password: root
    url: jdbc:mysql:///lexian
    driver-class-name: com.mysql.jdbc.Driver
  profiles: dao


mybatis:
  mapper-locations: classpath:mapping/*.xml
⑤修改【demo-web】层中application.yml配置文件来引用dao层配置文件
#application.yml配置文件中添加profiles配置
spring:
  profiles:
    active: dao
⑥DemoService通过@Autowired注解注入UserMapper,修改DemoService的test方法使之调用UserMapper的selectByPrimaryKey方法
package com.example.demo.service.impl;

import com.example.demo.dao.entity.User;
import com.example.demo.dao.mapper.UserMapper;
import com.example.demo.service.DemoService;
import org.springframework.beans.factory.annotation.Autowired;
import org.springframework.stereotype.Service;

@Service
public class DemoServiceImpl implements DemoService {

    @Autowired
    private UserMapper userMapper;

    @Override
    public Object test() {

        User user = userMapper.selectByPrimaryKey("1");
        return user;
    }
}
⑦在【demo-web】层中DemoWebApplication启动类中增加dao层包扫描,添加@MapperScan注解,并设置
basePackages 的值为com.example.demo.mapper,由于需要扫描dao层类,所以web层需要依赖【demo-dao】层,
package com.example.demo.web;

import org.mybatis.spring.annotation.MapperScan;
import org.springframework.boot.SpringApplication;
import org.springframework.boot.autoconfigure.SpringBootApplication;

@SpringBootApplication(scanBasePackages = "com.example.demo")
@MapperScan(basePackages = "com.example.demo.mapper")
public class DemoWebApplication {

    public static void main(String[] args) {

        SpringApplication.run(DemoWebApplication.class,args);
    }
}
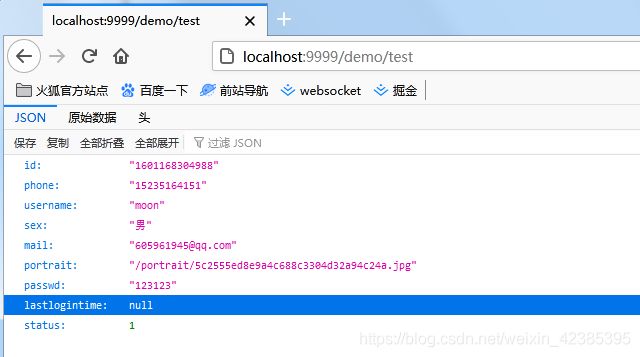
⑧重新运行main方法,项目正常启动,访问http://localhost:9999/demo/test得到如下效果
遇到的问题
①项目启动后,出现如下报错,是因为项目中内部集成了mysql-connection-java :8.×.×以上的版本
Loading class `com.mysql.jdbc.Driver'. This is deprecated. The new driver class is `com.mysql.cj.jdbc.Driver'. The driver is automatically registered via the SPI and manual loading of the driver class is generally unnecessary.
在父工程中修改mysql-connection-java版本为5.1.××,项目启动成功
