前面讲了动画中的Frame动画,今天就来详细讲解一下Tween动画的使用。
同样,在开始实例演示之前,先引用官方文档中的一段话:
Tween动画是操作某个控件让其展现出旋转、渐变、移动、缩放的这么一种转换过程,我们成为补间动画。我们可以以XML形式定义动画,也可以编码实现。
如果以XML形式定义一个动画,我们按照动画的定义语法完成XML,并放置于/res/anim目录下,文件名可以作为资源ID被引用;如果由编码实现,我们需要使用到Animation对象。
如果用定义XML方式实现动画,我们需要熟悉一下动画XML语法:
01 |
<?xml version="1.0" encoding="utf-8"?> |
02 |
<set xmlns:android="http://schemas.android.com/apk/res/android" |
03 |
android:interpolator="@[package:]anim/interpolator_resource" |
04 |
android:shareInterpolator=["true" | "false"] > |
06 |
android:fromAlpha="float" |
07 |
android:toAlpha="float" /> |
09 |
android:fromXScale="float" |
10 |
android:toXScale="float" |
11 |
android:fromYScale="float" |
12 |
android:toYScale="float" |
13 |
android:pivotX="float" |
14 |
android:pivotY="float" /> |
19 |
android:toY="float" /> |
21 |
android:fromDegrees="float" |
22 |
android:toDegrees="float" |
23 |
android:pivotX="float" |
24 |
android:pivotY="float" /> |
XML文件中必须有一个根元素,可以是<alpha>、<scale>、<translate>、<rotate>中的任意一个,也可以是<set>来管理一个由前面几个元素组成的动画集合。
<set>是一个动画容器,管理多个动画的群组,与之相对应的Java对象是AnimationSet。它有两个属 性,android:interpolator代表一个插值器资源,可以引用系统自带插值器资源,也可以用自定义插值器资源,默认值是匀速插值器;稍后我 会对插值器做出详细讲解。android:shareInterpolator代表<set>里面的多个动画是否要共享插值器,默认值为 true,即共享插值器,如果设置为false,那么<set>的插值器就不再起作用,我们要在每个动画中加入插值器。
<alpha>是渐变动画,可以实现fadeIn和fadeOut的效果,与之对应的Java对象是AlphaAnimation。 android:fromAlpha属性代表起始alpha值,浮点值,范围在0.0和1.0之间,分别代表透明和完全不透 明,android:toAlpha属性代表结尾alpha值,浮点值,范围也在0.0和1.0之间。
<scale>是缩放动画,可以实现动态调控件尺寸的效果,与之对应的Java对象是ScaleAnimation。 android:fromXScale属性代表起始的X方向上相对自身的缩放比例,浮点值,比如1.0代表自身无变化,0.5代表起始时缩小一倍,2.0 代表放大一倍;android:toXScale属性代表结尾的X方向上相对自身的缩放比例,浮点值;android:fromYScale属性代表起始 的Y方向上相对自身的缩放比例,浮点值;android:toYScale属性代表结尾的Y方向上相对自身的缩放比例,浮点 值;android:pivotX属性代表缩放的中轴点X坐标,浮点值,android:pivotY属性代表缩放的中轴点Y坐标,浮点值,对于这两个属 性,如果我们想表示中轴点为图像的中心,我们可以把两个属性值定义成0.5或者50%。
<translate>是位移动画,代表一个水平、垂直的位移。与之对应的Java对象是TranslateAnimation。 android:fromXDelta属性代表起始X方向的位置,android:toXDelta代表结尾X方向上的位 置,android:fromYScale属性代表起始Y方向上的位置,android:toYDelta属性代表结尾Y方向上的位置,以上四个属性都支 持三种表示方式:浮点数、num%、num%p;如果以浮点数字表示,代表相对自身原始位置的像素值;如果以num%表示,代表相对于自己的百分比,比如 toXDelta定义为100%就表示在X方向上移动自己的1倍距离;如果以num%p表示,代表相对于父类组件的百分比。
<rotate>是旋转动画,与之对应的Java对象是RotateAnimation。android:fromDegrees属性 代表起始角度,浮点值,单位:度;android:toDegrees属性代表结尾角度,浮点值,单位:度;android:pivotX属性代表旋转中 心的X坐标值,android:pivotY属性代表旋转中心的Y坐标值,这两个属性也有三种表示方式,数字方式代表相对于自身左边缘的像素值,num% 方式代表相对于自身左边缘或顶边缘的百分比,num%p方式代表相对于父容器的左边缘或顶边缘的百分比。
另外,在动画中,如果我们添加了android:fillAfter="true"后,这个动画执行完之后保持最后的状态;android:duration="integer"代表动画持续的时间,单位为毫秒。
如果要把定义在XML中的动画应用在一个ImageView上,代码是这样的:
1 |
ImageView image = (ImageView) findViewById(R.id.image); |
2 |
Animation testAnim = AnimationUtils.loadAnimation(this, R.anim.test); |
3 |
image.startAnimation(testAnim); |
下面重点介绍一下插值器的概念:
首先要了解为什么需要插值器,因为在补间动画中,我们一般只定义关键帧(首帧或尾帧),然后由系统自动生成中间帧,生成中间帧的这个过程可以成为 “插值”。插值器定义了动画变化的速率,提供不同的函数定义变化值相对于时间的变化规则,可以定义各种各样的非线性变化函数,比如加速、减速等。下面是几 种常见的插值器:
| Interpolator对象 |
资源ID |
功能作用 |
| AccelerateDecelerateInterpolator |
@android:anim/accelerate_decelerate_interpolator |
先加速再减速 |
| AccelerateInterpolator |
@android :anim/accelerate_interpolator |
加速 |
| AnticipateInterpolator |
@android :anim/anticipate_interpolator |
先回退一小步然后加速前进 |
| AnticipateOvershootInterpolator |
@android:anim/anticipate_overshoot_interpolator |
在上一个基础上超出终点一小步再回到终点 |
| BounceInterpolator |
@android :anim/bounce_interpolator |
最后阶段弹球效果 |
| CycleInterpolator |
@android :anim/cycle_interpolator |
周期运动 |
| DecelerateInterpolator |
@android :anim/decelerate_interpolator |
减速 |
| LinearInterpolator |
@android :anim/linear_interpolator |
匀速 |
| OvershootInterpolator |
@android :anim/overshoot_interpolator |
快速到达终点并超出一小步最后回到终点 |
然后我们可以这样使用一个插值器:
1 |
<set android:interpolator="@android :anim/accelerate_interpolator"> |
3 |
</set> <span><span><</span><span>alpha</span><span> </span><span>android:interpolator</span><span>=</span><span>"<a href="http://my.oschina.net/asia" target="_blank" rel="nofollow">@android</a> :anim/accelerate_interpolator"</span><span> </span></span> <span> ...<span>/></span><span> </span></span> |
如果只简单地引用这些插值器还不能满足需要的话,我们要考虑一下个性化插值器。我们可以创建一个插值器资源修改插值器的属性,比如修改 AnticipateInterpolator的加速速率,调整CycleInterpolator的循环次数等。为了完成这种需求,我们需要创建XML 资源文件,然后将其放于/res/anim下,然后再动画元素中引用即可。我们先来看一下几种常见的插值器可调整的属性:
<accelerateDecelerateInterpolator> 无
<accelerateInterpolator> android:factor 浮点值,加速速率,默认为1
<anticipateInterploator> android:tension 浮点值,起始点后退的张力、拉力数,默认为2
<anticipateOvershootInterpolator> android:tension 同上 android:extraTension 浮点值,拉力的倍数,默认为1.5(2 * 1.5)
<bounceInterpolator> 无
<cycleInterplolator> android:cycles 整数值,循环的个数,默认为1
<decelerateInterpolator> android:factor 浮点值,减速的速率,默认为1
<linearInterpolator> 无
<overshootInterpolator> 浮点值,超出终点后的张力、拉力,默认为2
下面我们就拿最后一个插值器来举例:
1 |
<?xml version="1.0" encoding="utf-8"?> |
2 |
<overshootInterpolator xmlns:android="http://schemas.android.com/apk/res/android" |
3 |
android:tension="7.0"/> |
上面的代码中,我们把张力改为7.0,然后将此文件命名为my_overshoot_interpolator.xml,放置于/res/anim下,我们就可以引用到自定义的插值器了:
1 |
<scale xmlns:android="http://schemas.android.com/apk/res/android" |
2 |
android:interpolator="@anim/my_overshoot_interpolator" |
如果以上这些简单的定义还不能满足我们的需求,那么我们就需要考虑一下自己定义插值器类了。
我们可以实现Interpolator接口,因为上面所有的Interpolator都实现了Interpolator接口,这个接口定义了一个方法:float getInterpolation(float input);
此方法由系统调用,input代表动画的时间,在0和1之间,也就是开始和结束之间。
线性(匀速)插值器定义如下:
1 |
public float getInterpolation(float input) { |
加速减速插值器定义如下:
1 |
public float getInterpolation(float input) { |
2 |
return (float)(Math.cos((input + 1) * Math.PI) / 2.0f) + 0.5f; |
有兴趣的话,大家可以尝试一下自定义一个插值器。
讲了这么久的概念,下面我们就结合实例来演示一下几种Tween动画的应用。
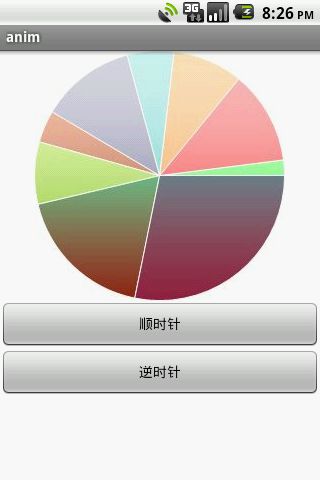
先来介绍一下旋转动画的使用,布局文件/res/layout/rotate.xml如下:
01 |
<?xml version="1.0" encoding="utf-8"?> |
03 |
xmlns:android="http://schemas.android.com/apk/res/android" |
04 |
android:orientation="vertical" |
05 |
android:layout_width="fill_parent" |
06 |
android:layout_height="fill_parent" |
07 |
android:background="#FFFFFF"> |
09 |
android:id="@+id/piechart" |
10 |
android:layout_width="wrap_content" |
11 |
android:layout_height="wrap_content" |
12 |
android:layout_gravity="center_horizontal" |
13 |
android:src="@drawable/piechart"/> |
15 |
android:id="@+id/positive" |
16 |
android:layout_width="fill_parent" |
17 |
android:layout_height="wrap_content" |
19 |
android:onClick="positive"/> |
21 |
android:id="@+id/negative" |
22 |
android:layout_width="fill_parent" |
23 |
android:layout_height="wrap_content" |
25 |
android:onClick="negative"/> |
我们定义了一个ImageView,用于显示一个饼状图,演示旋转动画,然后定义了两个按钮,用以运行编码实现的动画。动画定义文件/res/anim/rotate.xml如下:
01 |
<?xml version="1.0" encoding="utf-8"?> |
02 |
<set xmlns:android="http://schemas.android.com/apk/res/android" |
03 |
android:interpolator="@android :anim/accelerate_decelerate_interpolator"> |
05 |
android:fromDegrees="0" |
06 |
android:toDegrees="+360" |
09 |
android:duration="5000"/> |
最后再来看一下RotateActivity.java代码:
01 |
package com.scott.anim; |
03 |
import android.app.Activity; |
04 |
import android.os.Bundle; |
05 |
import android.view.View; |
06 |
import android.view.animation.Animation; |
07 |
import android.view.animation.AnimationUtils; |
08 |
import android.view.animation.LinearInterpolator; |
09 |
import android.view.animation.RotateAnimation; |
11 |
public class RotateActivity extends Activity { |
13 |
private int currAngle; |
14 |
private View piechart; |
17 |
public void onCreate(Bundle savedInstanceState) { |
18 |
super.onCreate(savedInstanceState); |
19 |
setContentView(R.layout.rotate); |
21 |
piechart = findViewById(R.id.piechart); |
22 |
Animation animation = AnimationUtils.loadAnimation(this, R.anim.rotate); |
23 |
piechart.startAnimation(animation); |
26 |
public void positive(View v) { |
27 |
Animation anim = new RotateAnimation(currAngle, currAngle + 180, Animation.RELATIVE_TO_SELF, 0.5f, |
28 |
Animation.RELATIVE_TO_SELF, 0.5f); |
30 |
LinearInterpolator lir = new LinearInterpolator(); |
31 |
anim.setInterpolator(lir); |
32 |
anim.setDuration(1000); |
34 |
anim.setFillAfter(true); |
36 |
if (currAngle > 360) { |
37 |
currAngle = currAngle - 360; |
39 |
piechart.startAnimation(anim); |
42 |
public void negative(View v) { |
43 |
Animation anim = new RotateAnimation(currAngle, currAngle - 180, Animation.RELATIVE_TO_SELF, 0.5f, |
44 |
Animation.RELATIVE_TO_SELF, 0.5f); |
46 |
LinearInterpolator lir = new LinearInterpolator(); |
47 |
anim.setInterpolator(lir); |
48 |
anim.setDuration(1000); |
50 |
anim.setFillAfter(true); |
52 |
if (currAngle < -360) { |
53 |
currAngle = currAngle + 360; |
55 |
piechart.startAnimation(anim); |
然后,看一下渐变动画,布局文件/res/layout/alpha.xml如下:
01 |
<?xml version="1.0" encoding="utf-8"?> |
03 |
xmlns:android="http://schemas.android.com/apk/res/android" |
04 |
android:layout_width="fill_parent" |
05 |
android:layout_height="fill_parent" |
06 |
android:background="#FFFFFF"> |
08 |
android:id="@+id/splash" |
09 |
android:layout_width="fill_parent" |
10 |
android:layout_height="fill_parent" |
11 |
android:layout_gravity="center" |
12 |
android:src="@drawable/splash"/> |
14 |
android:layout_width="fill_parent" |
15 |
android:layout_height="wrap_content" |
16 |
android:layout_gravity="bottom" |
18 |
android:onClick="alpha"/> |
动画定义文件/res/anim/alpha.xml如下:
1 |
<?xml version="1.0" encoding="utf-8"?> |
2 |
<set xmlns:android="http://schemas.android.com/apk/res/android"> |
4 |
android:fromAlpha="0.0" |
6 |
android:duration="3000"/> |
AlphaActivity.java代码如下:
01 |
package com.scott.anim; |
03 |
import android.app.Activity; |
04 |
import android.os.Bundle; |
05 |
import android.util.Log; |
06 |
import android.view.View; |
07 |
import android.view.animation.AlphaAnimation; |
08 |
import android.view.animation.Animation; |
09 |
import android.view.animation.Animation.AnimationListener; |
10 |
import android.view.animation.AnimationUtils; |
11 |
import android.widget.ImageView; |
13 |
public class AlphaActivity extends Activity implements AnimationListener { |
15 |
private ImageView splash; |
18 |
protected void onCreate(Bundle savedInstanceState) { |
19 |
super.onCreate(savedInstanceState); |
20 |
setContentView(R.layout.alpha); |
22 |
splash = (ImageView) findViewById(R.id.splash); |
23 |
Animation anim = AnimationUtils.loadAnimation(this, R.anim.alpha); |
24 |
anim.setAnimationListener(this); |
25 |
splash.startAnimation(anim); |
28 |
public void alpha(View view) { |
29 |
Animation anim = new AlphaAnimation(1.0f, 0.0f); |
30 |
anim.setDuration(3000); |
31 |
anim.setFillAfter(true); |
32 |
splash.startAnimation(anim); |
36 |
public void onAnimationStart(Animation animation) { |
37 |
Log.i("alpha", "onAnimationStart called."); |
41 |
public void onAnimationEnd(Animation animation) { |
42 |
Log.i("alpha", "onAnimationEnd called"); |
46 |
public void onAnimationRepeat(Animation animation) { |
47 |
Log.i("alpha", "onAnimationRepeat called"); |
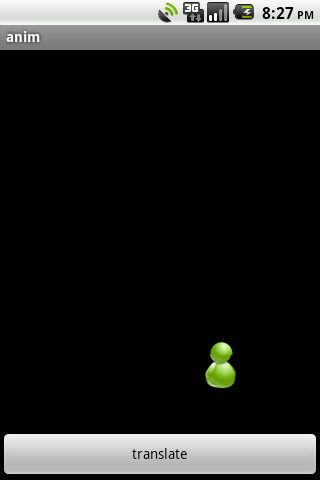
接着看一下位移动画,布局文件/res/layout/translate.xml如下:
01 |
<?xml version="1.0" encoding="utf-8"?> |
03 |
xmlns:android="http://schemas.android.com/apk/res/android" |
04 |
android:orientation="vertical" |
05 |
android:layout_width="fill_parent" |
06 |
android:layout_height="fill_parent"> |
08 |
android:id="@+id/trans_image" |
09 |
android:layout_width="wrap_content" |
10 |
android:layout_height="wrap_content" |
11 |
android:layout_weight="1" |
12 |
android:src="@drawable/person"/> |
14 |
android:id="@+id/trans_button" |
15 |
android:layout_width="fill_parent" |
16 |
android:layout_height="wrap_content" |
17 |
android:layout_gravity="bottom" |
18 |
android:text="translate" |
19 |
android:onClick="translate"/> |
动画定义文件/res/anim/translate.xml如下:
01 |
<?xml version="1.0" encoding="utf-8"?> |
02 |
<set xmlns:android="http://schemas.android.com/apk/res/android" |
03 |
android:interpolator="@android :anim/bounce_interpolator"> |
05 |
android:fromXDelta="0" |
06 |
android:fromYDelta="0" |
07 |
android:toXDelta="200" |
08 |
android:toYDelta="300" |
09 |
android:duration="2000"/> |
然后TranslateActivity.java代码如下:
01 |
package com.scott.anim; |
03 |
import android.app.Activity; |
04 |
import android.os.Bundle; |
05 |
import android.view.View; |
06 |
import android.view.animation.Animation; |
07 |
import android.view.animation.AnimationUtils; |
08 |
import android.view.animation.OvershootInterpolator; |
09 |
import android.view.animation.TranslateAnimation; |
10 |
import android.widget.ImageView; |
12 |
public class TranslateActivity extends Activity { |
14 |
private ImageView trans_iamge; |
17 |
protected void onCreate(Bundle savedInstanceState) { |
18 |
super.onCreate(savedInstanceState); |
19 |
setContentView(R.layout.tanslate); |
20 |
trans_iamge = (ImageView) findViewById(R.id.trans_image); |
21 |
Animation anim = AnimationUtils.loadAnimation(this, R.anim.translate); |
22 |
anim.setFillAfter(true); |
23 |
trans_iamge.startAnimation(anim); |
26 |
public void translate(View view) { |
27 |
Animation anim = new TranslateAnimation(200, 0, 300, 0); |
28 |
anim.setDuration(2000); |
29 |
anim.setFillAfter(true); |
30 |
OvershootInterpolator overshoot = new OvershootInterpolator(); |
31 |
anim.setInterpolator(overshoot); |
32 |
trans_iamge.startAnimation(anim); |
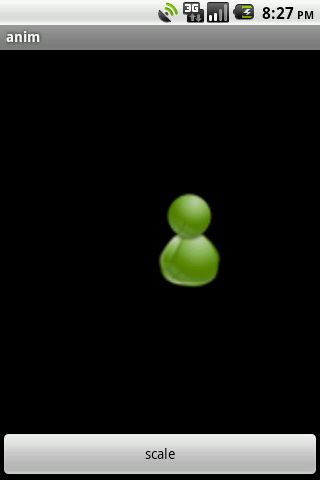
最后,我们再来看以下缩放动画,布局文件/res/layout/scale.xml如下:
01 |
<?xml version="1.0" encoding="utf-8"?> |
03 |
xmlns:android="http://schemas.android.com/apk/res/android" |
04 |
android:orientation="vertical" |
05 |
android:layout_width="fill_parent" |
06 |
android:layout_height="fill_parent"> |
08 |
android:id="@+id/scale_image" |
09 |
android:layout_width="wrap_content" |
10 |
android:layout_height="wrap_content" |
11 |
android:layout_gravity="center" |
12 |
android:layout_weight="1" |
13 |
android:src="@drawable/person"/> |
15 |
android:id="@+id/scale_button" |
16 |
android:layout_width="fill_parent" |
17 |
android:layout_height="wrap_content" |
18 |
android:layout_gravity="bottom" |
20 |
android:onClick="sclae"/> |
动画定义文件/res/anim/scale.xml如下:
01 |
<?xml version="1.0" encoding="utf-8"?> |
02 |
<set xmlns:android="http://schemas.android.com/apk/res/android" |
03 |
android:interpolator="@android :anim/bounce_interpolator"> |
05 |
android:fromXScale="1.0" |
06 |
android:toXScale="2.0" |
07 |
android:fromYScale="1.0" |
08 |
android:toYScale="2.0" |
11 |
android:duration="2000"/> |
13 |
android:fromAlpha="0.0" |
15 |
android:duration="3000"/> |
然后ScaleActivity.java代码如下:
01 |
package com.scott.anim; |
03 |
import android.app.Activity; |
04 |
import android.os.Bundle; |
05 |
import android.view.View; |
06 |
import android.view.animation.Animation; |
07 |
import android.view.animation.AnimationUtils; |
08 |
import android.view.animation.BounceInterpolator; |
09 |
import android.view.animation.ScaleAnimation; |
10 |
import android.widget.ImageView; |
12 |
public class ScaleActivity extends Activity { |
14 |
private ImageView scale_iamge; |
17 |
protected void onCreate(Bundle savedInstanceState) { |
18 |
super.onCreate(savedInstanceState); |
19 |
setContentView(R.layout.scale); |
20 |
scale_iamge = (ImageView) findViewById(R.id.scale_image); |
21 |
Animation anim = AnimationUtils.loadAnimation(this, R.anim.scale); |
22 |
anim.setFillAfter(true); |
23 |
scale_iamge.startAnimation(anim); |
26 |
public void sclae(View view) { |
27 |
Animation anim = new ScaleAnimation(2.0f, 1.0f, 2.0f, 1.0f, |
28 |
Animation.RELATIVE_TO_SELF, 0.5f, |
29 |
Animation.RELATIVE_TO_SELF, 0.5f); |
30 |
anim.setDuration(2000); |
31 |
anim.setFillAfter(true); |
32 |
BounceInterpolator bounce = new BounceInterpolator(); |
33 |
anim.setInterpolator(bounce); |
34 |
scale_iamge.startAnimation(anim); |
几种动画运行效果如下图所示: