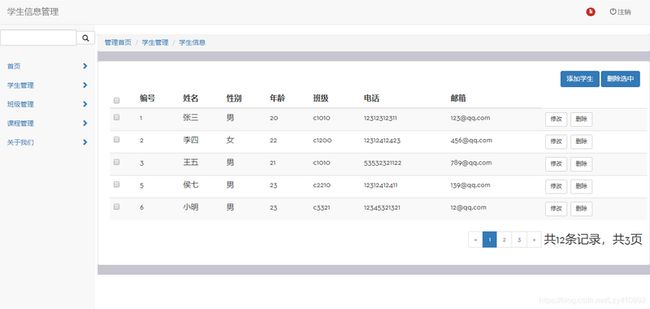
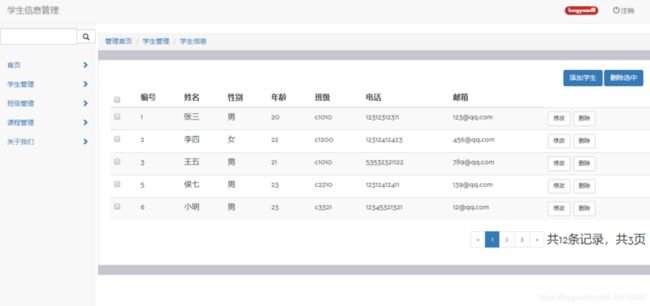
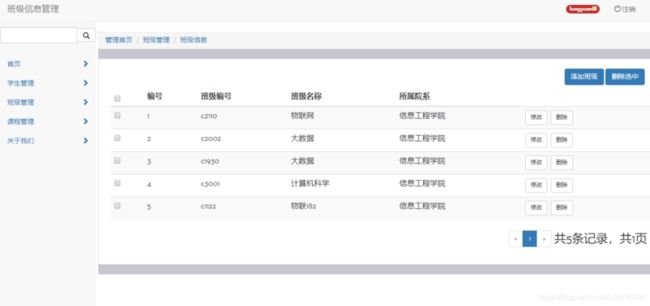
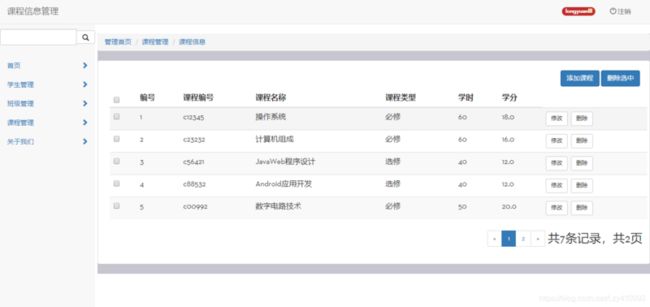
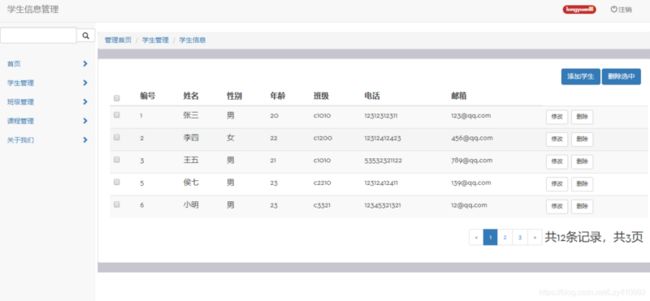
JavaWeb课程设计,通过Jsp+Servlet+MySql设计实现,功能比较简单,用户可以通过登录注册方式进入管理界面可以管理学生信息,班级信息,课程信息等信息。实现了分页查询,添加信息、修改信息、删除信息、选中删除等功能,下面是运行的界面:
相关技术:
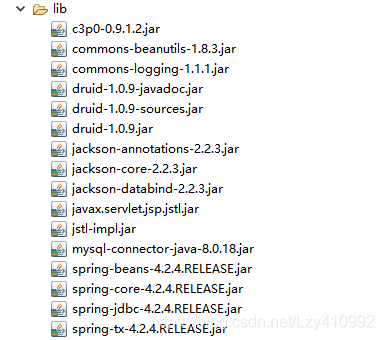
Servlet+JSP+Bootstrap+Jquery+MYSQL
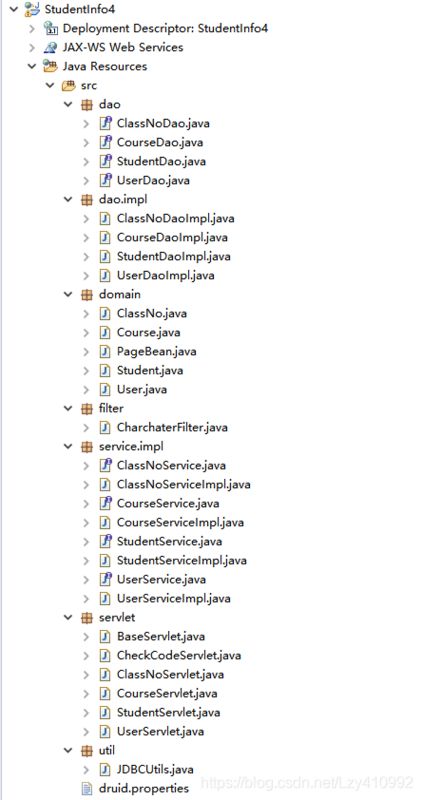
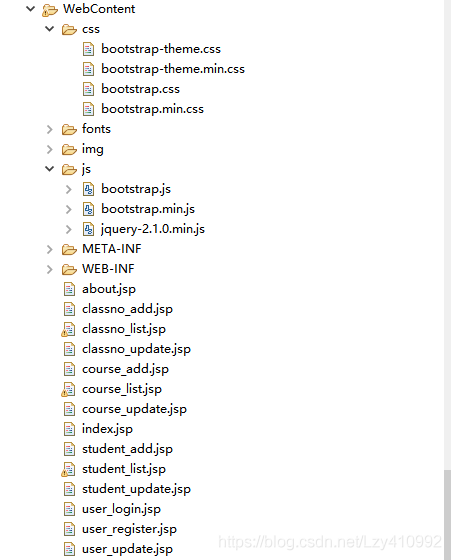
项目目录:
数据库表结构:
`create database StudentInfo;
use StudentInfo;
drop table if exists student;
drop table if exists user;
drop table if exists class;
drop table if exists course;

#用户表
create table user(
    id int auto_increment primary key,
    username nvarchar(20) null,
    password nvarchar(20) null,
    name nvarchar(20) null,
    gender nchar(10) null,
    age int null,
    classno nvarchar(20) null,
    phone nvarchar(11) unique null,
    email nvarchar(30) null
);

#学生表
create table student(
    id int auto_increment primary key,
    name nvarchar(20) null,
    gender nvarchar(10) null,
    age int null,
    classno nvarchar(20) null,
    phone nvarchar(11) unique null,
    email nvarchar(30) null
);

#班级表
create table class(
    id int auto_increment primary key,
    cno nvarchar(10) null,
    classname nvarchar(30) null,
    department nvarchar(30) null
);

#课程表
create table course(
    id int auto_increment primary key,
    courseno nvarchar(20) null,
    coursename nvarchar(20) null,
    type nvarchar(8) null,
    period int null,
    credit double null
);`

*   1
*   2
*   3
*   4
*   5
*   6
*   7
*   8
*   9
*   10
*   11
*   12
*   13
*   14
*   15
*   16
*   17
*   18
*   19
*   20
*   21
*   22
*   23
*   24
*   25
*   26
*   27
*   28
*   29
*   30
*   31
*   32
*   33
*   34
*   35
*   36
*   37
*   38
*   39
*   40
*   41
*   42
*   43
*   44
*   45
*   46
*   47
*   48
用户信息表:User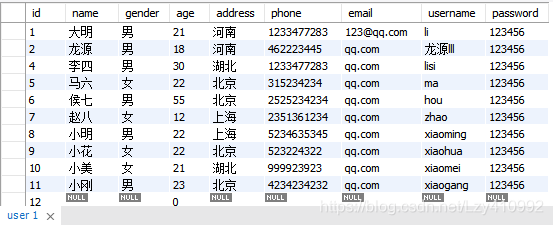
学生信息表:Student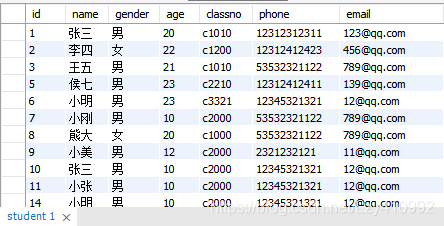
班级信息表:Class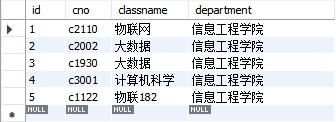
课程信息表:Course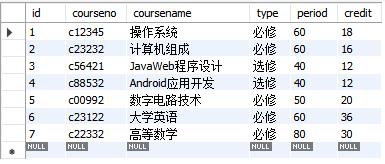
功能展示:
用户登录:
用户注册: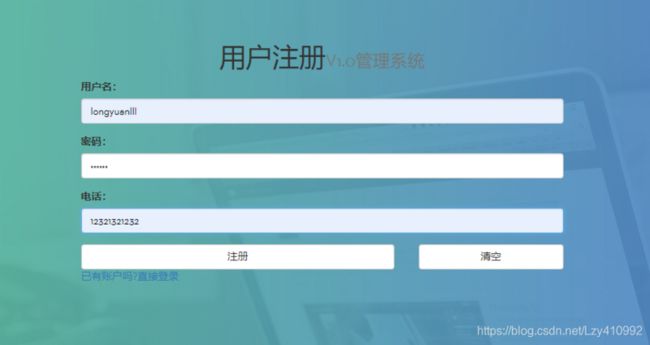
登录成功: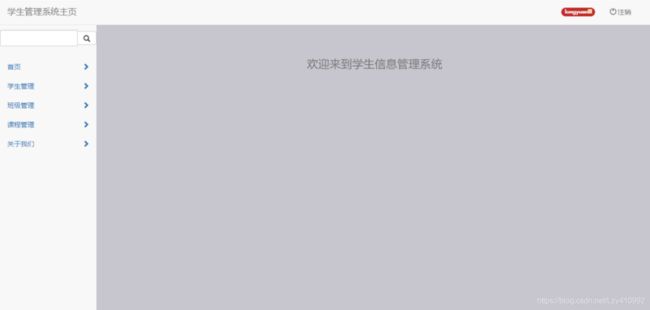
点击左上角用户名完善个人信息: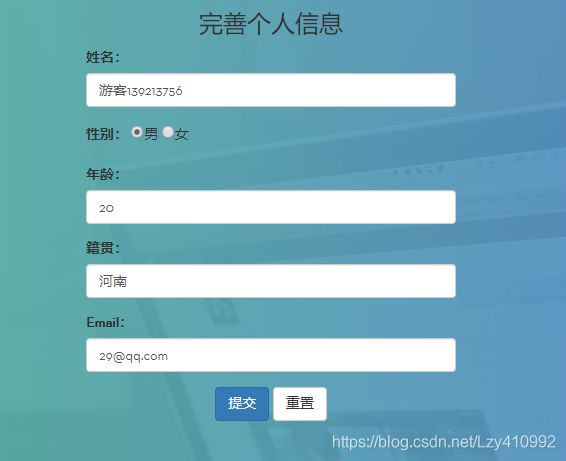
信息管理部分实现了分页展示,增、删、改、查、批量删除
设计步骤
代码比较多,只展示比较重要的部分:
1. 数据库连接实现
数据库连接部分使用的是druid数据库连接池,首先先进行数据库连接池的配置:druid.properties
`driverClassName=com.mysql.cj.jdbc.Driver
url=jdbc:mysql://localhost:3306/mydb?serverTimezone=GMT%2B8&useUnicode=true&characterEncoding=utf-8
username=root
password=123456
initialSize=5
maxActive=10
maxWait=3000`

*   1
*   2
*   3
*   4
*   5
*   6
*   7
然后编写数据库连接工具类:
`/**
 * JDBC工具类 使用Durid连接池
 */
public class JDBCUtils {

    private static DataSource ds ;
    static {
        try {
            //1.加载配置文件
            Properties pro = new Properties();
            //使用ClassLoader加载配置文件,获取字节输入流
            InputStream is = JDBCUtils.class.getClassLoader().getResourceAsStream("druid.properties");
            pro.load(is);

            //2.初始化连接池对象
            ds = DruidDataSourceFactory.createDataSource(pro);
        } catch (IOException e) {
            e.printStackTrace();
        } catch (Exception e) {
            e.printStackTrace();
        }
    }

    /**
     * 获取连接池对象
     */
    public static DataSource getDataSource(){
        return ds;
    }

    /**
     * 获取连接Connection对象
     */
    public static Connection getConnection() throws SQLException {
        return  ds.getConnection();
    }
}`

*   1
*   2
*   3
*   4
*   5
*   6
*   7
*   8
*   9
*   10
*   11
*   12
*   13
*   14
*   15
*   16
*   17
*   18
*   19
*   20
*   21
*   22
*   23
*   24
*   25
*   26
*   27
*   28
*   29
*   30
*   31
*   32
*   33
*   34
*   35
*   36
*   37
这里我们使用JdbcTemplate来进行数据连接操作数据库:
`private JdbcTemplate template = new JdbcTemplate(JDBCUtils.getDataSource());`

*   1
2. 实现持久层(Dao)
编写持久层接口:
`/**
 * 用户操作的DAO
 */
public interface UserDao {

}`

*   1
*   2
*   3
*   4
*   5
*   6
实现持久层接口:
`public class UserDaoImpl implements UserDao {

    private JdbcTemplate template = new JdbcTemplate(JDBCUtils.getDataSource());

}`

*   1
*   2
*   3
*   4
*   5
3. 实现业务层(Service)
编写业务层接口:
`/**
 * 用户管理的业务接口
 */
public interface UserService {

}`

*   1
*   2
*   3
*   4
*   5
*   6
实现业务层接口:
`public class UserServiceImpl implements UserService {
    private UserDao dao = new UserDaoImpl();

}`

*   1
*   2
*   3
*   4
4.实现表现层功能
编写表现层:
`@WebServlet("/loginServlet")
public class LoginServlet extends HttpServlet {
    protected void doPost(HttpServletRequest request, HttpServletResponse response) throws ServletException, IOException {
       /*
        * Code
        */
    }

    protected void doGet(HttpServletRequest request, HttpServletResponse response) throws ServletException, IOException {
        this.doPost(request, response);
    }
}`

*   1
*   2
*   3
*   4
*   5
*   6
*   7
*   8
*   9
*   10
*   11
*   12
5.由于表现层Servlet太多,我们可以做简单的提取
编写BaseServlet类,然后由其他servlet继承
`public class BaseServlet extends HttpServlet {

    private static final long serialVersionUID = 1L;

    public void service(HttpServletRequest request, HttpServletResponse response) throws ServletException, IOException {

       try {
           // 获取请求标识
           String methodName = request.getParameter("method");
           // 获取指定类的字节码对象
           Class clazz = this.getClass();//这里的this指的是继承BaseServlet对象
           // 通过类的字节码对象获取方法的字节码对象
           Method method = clazz.getMethod(methodName, HttpServletRequest.class, HttpServletResponse.class);
           // 让方法执行
           method.invoke(this, request, response);

       } catch (Exception e) {
           // TODO Auto-generated catch block
           e.printStackTrace();
       }
    }
}`

*   1
*   2
*   3
*   4
*   5
*   6
*   7
*   8
*   9
*   10
*   11
*   12
*   13
*   14
*   15
*   16
*   17
*   18
*   19
*   20
*   21
*   22
5.编写对应的前端页面:以user_login.jsp为例
`<%@ page contentType="text/html;charset=UTF-8" language="java" %>
<%@taglib prefix="c" uri="http://java.sun.com/jsp/jstl/core" %>
管理员登录
管理员登录
${login_msg}
`
* 1
* 2
* 3
* 4
* 5
* 6
* 7
* 8
* 9
* 10
* 11
* 12
* 13
* 14
* 15
* 16
* 17
* 18
* 19
* 20
* 21
* 22
* 23
* 24
* 25
* 26
* 27
* 28
* 29
* 30
* 31
* 32
* 33
* 34
* 35
* 36
* 37
* 38
* 39
* 40
* 41
* 42
* 43
* 44
* 45
* 46
* 47
* 48
* 49
* 50
* 51
* 52
* 53
* 54
* 55
* 56
* 57
* 58
* 59
* 60
* 61
* 62
* 63
* 64
* 65
* 66
运行截图: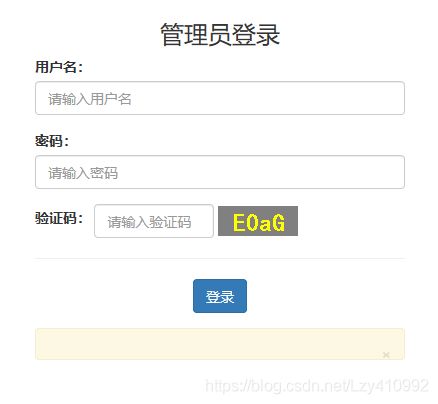
测试登录功能,发现中文乱码问题(直接继承HttpServlet不会出现,继承BaseServlet会出现)
6.编写过滤器解决中文乱码问题
`@WebFilter("/*")
public class CharchaterFilter implements Filter {

    protected String encoding;

    @Override
    public void destroy() {
        // TODO 自动生成的方法存根

    }

    @Override
    public void doFilter(ServletRequest req, ServletResponse res, FilterChain chain) throws IOException, ServletException {
        // TODO 自动生成的方法存根
        HttpServletRequest request=(HttpServletRequest)req;
        HttpServletResponse response=(HttpServletResponse)res;

        String method=request.getMethod();

        if(method.equalsIgnoreCase("post")){
            request.setCharacterEncoding("utf-8");
        }

        response.setContentType("text/html;charset=utf-8");

        chain.doFilter(request, response);
    }

    @Override
    public void init(FilterConfig arg0) throws ServletException {
        // TODO 自动生成的方法存根

    }

}`

*   1
*   2
*   3
*   4
*   5
*   6
*   7
*   8
*   9
*   10
*   11
*   12
*   13
*   14
*   15
*   16
*   17
*   18
*   19
*   20
*   21
*   22
*   23
*   24
*   25
*   26
*   27
*   28
*   29
*   30
*   31
*   32
*   33
*   34
*   35
7.编写列表页面,并在后端代码上实现响应的功能
`<%@ page language="java" contentType="text/html; charset=UTF-8"
pageEncoding="UTF-8"%>
<%@ taglib uri="http://java.sun.com/jsp/jstl/core" prefix="c"%>
网站后台管理
`
* 1
* 2
* 3
* 4
* 5
* 6
* 7
* 8
* 9
* 10
* 11
* 12
* 13
* 14
* 15
* 16
* 17
* 18
* 19
* 20
* 21
* 22
* 23
* 24
* 25
* 26
* 27
* 28
* 29
* 30
* 31
* 32
* 33
* 34
* 35
* 36
* 37
* 38
* 39
* 40
* 41
* 42
* 43
* 44
* 45
* 46
* 47
* 48
* 49
* 50
* 51
* 52
* 53
* 54
* 55
* 56
* 57
* 58
* 59
* 60
* 61
* 62
* 63
* 64
* 65
* 66
* 67
* 68
* 69
* 70
* 71
* 72
* 73
* 74
* 75
* 76
* 77
* 78
* 79
* 80
* 81
* 82
* 83
* 84
* 85
* 86
* 87
* 88
* 89
* 90
* 91
* 92
* 93
* 94
* 95
* 96
* 97
* 98
* 99
* 100
* 101
* 102
* 103
* 104
* 105
* 106
* 107
* 108
* 109
* 110
* 111
* 112
* 113
* 114
* 115
* 116
* 117
* 118
* 119
* 120
* 121
* 122
* 123
* 124
* 125
* 126
* 127
* 128
* 129
* 130
* 131
* 132
* 133
* 134
* 135
* 136
* 137
* 138
* 139
* 140
* 141
* 142
* 143
* 144
* 145
* 146
* 147
* 148
* 149
* 150
* 151
* 152
* 153
* 154
* 155
* 156
* 157
* 158
* 159
* 160
* 161
* 162
* 163
* 164
* 165
* 166
* 167
* 168
* 169
* 170
* 171
* 172
* 173
* 174
* 175
* 176
* 177
* 178
* 179
* 180
* 181
* 182
* 183
* 184
* 185
* 186
* 187
* 188
* 189
* 190
* 191
* 192
* 193
* 194
* 195
* 196
* 197
* 198
* 199
* 200
* 201
* 202
* 203
* 204
* 205
* 206
* 207
* 208
* 209
* 210
* 211
* 212
* 213
* 214
* 215
* 216
* 217
* 218
* 219
* 220
* 221
* 222
* 223
* 224
* 225
* 226
* 227
* 228
* 229
* 230
* 231
* 232
* 233
* 234
* 235
* 236
* 237
* 238
* 239
* 240
* 241
* 242
* 243
* 244
* 245
* 246
* 247
* 248
* 249
* 250
* 251
* 252
8.实现不同信息的删除修改功能,并进一步完善
`<%@ page contentType="text/html;charset=UTF-8" language="java" %>
<%@taglib prefix="c" uri="http://java.sun.com/jsp/jstl/core" %>
修改学生信息
修改学生信息
`
* 1
* 2
* 3
* 4
* 5
* 6
* 7
* 8
* 9
* 10
* 11
* 12
* 13
* 14
* 15
* 16
* 17
* 18
* 19
* 20
* 21
* 22
* 23
* 24
* 25
* 26
* 27
* 28
* 29
* 30
* 31
* 32
* 33
* 34
* 35
* 36
* 37
* 38
* 39
* 40
* 41
* 42
* 43
* 44
* 45
* 46
* 47
* 48
* 49
* 50
* 51
* 52
* 53
* 54
* 55
* 56
* 57
* 58
* 59
* 60
* 61
* 62
* 63
* 64
* 65
* 66
* 67
* 68
* 69
* 70
* 71
* 72
* 73
