Ubuntu从头开始使用Docker运行OpenPose
Ubuntu从头开始使用Docker运行OpenPose
- Docker安装OpenPose
-
- Ubuntu系统安装
-
- Ubuntu系统下载镜像选择:
- Ubuntu系统安装:
- 显卡驱动安装:
- 硬件及软件环境
- docker
-
- docker安装:
- NVIDIA Container Toolkit安装:
- docker 结构:
- docker 学习:
- openpose
-
- 下载安装镜像文件
-
- 通过dockerfile:
- 通过docker images:
- 镜像文件的使用
-
- 执行镜像:
- 再容器中运行openpose:
Docker安装OpenPose
Ubuntu系统安装
Ubuntu系统下载镜像选择:
		阿里云镜像地址
		ubuntu 14.04:
		[http://mirrors.aliyun.com/ubuntu-releases/14.04/](http://mirrors.aliyun.com/ubuntu-releases/14.04/)
		ubuntu 16.04:
		[http://mirrors.aliyun.com/ubuntu-releases/16.04/](http://mirrors.aliyun.com/ubuntu-releases/16.04/)
		ubuntu 18.04:
		[http://mirrors.aliyun.com/ubuntu-releases/18.04/](http://mirrors.aliyun.com/ubuntu-releases/18.04/)
		本人使用的18.04.4
Ubuntu系统安装:
参考这一篇:https://www.cnblogs.com/masbay/p/10745170.html
注意分区格式:
想要删除ubuntu的系统用软件:DiskGenius
直接删除分区
显卡驱动安装:
自动安装的方法:https://blog.csdn.net/qq_37935670/article/details/80377196
手动下载驱动安装方法:
https://blog.csdn.net/weixin_43820996/article/details/100676292
https://blog.csdn.net/u011037837/article/details/84503376
https://blog.csdn.net/chentianting/article/details/85089403
笔记本安装坑比较多
台式机会简单很多
硬件及软件环境
硬件为i7-7820x,内存32G,显卡TITAN X (Pascal)12G显存,环境为ubuntu18.04.4显卡驱动为440.59
# 查看负载情况
$ htop
# 查看显卡驱动
$ nvidia-smi
docker
docker安装:
参考:https://www.runoob.com/docker/ubuntu-docker-install.html
# 卸载旧版本
$ sudo apt-get remove docker docker-engine docker.io containerd runc
# 更新 apt 包索引
$ sudo apt-get update
# 安装 apt 依赖包
$ sudo apt-get install \
    apt-transport-https \
    ca-certificates \
    curl \
    gnupg-agent \
    software-properties-common
# 添加 Docker 的官方 GPG 密钥
$ curl -fsSL https://download.docker.com/linux/ubuntu/gpg | sudo apt-key add -
# 阿里
curl -fsSL https://mirrors.aliyun.com/docker-ce/linux/ubuntu/gpg | sudo apt-key add -
# 命令验证
$ sudo apt-key fingerprint 0EBFCD88
# 设置stable存储库
$ sudo add-apt-repository "deb [arch=amd64] https://download.docker.com/linux/ubuntu $(lsb_release -cs) stable"
$ sudo apt-get update
# 安装最新版本的Docker CE
$ sudo apt-get install -y docker-ce
验证安装是否成功docker
# 测试安装是否成功
$ systemctl status docker
# 若未启动,则启动docker服务:
$ sudo systemctl start docker
# 需要下载一会,不要急
$ sudo docker pull hello-world
$ sudo docker run hello-world
显示中有Hello from Docker!则安装成功
解决Ubuntu18.04启动Docker"Got permission denied while trying to connect to the Docker daemon socket"问题
sudo groupadd docker #添加docker用户组
sudo gpasswd -a $XXX docker #检测当前用户是否已经在docker用户组中,其中XXX为用户名,例如我的,liangll
sudo gpasswd -a $USER docker #将当前用户添加至docker用户组
newgrp docker #更新docker用户组
NVIDIA Container Toolkit安装:
为了在docker中支持GPU,NVidia之前是弄了个nvidia-docker2,现在升级为NVIDIA Container Toolkit了。官方说法是"Usage of nvidia-docker2 packages are deprecated since NVIDIA GPUs are now natively supported as devices in the Docker runtime"。
安装nvidia-docker必须要显卡驱动,CUDA不必须
Ubuntu 16.04/18.04/20.04, Debian Jessie/Stretch/Buster用以下方法,其他的看nvidia-docker网站
# Add the package repositories
$ distribution=$(. /etc/os-release;echo $ID$VERSION_ID)
$ curl -s -L https://nvidia.github.io/nvidia-docker/gpgkey | sudo apt-key add -
$ curl -s -L https://nvidia.github.io/nvidia-docker/$distribution/nvidia-docker.list | sudo tee /etc/apt/sources.list.d/nvidia-docker.list

$ sudo apt-get update && sudo apt-get install -y nvidia-container-toolkit
$ sudo systemctl restart docker
# 如果下载不动,可能需要
# 测试安装是否成功
# Test nvidia-smi with the latest official CUDA image
$ docker run --gpus all nvidia/cuda:10.0-base nvidia-smi
docker 结构:
docker 学习:
中文:
https://www.runoob.com/docker/docker-tutorial.html
官方英文:
https://docs.docker.com/reference/
openpose
下载安装镜像文件
通过dockerfile:
Dockerfile 是一个用来构建镜像的文本文件,文本内容包含了一条条构建镜像所需的指令和说明。
使用方法:
https://www.cnblogs.com/panwenbin-logs/p/8007348.html
第一步:下载dockerfile,或是自己创建新的
openpose 的 Dockerfile在这里下载CUDA 10 CUDnn 7 Python 3 (本文未使用):
https://download.csdn.net/download/weixin_44061195/12507171
# -f :指定要使用的Dockerfile路径(或是直接cd到路径后直接写文件名也可以);
# --tag, -t: 镜像的名字及标签,通常 name:tag 或者 name 格式;可以在一次构建中为一个镜像设置多个标签。
$ docker build -f Dockerfile -t openpose:tset .
最后的 . 代表本次执行的上下文路径,不能忘写,前面还要加空格
成功后他会自动下载所有需要的环境配置

通过docker images:
在docker hub 上直接找镜像:
https://hub.docker.com/search?q=openpose&type=image
找到镜像后,获取镜像:
官方镜像

# 下载Images
# 多运行几遍就能都下载完全了
$ docker pull mjsobrep/openpose
但是他的指导有点过时。
pull完成后查看镜像
# 查看有哪些镜像
$ docker images
镜像文件的使用
执行镜像:
run 命令:https://www.runoob.com/docker/docker-run-command.html
docker run [OPTIONS] IMAGE [COMMAND] [ARG…]
每次执行该命令则生成一个独立的容器(containers)
-t 表示在新容器内指定一个伪终端或终端
-i 表示允许我们对容器内的 (STDIN) 进行交互。
mjsobrep/openpose 为刚PULL的镜像名
我们在容器内还指定了一个新的命令: /bin/bash ,这将在容器内启动 bash shell。
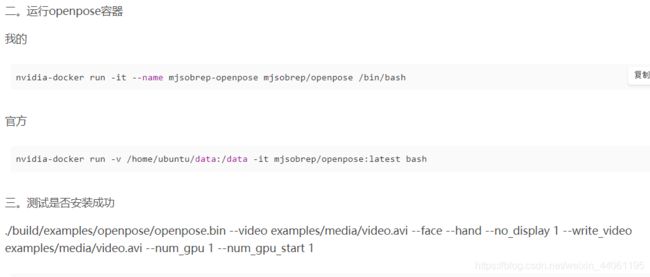
坑:注意有些指导的是用下图命令

现在英伟达把nvidia-docker升级成了NVIDIA Container Toolkit,所以一定要安装官方的指导文件写命令
官方示例为:
#### Test nvidia-smi with the latest official CUDA image
docker run --gpus all nvidia/cuda:10.0-base nvidia-smi

# Start a GPU enabled container on two GPUs
docker run --gpus 2 nvidia/cuda:10.0-base nvidia-smi

# Starting a GPU enabled container on specific GPUs
docker run --gpus '"device=1,2"' nvidia/cuda:10.0-base nvidia-smi
docker run --gpus '"device=UUID-ABCDEF,1"' nvidia/cuda:10.0-base nvidia-smi

# Specifying a capability (graphics, compute, ...) for my container
# Note this is rarely if ever used this way
docker run --gpus all,capabilities=utility nvidia/cuda:10.0-base nvidia-smi
本项目示例为:
# --gups all 是再显卡上运行docker
sudo docker run --gpus all -t -i mjsobrep/openpose /bin/bash
可以使用使用 exit 命令或者使用 CTRL-D 来退出容器。

再容器中运行openpose:
# 查看所有containers
$ docker ps -a
# 启动容器mjsobrep/openpose
$ docker start a77194a1b7ed
# 连接到正在运行中的容器mjsobrep/openpose
$ docker attch a77194a1b7ed
# 新建个输出json的文件加再openpose文件夹下
$ mkdir output
# 测试openpose是否可以正常运行
$ ./build/examples/openpose/openpose.bin --image_dir examples/media/ --write_keypoint_json output/ --no_display
成功后画面

附:
openpose使用指导链接
openpose快速启动链接
NVIDIA Container Toolkit安装使用指南


