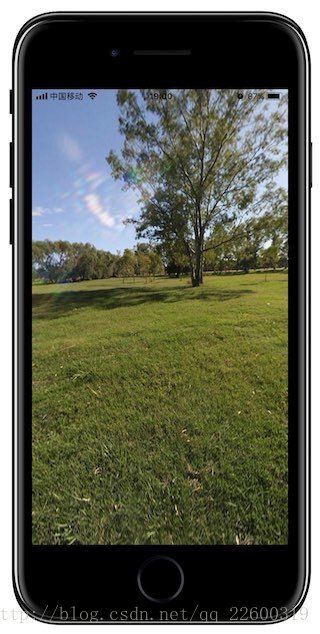
利用OpenGL实现IOS上VR全景图
VR做为近几年较火的一个新技术,获得了许多大公司的关注,如Google、微软、Facebook都先后进入这个领域,希望能够在VR上能抢占先机,获得市场。2016又被称为VR元年,借此势头VR获得了巨大的发展,因此作为IT人员有必要对VR有更多的学习和了解,而全景图是VR技术中发展较火的一个技术,许多全景公司做的很好,如Insta360,Wipet、理光、暴风魔眼等公司。由于最近在做与全景有关的开发,但是网上相关学习资源较少,除了Google开源的Cardboard源码之外,很少有完整的全景开发资料。因此,通过借鉴网上的一些资料,整理出比较完善的IOS全景开发,供大家学习使用。废话不多说,上代码:
PanoramaController 这是一个我封装好的类,它继承于GLKViewController,这是apple GLKit库中的类,作为呈现OpenGL内容的视图控制器,它配合GLKView来显示动画效果,其详细介绍可以参考官网API,下面是头文件。
PanoramaController.h

#import
#import
#import

@interface PanoramaController : GLKViewController
//全景图片的名字
@property (nonatomic, copy  ) NSString        *imageName;
//全景图片的类型 jpeg、jpg、png
@property (nonatomic, copy  ) NSString        *imageNameType;
//陀螺系
@property (nonatomic, strong) CMMotionManager *motionManager;
//作为OpenGL绘制的图显示在此View上
@property (nonatomic, strong) GLKView         *panoramaView;

/**
 初始化全景控制器

 @param imageName 全景图名字
 @param type 全景图类型,默认是jpg
 @return PanoramaController
 */
- (instancetype)initWithImageName:(NSString *)imageName type:(NSString *)type;
下面是PanoramaController.m中的类扩展(extension),里面主要是一些参数。
PanoramaController.m

#import "PanoramaController.h"
#import "PanoramaUtil.h"

#define ES_PI  (3.14159265f)

#define MAX_VIEW_DEGREE 110.0f  //最大视角
#define MIN_VIEW_DEGREE 50.0f   //最小视角

#define FRAME_PER_SENCOND 60.0  //帧数

@interface PanoramaController ()<GLKViewControllerDelegate,GLKViewDelegate>

@property (nonatomic, strong) EAGLContext              *context;

// 相机的广角角度
@property (nonatomic, assign) CGFloat                  overture;

// 索引数
@property (nonatomic, assign) int                      numIndices;

// 顶点索引缓存指针
@property (nonatomic, assign) GLuint                   vertexIndicesBuffer;

// 顶点缓存指针
@property (nonatomic, assign) GLuint                   vertexBuffer;

// 纹理缓存指针
@property (nonatomic, assign) GLuint                   vertexTexCoord;

// 着色器
@property (nonatomic, strong) GLKBaseEffect            *effect;

// 图片的纹理信息
@property (nonatomic, strong) GLKTextureInfo           *textureInfo;

// 模型坐标系
@property (nonatomic, assign) GLKMatrix4               modelViewMatrix;

// 手势平移距离
@property (nonatomic, assign) CGFloat                  panX;
@property (nonatomic, assign) CGFloat                  panY;

//两指缩放大小
@property (nonatomic, assign) CGFloat                  scale;

//是否双击
@property (nonatomic, assign) BOOL                  isTapScale;

@end
下面是PanoramaController.m中主要的方法:
    //初始化方法
- (instancetype)initWithImageName:(NSString *)imageName type:(NSString *)type;
- (void)createPanoramView; //创建OpenGL渲染的视图
- (void)startDeviceMotion; //开启陀螺仪
- (void)setupOpenGL; // 建立OpenGL的渲染
- (void)addGesture;  // 给全景图添加手势
下面分别看一下各方法的实现:
这个方法是给外部调用的。这里我提示一下,测试时,必须将图片添加到bundle resource里面才能正常显示。
- (instancetype)initWithImageName:(NSString *)imageName type:(NSString *)type{


    self = [super init];

    if (self) {

        self.imageName     = imageName;
        self.imageNameType = type;

        if (type.length == 0) {

            type = @"jpg";
        }

        [self createPanoramView];
    }
    return self;
}
- (void)createPanoramView {

    if (self.imageName == nil) {
        NSAssert(_imageName.length != 0, @"image name is nil,please check image name of PanoramView");
        return;
    }

    _context                              = [[EAGLContext alloc] initWithAPI:kEAGLRenderingAPIOpenGLES3];
    self.panoramaView                     = (GLKView *)self.view;
    self.panoramaView.drawableColorFormat = GLKViewDrawableColorFormatRGBA8888;
    self.panoramaView.drawableDepthFormat = GLKViewDrawableDepthFormat24;

    self.panoramaView.delegate            = self;
    self.delegate                         = self;

    self.panoramaView.context             = _context;

    self.preferredFramesPerSecond         = FRAME_PER_SENCOND;

    [self startDeviceMotion];
    [self setupOpenGL];
    [self addGesture];

    self.view.backgroundColor = [UIColor whiteColor];
}
开启陀螺仪是为了实现全景图能够根据手机的为旋转来显示不同的观察视角。
#pragma mark set device Motion
- (void)startDeviceMotion {
self.motionManager = [[CMMotionManager alloc] init];
//刷新频率
self.motionManager.deviceMotionUpdateInterval = 1/FRAME_PER_SENCOND;
self.motionManager.showsDeviceMovementDisplay = YES;
// 以push的方式开启刷新设备运动信息
[self.motionManager startDeviceMotionUpdatesUsingReferenceFrame:CMAttitudeReferenceFrameXArbitraryCorrectedZVertical];
//记录矩阵变化
_modelViewMatrix = GLKMatrix4Identity;
}OpenGL渲染,里面给了很多注释。
- (void)setupOpenGL {
[EAGLContext setCurrentContext:_context];
glEnable(GL_DEPTH_TEST);
// 顶点
GLfloat *vVertices = NULL;
// 纹理
GLfloat *vTextCoord = NULL;
// 索引
GLushort *indices = NULL;
int numVertices = 0;
//esGenSphere这个函数时C语言写的,是国外一个大牛写的,用来渲染球体环境,在我的github中的PanoramaUtil里面能够看到里面的代码。
_numIndices = esGenSphere(200, 1.0, &vVertices, &vTextCoord, &indices, &numVertices);
// 创建索引buffer并将indices的数据放入
glGenBuffers(1, &_vertexIndicesBuffer);
glBindBuffer(GL_ELEMENT_ARRAY_BUFFER, _vertexIndicesBuffer);
glBufferData(GL_ELEMENT_ARRAY_BUFFER, _numIndices*sizeof(GLushort), indices, GL_STATIC_DRAW);
// 创建顶点buffer并将vVertices中的数据放入
glGenBuffers(1, &_vertexBuffer);
glBindBuffer(GL_ARRAY_BUFFER, _vertexBuffer);
glBufferData(GL_ARRAY_BUFFER, numVertices*3*sizeof(GLfloat), vVertices, GL_STATIC_DRAW);
//设置顶点属性,对顶点的位置,颜色,坐标进行赋值
glEnableVertexAttribArray(GLKVertexAttribPosition);
glVertexAttribPointer(GLKVertexAttribPosition, 3, GL_FLOAT, GL_FALSE, sizeof(GLfloat)*3, NULL);
// 创建纹理buffer并将vTextCoord数据放入
glGenBuffers(1, &_vertexTexCoord);
glBindBuffer(GL_ARRAY_BUFFER, _vertexTexCoord);
glBufferData(GL_ARRAY_BUFFER, numVertices*2*sizeof(GLfloat), vTextCoord, GL_DYNAMIC_DRAW);
//设置纹理属性,对纹理的位置,颜色,坐标进行赋值
glEnableVertexAttribArray(GLKVertexAttribTexCoord0);
glVertexAttribPointer(GLKVertexAttribTexCoord0, 2, GL_FLOAT, GL_FALSE, sizeof(GLfloat)*2, NULL);
// 将图片转换成为纹理信息
NSString *imagePath = [[NSBundle mainBundle] pathForResource:self.imageName ofType:self.imageNameType];
// 由于OpenGL的默认坐标系设置在左下角, 而GLKit在左上角, 因此需要转换
NSDictionary *options = [NSDictionary dictionaryWithObjectsAndKeys:[NSNumber numberWithBool:YES],
GLKTextureLoaderOriginBottomLeft,
nil];
_textureInfo = [GLKTextureLoader textureWithContentsOfFile:imagePath options:options error:nil];
// 设置着色器的纹理
_effect = [[GLKBaseEffect alloc] init];
_effect.texture2d0.enabled = GL_TRUE;
_effect.texture2d0.name = _textureInfo.name;
}添加各种手势,缩放,移动,双击
- (void)addGesture {
/// 平移手势
UIPanGestureRecognizer *pan =[[UIPanGestureRecognizer alloc] initWithTarget:self
action:@selector(panGestture:)];
/// 捏合手势
UIPinchGestureRecognizer *pinch = [[UIPinchGestureRecognizer alloc] initWithTarget:self
action:@selector(pinchGesture:)];
UITapGestureRecognizer *tap = [[UITapGestureRecognizer alloc] initWithTarget:self
action:@selector(tapGesture:)];
tap.numberOfTouchesRequired = 1;
tap.numberOfTapsRequired = 2;
[self.view addGestureRecognizer:pinch];
[self.view addGestureRecognizer:pan];
[self.view addGestureRecognizer:tap];
_scale = 1.0;
}下面是GLKView和GLKViewController中的两个代理方法:
#pragma mark -GLKViewDelegate

- (void)glkView:(GLKView *)view drawInRect:(CGRect)rect {

    /*
    * 初始化OpenGL所需的环境
    */
    /**清除颜色缓冲区内容时候: 使用白色填充*/
    glClearColor(1.0f, 1.0f, 1.0f, 0.0f);
    /**清除颜色缓冲区与深度缓冲区内容*/
    glClear(GL_COLOR_BUFFER_BIT|GL_DEPTH_BUFFER_BIT);
    [_effect prepareToDraw];
    glDrawElements(GL_TRIANGLES, _numIndices, GL_UNSIGNED_SHORT, 0);
}

#pragma mark GLKViewControllerDelegate

- (void)glkViewControllerUpdate:(GLKViewController *)controller {

    /*
    * 根据陀螺系时时刷新显示的内容
    */
    CGSize size    = self.view.bounds.size;
    float aspect   = fabs(size.width / size.height);

    CGFloat radius = [self rotateFromFocalLengh];

    /**GLKMatrix4MakePerspective 配置透视图
     第一个参数, 类似于相机的焦距, 比如10表示窄角度, 100表示广角 一般65-75;
     第二个参数: 表示时屏幕的纵横比
     第三个, 第四参数: 是为了实现透视效果, 近大远处小, 要确保模型位于远近平面之间
     */
    GLKMatrix4 projectionMatrix        = GLKMatrix4MakePerspective(GLKMathDegreesToRadians(radius),
                                                                   aspect,
                                                                   0.1f,
                                                                   1);

    projectionMatrix                   = GLKMatrix4Scale(projectionMatrix, -1.0f, 1.0f, 1.0f);

    CMDeviceMotion *deviceMotion       = self.motionManager.deviceMotion;
    double w                           = deviceMotion.attitude.quaternion.w;
    double wx                          = deviceMotion.attitude.quaternion.x;
    double wy                          = deviceMotion.attitude.quaternion.y;
    double wz                          = deviceMotion.attitude.quaternion.z;

    GLKQuaternion quaternion           = GLKQuaternionMake(-wx, wy, wz, w);
    GLKMatrix4 rotation                = GLKMatrix4MakeWithQuaternion(quaternion);
    //上下滑动,绕X轴旋转
    projectionMatrix                   = GLKMatrix4RotateX(projectionMatrix, -0.005 * _panY);
    projectionMatrix                   = GLKMatrix4Multiply(projectionMatrix, rotation);
    // 为了保证在水平放置手机的时候, 是从下往上看, 因此首先坐标系沿着x轴旋转90度
    projectionMatrix                   = GLKMatrix4RotateX(projectionMatrix, M_PI_2);

    _effect.transform.projectionMatrix = projectionMatrix;
    GLKMatrix4 modelViewMatrix         = GLKMatrix4Identity;
    //左右滑动绕Y轴旋转
    modelViewMatrix                    = GLKMatrix4RotateY(modelViewMatrix, 0.005 * _panX);
    _effect.transform.modelviewMatrix  = modelViewMatrix;


}
根据缩放比例来调整旋转的角度
- (CGFloat)rotateFromFocalLengh{

    CGFloat radius = 100 / _scale;

    // radius不小于50, 不大于110;
    if (radius < MIN_VIEW_DEGREE) {

        radius = MIN_VIEW_DEGREE;
        _scale = 1 / (MIN_VIEW_DEGREE / 100);

    }
    if (radius > MAX_VIEW_DEGREE) {

        radius = MAX_VIEW_DEGREE;
        _scale = 1 / (MAX_VIEW_DEGREE / 100);
    }

    return radius;
}
以上就是全景实现的过程,详细内容,请到我的github上查看。如果有问题还请大家不吝气色的指出,谢谢。
以上至全景图显示还有很大的空间可以优化,还可以集成Google的cardboard来实现VR效果。(提示:对显示的全景图有所要求,一般是4096x2048,2048x1024这些比例的全景图,也可以是相近比例和尺寸的图,不支持高质量的全景图,如10000x3000这种。)
