Idea Java Maven创建项目,添加依赖,引用本地jar,打包jar
idea版本:2020.2
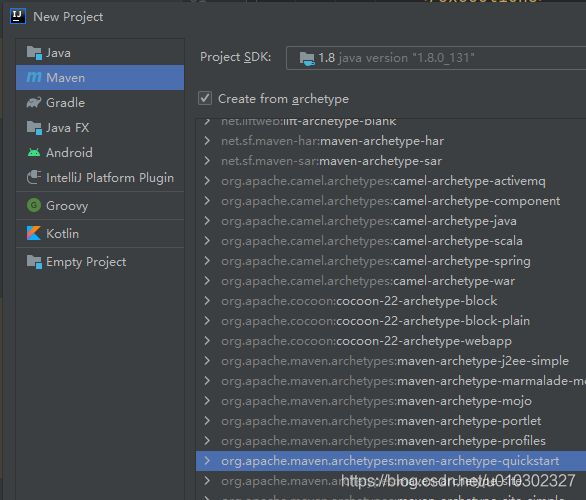
首先创建项目,选Maven,勾上Create from archetype,选maven-archetype-quickstart
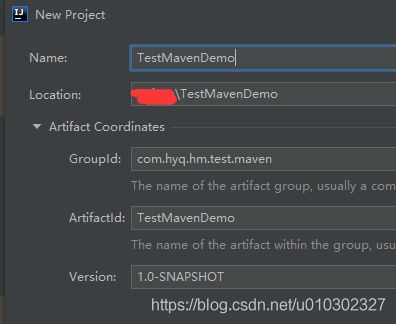
填好项目名和包名 ,然后Next
我这里使用默认的,直接Finish
等待创建完成
右上角同样无法run
在APP.java类内右键->Run 'App.main()'
看到输出Hello World!
试着在pom.xml添加okhttp
      junit
      junit
      4.11
      test


      com.squareup.okhttp3
      okhttp
      4.9.0
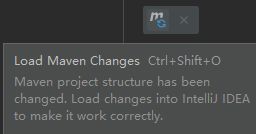
按ctrl+shift+o刷新一下或者按下下图按钮
在App.main()函数内写上okhttp代码测试一下
package com.hyq.hm.test.maven;

import okhttp3.*;
import org.jetbrains.annotations.NotNull;

import java.io.IOException;
import java.util.Objects;

/**
 * Hello world!
 *
 */
public class App
{
    public static void main( String[] args )
    {
        System.out.println( "Hello World!" );
        String url = "https://www.baidu.com";
        OkHttpClient okHttpClient = new OkHttpClient();
        final Request request = new Request.Builder()
                .url(url)
                .get()
                .build();
        Call call = okHttpClient.newCall(request);
        call.enqueue(new Callback() {
            @Override
            public void onFailure(@NotNull Call call, @NotNull IOException e) {
                System.out.println("onFailure");//测试
            }

            @Override
            public void onResponse(@NotNull Call call, @NotNull Response response) throws IOException {
                System.out.println("onResponse: " + Objects.requireNonNull(response.body()).string());
            }
        });
    }
}
run一下
成功
接下来添加本地jar包了,同样拿opencv 4.4.0来举例
首先在项目目录内创建一个lib文件夹
将opencv的jar包复制到lib文件夹内
点击idea的右上角的Edit Configurations...
在VM options:内填上opencv_java440.dll的文件夹路径-Djava.library.path=X:/opencv/build/java/x64
在pom.xml的dependencies添加代码
            junit
            junit
            4.12


            com.squareup.okhttp3
            okhttp
            4.9.0


            com.opencv
            opencv
            4.4.0
再在build内的maven-install-plugin内填上代码,最后我会贴上完整pom.xml
          maven-install-plugin
          2.5.2


              install-opencv
              clean

                ${basedir}/lib/opencv-440.jar
                default
                com.opencv
                opencv
                4.4.0
                jar
                true


                install-file
ctrl+shift+o刷新一下
创建ImageGUI.java来显示,也可以跳过这个,我只是显示看看更直观
package com.hyq.hm.test.maven;
import org.opencv.core.Mat;

import javax.swing.*;
import java.awt.*;
import java.awt.event.ComponentAdapter;
import java.awt.event.ComponentEvent;
import java.awt.image.BufferedImage;
import java.awt.image.DataBufferByte;

public class ImageGUI extends JComponent{
    private BufferedImage image;
    @Override
    protected void paintComponent(Graphics g) {
        int width = g.getClipBounds().width;
        int height = g.getClipBounds().height;
        Graphics2D g2d = (Graphics2D)g;
        g2d.setPaint(Color.WHITE);
        g2d.fillRect(0, 0, width, height);
        if(image != null)  {
            int[] rect = viewportSize(width, height,image.getWidth(),image.getHeight());
            g2d.drawImage(image, rect[0], rect[1], rect[2], rect[3], null);
        }
    }
    private JFrame ui;
    public void createWin(String title) {
        ui = new JFrame();
        ui.setLayout(null);
        ui.setTitle(title);
        ui.setDefaultCloseOperation(JFrame.EXIT_ON_CLOSE);
        int viewWidth = 800;
        int viewHeight = (int) (9.0f/16.0f*viewWidth);
        setBounds(0,0,viewWidth,viewHeight);
        ui.add(this);
        ui.setSize(viewWidth,viewHeight);
        ui.setVisible(true);
        ui.addComponentListener(new ComponentAdapter() {
            @Override
            public void componentResized(ComponentEvent e) {
                int width = ui.getSize().width;
                int height = ui.getSize().height;
                setSize(width, height);
            }
        });
    }
    private int[] viewportSize(int screenWidth, int screenHeight, int width, int height) {
        int left, top, viewWidth, viewHeight;
        float sh = screenWidth * 1.0f / screenHeight;
        float vh = width * 1.0f / height;
        if (sh < vh) {
            left = 0;
            viewWidth = screenWidth;
            viewHeight = (int) (height * 1.0f / width * viewWidth);
            top = (screenHeight - viewHeight) / 2;
        } else {
            top = 0;
            viewHeight = screenHeight;
            viewWidth = (int) (width * 1.0f / height * viewHeight);
            left = (screenWidth - viewWidth) / 2;
        }
        return new int[]{left, top, viewWidth, viewHeight};
    }
    public void imageShow(BufferedImage image) {
        this.image = image;
        this.repaint();
    }
    public void matShow(Mat mat){
        this.image = toImage(mat);
        this.repaint();
    }
    public static BufferedImage toImage(Mat matrix) {
        int type = BufferedImage.TYPE_BYTE_GRAY;
        if (matrix.channels() == 3) {
            type = BufferedImage.TYPE_3BYTE_BGR;
        }else if(matrix.channels() == 4){
            type = BufferedImage.TYPE_4BYTE_ABGR;
        }
        int bufferSize = matrix.channels() * matrix.cols() * matrix.rows();
        byte[] buffer = new byte[bufferSize];
        matrix.get(0, 0, buffer);
        BufferedImage image = new BufferedImage(matrix.cols(), matrix.rows(), type);
        final byte[] targetPixels = ((DataBufferByte) image.getRaster().getDataBuffer()).getData();
        System.arraycopy(buffer, 0, targetPixels, 0, buffer.length);
        return image;
    }
}
在App.java内添加上代码
package com.hyq.hm.test.maven;
import org.opencv.core.Core;
import org.opencv.core.CvType;
import org.opencv.core.Mat;
import org.opencv.core.Scalar;
/**
 * Hello world!
 *
 */
public class App
{
    static {
        System.loadLibrary(Core.NATIVE_LIBRARY_NAME);
    }
    public static void main( String[] args )
    {
        Mat mat = new Mat(100,100, CvType.CV_8UC3,new Scalar(255,0,0));
        ImageGUI gui = new ImageGUI();
        gui.createWin("test");
        gui.matShow(mat);
        System.out.println( "Hello World!" );
    }
}
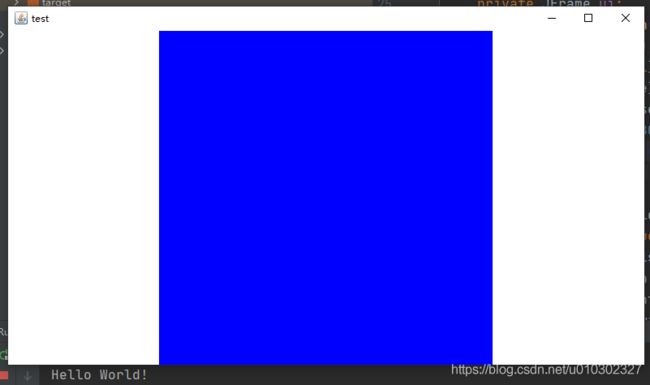
run一下
好了,最后打成jar包了
首先将pom.xml内的
          maven-install-plugin
          2.5.2


              install-opencv
              clean

                ${basedir}/lib/opencv-440.jar
                default
                com.opencv
                opencv
                4.4.0
                jar
                true


                install-file
再添加上maven-assembly-plugin
          maven-assembly-plugin


                com.hyq.hm.test.maven.App


              jar-with-dependencies


              make-assemble
              package

                single
点开右边的Maven,双击Lifecycle内的package开始打包
完成后在target可以看到打好的jar包
TestMavenDemo-1.0-SNAPSHOT-jar-with-dependencies.jar是我打好的包,把其他的都删掉,将opencv_java440.dll复制过来
使用控制台运行一下
这只是打包的一种还有很多打包方式,慢慢研究
pom.xml
  4.0.0

  com.hyq.hm.test.maven
  TestMavenDemo
  1.0-SNAPSHOT

  TestMavenDemo

  http://www.example.com


    UTF-8
    1.8
    1.8


      junit
      junit
      4.11
      test


      com.squareup.okhttp3
      okhttp
      4.9.0


      com.opencv
      opencv
      4.4.0


          maven-install-plugin
          2.5.2


              install-opencv
              clean

                ${basedir}/lib/opencv-440.jar
                default
                com.opencv
                opencv
                4.4.0
                jar
                true


                install-file


          maven-assembly-plugin


                com.hyq.hm.test.maven.App


              jar-with-dependencies


              make-assemble
              package

                single


