Spring Boot 集成 Redis 缓存
Spring Boot 集成 Redis 缓存
在此章,我们将 SpringBoot 集成 Redis 缓存,Redis是一个开源的,基于内存的数据结构存储,可以用作数据库、缓存和消息代理,在本章仅讲解缓存集成。
准备工作
当前项目工具及环境
- 开发工具 IDEA 2020.3
- 依赖管理 Maven
- Spring Boot
- JDK 1.8
- Redis
现在去初始化一个Spring网站初始生成一个SpringBoot项目
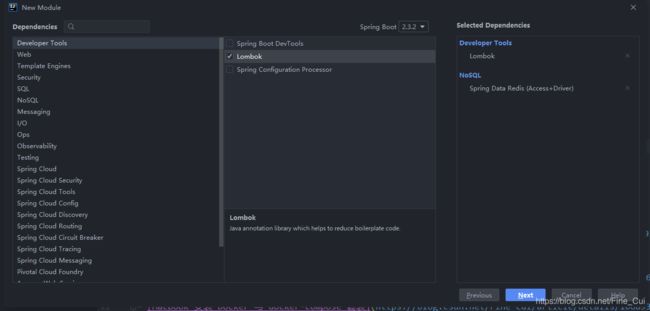
新建项目


点击 Next 后设置项目名称后,点击 Finish 完成创建项目
新建实体对象
要将数据存到redis,我们需要定义一个实体来进行交互,并需要序列化实体对象
User.java
package com.github.gleans.model;

import lombok.AllArgsConstructor;
import lombok.Data;
import lombok.NoArgsConstructor;
import lombok.ToString;

import javax.persistence.*;
import java.io.Serializable;

@Data
@Entity
@ToString
@NoArgsConstructor
@AllArgsConstructor
public class User implements Serializable {


    private static final long serialVersionUID = 1L;

    @Id
    @SequenceGenerator(name = "SEQ_GEN", sequenceName = "SEQ_USER", allocationSize = 1)
    @GeneratedValue(strategy = GenerationType.SEQUENCE, generator = "SEQ_GEN")
    private Long id;

    private String name;

    private long money;
}
使用JPA的简洁数据操作
UserRepository.java
package com.github.gleans.dao;

import com.github.gleans.model.User;
import org.springframework.data.jpa.repository.JpaRepository;
import org.springframework.stereotype.Repository;

/**
 * 操作数据库
 */
@Repository
public interface UserRepository extends JpaRepository<User, Long>  {


}
接口api代码
UserController.java
import com.github.gleans.dao.UserRepository;
import com.github.gleans.model.User;
import lombok.extern.slf4j.Slf4j;
import org.springframework.beans.factory.annotation.Autowired;
import org.springframework.cache.annotation.CacheEvict;
import org.springframework.cache.annotation.CachePut;
import org.springframework.cache.annotation.Cacheable;
import org.springframework.web.bind.annotation.*;

import java.util.List;

@Slf4j
@RestController
public class UserController {

    private  UserRepository userRepository;

    @Autowired
    public void setUserRepository(UserRepository userRepository) {
        this.userRepository = userRepository;
    }

    @Cacheable(cacheNames = "userAll")
    @GetMapping("user/all")
    public Object getUserAll() {
        return userRepository.findAll();
    }

    @Cacheable(value = "users", key = "#userId", unless = "#result.money < 10000")
    @GetMapping("user/con/{userId}")
    public Object getUserByCondition(@PathVariable Long userId) {
        return userRepository.findById(userId);
    }

    @CachePut(value = "users", key = "#user.id")
    @PutMapping("/update")
    public User updatePersonByID(@RequestBody User user) {
        userRepository.save(user);
        return user;
    }

    @CacheEvict(value = "users", allEntries=true)
    @DeleteMapping("/{id}")
    public void deleteUserByID(@PathVariable Long id) {
        List userListOld =  userRepository.findAll();
        log.info("删除前:{}", userListOld.toString());
        userRepository.deleteById(id);
        List userList =  userRepository.findAll();
        log.info("删除后:{}", userList.toString());
    }
}
配置 application.yml
# Redis Config
spring:
  datasource:
    url: jdbc:h2:mem:activiti;DB_CLOSE_DELAY=1000
    driverClassName: org.h2.Driver
    username: root
    password: root
  cache:
    type: redis
  redis:
    host: localhost
    port: 6379
    password: ekko1234
  jpa:
    show-sql: true
启动 Redis
项目根目录, 使用docker-compose up -d 启动 redis
Microsoft Windows [版本 10.0.17763.1339]
(c) 2018 Microsoft Corporation。保留所有权利。

C:\Users\ekko\Documents\SpringBootLearn>cd springboot-redis

C:\Users\ekko\Documents\SpringBootLearn\springboot-redis>docker-compose up -d
Creating network "springboot-redis_default" with the default driver
Creating my_redis ... done

C:\Users\ekko\Documents\SpringBootLearn\springboot-redis>
开启缓存并初始化数据
在启动类增加注解@EnableCaching开启缓存
并实现CommandLineRunner接口来执行启动完成之后的任务
SpringBootRedisApplication.java
import com.github.gleans.dao.UserRepository;
import com.github.gleans.model.User;
import lombok.extern.slf4j.Slf4j;
import org.springframework.beans.factory.annotation.Autowired;
import org.springframework.boot.CommandLineRunner;
import org.springframework.boot.SpringApplication;
import org.springframework.boot.autoconfigure.SpringBootApplication;
import org.springframework.cache.annotation.EnableCaching;

@Slf4j
//springboot启动时执行任务CommandLineRunner
@SpringBootApplication
//开启缓存
@EnableCaching
public class SpringBootRedisApplication implements CommandLineRunner {


    private UserRepository userRepository;

    public static void main(String[] args) {

        SpringApplication.run(SpringBootRedisApplication.class, args);
    }

    @Autowired
    public void setUserRepository(UserRepository userRepository) {

        this.userRepository = userRepository;
    }

    @Override
    public void run(String... args) throws Exception {

        log.info("开始初始化user ->user count ->{}", userRepository.count());
        User james = new User(1L, "James", 2000);
        User potter = new User(2L, "Potter", 4000);
        User dumbledore = new User(3L, "Dumbledore", 999999);

        userRepository.save(james);
        userRepository.save(potter);
        userRepository.save(dumbledore);
        log.info("初始化完成 数据-> {}.", userRepository.findAll());
    }
}
新增缓存
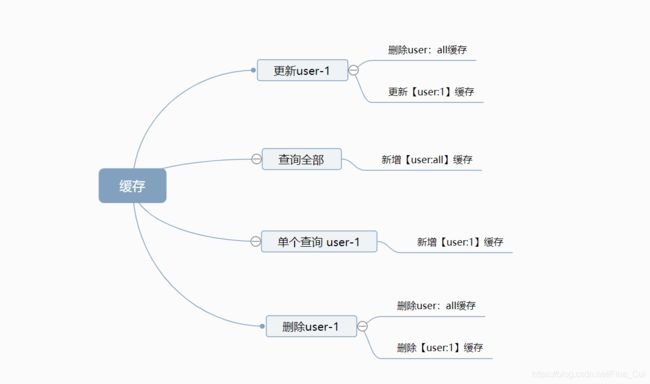
当我们数据库查询出来的值要放到缓存里,用@Cacheable注解
    @Cacheable(value = "users", key = "#userId", unless = "#result.money < 10000")
    @RequestMapping(value = "/{userId}", method = RequestMethod.GET)
    public Object getUser(@PathVariable Long userId) {

        logger.info("获取user信息根据ID-> {}.", userId);
        return userRepository.findById(userId);
    }
我们访问 localhost:8080/1 和 localhost:8080/3 分别两次
发现id为3的就走了一次方法 说明缓存成功
id为1的走了两次是因为 unless里条件成立就不会缓存到redis
更新缓存
每次当我们的数据库的值要更改,我们缓存的也要更改 ,我们可以使用 @CachePut 注解
   @CachePut(value = "users", key = "#user.id")
    @PutMapping("/update")
    public User updatePersonByID(@RequestBody User user) {

        userRepository.save(user);
        return user;
    }
删除缓存
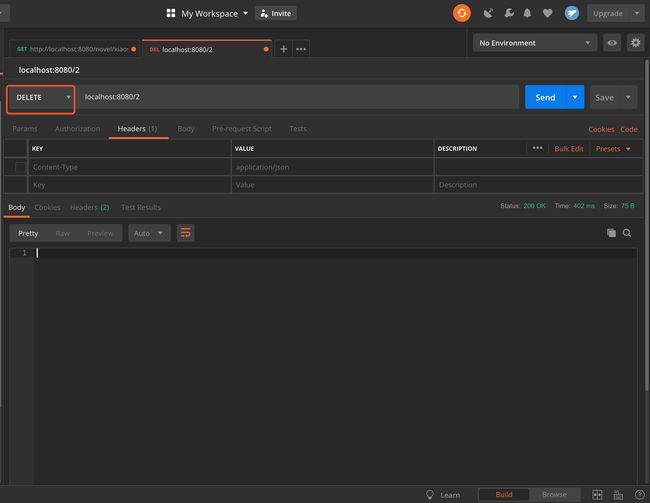
当我们的数据从数据库删除,我们也要从缓存进行删除,我们可以使用 @CacheEvict 注解
allEntries 是否清空所有缓存内容,缺省为 false,如果指定为 true,则方法调用后将立即清空所有缓存
    @CacheEvict(value = "users", allEntries=true)
    @DeleteMapping("/{id}")
    public void deleteUserByID(@PathVariable Long id) {

        logger.info("删除用户根据ID-> {}", id);
        userRepository.deleteById(id);
    }
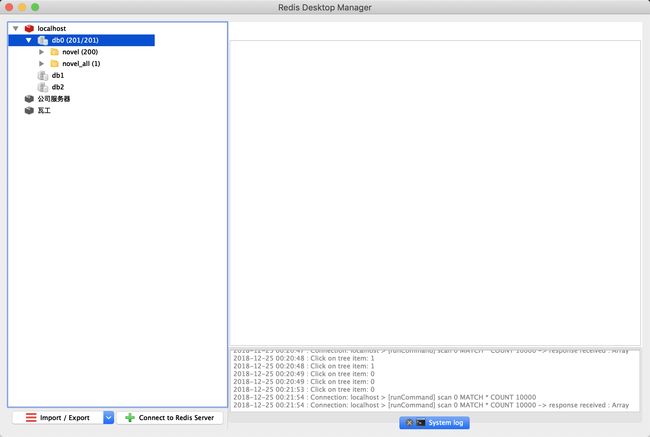
在redis中查看已经没有了缓存
redis可视化工具下载地址在github有
源码地址
https://github.com/Gleans/SpringBootLearn/tree/master/springboot-redis


