L03HTML5学习视频CSS3基础
在大学的时候就听过CSS(中文名称是层叠样式表),但从来没有系统的学习过CSS,在我目前的理解中,我感觉CSS就好像Android开发中的Style,但具体像不像,我想我在随后的学习中将会找到答案的。
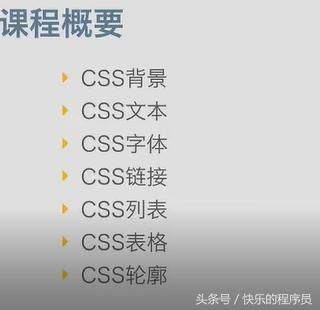
CSS模块总共有下面几个部分:
- 第一部分:CSS入门基础知识
- 第二部分:CSS基本样式讲解
- 第三部分:CSS盒子模型
- 第四部分:CSS定位
- 第五部分:CSS选择器
- 第六部分:CSS常用操作
- 第七部分:CSS动画—页面特效
- 第八部分:HTML与CSS简单页面效果实例
第一部分:CSS入门基础知识
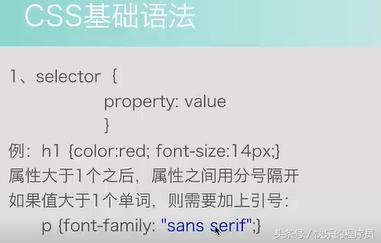
CSS基础-介绍及语法:
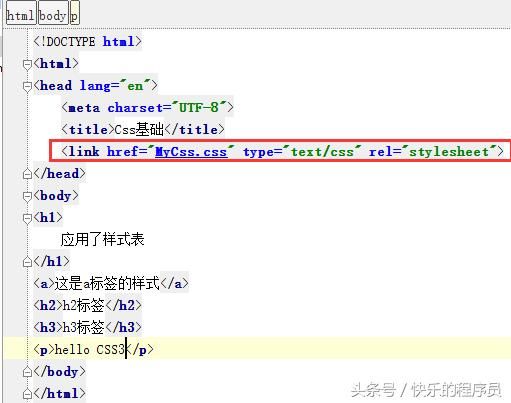
测试程序:
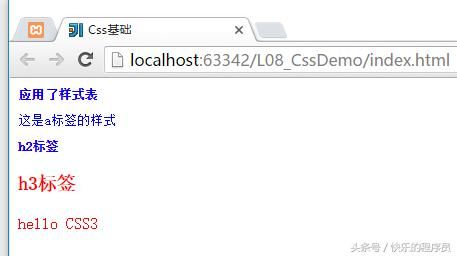
运行结果:
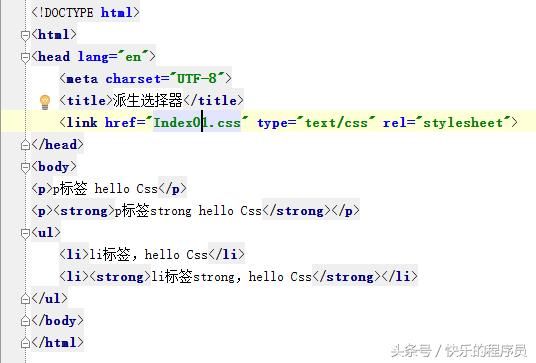
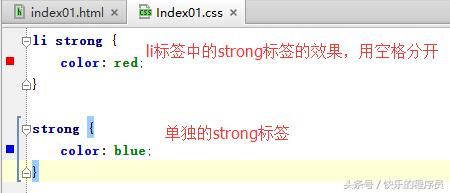
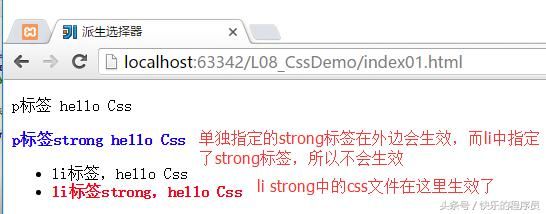
CSS基础-派生选择器:
测试程序:
运行结果:
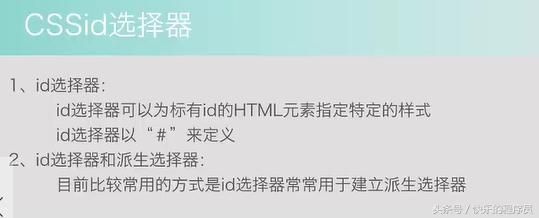
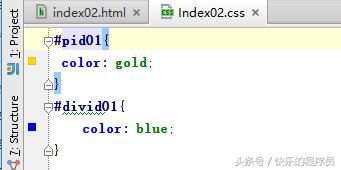
CSS基础-id选择器:
测试程序:
运行结果:
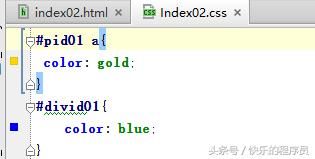
上面就是一个简单的id选择器的使用,接下来id选择器和派生选择器综合使用一下,修改Index02.css中的pid01,加上一个空格并写上a标签就可以将id选择器和派生选择器综合使用了,如下图:
测试运行结果是:
原来“id选择器”是金黄色的颜色,现在百度变成了金黄色的。
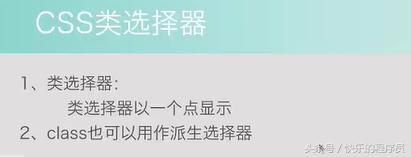
CSS基础-类选择器:
测试代码:
运行结果:
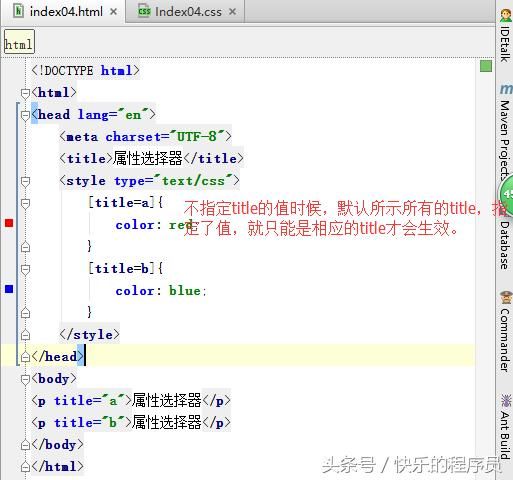
CSS基础-属性选择器:
测试代码:
选择器部分到此结束,在这里感觉选择器越来越像在Android中给某些控件指定的style一样,只不过这里可以给属性添加、给类添加、给id添加等。
第二部分:CSS基本样式讲解
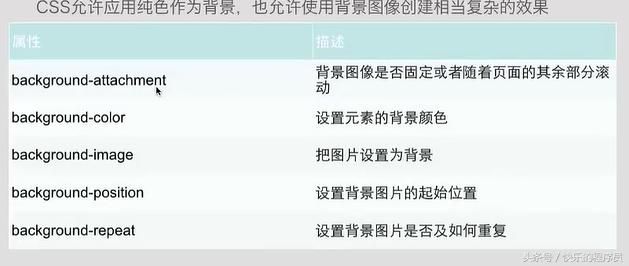
1:CSS背景
![]()
2:CSS文本
- text-indent:2em ,首航缩进两个字符,
- text-transform: capitalize;首字母大写
- text-transform: uppercase;全部大写
- text-transform: lowercase;全部小写
text-shadow: 5px 5px 0px #f00;四个参数意思:
背景距原文字的距离,上文字的距离,清晰度(为0时候是原始效果),背景颜色。
width: 100px;text-wrap: normal;默认文字自动换行,且英文不会被拆开。
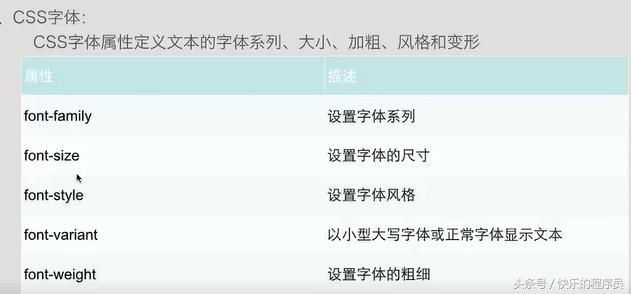
3:CSS字体
CSS3之后对字体做了很大的改变,可以使用第三方的字体。
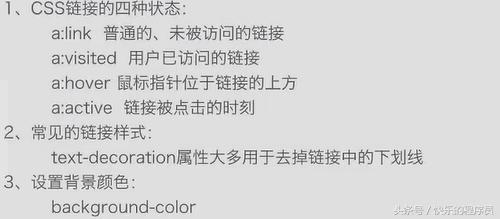
4:CSS链接
5:CSS列表
- list-style-type: disc; 默认的黑实心圆效果,list-style-type:circle;空心圆效果,
- list-style-type:decimal;1234效果, list-style-type: square;实心方块
- list-style-image: url(“tab_my_now.png”);使用图片作为列表项
- list-style-position: inside;靠近列表项内边缘
- list-style-position: outside;靠近列表项外边缘
6:CSS表格
border: dotted 1px red;
设置表格边框的颜色,线的粗细大小,以及边框的类型(实线、虚线还是点线等)。
border-collapse: collapse;折叠边框的属性。
测试代码:
<html>
<head lang="en">
<meta charset="UTF-8">
<title>Css背景title>
<link href="Style.css" type="text/css" rel="stylesheet">
head>
<body>
    <table id="tb">
        <tr>
            <th>姓名th>
            <th>年龄th>
            <th>性别th>
        tr>
        <tr>
            <td>小王td>
            <td>200岁td>
            <td>男td>
        tr>
        <tr class="alt">
            <td>小王td>
            <td>200岁td>
            <td>男td>
        tr>
        <tr>
            <td>小王td>
            <td>200岁td>
            <td>男td>
        tr>
        <tr class="alt">
            <td>小王td>
            <td>200岁td>
            <td>男td>
        tr>
    table>
body>
html>

#tb{
    /*外边框折叠方式*/
    /*border-collapse: collapse;*/
    /*设置宽度*/
    width: 500px;
}
/*设置th单元格和td单元格的边框*/
#tb td,#tb th{
    border: 1px solid aqua;
    padding: 10px;
}
/*设置th的文字排列方式,背景颜色和字体颜色,不加#tb效果也是一样的*/
#tb th{
    text-align: left;
    background-color: gray;
    color: #ffffff;
}
/*指定tb表中,类名为alt的tr中td的背景颜色以及字体颜色*/
#tb tr.alt td{
    color: red;
    background-color: aquamarine;
}
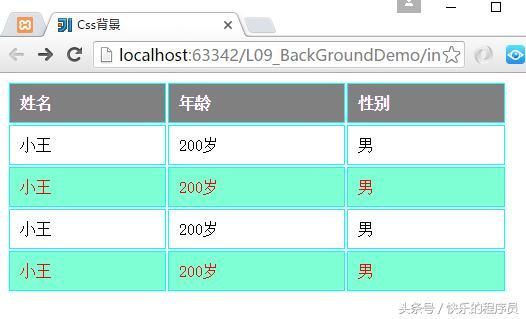
运行结果:
当指定tb指定(border-collapse: collapse;)属性的时候,效果如下图:
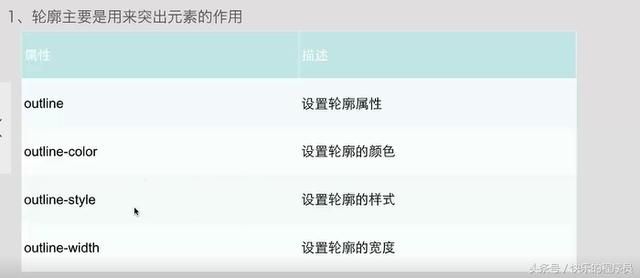
7:CSS样式轮廓
简单示例:
<html>
<head lang="en">
<meta charset="UTF-8">
<title>CSS轮廓title>
<link href="Index01.css" type="text/css" rel="stylesheet">
head>
<body>
    <p>CSS轮廓,p标签测试部分p>
body>
html>P{
outline-style: dashed;
outline-color: blue;
outline-width: 2px;
}程序结果:
第三部分:CSS盒子模型
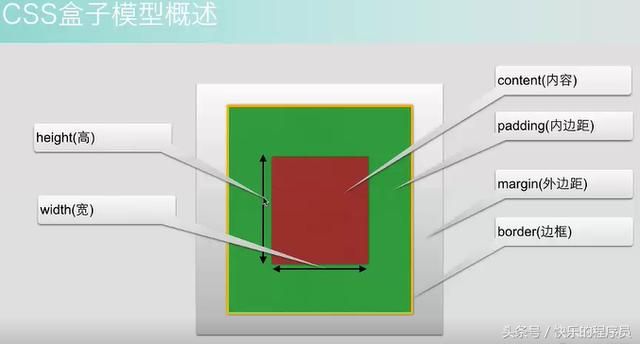
1、CSS盒子模型-概述
主要遵循W3C的标准,这里没有IE的标准。
看到这些数据发现,和Android中的padding和Margin的使用方法差不多。
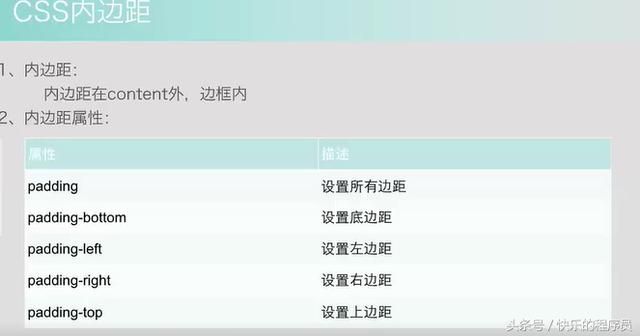
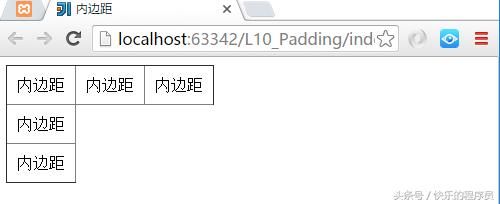
2、CSS盒子模型-内边距
有了Android中的基础,使用内边距就非常简单了。
测试代码:
<html>
<head lang="en">
<meta charset="UTF-8">
<title>内边距title>
<link rel="stylesheet" href="Index01.css" type="text/css" >
head>
<body>
    <table border="1">
        <tr>
        <td>内边距td>
        tr>
    table>
body>
html>在css文件中指定此table中单元格内容填充10px,非常的简单。
td{
padding: 10px;
}
table{
border-collapse: collapse;
}运行结果也非常的简单:
3、CSS盒子模型-边框
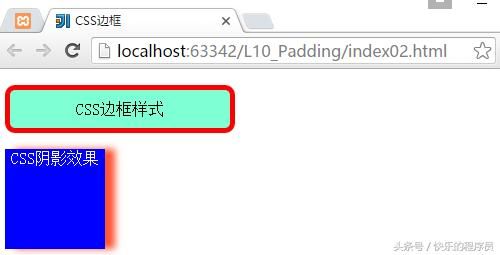
CSS3所提供的边框效果:
测试程序:
<html>
<head lang="en">
<meta charset="UTF-8">
<title>CSS边框title>
<link rel="stylesheet" href="Index02.css" type="text/css">
head>
<body>
    <p>CSS边框样式p>
    <div id="cssid">CSS阴影效果div>
body>
html>
Index02.css代码:
p{
    border-radius: 10px;
    width: 200px;
    background-color: aquamarine;
    text-align: center;
    border: 5px solid red;
    padding: 10px;
}
#cssid{
    background-color: blue;
    color: white;
    width: 100px;
    height: 100px;
    text-align: center;
    /*//向右移动 向下移动 透明度 颜色*/
    box-shadow: 10px 0px 10px #ff5533;
}
运行结果:
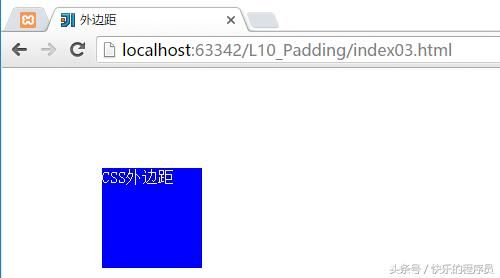
4、CSS盒子模型-外边距
这一块和Android种在布局的时候的Margin属性一样,都是设置外边距。
测试程序:
<html>
<head lang="en">
<meta charset="UTF-8">
<title>外边距title>
<link rel="stylesheet" href="Index03.css" type="text/css">
head>
<body>
    <div class="mg">CSS外边距div>
body>
html>body{
/*去掉默认的边距效果*/
margin: 0px;
}
.mg{
color: white;
background-color: blue;
width: 100px;
height: 100px;
margin: 100px;
}运行结果:
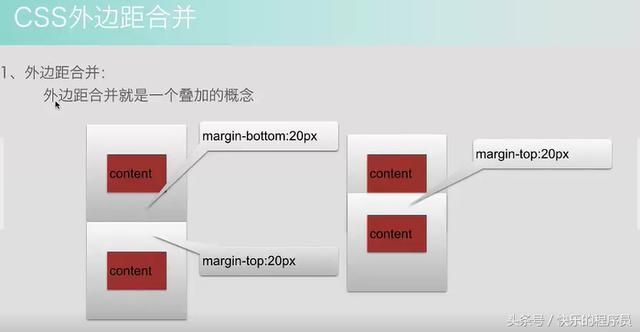
5、CSS盒子模型-外边距合并
外边距合并,没有看懂这里到底是什么意思??经过程序测试后明白了,内外边距合并的意思了。
测试程序:
<html>
<head lang="en">
<meta charset="UTF-8">
<title>外边距合并title>
<link rel="stylesheet" href="Index04.css" type="text/css">
head>
<body>
    <div class="container">
    <div class="bd">
    <div class="pd">
    <div class="content">内容部分div>
    div>
    div>
    div>
    <div class="container1">
    <div class="bd1">
    <div class="pd1">
    <div class="content1">内容部分div>
    div>
    div>
    div>
body>
html>
这里面包含两个相通的div,来测试外边距合并。body{
margin: 0px;
}
/*11111*/
.container{
background-color: #ff5533;
margin: 10px;
}
.bd{
border-style: dotted;
}
.pd{
padding: 10px;
}
.content{
background-color: blue;
color: white;
}
/*22222*/
.container1{
background-color: aqua;
margin: 10px;
}
.bd1{
border-style: dotted;
}
.pd1{
padding: 10px;
}
.content1{
background-color: blue;
color: white;
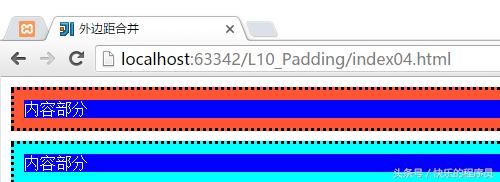
}运行结果:
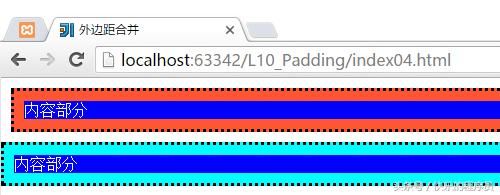
从上面程序和运行结果可以看到,我们虽然设置了container和container1都是margin:10px,按照Android上来说,上下应该有20px的距离,但是结果是距离仍然是10px,这就是外边距合并。外边距遵循最大原则,如container设置margin:10px,container1设置margin:0px,结果如下图。
container和container1之间的距离没有变化,只是container1距离左边距发生了变化,这就是所谓的最大原则,不管container1的margin设为多少,只要小于container的margin:10px,那么他俩之间的距离都是10px,这一点与Android就不一样了,在Android种这两个距离可是进行叠加的。
6、CSS盒子模型-盒子模型应用
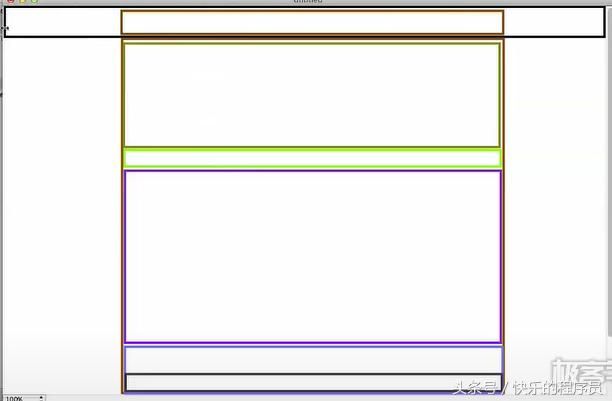
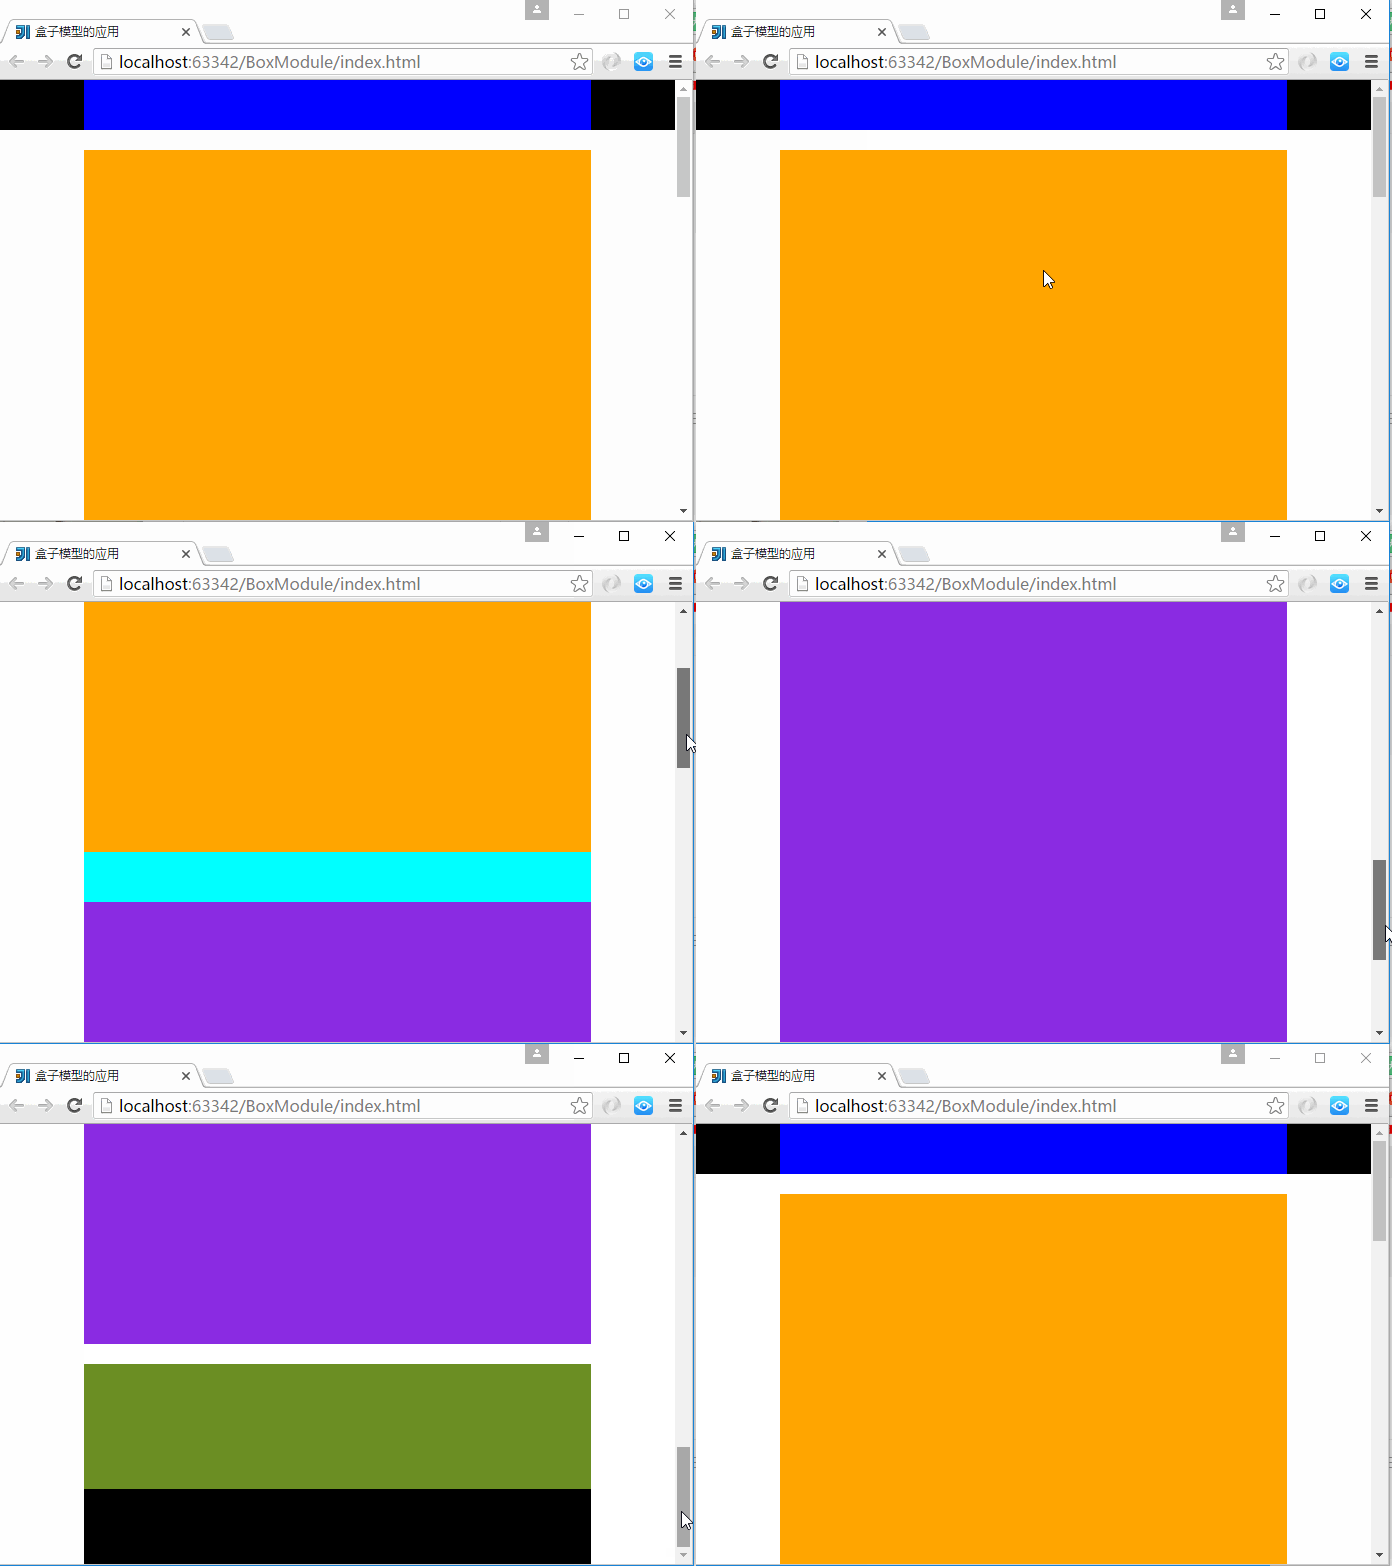
仿照极客学院官网做的盒子模型的应用
测试代码:
<html>
<head lang="en">
<meta charset="UTF-8">
<title>盒子模型的应用title>
<link href="style.css" rel="stylesheet" type="text/css">
head>
<body>

    <div class="top">
    <div class="top_content">div>
    div>

    <div class="body">
    <div class="body_img">div>
    <div class="body_content">
    <div class="body_no">div>
    div>
    div>

    <div class="footing">
    <div class="footing_content">div>
    <div class="footing_menu">div>
    div>
body>
html>
/*body{*/
/*margin: 0px;*/
/*padding: 0px;*/
/*}*/
/*上面的也可以这样写*/
* {
margin: 0px;
padding: 0px;
}
.top {
width: 100%;
height: 50px;
background-color: black;
}
.top_content {
width: 75%;
height: 50px;
margin: 0px;
margin-left: auto;
margin-right: auto;
background-color: blue;
}
.body{
margin: 20px auto;
width: 75%;
height: 1500px;
background-color: antiquewhite;
}
.body_img{
width: 100%;
height: 400px;
background-color: orange;
}
.body_content{
width: 100%;
height: 1100px;
background-color: blueviolet;
}
.body_no{
width: 100%;
height: 50px;
background-color: aqua;
}
.footing{
width: 75%;
height: 200px;
background-color: brown;
margin: 0px auto;
}
.footing_content{
width: 100%;
height: 125px;
background-color: olivedrab;
}
.footing_menu{
width: 100%;
height: 75px;
background-color: black;
}运行结果:
上面主要用到了3个div,分别是头部、内容区域、底部,各个部分又内嵌了div标签。
注意:子div标签中的宽度为100%是相对于它的父级div标签的宽度来说的。
第四部分:CSS定位
1、CSS定位-定位
测试程序:
<html>
<head lang="en">
<meta charset="UTF-8">
<title>CSS定位-positiontitle>
<link rel="stylesheet" href="style.css" type="text/css">
head>
<body>
    <div id="position1">div>
    <div id="position2">div>
    <script>
    for(var i=0;i<100;i++){
        document.write(i+"
")
    }
    script>
body>
html>
1:static属性
#position1{
    width: 100px;
    height: 100px;
    background-color: blue;
    position: static;
    /*向左偏移*/
    left: 10px;
    top: 10px;
    z-index: 2;
}
#position2{
    width: 100px;
    height: 100px;
    background-color: red;
    position: relative;
    /*向左偏移*/
    left: 20px;
    top: 20px;
    z-index: 1;
}
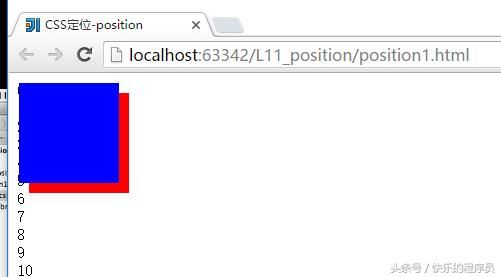
可以发现static属性对应position1是没有任何效果的。
运行结果:
2:relative属性
运行结果:
positon1向左向上偏移10个像素。
3:absolute属性
运行结果:
这里指定position1的z-index=2>position2的z-index=1,所以blue颜色在上面。
4:fixed属性
运行结果:
指定position1为fixed,网页上在滑动的时候可以看到,position1固定不动,position2被滑动到上面部分了。
2、CSS定位-浮动
测试程序:
<html>
<head lang="en">
<meta charset="UTF-8">
<title>CSS-浮动title>
<link href="style.css" rel="stylesheet" type="text/css">
head>
<body>
    <div id="container">
    <div id="fd">红div>
    <div id="sd">绿div>
    <div id="ad">蓝div>
    <div id="text">hello world hello worlddiv>
    div>
body>
html>#fd{
width: 100px;
height: 150px;
background-color: red;
float: left;
}
#sd{
width: 150px;
height: 100px;
background-color: green;
float: left;
}
#ad{
width: 100px;
height: 100px;
background-color: blue;
float: left;
}
#container{
width: 300px;
height: 500px;
background-color: gray;
}
#text{
clear: both;
}运行结果:
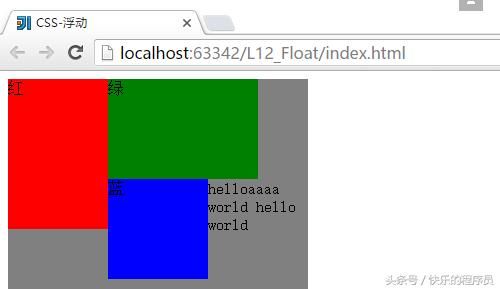
当没有#text的时候:
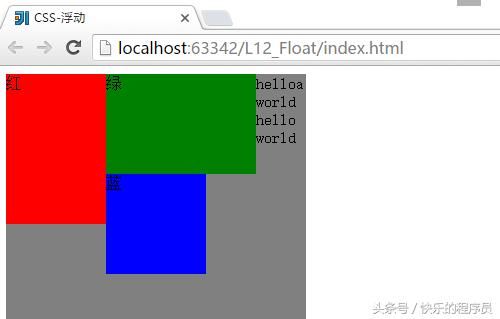
因为红绿蓝三个div指定的都是向左的浮动效果,所以,一次向左排列,
但修改文字长度后运行结果就是这样的,可以看到这里与文字的长度也有关系。
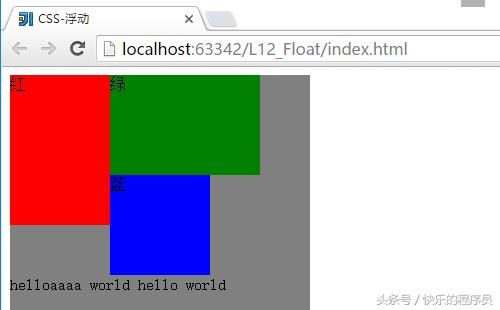
当有#text的时候:
因为文字部分使用了clear: both;属性,即没有左右浮动了,就会处在最下方。
3、CSS定位-浮动的应用
简单瀑布流的实现:
测试程序:
<html>
<head lang="en">
<meta charset="UTF-8">
<title>CSS定位-浮动的应用title>
<link rel="stylesheet" href="style.css" type="text/css">
head>
<body>
    <div id="div1">
    <ul>
        <li><img src="img/11.png">li>
        <li><img src="img/12.png">li>
        <li><img src="img/13.png">li>
    ul>
    <ul>
        <li><img src="img/14.png">li>
        <li><img src="img/15.png">li>
        <li><img src="img/13.png">li>
    ul>
    <ul>
        <li><img src="img/11.png">li>
        <li><img src="img/12.png">li>
        <li><img src="img/13.png">li>
    ul>
    div>
body>
html>
/*代表通配符,后面的所有属性都会起作用*/
* {
margin: 0px;
padding: 0px;
}
/*去掉默认li标签的黑点效果*/
li {
list-style: none;
}
#div1 {
width: 360px;
height: 400px;
padding: 10px;
background-color: blue;
margin-left: 0px;
}
ul {
width: 120px;
height: 120px;
float: left;
}运行结果:
这就是一个简单的瀑布流的实现过程,瀑布流这个词在安卓中经常听到,在安卓中的实现过程是比较熟悉的。
当看到目录,讲述CSS定位的时候,脑袋的第一个念头就是,CSS还能实现定位效果,这里理解的定位是地图中的定位,等到看视频的时候才发现,这里所指的定位并不是地图中所指的定位。
第五部分:CSS选择器
1. 元素选择器,文档的元素就是最基本的选择器:例如:和h1{}、a{}
2. 选择器分组,例如:h1,h2{},通配符*{},一般在通配符中指定margin:0px和padding:0px
3. 类选择器允许以一种独立与文档元素的方式来指定样式,例如:.class{}。
结合元素选择器:例如:a.class{}
多类选择器:例如:.class.class{},下面是多类选择器的一个demo。
<html>
<head lang="en">
<meta charset="UTF-8">
<title>CSS选择器title>
<link href="style.css" rel="stylesheet" type="text/css">
head>
<body>
    <p class="p1">this is one p>
    <p class="p2">this is two p>

    <p class="p1 p2">this is three p>
body>
html>*{
margin: 0px;
padding: 0px;
}
.p1{
color: blue;
}
.p2{
font-size: 30px;
}
.p1.p2{
background-color: antiquewhite;
}运行结果:
4、ID选择器,类似于类选择器,不过也有一些重要差别。例如:#id{}
ID只能在文档中使用一次,而类可以多次使用
ID选择器不能结合使用
当时用js时候,需要用到id。
5、属性选择器,
简单属性选择:例如:[title]{}
根据具体属性值选择:除了选择拥有某些的元素,还可以进一步缩小选择范围,只选择有特定属性值的元素,例如:a[ href=”http://www.baidu.com” ]{},
属性和属性值必须完全匹配
根据部分属性值选择
简单的一个测试程序:
<html>
<head lang="en">
<meta charset="UTF-8">
<title>CSS选择器title>
<style>
    /*这里只写了title但没有具体指定title是哪一个值,
    默认所有的title属性都会使用字体红色这个属性
    */
    [title]{
    color: red;
    }
    [href="http://www.baidu.com"]{
    font-size: 30px;
    }
    /*只有title里面包含title这个单词的时候才会生效,
    就是模糊匹配的问题。
    */
    [title~="title"]{
    font-size: 30px;
    }
    style>
    head>
    <body>
    <p title="tit">this is one p>
    <p title="title">this is one p>
    <p title="t">this is one p>
    <p title="hello title hello">this is one p>
    <a href="http://www.baidu.com">度娘搜索a>
body>
html>
运行结果:
6、后代选择器;
后代选择器可以选择作为某元素后代的元素。例如:p strong{};
测试程序:
<html>
<head lang="en">
<meta charset="UTF-8">
<title>后代选择器title>
<link href="style02.css" rel="stylesheet" type="text/css">
head>
<body>
    <p>my name is <strong>Bruce <i>Changi>strong> hahahap>
body>
html>
p strong{
color: red;
}
p strong i{
color: blue;
}运行结果:
7、子元素选择器,
与后代选择器相比,子元素选择器只能选择作为某元素子元素的元素。
例如:h1>strong{};
测试程序:
<html>
<head lang="en">
<meta charset="UTF-8">
<title>子元素选择器title>
<link href="style03.css" rel="stylesheet" type="text/css">
head>
<body>
    <p>my name is <strong>Bruce <i>Changi>strong> hahahap>
body>
html>当style03.css文件中这样写的时候:
p>strong{
color: red;
font-size: 30px;
}运行结果是这样的:
当style03.css文件中这样写的时候:
p>strong>i{
    color: red;
    font-size: 30px;
}
运行结果是这样的:
可以看到子元素选择器只会指定一级子类元素生效,当有二级子类的时候就不生效了。
后代选择器可以直接指定任何级别的子元素(只要是后代就可以),但子元素选择器只能指定自己的一级子元素。
8、相邻兄弟选择器,
可以选择紧接在另一个元素后的元素,且二者有相同的父元素,例如:h1+p{};
测试程序:
<html>
<head lang="en">
<meta charset="UTF-8">
<title>相邻兄弟选择器title>
<link href="style04.css" rel="stylesheet" type="text/css">
head>
<body>
    <div>
    <ul>
        <li>item1li>
        <li>item2li>
        <li>item3li>
    ul>
    <ol>
        <li>item11li>
        <li>item22li>
        <li>item33li>
    ol>
    div>
body>
html>li+li{
font-size: 20px;
color: red;
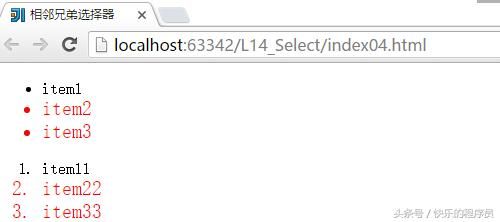
}运行结果:
在实际应用中,这种选择器用的不多,只需要知道了解就行了。
第六部分:CSS常用操作
1:对齐操作
测试程序:
<html>
<head lang="en">
<meta charset="UTF-8">
<title>对齐title>
<link rel="stylesheet" type="text/css" href="style.css">
head>
<body>
    <div class="div">div>
body>
html>
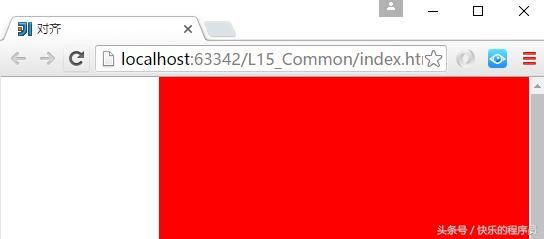
这里面只包含一个div标签。使用margin:
* {
margin: 0px;
}
.div {
width: 70%;
height: 1000px;
background-color: red;
/*0px代表上下 auto代表左右*/
margin: 0px auto;
}margin运行结果:
使用position:
* {
    margin: 0px;
}
.div {
    width: 70%;
    height: 1000px;
    background-color: red;
    position: absolute;
    right: 0px;
}
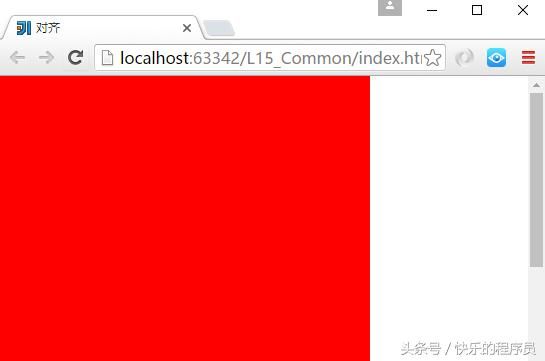
position运行结果:
使用float:
* {
    margin: 0px;
}
.div {
    width: 70%;
    height: 1000px;
    background-color: red;
    float: left;
}
float运行结果:
2:尺寸操作
测试程序:
<html>
<head lang="en">
<meta charset="UTF-8">
<title>尺寸操作title>
<link rel="stylesheet" type="text/css" href="style01.css">
head>
<body>
    <p class="p1">这里是一些文字 这里是一些文字
        这里是一些文字
        这里是一些文字
        这里是一些文字
        这里是一些文字p>
    <p class="p2">这里是一些文字 这里是一些文字
        这里是一些文字
        这里是一些文字
        这里是一些文字
        这里是一些文字p>
    <p class="p3">这里是一些文字 这里是一些文字
        这里是一些文字
        这里是一些文字
        这里是一些文字
        这里是一些文字p>
body>
html>
.p1 {
width: 200px;
background-color: red;
/*可以用这个属性设置行间距*/
line-height: normal;
}
.p2 {
width: 200px;
background-color: green;
line-height: 200%;
}
.p3 {
/*max-width*/
max-width: 100px;
background-color: blue;
line-height: 50%;
}运行结果:
3:分类操作
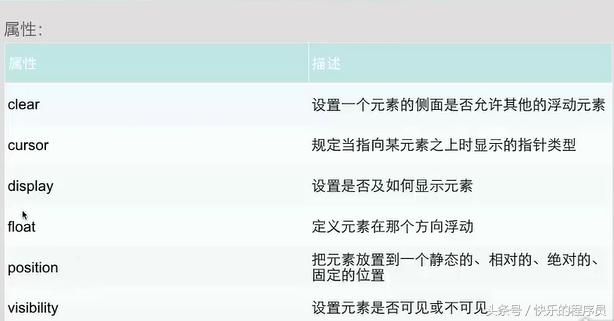
cursor主要设置鼠标放在文字上面的效果。
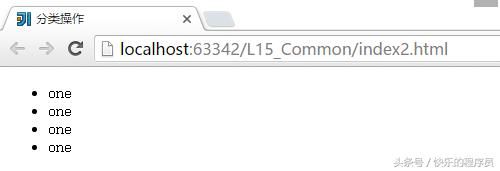
display效果:
<html>
<head lang="en">
<meta charset="UTF-8">
<title>分类操作title>
<link rel="stylesheet" type="text/css" href="style02.css">
head>
<body>
    <ul>
        <li>oneli>
        <li>oneli>
        <li>oneli>
        <li>oneli>
    ul>
body>
html>
li {
display: inline;
}默认不加display的时候是下面的效果:
可以用这个属性来设置导航栏效果。
visibility设置标签可见不可见。这个就很简单了。
4:导航栏
测试程序:
<html>
<head lang="en">
<meta charset="UTF-8">
<title>导航栏title>
<link rel="stylesheet" type="text/css" href="style03.css">
head>
<body>
<ul>
<li><a href="#">导航栏1a>li>
<li><a href="#">导航栏2a>li>
<li><a href="#">导航栏3a>li>
<li><a href="#">导航栏4a>li>
ul>
body>
html>ul {
margin: 0px;
padding: 0px;
list-style-type: none;
background-color: green;
width: 400px;
height: auto;
text-align: center;
padding-top: 5px;
padding-bottom: 5px;
}
/*未被点击和点击的时候*/
a:link, a:visited {
/*文字变粗*/
font-weight: bold;
text-decoration: none;
/*成为块级元素*/
/*display: block;*/
background-color: black;
padding-left: 10px;
padding-right: 10px;
padding-top: 5px;
padding-bottom: 5px;
color: aliceblue;
text-align: center;
}
/*鼠标点击和放上去的变化*/
a:active, a:hover {
background-color: crimson;
}
/*导航栏横向显示*/
li {
    display: inline;
}运行结果:
鼠标放在导航栏上的时候颜色将会发生变化。这就是一个简单的横向导航栏的效果。
5:图片操作
测试程序:
<html>
<head lang="en">
<meta charset="UTF-8">
<title>图片操作title>
<link rel="stylesheet" type="text/css" href="style04.css">
head>
<body>
    <div class="image">
        <a href="http://" target="_self">
        <img class="big_img" src="html5.jpg" alt="html5" width="250px" height="150px">
        a>
        <div class="text">这就是html5div>
        div>
        <div class="image">
            <a href="http://" target="_self">
            <img class="big_img" src="html5.jpg" alt="html5" width="250px" height="150px">
        a>
        <div class="text">这就是html5div>
        div>
        <div class="image">
            <a href="http://" target="_self">
            <img class="big_img" src="html5.jpg" alt="html5" width="250px" height="150px">
        a>
        <div class="text">这就是html5div>
        div>
        <div class="image">
            <a href="http://" target="_self">
            <img class="big_img" src="html5.jpg" alt="html5" width="250px" height="150px">
        a>
        <div class="text">这就是html5div>
    div>
body>
html>
body {
background-color: aqua;
margin: 20px auto;
width: 600px;
height: auto;
}
.image {
background-color: aliceblue;
border: 1px solid red;
width: auto;
height: auto;
float: left;
text-align: center;
margin: 10px;
}
.big_img {
margin: 5px;
/*透明效果,1代表完全不透明,就是原颜色,0代表完全透明*/
opacity: 0.5;
}
.text {
font-size: 12px;
margin-bottom: 5px;
}
/*鼠标点击和放上去的效果*/
a:active ,a:hover {
background-color: crimson;
}运行结果:
![]()
第七部分:CSS动画—页面特效
1、CSS动画-2D、3D转换:
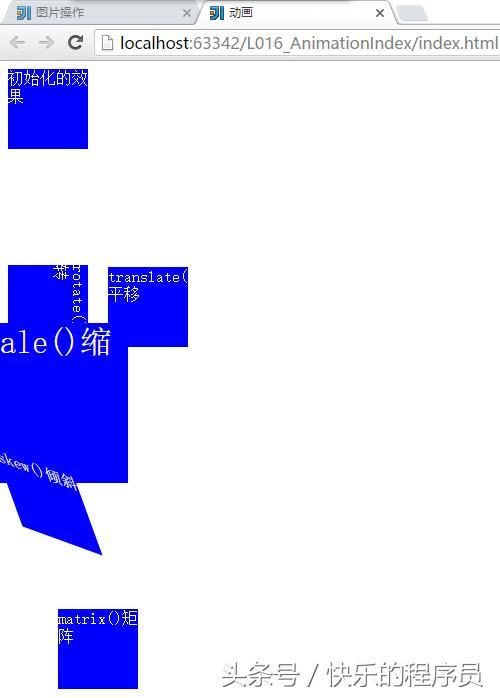
测试程序:依次测试2D转换方法
<html>
<head lang="en">
<meta charset="UTF-8">
<title>动画title>
<link rel="stylesheet" href="style.css" type="text/css">
head>
<body>
    <div>初始化的效果div>
        <br/>
    <div class="div2">translate()平移div>
        <br/>
    <div class="div3">rotate()旋转div>
        <br/>
    <div class="div4">scale()缩放div>
        <br/>
    <div class="div5">skew()倾斜div>
        <br/>
    <div class="div6">matrix()矩阵div>
body>
html>
div {
width: 80px;
height: 80px;
background-color: blue;
color: white;
}
.div2{
transform: translate(100px,100px);
-webkit-transform: translate(100px,100px); /*safari chrome*/
-ms-transform: translate(100px,100px) ;/*IE*/
-o-transform: translate(100px,100px);/*opea*/
-moz-transform: translate(100px,100px);;/*Firefox*/
}
.div3{
transform: rotate(90deg);
-webkit-transform: rotate(90deg); /*safari chrome*/
-ms-transform: rotate(90deg) ;/*IE*/
-o-transform: rotate(90deg);/*opea*/
-moz-transform: rotate(90deg);;/*Firefox*/
}
.div4{
/*宽度变为原来2倍,高度不变*/
transform: scale(2,2);
-webkit-transform:scale(2,2); /*safari chrome*/
-ms-transform: scale(2,2) ;/*IE*/
-o-transform: scale(2,2);/*opea*/
-moz-transform: scale(2,2);/*Firefox*/
}
.div5{
/*x轴倾斜,y轴倾斜*/
transform: skew(20deg,20deg);
-webkit-transform:skew(20deg,20deg); /*safari chrome*/
-ms-transform: skew(20deg,20deg) ;/*IE*/
-o-transform: skew(20deg,20deg);/*opea*/
-moz-transform: skew(20deg,20deg);/*Firefox*/
}
.div6{
/*30 和30 为水平平移 和垂直平移的距离*/
transform: matrix(1,0,0,1,30,30);
-webkit-transform:matrix(1,0,0,1,30,30); /*safari chrome*/
-ms-transform: matrix(1,0,0,1,30,30) ;/*IE*/
-o-transform: matrix(1,0,0,1,30,30);/*opea*/
-moz-transform: matrix(1,0,0,1,30,30);/*Firefox*/
}运行结果:
其中最后一条矩阵,这里设计太多矩阵的知识,从网上查了一下矩阵的参数是这个意思:transform: matrix(与我无关, 哪位, 怎么不去高考, 打麻将去吧,水平偏移距离, 垂直偏移距离);
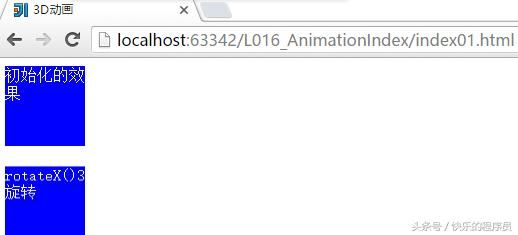
测试程序:3D转换(以rotateX()为例):
<html>
<head lang="en">
<meta charset="UTF-8">
<title>2D动画title>
<link rel="stylesheet" href="style01.css" type="text/css">
head>
<body>
    <div>初始化的效果div>
    <br/>
    <div class="div2">rotateX()3D旋转div>
    <br/>
body>
html>
div {
width: 80px;
height: 80px;
background-color: blue;
color: white;
}
.div2{
transform: rotateX(20deg);
-webkit-transform: rotateX(20deg); /*safari chrome*/
-ms-transform: rotateX(20deg) ;/*IE*/
-o-transform: rotateX(20deg);/*opea*/
-moz-transform: rotateX(20deg);;/*Firefox*/
}2、CSS动画-过渡:
简单的例子:
<html>
<head lang="en">
<meta charset="UTF-8">
<title>CSS动画-过渡title>
<link rel="stylesheet" href="style02.css" type="text/css">
head>
<body>
    <div>效果展示div>
body>
html>
div {
width: 100px;
height: 100px;
background-color: blue;
color: white;
-webkit-transition: width 2s, height 2s, transform 2s; /*safari chrome*/
transition: width 2s, height 2s, transform 2s;
-webkit-transition-delay: 2s;
transition-delay: 2s;
}
div:hover {
width: 200px;
height: 200px;
transform: rotate(360deg);
-webkit-transform: rotate(360deg);
}运行结果:
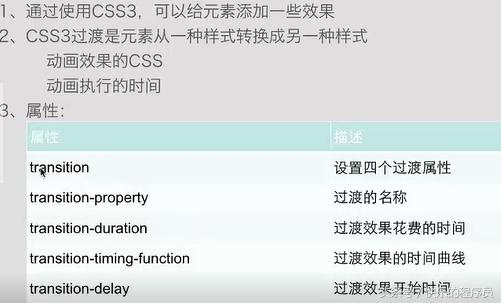
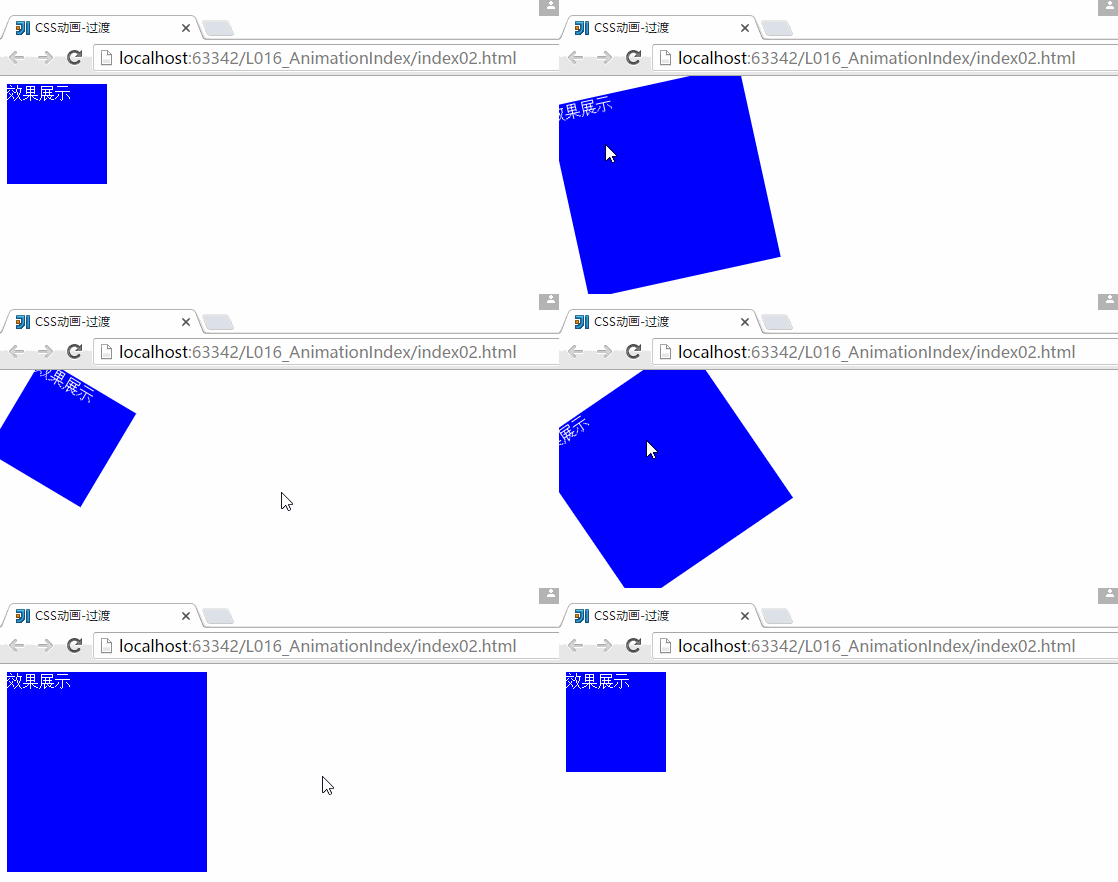
上面就是一个简单的CSS过渡的一个效果,但是CSS里面的配置文件还不是非常的清楚,随后在这个地方多多看看。
3、CSS动画-动画:
简单的测试例子:
<html>
<head lang="en">
<meta charset="UTF-8">
<title>CSS动画效果title>
<link rel="stylesheet" href="style03.css" type="text/css">
head>
<body>
    <div>效果展示div>
body>
html>
div {
width: 100px;
height: 100px;
background-color: red;
color: white;
position: relative;
animation: anim 5s infinite alternate;
-webkit-animation: anim 5s infinite alternate;
-o-animation: anim 5s;
}
/*anim为指定的名称*/
@keyframes anim {
0% {
background: red;
left: 0px;
top: 0px
}
25% {
background: blue;
left: 200px;
top: 0px
}
50% {
background: green;
left: 200px;
top: 200px
}
75% {
background: orange;
left: 0px;
top: 200px
}
100% {
background: pink;
left: 0px;
top: 0px
}
}
@-webkit-keyframes anim {
0% {
background: red;
left: 0px;
top: 0px
}
25% {
background: blue;
left: 200px;
top: 0px
}
50% {
background: green;
left: 200px;
top: 200px
}
75% {
background: orange;
left: 0px;
top: 200px
}
100% {
background: pink;
left: 0px;
top: 0px
}
}运行结果:
infinite alternate 表示循环的执行动画效果,前缀-webkit表示这适用于webkit内核的浏览器,-moz是火狐,-ms的是IE的,然后还有一段是原型代码
简单的测试程序:
<html>
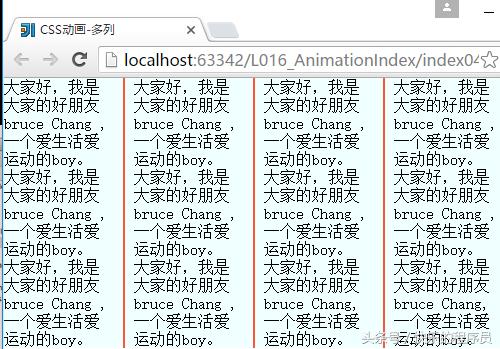
<head lang="en">
<meta charset="UTF-8">
<title>CSS动画-多列title>
<link rel="stylesheet" href="style04.css" type="text/css">
head>
<body>
    <div class="div1">
    大家好,我是大家的好朋友bruce Chang ,一个爱生活爱运动的boy。
    大家好,我是大家的好朋友bruce Chang ,一个爱生活爱运动的boy。
    大家好,我是大家的好朋友bruce Chang ,一个爱生活爱运动的boy。
    大家好,我是大家的好朋友bruce Chang ,一个爱生活爱运动的boy。
    大家好,我是大家的好朋友bruce Chang ,一个爱生活爱运动的boy。
    大家好,我是大家的好朋友bruce Chang ,一个爱生活爱运动的boy。
    大家好,我是大家的好朋友bruce Chang ,一个爱生活爱运动的boy。
    大家好,我是大家的好朋友bruce Chang ,一个爱生活爱运动的boy。
    大家好,我是大家的好朋友bruce Chang,一个爱生活爱运动的boy。
    大家好,我是大家的好朋友bruce Chang ,一个爱生活爱运动的boy。
    大家好,我是大家的好朋友bruce Chang ,一个爱生活爱运动的boy。
    大家好,我是大家的好朋友bruce Chang,一个爱生活爱运动的boy。
div>
body>
html>*{
margin: 0px;
padding: 0px;
}
div {
width: 500px;
height: auto;
background-color: azure;
/*控制分割的列数*/
column-count: 4;
-webkit-column-count: 4;
/*控制间隙的大小*/
-webkit-column-gap: 20px;
column-gap:20px;
/*控制分割线的宽度以及颜色*/
column-rule:2px outset #ff5533;
-webkit-column-rule:2px outset #ff5533 ;
}运行结果:
5、CSS瀑布流效果:
简单的测试程序:
<html>
<head lang="en">
<meta charset="UTF-8">
<title>CSS瀑布流效果title>
<link rel="stylesheet" href="index.css" type="text/css">
head>
<body>
    <div class="container">
    <div><img src="image/1.jpg">
        <p>这里添加标签p>
    div>
    <div><img src="image/2.jpg">
        <p>这里添加标签p>div>
    <div><img src="image/3.jpg">div>
    <div><img src="image/4.jpg">
        <p>这里添加标签p>div>
    <div><img src="image/5.jpg">
        <p>这里添加标签p>div>
    <div><img src="image/6.jpg">div>
    <div><img src="image/7.jpg">div>
    <div><img src="image/8.jpg">
        <p>这里添加标签p>div>
    <div><img src="image/9.jpg">div>
    <div><img src="image/10.jpg">
        <p>这里添加标签p>div>
    <div><img src="image/11.jpg">div>
    <div><img src="image/12.jpg">
        <p>这里添加标签p>div>
    div>
body>
html>
.container {
column-width: 200px;
-webkit-column-width: 200px;
column-gap: 10px;
-webkit-column-gap: 10px;
/*column-rule: 5px outset #ff5533 ;*/
/*-webkit-column-rule:5px outset #ff5533 ;*/
}
.container div {
height: auto;
background-color: azure;
margin: 5px 0;
}
.container p {
text-align: center;
}运行结果:
第八部分:HTML与CSS简单页面效果实例
1、HTML与CSS简单页面效果实例:
测试程序:
<html>
<head lang="en">
<meta charset="UTF-8">
<title>极客学院title>
<link href="style.css" type="text/css" rel="stylesheet">
head>
<body>
    <div class="container">
        <div class="wrapper">
            <div class="heading">
                <div class="heading_nav">
                      <div class="heading_title">
                      极客学院
                      div>
                      <div class="heading_navbar">
                          <ul>
                              <li><a href="#">首页a>li>
                              <li><a href="#">职业课程a>li>
                              <li><a href="#">技术问答a>li>
                              <li><a href="#">VIP会员a>li>
                          ul>
                      div>
                      <div class="heading_img">
                          <img src="jokul.jpg">
                      div>
                      <div class="heading_soptlight">
                          <form>
                              <input value="请您输入姓名" type="text">
                          form>
                      div>
                div>
            div>
        <div class="body">
        <div class="body_title">
            <h3>熟悉极客学院h3>
            <p>加入极客学院,学习最新实战教程,全面提升你的技术能力p>
        div>
            <hr/>
            <hr/>
        div>
        div>
        <div class="footing">
            @极客学院
        div>
    div>
body>
html>
* {
margin: 0px;
padding: 0px;
}
body {
background-color: snow;
}
.wrapper {
width: 80%;
height: 1000px;
background-color: antiquewhite;
margin: 0px auto;
}
.heading {
width: 100%;
height: 90px;
background-color: snow;
margin: 0px auto;
}
.heading_title {
float: left;
font-family: Arial, Helvetica, sans-serif;
font-size: 30px;
color: burlywood;
}
.heading_nav {
padding-bottom: 30px;
padding-top: 30px;
width: 100%;
height: 30px;
position: relative;
}
ul {
margin-left: 40px;
float: left;
list-style-type: none;
padding-top: 6px;
padding-bottom: 6px;
}
li {
padding-left: 10px;
display: inline;
}
/*link:连接平常的状态 visited:连接被访问过之后 */
a:link, a:visited {
font-weight: bold;
color: darkgray;
text-align: center;
padding: 6px;
text-decoration: none;
}
/*hover:鼠标放到连接上的时候 active:连接被按下的时候 */
a:hover, a:active {
color: dimgray;
}
.heading_img img {
border-radius: 30px;
display: inline;
width: 26px;
height: 26px;
box-shadow: 0 1px 1px rgba(0, 0, 0, 0.2);
float: left;
}
.heading_soptlight form {
float: right;
width: 100px;
height: 26px;
position: relative;
margin-right: 100px;
}
form input {
height: 26px;
border-radius: 10px;
}
.body {
padding: 30px;
height: auto;
width: auto;
}
.body_title h3 {
font-size: 30px;
font-family: Arial, Helvetica, fantasy;
color: #333333;
}
.body_title p {
margin-top: 20px;
margin-bottom: 20px;
}
.footing {
padding-top: 20px;
text-align: center;
font-size: 10px;
color: darkgray;
}运行结果:
本章小结:
至此,按照教程,CSS3的基础部分大致学习结束了,CSS3基础这一章节里面还有许多我没有用到过的标签、方法等,以后会慢慢的使用。
学习不是一蹴而就,每天学习一点点,这样才能进步。
![]()
时间:2016-11-06
