大前端学习笔记 - 静态站点生成(Gridsome静态站点方案、GraphQL查询数据、Strapi生成接口、自动部署到Vercel)
静态站点生成
文章内容输出来源:大前端高薪训练营
一、Gridsome基础知识
1. Gridsome是什么
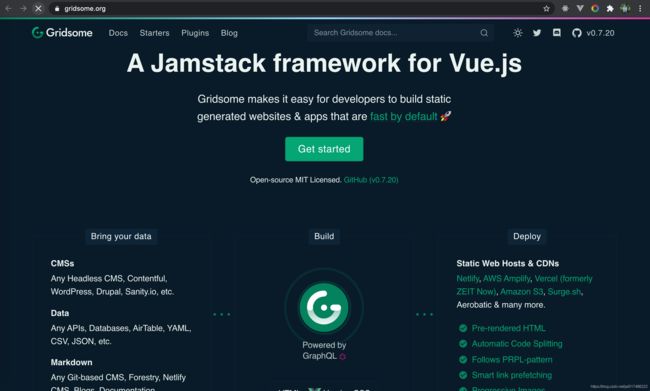
- 一个免费、开源、基于VUE.js技术栈的静态网站生成器
- 官方网址:https://gridsome.org
- GitHub: https://github.com/gridsome/gridsome
2. 什么是静态网站生成器
- 静态网站生成器是使用一系列配置、模板以及数据,生成静态HTML文件及相关资源的工具
- 这个功能也叫做预渲染
- 生成的网站不需要类似PHP这样的服务器
- 只需要放到支持静态资源的WebServer或者CDN上即可运行
3. 静态网站的好处
- 省钱:不需要专业的服务器,只要能托管静态文件的空间即可
- 快速:不经过后端服务器的处理,只传输内容
- 安全:没有后端程序的支持,自然会更安全
4. 常见的静态网站生成器
- Jekyll(Ruby)
- Hexo(Node)
- Hugo(Golang)
- Gatsby(Node/React)
- Gridsome(Node/Vue)
- 另外,Next.js/Nuxt.js也能生成静态网站,但它们更多被认为是SSR(服务端渲染)框架
5. JAMStack
- 这类静态网站生成器还有个漂亮的名字叫做JAMStack
- JAMStack的JAM是JavaScript、API和Markup的首字母组合
- 本质上是一种胖前端,通过调用各种API来实现更多的功能
- 其实也是一种前后端的模式,只不过离的比较开,甚至前后端来自多个不同的厂商。
6. 静态应用的使用场景
- 不适合有大量路由页面的应用
- 如果您的站点有成百上千条路由页面,则预渲染将非常缓慢。当然,您每次更新之需要做一次,但是可能要花一些时间。大多数人不会最终获得数千条静态路由页面,而只是以防万一。
- 不适合有大量动态内容的应用
- 如果渲染路由中包含特定于用户查看其内容或其他动态源的内容,则应确保您具有可以显示的占位符组件,直到动态内容加载到客户端为止,否则可能有点怪异。
7. Gridsome学习建议
- 使用Gridsome需要有一定的Vue基础,如果有基础,看过文档,只会觉得它比Vue本身更简单一些。
二、Gridsome基础
1. 创建Gridsome项目
Gridsome依赖sharp,国内的用户很难安装成功sharp,所以使用淘宝镜像安装sharp。
npm config set sharp_binary_host "https://npm.taobao.org/mirrors/sharp"
npm config set sharp_libvips_binary_host "https://npm.taobao.org/mirrors/sharp-libvips"
sharp是C++语言编写的,所以还要安装C++环境。
安装node-gyp,编译C++扩展包
根据node-gyp的官方文档 https://github.com/nodejs/node-gyp 的说明对不同操作系统进行安装命令:
On Unix
- Python v2.7, v3.5, v3.6, v3.7, or v3.8
make- A proper C/C++ compiler toolchain, like GCC
On macOS
ATTENTION: If your Mac has been upgraded to macOS Catalina (10.15), please read macOS_Catalina.md.
- Python v2.7, v3.5, v3.6, v3.7, or v3.8
- Xcode
- You also need to install the
XCode Command Line Toolsby runningxcode-select --install. Alternatively, if you already have the full Xcode installed, you can find them under the menuXcode -> Open Developer Tool -> More Developer Tools.... This step will installclang,clang++, andmake.
- You also need to install the
On Windows
Install the current version of Python from the Microsoft Store package.
然后根据Gridsome官网https://gridsome.org/docs/的教程安装gridsome,
npm install --global @gridsome/cli
拉取远程模板到本地:
gridsome create my-gridsome-site
安装依赖的时候比较慢,又没有进度条,可以按ctrl+C中断掉,然后进入已经生成的my-gridsome-site目录下,执行rm -rf node_modules删除半成品node_modules,然后重新执行npm install,此时就能看到进度了。
安装好依赖之后,可以在package.json里查看命令。
执行npm run develop启动项目
访问http://localhost:8080/看到以下页面就证明启动成功了。

2. 预渲染
创建一个Foo.vue页面
<template>
  <div>
    <h1>Foo Pageh1>
  div>
template>

<script>
export default {

  name: 'FooPage'
}
script>

<style>

style>
然后执行npm run build进行打包,打包后生成了一个dist文件

然后在这个dist路径下起一个静态服务:serve .
然后访问http://localhost:5000就可以看到页面是由服务端渲染好了返回的,然后客户端的交互都是单页面应用形式。
3. 目录结构
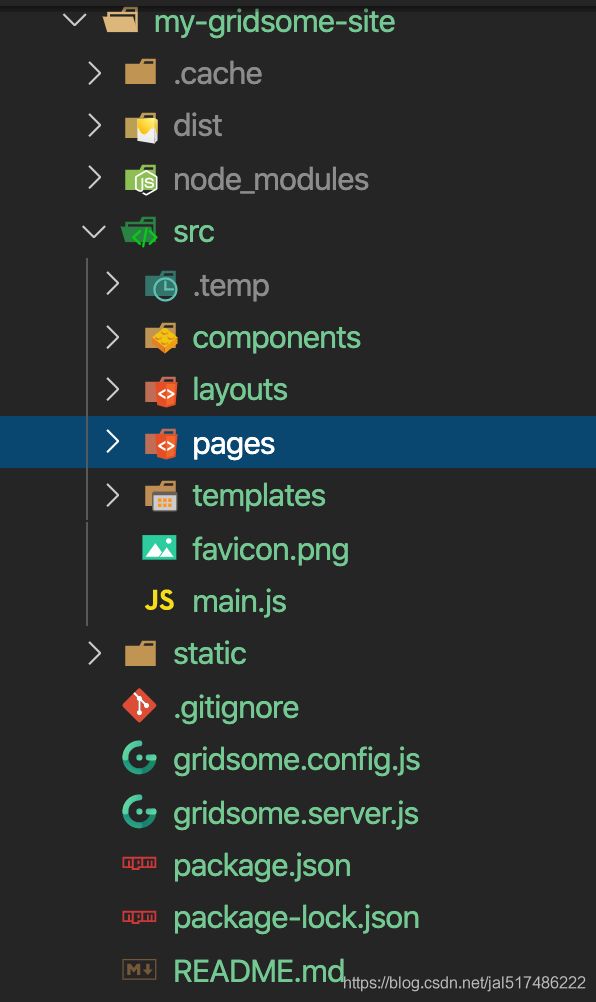
src/main.js是整个项目的启动入口,里面加载了/layouts/Default.vue
// This is the main.js file. Import global CSS and scripts here.
// The Client API can be used here. Learn more: gridsome.org/docs/client-api

import DefaultLayout from '~/layouts/Default.vue'

export default function (Vue, {
      router, head, isClient }) {

  // Set default layout as a global component
  Vue.component('Layout', DefaultLayout)
}
Default.vue中有个特别之处:
<static-query>
query {
  metadata {
    siteName
  }
}
static-query>
这个query是查询gridsome数据给组件用的。
src/templates文件夹是放集合的节点。
src/pages是路由页面。
src/layouts放布局组件。
src/components放公共组件。
src/.temp放打包过程生成的文件。
.catch是缓存的一些内容
node_modules放第三方包
static放不需要打包编译的文件,指静态的资源
gridsome.config.js gridsome的配置文件
gridsome.server.js 也是girdsome的配置文件,是配置服务端的,Gridsome内部的服务配置。
4. 项目配置
在 https://gridsome.org/docs/config 可以查看Gridsome的配置
gridsome.config.js
// This is where project configuration and plugin options are located.
// Learn more: https://gridsome.org/docs/config

// Changes here require a server restart.
// To restart press CTRL + C in terminal and run `gridsome develop`

module.exports = {

  siteName: '拉钩教育',
  siteDescription: '大前端',
  plugins: []
}
5. Pages
(1) 基于文件形式
直接在src/pages目录下创建一个文件
(2) 基于编程方式
gridsome.server.js
api.createPages(({
      createPage }) => {

    // Use the Pages API here: https://gridsome.org/docs/pages-api/
    createPage({

      path: '/my-page',
      component: './src/templates/MyPage.vue'
    })
  })
src/templates/MyPage.vue
<template>
  <div>
    <h1>
      MyPage
    h1>
  div>
template>

<script>
export default {

  name: 'MyPage',
  metaInfo: {

    title: 'MyPage' // 配置header中的title
  }
}
script>

<style>

style>
重启项目后访问http://localhost:8080/my-page就可以看到MyPage页面。
6. 动态路由
(1) pages下面创建的页面文件名称用方括号括起来,作为动态路由参数
src/pages/user/[id].vue
<template>
  <div>
    <h1>
      User {
    { $route.params.id }} Page
    h1>
  div>
template>

<script>
export default {

  name: 'UserPage'
}
script>

<style>

style>
重启后访问:http://localhost:8080/user/1
就可以看到 User 1 Page 这个内容了
(2) 编程方式
gridsome.server.js
api.createPages(({
      createPage }) => {

  createPage({

    path: '/user/:id(\\d+)',
    component: './src/templates/User.vue'
  })
})
7. 添加集合
定义一个页面Posts1.vue
<template>
  <Layout>
      <h1>Posts1h1>
      <ul>
      <li v-for="post in posts" :key="post.id">{
    { post.title }}li>
    ul>
    Layout>
template>

<script>
import axios from 'axios'
export default {

  name: 'Posts1',
  data () {

    return {

      posts: []
    }
  },
  async created () {

    const {
       data } = await axios.get('https://jsonplaceholder.typicode.com/posts')
    this.posts = data
  }
}
script>

<style>

style>
数据是在客户端动态加载请求过来的,不是预渲染生成的。
想要数据预渲染,得使用Gridsome中的集合Collections
// gridsome.server.js
const axios = require('axios')

module.exports = function (api) {

  api.loadSource(async actions => {

    const collection = actions.addCollection('Post')

    const {
      data } = await axios.get('https://api.example.com/posts')

    for (const item of data) {

      collection.addNode({

        id: item.id,
        title: item.title,
        content: item.content
      })
    }
  })
}
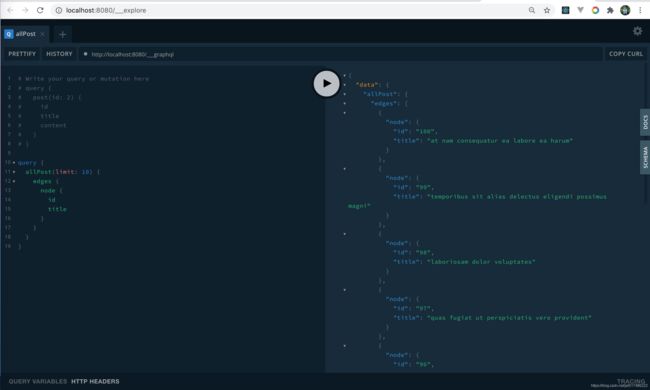
8. 在GraphQL中查询数据
9. 在页面中查询GraphQL查询数据
Posts2.vue,静态页面,服务端渲染的
<template>
  <Layout>
      <h1>Posts2h1>
      <ul>
        <li v-for="edge in $page.posts.edges" :key="edge.node.id">
          <g-link to="/">{
    {edge.node.title}}g-link>
        li>
      ul>
    Layout>
template>

<script>
export default {

  name: 'Posts2',
}
script>

<style>

style>

<page-query>
query {
  posts: allPost {
    edges {
      node {
        id
        title
      }
    }
  }
}
page-query>
10. 使用模板渲染结点
配置动态路由模板
// gridsome.config.js
module.exports = {

  siteName: '拉钩教育',
  siteDescription: '大前端',
  plugins: [],
  templates: {

    Post: [
      {

        path: '/posts/:id',
        component: './src/templates/Post.vue'
      }
    ]
  }
}
模板页面src/template/Post.vue,预渲染页面,从GraphQL获取的数据
<template>
  <Layout>
    <h1>{
    {$page.post.title}}h1>
    <p>{
    {$page.post.content}}p>
  Layout>
template>

<page-query>
query($id: ID!) { # 动态路由参数会自动传入进来
  post(id: $id) {
    id
    title
    content
  }
}
page-query>
<script>
export default {

  name: 'PostPage',
  metaInfo () {

    return {

      title: this.$page.post.title
    }
  }
}
script>

<style>

style>
metaInfo写成函数形式可以通过this.$page获取到graphQL返回的数据。
三、Gridsome案例
1. 创建项目
gridsome create blog-with-gridsome
当进入install的时候按ctrl C中断,然后进入文件夹执行npm install来安装第三方包
cd blog-with-gridsome
npm install
2. 处理首页模板
Fork Bootstrap的一个模板:https://github.com/StartBootstrap/startbootstrap-clean-blog
然后执行git clone https://github.com/2604150210/startbootstrap-clean-blog --depth=1,只克隆最后一个版本就行了。
然后回到我们的项目中,安装需要的依赖
npm i bootstrap
npm i @fortawesome/fontawesome-free
创建src/assets/css/index.css
@import url('https://fonts.googleapis.com/css?family=Lora:400,700,400italic,700italic');
@import url('https://fonts.googleapis.com/css?family=Open+Sans:300italic,400italic,600italic,700italic,800italic,400,300,600,700,800')

  /* 下面将startbootstrap-clean-blog里面的css/clean-blog.css里面的内容复制到此处 */
在src/main.js中开始位置增加:
import 'bootstrap/dist/css/bootstrap.min.css'
import '@fortawesome/fontawesome-free/css/all.min.css'

import './assets/css/index.css'
把startbootstrap-clean-blog中的img文件夹拷贝到我们的项目中的static中,作为静态资源使用。
把startbootstrap-clean-blog中的index.html里面的body部分的HTML代码拷贝到我们的项目中的src/pages/Index.vue中
3. 处理其他页面模板
将Index.vue中的头部、尾部代码剪切到layouts/Default.vue中,注意头尾代码块中间要放一个
然后将Index.vue的最外层组件由div改为Layout。Layout已经在全局注册过了,可以直接使用
然后写Post.vue、About.vue、Contact.vue页面,把startbootstrap-clean-blog中的post.html、about.html、contact.html中的代码拿过来即可。
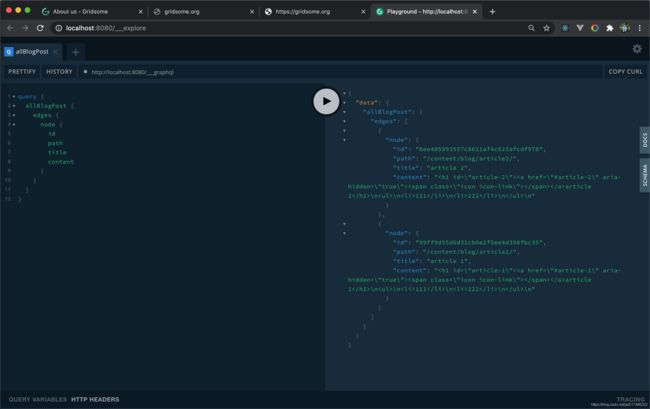
4. 使用本地md文件管理文章内容
npm i @gridsome/source-filesystem
npm i @gridsome/transformer-remark # 转换MD文件
创建两个md文件, content/blog/article1.md、contetn/blog/artcle2.md
在GraphQL中查询数据:
5. Strapi介绍
网址:https://strapi.io/
strapi是一个通用的内容管理系统。
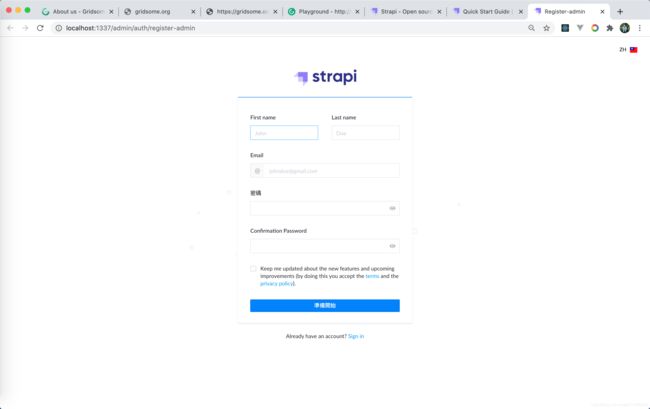
执行创建strapi命令
yarn create strapi-app my-project --quickstart
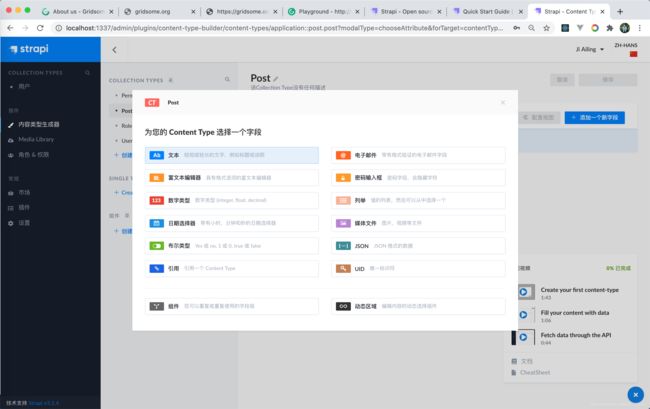
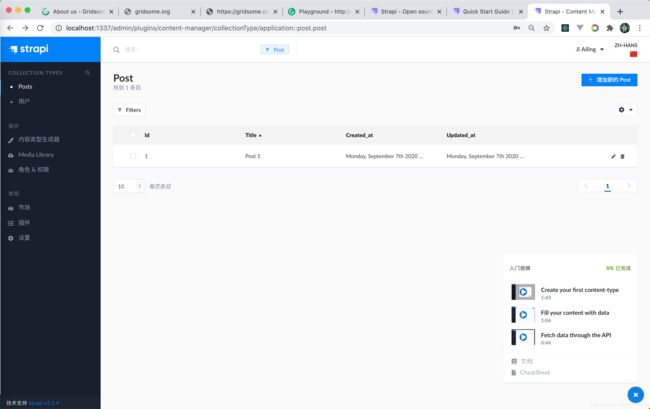
创建一个Content Type
6. 使用strapi数据接口
默认是Restful API
https://strapi.io/documentation/v3.x/content-api/api-endpoints.html#get-an-entry

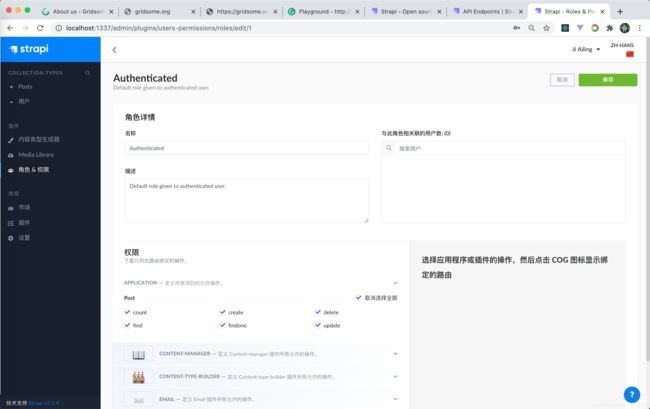
给用户配置权限:
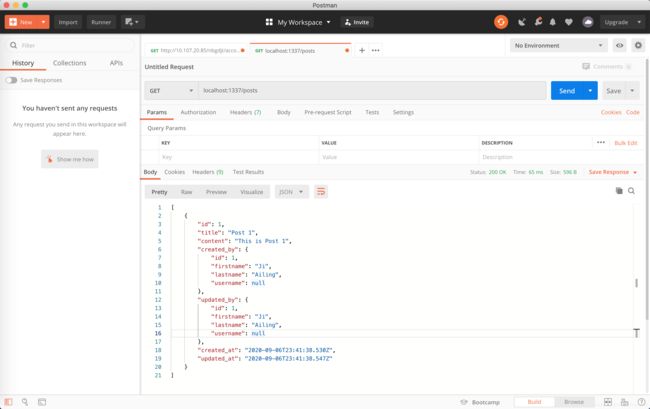
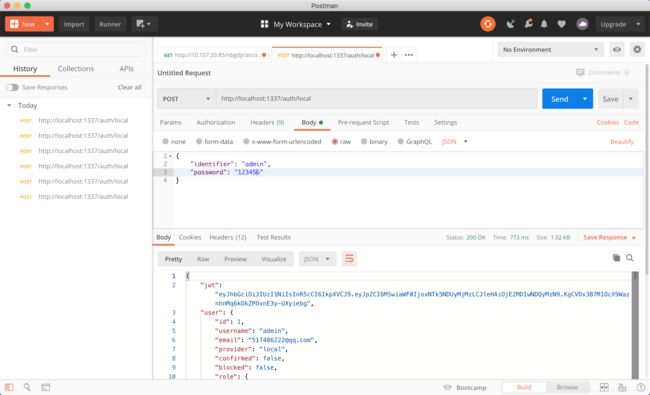
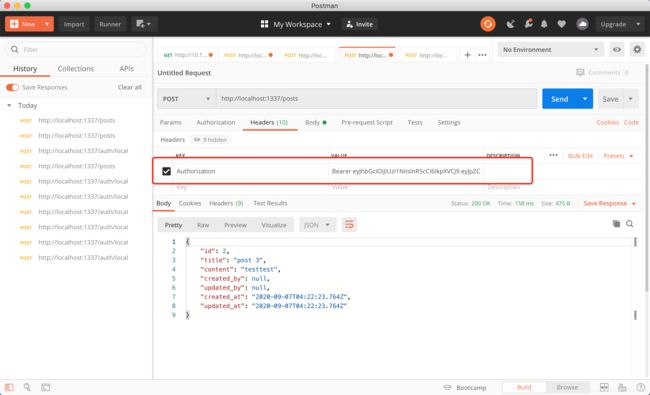
使用Postman进行接口测试:
7. 访问受保护的API
创建一个用户:admin, 123456
注册、登录的API:https://strapi.io/documentation/v3.x/plugins/users-permissions.html#concept
请求其他接口时,http头部要增加授权信息Authorization: Bearer ${token}
8. 将Strapi数据预取到Gridsome应用中
安装
npm install @gridsome/source-strapi
使用
// gridsome.config.js
export default {

  plugins: [
    {

      use: '@gridsome/source-strapi',
      options: {

        apiURL: 'http://localhost:1337',
        queryLimit: 1000, // Defaults to 100
        contentTypes: ['article', 'user'],
        singleTypes: ['impressum'],
        // Possibility to login with a Strapi user,
        // when content types are not publicly available (optional).
        loginData: {

          identifier: '',
          password: ''
        }
      }
    }
  ]
}
重启应用,才会拉取最新数据。
9. 设计文章标签数据模型
创建新的Content Type,名称为Post,有四个字段

再创建一个新的Content Type,名称为Tag,有两个字段,其中字段posts为引用类型,为多对多的关系
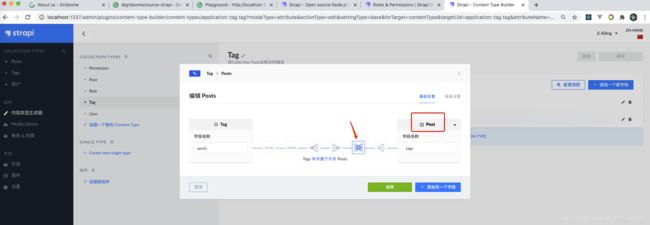

新增一个Tag,标题为HTML
然后修改post里面的标题为post 1的数据,选择Tags为HTML
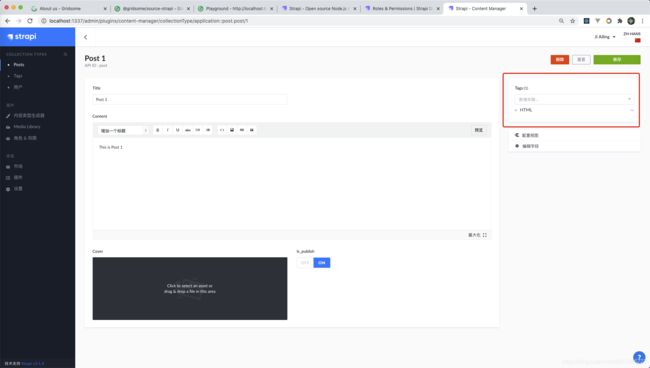
然后回到Tags表中的HTML数据的编辑屏,还可以再关联别的Posts

10. 展示文章列表、分页
src/pages/Index.vue
<template>
  <Layout>


    <header class="masthead" style="background-image: url('/img/home-bg.jpg')">
      <div class="overlay">div>
      <div class="container">
        <div class="row">
          <div class="col-lg-8 col-md-10 mx-auto">
            <div class="site-heading">
              <h1>Clean Blogh1>
              <span class="subheading">A Blog Theme by Start Bootstrapspan>
            div>
          div>
        div>
      div>
    header>


    <div class="container">
      <div class="row">
        <div class="col-lg-8 col-md-10 mx-auto">
          <div class="post-preview" v-for="edge in $page.posts.edges" :key="edge.node.id">
            <g-link :to="'post/'+edge.node.id">
              <h2 class="post-title">
                {
    {edge.node.title}}
              h2>
            g-link>
            <p class="post-meta">
              Posted by
              <a href="#">{
    {edge.node.created_by.firstname + edge.node.created_by.lastname}}a>
              on {
    {edge.node.created_at}}
            p>
            <p>
              <span v-for="tag in edge.node.tags" :key="tag.id">
                <a href="">{
    {tag.title}}a>

              span>
            p>
            <hr />
          div>
          <Pager :info="$page.posts.pageInfo" />
        div>
      div>
    div>

  Layout>
template>

<page-query>
query ($page: Int) {
  posts: allStrapiPost (perPage: 2, page: $page) @paginate {
    pageInfo {
      totalPages
      currentPage
    }
    edges {
      node {
        id
        title
        created_at
        created_by {
          id
          firstname
          lastname
        }
        tags {
          id
          title
        }
      }
    }
  }
}
page-query>
<script>
import {
       Pager } from 'gridsome'
export default {

  name: 'HomePage',
  components: {

    Pager
  },
  metaInfo: {

    title: "Hello, world!",
  },
};
script>
11. 展示文章详情
gridsome.config.js
module.exports = {

  siteName: 'Gridsome',
  plugins: [
    {

      use: '@gridsome/source-filesystem',
      options: {

        typeName: 'BlogPost',
        path: './content/blog/**/*.md'
      }
    },
    {

      use: '@gridsome/source-strapi',
      options: {

        apiURL: 'http://localhost:1337',
        queryLimit: 1000, // Defaults to 100
        contentTypes: ['post', 'tag'], // StrapiPost
        // typeName: 'Strapi,
        // singleTypes: ['impressum'],
        // Possibility to login with a Strapi user,
        // when content types are not publicly available (optional).
        // loginData: {

        //   identifier: '',
        //   password: ''
        // }
      }
    }
  ],
  templates: {

    // StrapiPost为上面Plugin中配置的typeName和contentTypes的组合
    StrapiPost: [
      {

        path: '/post/:id',
        component: './src/templates/Post.vue'
      }
    ]
  }
}
src/templates/Post.vue
<template>
  <Layout>

    <header
      class="masthead"
      :style="{
        backgroundImage: `url(http://localhost:1337${$page.post.cover.url})`}"
    >
      <div class="overlay">div>
      <div class="container">
        <div class="row">
          <div class="col-lg-8 col-md-10 mx-auto">
            <div class="post-heading">
              <h1>{
    {$page.post.title}}h1>
              <span class="meta"
                >Posted by
                <a href="#">{
    {$page.post.created_by.firstname + $page.post.created_by.lastname}}a>
                on {
    {$page.post.created_at}}span
              >
            div>
          div>
        div>
      div>
    header>


    <article>
      <div class="container">
        <div class="row">
          <div class="col-lg-8 col-md-10 mx-auto">
            {
    {$page.post.content}}
          div>
        div>
      div>
    article>
  Layout>
template>

<page-query>
query($id: ID!) {
  post: strapiPost(id: $id) {
    id
    title
    content
    cover {
      url
    }
    tags {
      id
      title
    }
    created_at
    created_by {
      id
      firstname
      lastname
    }
  }
}
page-query>

<script>
export default {

  name: 'PostPage'
}
script>

<style>style>
12. 处理Markdown格式的文章内容
安装markdown处理器:npm install markdown-it
src/templates/Post.vue
<div class="col-lg-8 col-md-10 mx-auto" v-html="mdToHtml($page.post.content)">
div>

<script>
import MarkDownIt from 'markdown-it'
const md = new MarkDownIt()
export default {

  name: 'PostPage',
  methods: {

    mdToHtml (markdown) {

    return md.render(markdown)
  }
  }
}
script>
13. 文章标签处理
src/templates/Tag.vue
<template>
    <Layout>


    <header class="masthead" style="background-image: url('/img/home-bg.jpg')">
      <div class="overlay">div>
      <div class="container">
        <div class="row">
          <div class="col-lg-8 col-md-10 mx-auto">
            <div class="site-heading">
              <h1># {
    {$page.tag.title}}h1>
            div>
          div>
        div>
      div>
    header>


    <div class="container">
      <div class="row">
        <div class="col-lg-8 col-md-10 mx-auto">
          <div class="post-preview" v-for="post in $page.tag.posts" :key="post.id">
            <g-link :to="'post/'+post.id">
              <h2 class="post-title">
                {
    {post.title}}
              h2>
            g-link>
            <p class="post-meta">
              Posted by
              on {
    {post.created_at}}
            p>
            <hr />
          div>
        div>
      div>
    div>

  Layout>
template>

<page-query>
query($id: ID!) {
  tag: strapiTag(id: $id) {
    title
    id
    posts {
      id
      title
      created_at
    }
  }
}
page-query>

<script>
export default {

  name: 'TagPage'
}
script>

<style>

style>
gridsome.config.js
module.exports = {

  siteName: 'Gridsome',
  plugins: [
    {

      use: '@gridsome/source-filesystem',
      options: {

        typeName: 'BlogPost',
        path: './content/blog/**/*.md'
      }
    },
    {

      use: '@gridsome/source-strapi',
      options: {

        apiURL: 'http://localhost:1337',
        queryLimit: 1000, // Defaults to 100
        contentTypes: ['post', 'tag'], // StrapiPost

      }
    }
  ],
  templates: {

    // StrapiPost为上面Plugin中配置的typeName和contentTypes的组合
    StrapiPost: [
      {

        path: '/post/:id',
        component: './src/templates/Post.vue'
      }
    ],
    StrapiTag: [
      {

        path: '/tag/:id',
        component: './src/templates/Tag.vue'
      }
    ]
  }
}
14. 网站基本设置
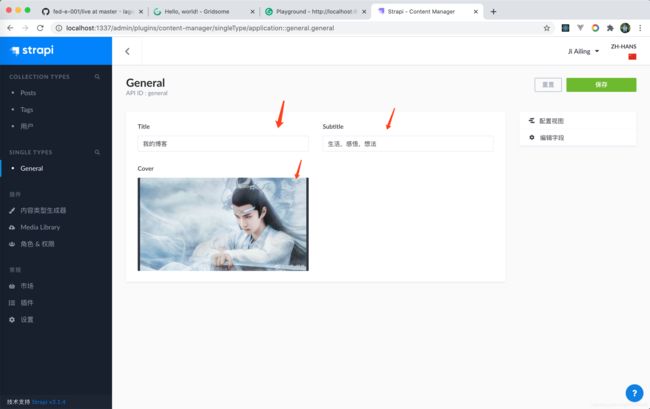
创建一个名为general的Single Type,有三个字段,如下:

gridsome.config.js的source-strapi插件增加singleTypes: ['general']配置,就可以获取general数据,重启项目就生效。
src/pages/Index.vue
    <header
      class="masthead"
      :style="{

        backgroundImage: `url(http://localhost:1337${general.cover.url})`
      }"
    >
      <div class="overlay">div>
      <div class="container">
        <div class="row">
          <div class="col-lg-8 col-md-10 mx-auto">
            <div class="site-heading">
              <h1>{
    {general.title}}h1>
              <span class="subheading">{
    {general.subtitle}}span>
            div>
          div>
        div>
      div>
    header>
<page-query>
query ($page: Int) {
  # ----

  general: allStrapiGeneral {
    edges {
      node {
        title
        subtitle
        cover {
          url
        }
      }
    }
  }
}
page-query>
<script>
import {
       Pager } from 'gridsome'
export default {

// ----

  computed: {

    general () {

      return this.$page.general.edges[0].node
    }
  }
};
script>
15. 联系我 Contact页面
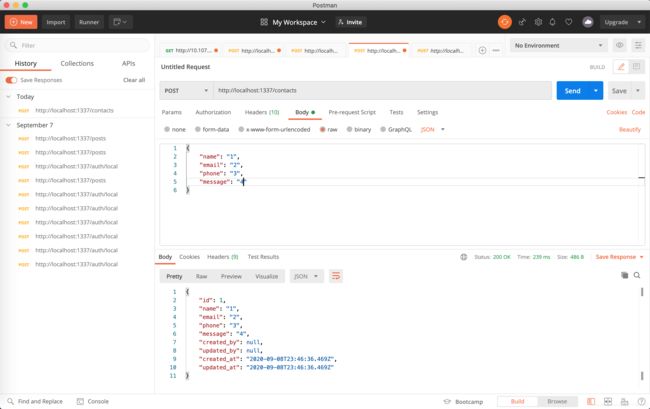
页面中使用传统客户端表单提交功能
src/pages/Contact.vue
<input v-model="form.name" type="text" class="form-control" placeholder="Name" id="name" required data-validation-required-message="Please enter your name.">

<input v-model="form.email" type="email" class="form-control" placeholder="Email Address" id="email" required data-validation-required-message="Please enter your email address.">

<input v-model="form.phone" type="tel" class="form-control" placeholder="Phone Number" id="phone" required data-validation-required-message="Please enter your phone number.">

<textarea v-model="form.message" rows="5" class="form-control" placeholder="Message" id="message" required data-validation-required-message="Please enter a message.">textarea>

<button type="submit" class="btn btn-primary" id="sendMessageButton" @click.prevent="onSubmit">Sendbutton>
<script>
import axios from 'axios'
export default {

  name: 'ContactPage',
  data () {

    return {

      form: {

        name: '',
        email: '',
        phone: '',
        message: ''
      }
    }
  },
  methods: {

    async onSubmit () {

      try {

        const {
       data } = await axios({

          method: 'POST',
          url: 'http://localhost:1337/contacts',
          data: this.form
        })
        window.alert('发送成功')
      } catch (e) {

        alert('发送失败,请稍后重试')
      }
    }
  }
}
script>
16. 部署strapi
先部署strapi、再部署Gridsome。strapi部署环境依赖于node环境的服务器,而Gridsome只需要支持静态网页的服务器就行。
(1) 配置为strapi后台服务配置数据库为MySQL
其他数据库配置可以参考这里:
https://strapi.io/documentation/v3.x/concepts/configurations.html#database
config/database.js
module.exports = ({
      env }) => ({

  defaultConnection: 'default',
  connections: {

    default: {

      connector: 'bookshelf',
      settings: {

        client: 'mysql',
        host: env('DATABASE_HOST', 'localhost'),// strapi部署的服务器与MySQL所在的服务器是同一个服务器,主机就直接写localhost
        port: env.int('DATABASE_PORT', 3306),
        database: env('DATABASE_NAME', 'blog'),
        username: env('DATABASE_USERNAME', 'blog'),
        password: env('DATABASE_PASSWORD', 'oPqc0Am9lfhWKNuT'),
      },
      options: {
     },
    },
  },
});
安装MySQL数据的依赖
npm install mysql
(2) 将代码上传到gitee上
git init
echo node_modules > .gitignore
git add .
git commit -m"第一次提交"
git remote add origin [email protected]:jiailing/blog-backend.git
git push -u origin master
(3) 登录到服务器进行部署
先进入MySQL
mysql -uroot -p
创建用户blog,和数据库blog,并且给该用户授权操作该数据库
CREATE USER 'blog'@'%' IDENTIFIED BY 'oPqc0Am9lfhWKNuT';
CREATE DATABASE blog;
FLUSH PRIVILEGES;
GRANT ALL ON blog.* TO 'blog'@'%';
exit;
然后回到存放代码的目录下,拉取gitee上的代码,并且安装项目依赖
git clone https://gitee.com/jiailing/blog-backend
cd blog-backend
npm config set sharp_binary_host "https://npm.taobao.org/mirrors/sharp"
npm config set sharp_libvips_binary_host "https://npm.taobao.org/mirrors/sharp-libvips"
npm install
npm run build
npm run start
或者执行npm run develop也可以启动项目。
如果执行build时命令行卡在了90%进度时,直接中断掉执行start就可以了。
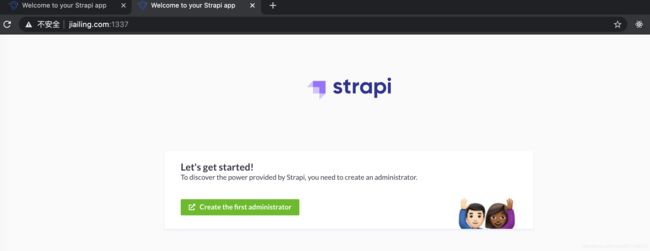
然后就可以通过 主机地址+1337端口号来访问页面了。
start 此时命令行被占用,退出命令行服务就会停止,所以使用pm2守护进程,让一个node应用启动在后台
pm2 start --name blog-backend npm -- run start
或者develop (成功率高)
pm2 start --name blog-backend npm -- run develop
登录后别忘了给用户分配权限
17. 把本地服务连通远程应用
grid.config.js中的strapi插件的配置中的URL接口要改为线上接口,
apiURL: process.env.GRIDSOME_API_URL
为了区分开发接口和生产接口,可以配置环境变量
.env.production
GRIDSOME_API_URL=http://jiailing.com:1337
.env.development
GRIDSOME_API_URL=http://localhost:1337
在src/main.js中注入环境变量到页面模板中使用:
export default function (Vue, {
      router, head, isClient }) {

  Vue.mixin({

    data () {

      return {

        GRIDSOME_API_URL: process.env.GRIDSOME_API_URL
      }
    }
  })
  // Set default layout as a global component
  Vue.component('Layout', DefaultLayout)
}
将页面中之前用到localhost:1337的路径都替换掉,如背景图片:
:style="{backgroundImage: `url(${GRIDSOME_API_URL+$page.post.cover.url})`}"
18. 部署Gridsome应用
vercel可以使得在Gridsome代码发生了改变,或者strapi的数据发生了改变时,都可以触发Gridsome的自动部署。
Vercel网址:vercel.com
使用GitHub登录,GitHub的邮箱是QQ邮箱会出问题,我改成了163邮箱就可以了。
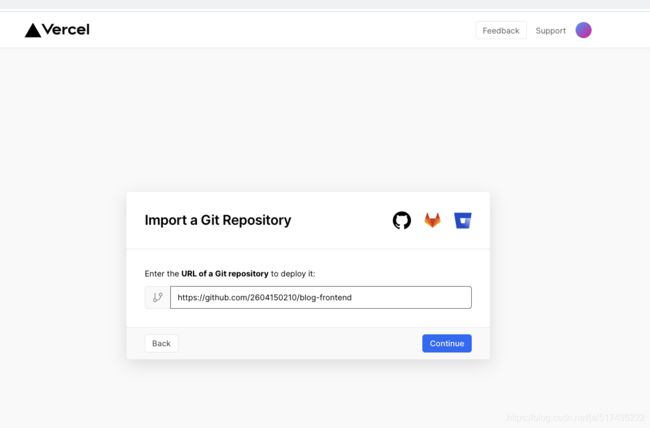
导入blog前端仓库的地址,我已经将项目上传到了GitHub上了。

飘下了成功的彩带~
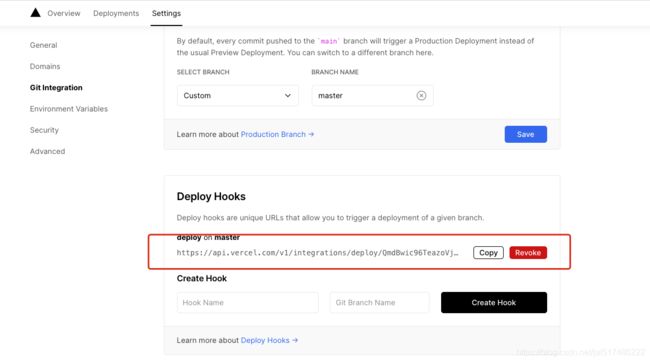
创建自动部署钩子
复制钩子到strapi里
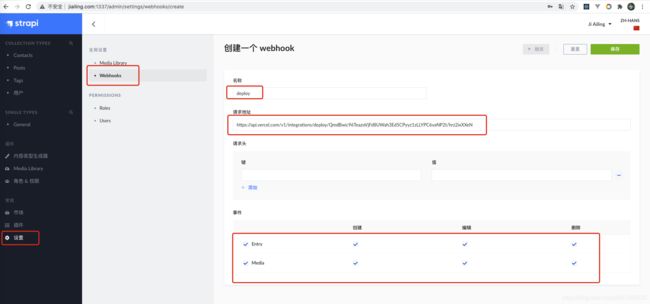
在strapi的设置里添加webHook,请求地址为刚才复制的Vercel的里部署钩子地址。
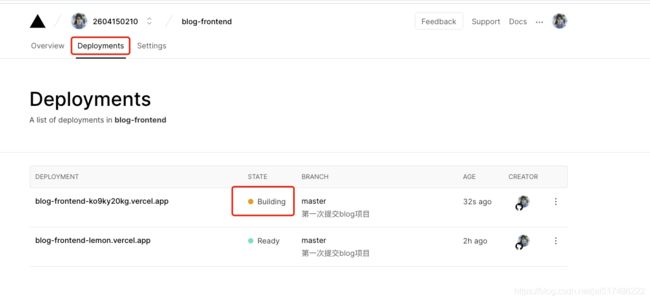
修改代码提交或者是strapi数据变化都会触发Vercel里的项目重新部署:
